‘Java not Found’ Error in Xmage on Windows 10
Some Windows 10 users attempting to play Magic online against their friends using the XMage application are reporting that they end up seeing the ‘Java Not Found’ error even though they have previously installed the Java Environment.
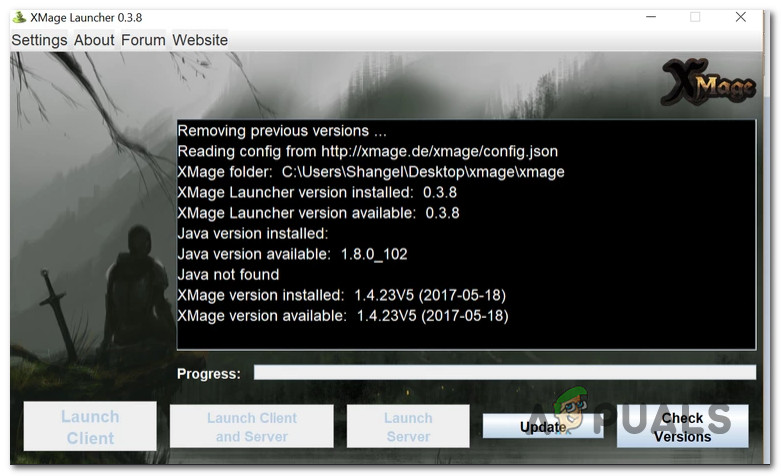
After investigating this particular issue, it turns out that there are several different underlying situations that are known to cause this particular error code. Here’s a list of potential culprits that might be responsible for this issue:
- Corrupted / Improperly installed Java Environment – As it turns out, one of the most common instances that will cause this issue is an inconsistency with the Java installation. In this scenario, you should be able to fix the issue by reinstalling the Java environment.
- Removing remnants from the old java installation – Under certain circumstances, you might expect to see this issue occurring due to a conflict caused by remnants of an older Java installation that is conflicting with the XMage attempts to install the latest version of java. If this scenario is applicable, you should be able to resolve the issue by removing the remnant files before retrying the Java Environment installation.
- Broken Java Environment variable – Another reason why you can expect to encounter this issue is an inconsistency in the java environment variable that makes it impossible for XMage to call upon the required Java dependencies. In this case, you should be able to resolve the issue by fixing the java environment variable from the System screen.
Now that you know every potential culprit that might be responsible for this issue, here’s a list of verified methods that other affected users have successfully used to get to the bottom of this issue:
Method 1: Reinstalling the Java Environment
Since the most common causes that are known to cause the ‘Java Not Found’ with the Xmage program is an inconsistency with the Java installation. Whether this is due to some kind of corruption or you’re seeing this issue because the Java Environment path is different than the one specified in the Home Path, this operation should correct the issue.
Several affected uses have confirmed that reinstalling the entire Java Environment allowed them to finally play Magic using the XMage platform without encountering the same error when using the launcher.
If you haven’t tried this fix yet, follow the instructions below to reinstall the Java environment:
- Start by pressing Windows key + R to open up a Run dialog box. Next, inside the text box, ‘appwiz.cpl’ and press Enter to access the Programs and Features menu.
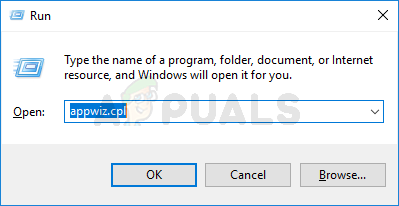
Accessing the Programs and Applications menu - Inside the Programs and Features menu, go ahead and scroll down through the list of installed applications until you locate your current Java installation. Once you find the correct listing, right-click on it and then click on Uninstall from the newly appeared context menu.
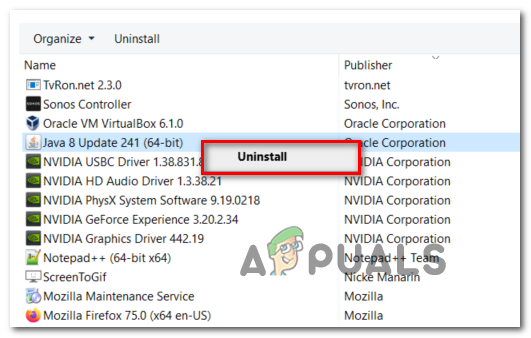
Uninstalling the Java environment - Once you’re inside the uninstallation screen, follow the on-screen instructions to complete this process, then reboot your computer and wait for the next startup to complete.
- As soon as your computer boots back up, access the official download page of Java Environment from your default browser and click on the Agree and Start free Download button.

Downloading the latest Java version - After your computer successfully downloads the installer, double-click on JavaSetup, then follow the next instructions to install the latest version of Java.
- After the operation is finally complete, restart your computer and see if the problem is resolved at the next system startup by attempting to launch XMage once again.
In case the launching attempt ends in the same ‘Java Not Found’ error, move down to the next potential fix below.
Method 2: Removing remnants from old Java Installation (if applicable)
As it turns out, you can also expect to encounter the ‘Java Not Found’ error in those instances where your computer contains remnant with an older Java installation that end up interfering with the installation of the latest java version (handled by the XMage program).
Several affected users that were dealing with the same issue have confirmed that they finally managed to fix the issue after they used an elevated Command Prompt to find the remnant Java filers and delete the main executables before launching XMage once again.
If you haven’t tried this method yet, follow the instructions below to receive step by step instructions:
- Press Windows key + R to open up a Run dialog box. Inside the text box, type ‘cmd’, then press Ctrl + Shift + Enter to open up an elevated Command Prompt window. When you’re prompted by the UAC (User Account Control), click Yes to grant admin access.
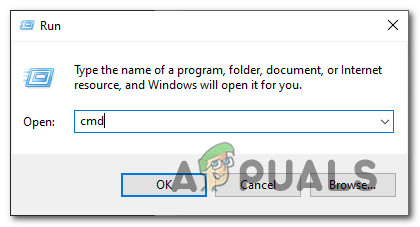
Accessing the CMD menu - Once you’re inside the elevated Command prompt menu type the following command and press Enter to discover the exact location of the remnant Java files:
C:> where javaNote: You can also use the following command:
C:> for %i in (javac.exe) do @echo. %~$PATH:i
- Once the location of your previous Java installation is returned, open File Explorer and use it to navigate to the folder in question.
Note: Most commonly the java installation should be located in C:\ProgramData\Oracle\Java\javapath - After you’re inside the correct location, ensure that you delete every executable from the following before restarting your computer:
java.exe
javaw.exe
javaws.exe
- Once your computer boots back up, open the XMage application once again. This time, the program should detect that you’re completely missing the Java Environment installation and will offer to install it for you. If this happens, click Yes to accept, then wait for the operation to complete.
In case the same problem is still occurring even after following the instructions above, move down to the next potential fix below.
Method 3: Fixing the Java Environment Variable
As it turns out, you can also expect to see this particular issue popping up if you have an incorrect Java environment variable that is giving the XMage launcher the impression that the Java dependencies aren’t installed when in fact they are.
If you find yourself in this scenario, you should be able to fix the issue by fetching the location of your Java installation and ensuring that the Java environment variable points to the correct location – This fix was confirmed to work by a lot of affected users.
If you haven’t tried out this fix yet, follow the instructions below:
- Start by opening up File Explorer and navigating to the installation path of your Java Environment. Keep in mind that unless you installed the Java environment in a custom location, you will find it in one of the following(depending on your OS-bit architecture):
C:\Program Files\Java\*Java version* - 64-bit version
C:\Program Files (x86)\Java\*Java version* - 32-bit version
- Inside the correct location, go ahead and right-click on the navigation bar, then choose Copy Address from the newly appeared context menu.
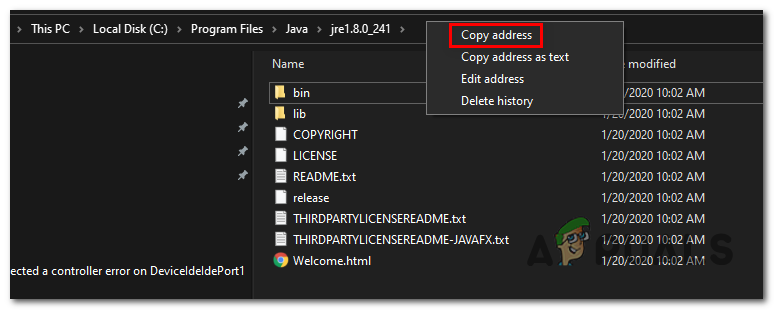
Copying the java address from the correct location - Once you have successfully copied the correct java location to your clipboard, press Windows key + R to open a Run dialog box. Next, type ‘sysdm.cpl’ inside the text box and press Enter to open up the System Properties screen.
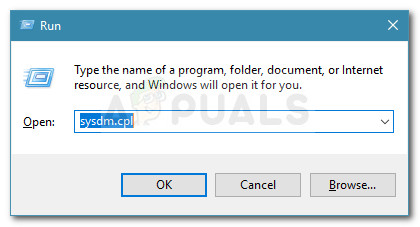
Accessing the System Properties screen - After you are finally inside the System Properties window, access the Advanced tab, then click on Environment Variables from the list of available options.
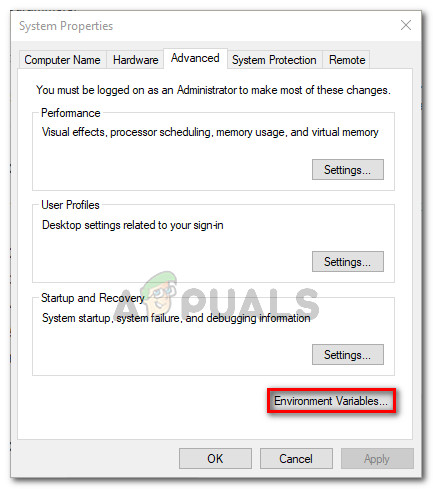
Accessing the Environment Variables menu - When you’re inside the Environment variable window, go to System variables, select the Path option and click the Edit button.
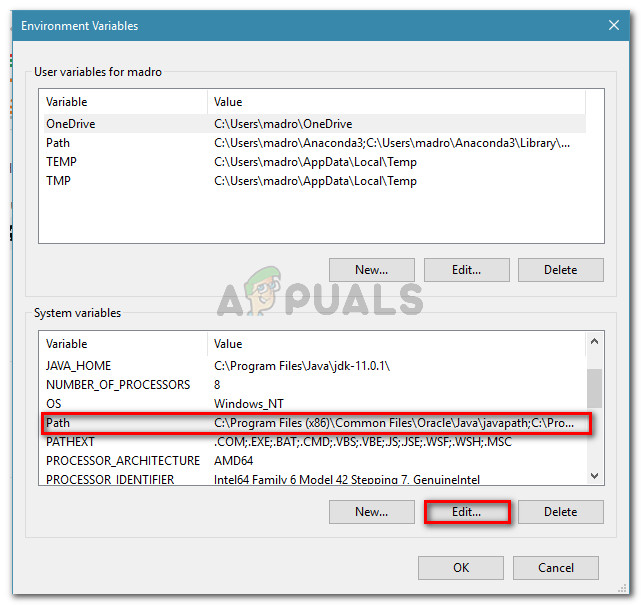
Editing the path variable - After you’re at the next window, search for an environment variable that mentions Java. When you manage to locate the correct entry, change its value to the correct location that you previously identified at step 2.
- Reboot your computer and see if the problem is resolved at the next system startup by launching XMage once again and seeing if the problem is now fixed.


