Fix the ‘Internet May not be Available’ Error on Android Devices
When the “Internet May Not Be Available” error appears on an Android device, it usually happens when your device is connected to a Wi-Fi network but cannot access the internet. This error means the device is not getting a valid response from the router or the internet service provider, even though it seems to be connected to the Wi-Fi network. The most common cause of this issue is incorrect network settings or a problem with the Wi-Fi network itself.
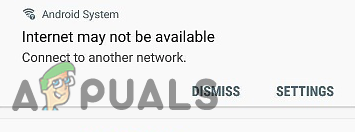
Other factors could include incorrect DNS settings, IP conflicts, or software bugs on the Android device. Additionally, third-party apps or network interference may disrupt the connection.
1. Check Your Date/Time
Many routers and internet services use time stamps to validate connections. If your device’s date or time is incorrect, it can cause authentication failures, preventing internet access. By updating the time settings, you sync your device with network protocols, which can resolve the “Internet May Not Be Available” error.
- Drag down the notifications panel and click on the Settings icon.
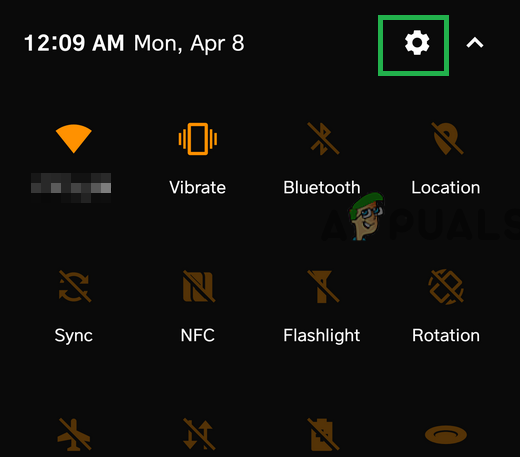
Opening Settings - Scroll down until you find “System Settings“, then tap on it.
- Now head over to “Date and Time Settings“. (If you are having trouble finding it, you can search for it.)
- Find and ensure that the options named “Use network-provided time” and “Use network-provided time zone” are turned on.
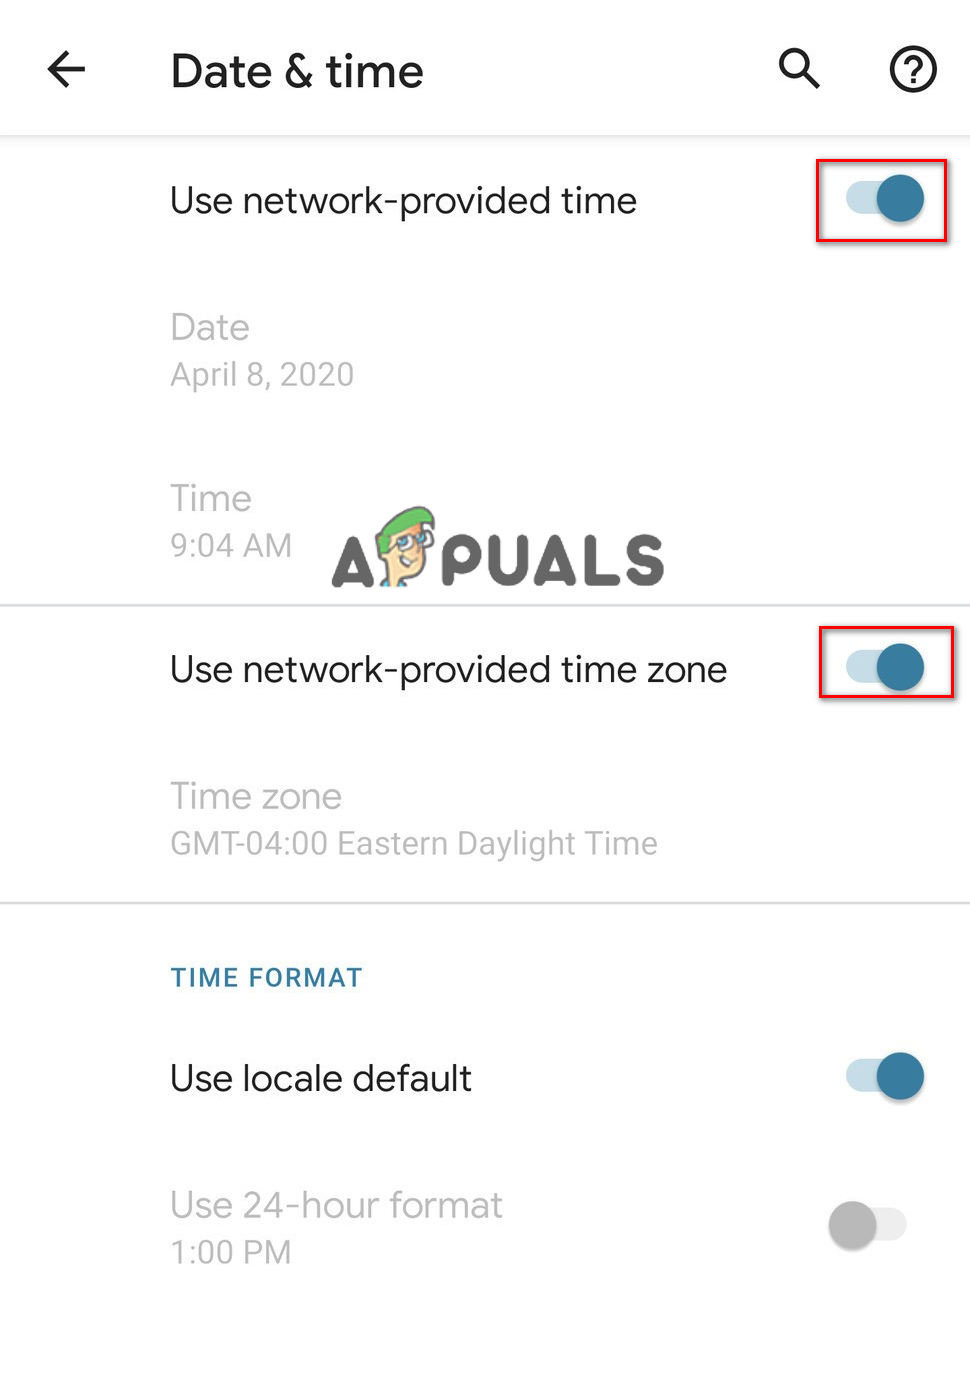
Turning on options - Check to see if the problem still persists.
2. Change DHCP Mode
Switching from DHCP to a static IP can fix connectivity issues by resolving IP conflicts. DHCP automatically assigns IPs, but errors or conflicts can cause unstable connections. A static IP ensures your device always uses a specific address, which can stabilize the connection.
- Drag down the notifications panel and click on the settings icon.
- Select the “Wireless and Networks” option and click on Wi-Fi.
- Press and hold the Wi-Fi connection that you are trying to connect to.
- Select the “Modify Network” button and click on the “Show Advanced Options” button.
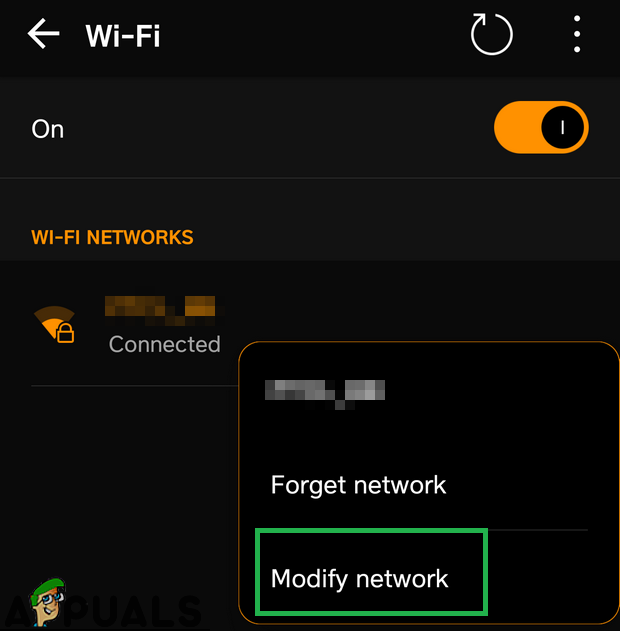
Long pressing on the Wi-Fi which we are connected to and tapping on the Modify Network option - Click on the “IP Settings” option and select the “Static” option.
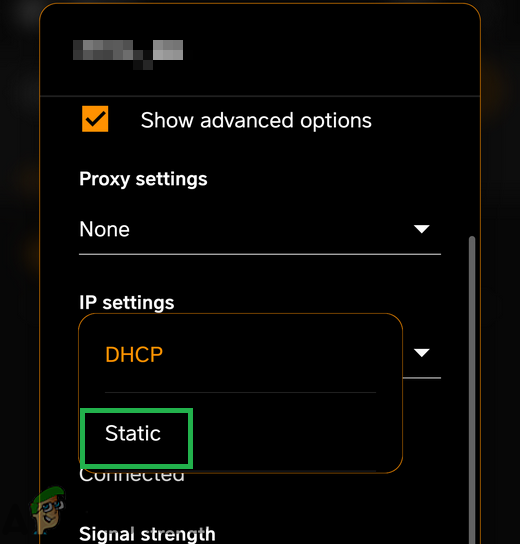
Selecting “Static” in the IP settings - Navigate down and click on the “DNS 1 option.
- Type in “8.8.8.8” as the first DNS address, and then click on the “DNS 2” option.
- Type in “8.8.4.4” as the second DNS address.
- Click on “Save” and try to connect to the Wi-Fi.
- Check to see if the issue persists.
3. Check for Updates
Updates often contain important bug fixes and patches for network problems, ensuring your device stays compatible with changing network protocols and router firmware. By updating your phone, you allow the system to refresh and fix potential software issues that may be preventing a stable internet connection.
- Drag down the notifications panel and click on the “Settings” icon.

Dragging down the notifications panel and tapping on the “Settings” option - Scroll down, click on the “System” option, and select the “Software Update” button.
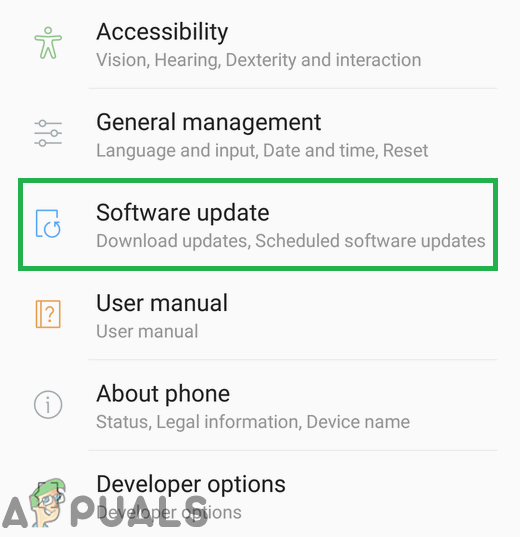
Tapping on the “Software Updates” option - Click on the “Check for Updates” button and wait for the process to complete.
- Click on the “Download and Install” button once an update becomes available.
- Wait for the update to be downloaded and installed.
- Check to see if the issue persists.
4. Clear Cache Partition
Clearing the cache partition removes temporary system files that might be outdated or corrupted, which can fix issues like unstable Wi-Fi connections. By cleaning up these files, your device can run more smoothly, especially with connectivity, without affecting any of your personal data or settings.
- Press and hold the Power button and select Power Off to turn off your mobile device.
- Press and hold the Power + Volume Down buttons to turn it back on.
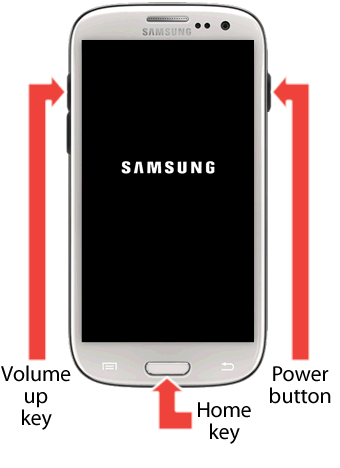
Button orientation - Wait for the device to power on and display the logo.
- Release the Power button when the mobile developer’s logo appears and release the Volume Down button when the Android Logo appears.
- Use the Volume Down key to navigate and highlight the Wipe Cache Partition option.
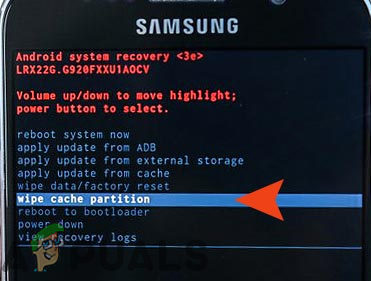
Highlighting the Wipe Cache Partition option and pressing the power button - Use the Power key to select the option and wait for the cache to be cleared.
- Once the cache is cleared, highlight and select Reboot and wait for the phone to restart.
- Check if the issue persists after the reboot.
5. Safe Mode
This issue can be caused by a third-party app interfering with your network connection. Running your device in Safe Mode temporarily disables these apps, helping you determine if one is causing the “Internet May Not Be Available” error. If the error doesn’t appear in Safe Mode, you can uninstall the problematic app.
- Press and hold the Power button.
- Press and hold the Power Off option when it is displayed.
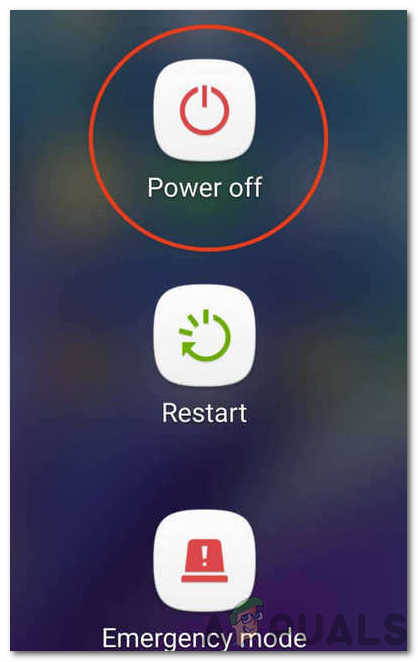
Clicking on the Power Off button - Select the Launch in Safe Mode option.
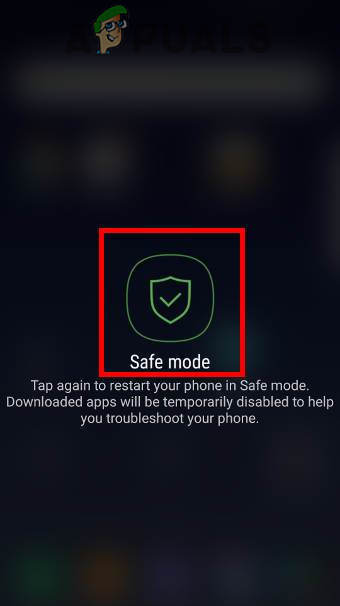
Tapping on the “Safe Mode” option to launch the device in Safe Mode - The phone will now restart. Check if the Wi-Fi connects in Safe Mode.
- If it does, start enabling the applications one by one to see which one causes the error to reoccur.
- Either delete the problematic application or update it to fix this issue.


