How to Fix Installation Error Code 0x8007012a on Windows?
Several users have reported encountering the error code 0x8007012a in both Windows 10 and 11 operating systems.
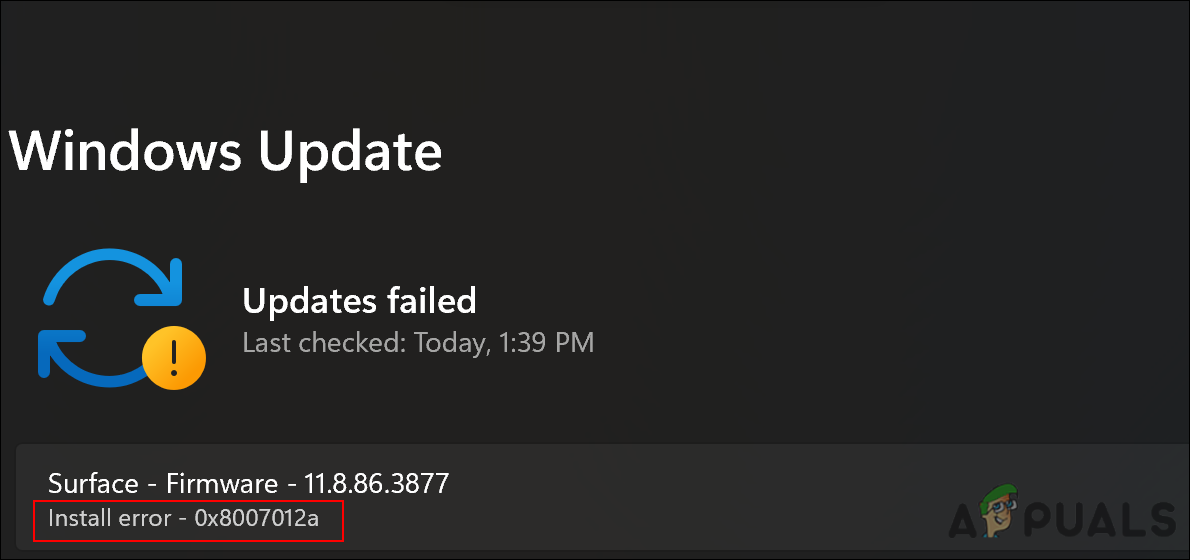
We had a look into the issue and discovered that it can be caused by a number of different reasons including:
- Generic WU glitch – Troubleshoot any potential WU component glitch as soon as possible. There’s a possibility that the problem can be fixed automatically if you run the Windows Update troubleshooter and apply the recommended fix.
- Corrupted WU dependencies – As it turns out, you will encounter this error code in situations where certain dependencies used by Windows Update have been corrupted.
- Bad update – There’s a possibility that the update you are experiencing is a bad one or interacting with your fleet of hardware drivers in some way.
- Disabled Services – You are likely to face the issue at hand if Background Intelligence Transfer Service and Windows Update Service are disabled on your operating system. If this scenario is applicable, then restarting both services can do the trick for you.
Now that we know about the potential causes, let’s see how we can fix the error code 0x8007012a.
Check Your Internet Connection
You are likely to encounter issues like this if your internet connection is not optimal and the connection is getting interrupted often. This is why the first thing that we recommend you do is to connect to a stable internet connection.
If you are sure that the internet connection is not an issue, jump to the next method below.
Run the Windows Update Troubleshooter
Microsoft Windows includes a variety of tools for troubleshooting various problems. This includes the Windows Update troubleshooter, which is designed specifically to resolve problems with updates.
There are a number of troubleshooting strategies in the Windows Update troubleshooter that are capable of resolving most of the common causes of a failed Windows update. The tool will determine if there are any inconsistencies in WU components and apply the appropriate repair strategy.
Here is how you can do that:
- Press Windows + R keys simultaneously to open a Run dialog box.
- Type ms-settings:troubleshoot in the text field of the dialog box and hit Enter.
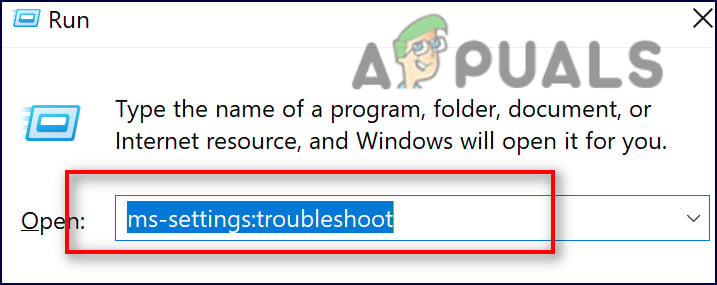
Run ms-settings.troubleshoot - Within the troubleshooting screen, select the Additional troubleshooters option.
- Now, click on Windows Update and then click on Run the Troubleshooter from the context menu.
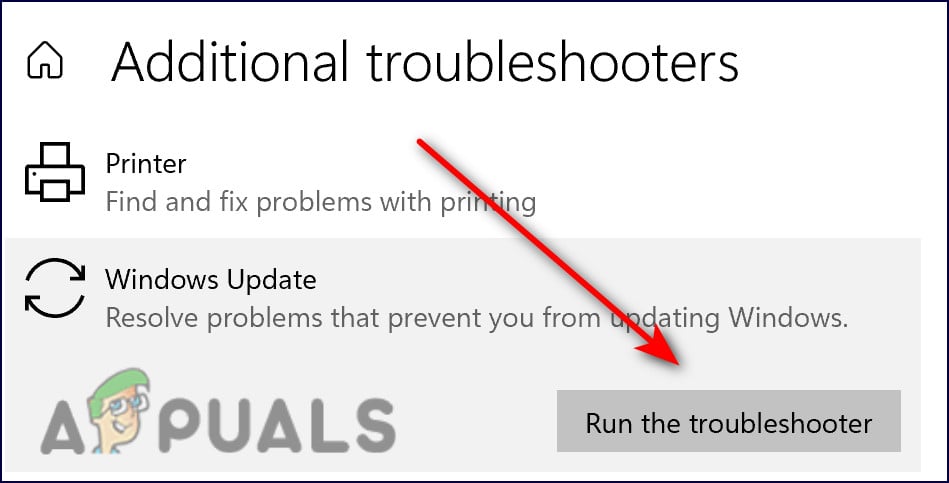
Open windows update troubleshoot - Wait until the troubleshooter has completed its initial analysis. When the appropriate repair strategy is found, you will be asked to apply it. To do so, click on Apply this fix.
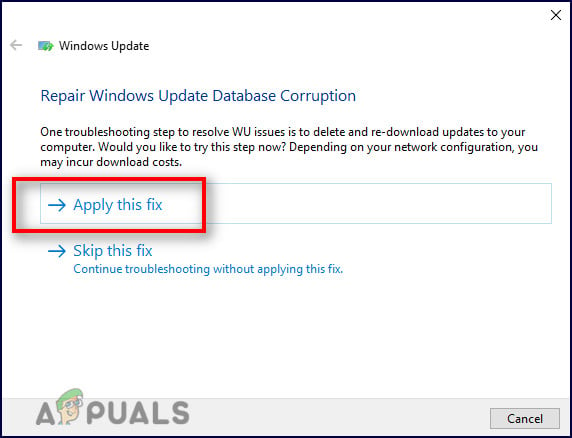
Apply this fix on windows update - Once the fix has been applied, restart your computer and try installing the problematic update again at the next start. Hopefully, you will not face the error code 0x8007012a this time.
Start Windows Update and Background Intelligent Transfer Services
Windows Update and Background Intelligent Transfer are two services that must be enabled on your operating system in order for update installations to succeed.
BITS transfers files in the background using idle bandwidth. During Windows Update, the BITS service uses idle bandwidth on your computer to install updates. As a result, Windows updates only install when there is no other update installation in progress, so you can carry on with your daily tasks.
If both or any of these services are disabled on your PC, you are likely to be unable to install the required update.
Here is how you can start both the services to resolve the error code 0x8007012a:
- Press Windows + R keys simultaneously on your keyboard to open a Run dialogue box.
- In the text field of the dialog box, type services.msc and hit Enter.
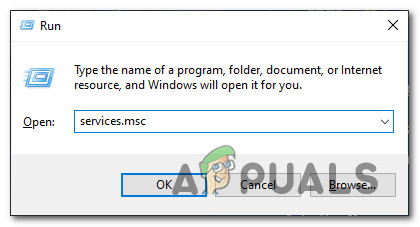
Accessing the Services screen - Once you are inside the Services window, locate and double-click on the Background Intelligent Transfer Service.
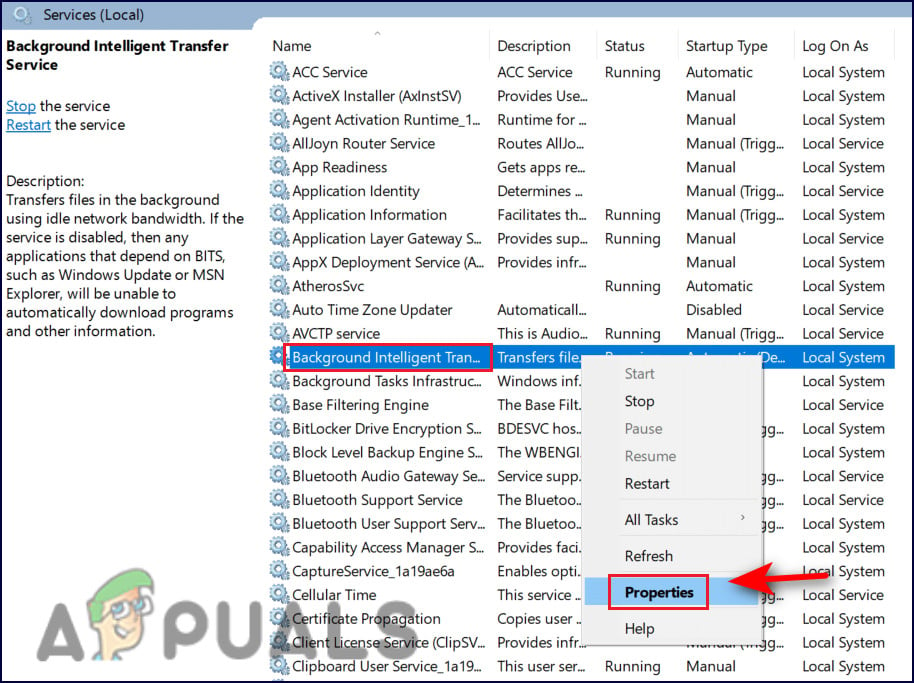
Check Background intelligent Properties - Check the Startup status from the Properties window. If it is, click on Start and then click OK. If the service is already running, then click on the Restart button and hit OK.
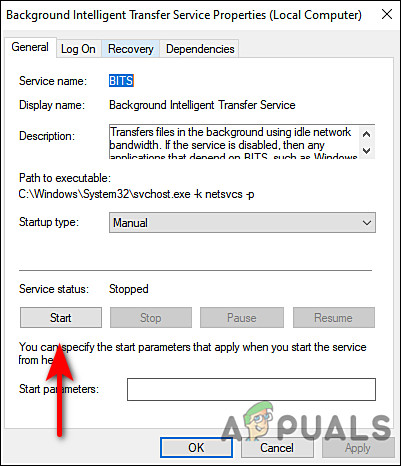
Start BIT service - Next, repeat the 3rd and 4th steps with the Windows Update service.
- Finally, close the Services window and check if the error code 0x8007012a is fixed.
Reset Windows Update Components
You may also be unable to install the update if your Windows Update components are corrupt. The solution to this is simple, as all that you need to do is reset the components to get them up and running again.
Here is how you can do that:
- Type cmd in the search bar and click on Run as administrator to launch Command Prompt with administrative rights.
- Now type the commands mentioned below and hit Enter after each to execute them.
net stop wuauserv
net stop cryptSvc
net stop bits
net stop msiserver
- Once done, execute the following commands one by one:
net start wuauserv

net start cryptSvc

net start bits

net start msiserver
- You can now restart your PC to check if performing the steps mentioned above fixed the issue.
Remove External Peripherals
If you have connected your PC to a DVD player, CD drive, or USB drive, disconnect it and restart it. It is possible that you are experiencing the problem due to a temporary glitch related to them, and removing the external peripherals may help you resolve it.
- Locate the Safely Remove Hardware and Eject Media icon on your taskbar and right-click on it.
- Select the Eject <name of the device> option.
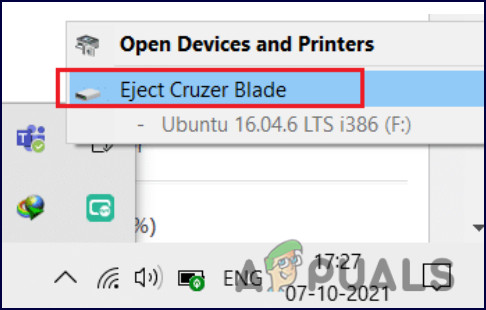
Safely remove any connected device - Perform the same steps for all other external devices and then reboot your PC.
Repair Install or Clean Install
If none of the methods mentioned in this article have worked for you and you are still unable to install the update due to the error code 0x8007012a, your only option is to reinstall the system files. You can do so via Repair install and Clean install.
Clean installing – With this method, Windows will be reinstalled. You can do this if you want a fresh start. Nevertheless, any files that you previously stored on the same partition as Windows will be lost.
Repair installing – The in-place repair procedure allows you to replace each corrupted Windows file while preserving your personal files (including applications and games). It is, however, a bit lengthy.


