How to install TWRP and Root the Alcatel Ideal 4060A
This is a step-by-step guide for installing TWRP, rooting with SuperSU, and soft-brick recovery for the Alcatel Ideal 4060A. It is a fairly simple process that involves the ADB terminal.
Warning: Make a complete backup of all your important data before proceeding, as your device will be wiped during the process.
Requirement:
Cure_4

 SuperSU

 TWRP
- First download Cure_4 and extract to your desktop. The password for the archive is ‘fax’. Inside the extracted folder you will also find the TWRP and SuperSU .zip files for flashing.
- Now go to Settings > About Phone > tap on Build Number 7 times, until it confirms you have unlocked Developer Mode.
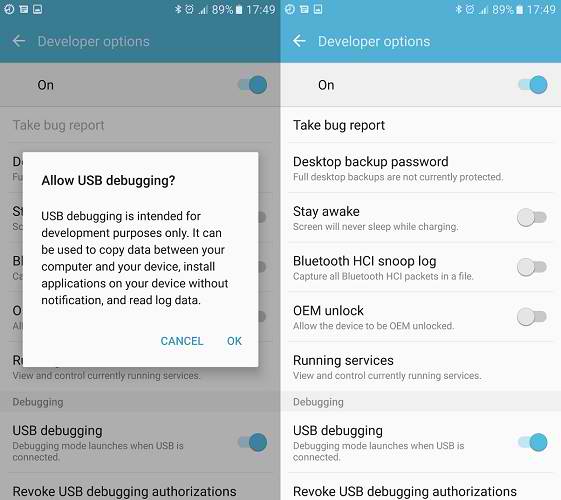
- Go to Settings > Developer Options > enable OEM Unlock and USB Debugging. Reboot your Alcatel Ideal 4060A.
- Connect your device to your computer via USB, and copy the SuperSU .zip file from the Cure_4 folder to your device’s SD card.
- Run the START_HERE.bat file from the Cure_4 folder.
- It will start a command terminal that copies files, executes a temporary root exploit, and opens a new CMD window. When the new CMD window opens, type the following commands inidividually:
Adb shell
Run-as-s1
Su
dd if=/data/local/tmp/twrp.img of=/dev/block/mmcblk0p25
- The terminal should display the following codes after you type the last command:
- 26404+0 records in
- 26404+0 records out
- At this point you need to pull out the device’s battery, wait for about 10 seconds, and put the battery back in.
- Now hold Power + Volume Up at the same time, and when you see the Alcatel logo screen, release the Power button while continuing to hold Volume Up.
- The device should boot into TWRP recovery. Now we are going to flash the SuperSU .zip to achieve root status.
- In the TWRP menu, go to Install > “Up a Level” and then choose SD Card. Select the SuperSu.zip file and swipe to flash it.
- The process may take a minute, leave your phone alone until it is done. Then reboot system from TWRP menu, and leave your phone alone until it boots into Android system. This may take a few minutes.
- Once you’re in the Android system, you can verify root status with an app like Root Check from Google Play.
- If everything is well and root is verified, open the Cure_4 folder again on your desktop, and run the CLEANUP.bat file.
To Fix any Soft Brick Issue:
- Boot into TWRP recovery with the method earlier in this guide.
- From the TWRP main menu, choose Wipe > Advanced Wipe > select Dalvik Cache and Cache, then swipe to begin the wipe process.
- Go back to the TWRP main screen, and tap Advanced > Fix Permissions and swipe.
- Reboot your phone, and all should be well. If not, you may consider performing a complete wipe from TWRP and flashing a stock ROM from Alcatel, which can be found here.