How to Install and Uninstall Homebrew on macOS?
The Command-line Interface is a text-based user interface through which users can interact with their computer. Instead of using the mouse to interact, users will need to type commands as text and receive text-based feedback. However, you may not have a good package manager that lets you install free and open-source software. Homebrew is a pretty known package manager for macOS that lets you install a different type of software through the terminal. You will even need Homebrew to install the developer tools on your system. In this article, we will teach you about the installation and uninstallation of Homebrew in macOS.
Installing Homebrew on macOS
The Homebrew will install all the packages to their own director and then symbolic links their files into /usr/local. It will not install the files outside of its prefix. The user can place a Homebrew installation anywhere they like. Once Homebrew installed, users will be able to easily install software like Ruby, Git, and Python.
Important: You need to install Xcode development software from the Apple App Store before installing Homebrew.
- Open the Safari browser and go to the Homebrew site (brew.sh). On the home page, you will get the install command. Copy the command from there.
/bin/bash -c "$(curl -fsSL https://raw.githubusercontent.com/Homebrew/install/HEAD/install.sh)"
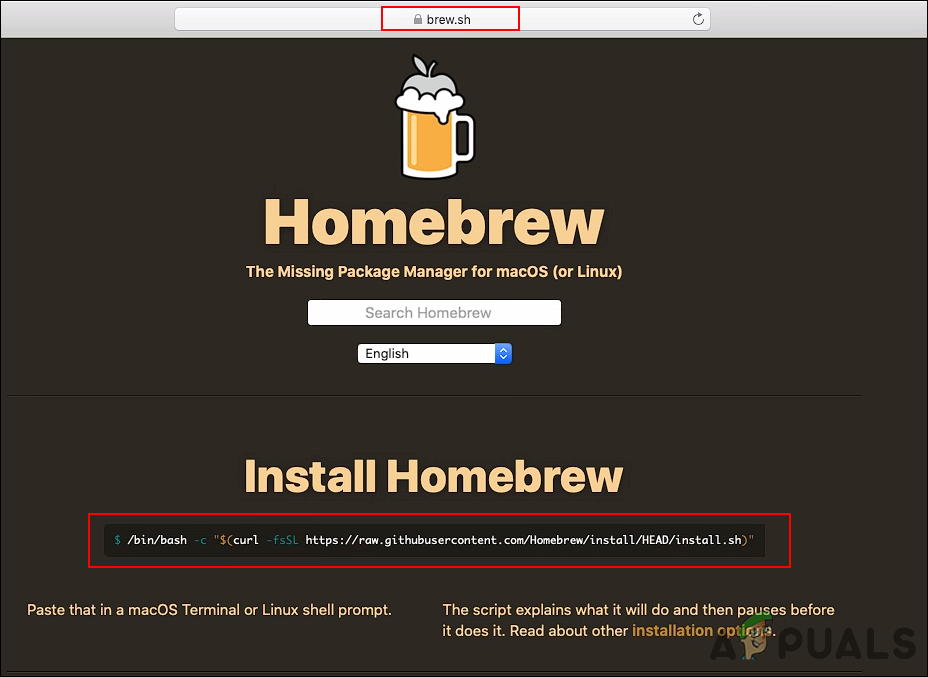
Opening Homebrew site and copying command Note: The command may change in the future, so make sure to check it on the site.
- Hold the Command key and press the Space Bar to open the Spotlight. Now search for the Terminal and open it.

Opening Terminal - Paste the following command that you just copied from the site and press the Enter key. Provide the password and press the Enter key to confirm the installation.

Installing Homebrew on macOS Note: If it gives an error for Xcode command-line tool not being installed. You can run the “xcode-select –install” command, and then try installing Homebrew again. Some of the components that you want to install will rely on Xcode’s Command Line Tool package.
- You will get the successfully installed message. You can also type the following command to check the installed version of Homebrew on your system.
brew --version

Checking Homebrew version
Uninstalling Homebrew on macOS
Uninstalling Homebrew is similar to the installation method of Homebrew. It is also done by using the Terminal on your system. Both of them have similar commands, but only the script name difference. The installation method has the “install.sh” and the uninstalling method has the “uninstall.sh” in the command. This will run the uninstall script in your terminal and remove Homebrew from your system. You can follow the detailed steps down below:
Note: Keep in mind that uninstalling Homebrew also uninstalls every package you installed. You can’t uninstall Homebrew and keep the packages.
- Open the Safari browser and then go to the Homebrew site (brew.sh). Now copy the installation command that is shown on the home page.

Opening Homebrew site and copying command Note: The command may change in the future, so make sure to check it on the site.
- Press the Command + Space Bar key to open the Spotlight. Now search for Terminal and press the Enter key.

Opening Terminal - Now paste the command (that you copied in the first step) in the Terminal. However, change the “install.sh” to “uninstall.sh” as shown below:
/bin/bash -c "$(curl -fsSL https://raw.githubusercontent.com/Homebrew/install/HEAD/uninstall.sh)"
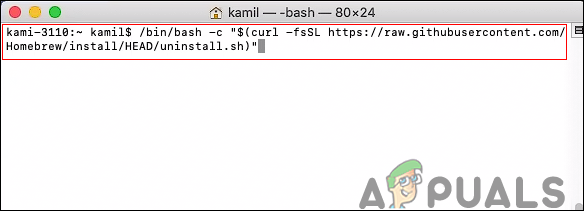
Uninstalling Homebrew on macOS - Type “y” and press Enter to confirm the uninstalling. Then, provide the password to confirm this operation as an admin.
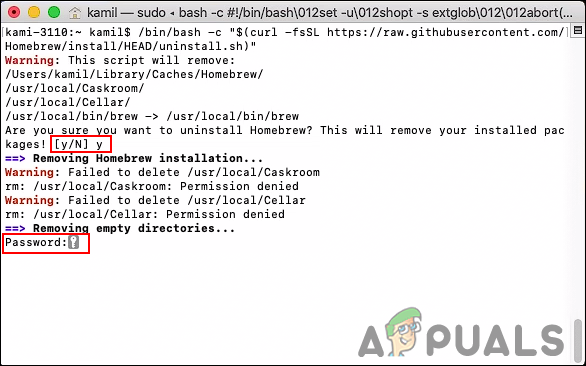
Confirming the uninstalling of Homebrew - It will show the uninstalled message and also show the possible Homebrew files that were not deleted.
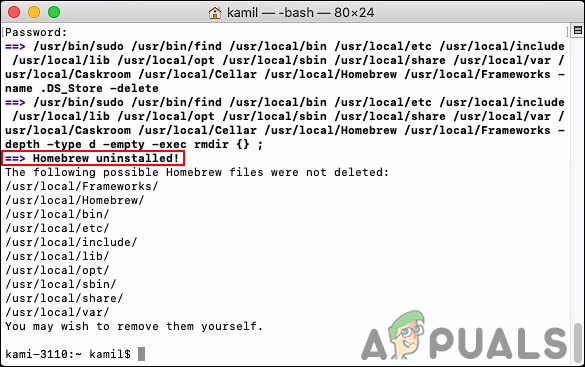
Uninstalled successfully - For confirmation, you can type the following command to check if Homebrew is still available or not.
brew –version
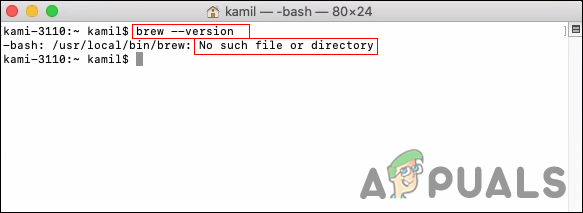
Checking Homebrew after uninstalling


