How to Wipe Cache Partition on Android Phone or Tablet
Applications store cache on the device to reduce loading times and provide the users with a smoother experience. This cache is stored on the device’s partition and stays there unless deleted. The cache is regenerated automatically if it is deleted so it deleting the cache does not cause any problem with the application what so ever. Over time cache might get corrupted and even if it is not corrupted it generally uses some of the device’s resources.
In this article, we will teach you how to completely wipe the cache partition on your mobile which will, in turn, erase all the cached data on your device. Doing so might fix many issues with the device such as sluggish performance and increased battery usage.
How to Wipe the Cache Partition on your Phone or Tablet?
In this step, we will be deleting the cache partition by turning the phone off and performing a hard boot which provides the option to all Android users to wipe the partition storing cache. The process might vary slightly depending upon the device that you are using. Some devices allow users to delete the cached data without having to hard boot the device however, most do not. So there are 2 methods that you can apply.
Deleting Cached Data Through Settings:
- Drag down the notifications panel and tap on the “Settings” icon.
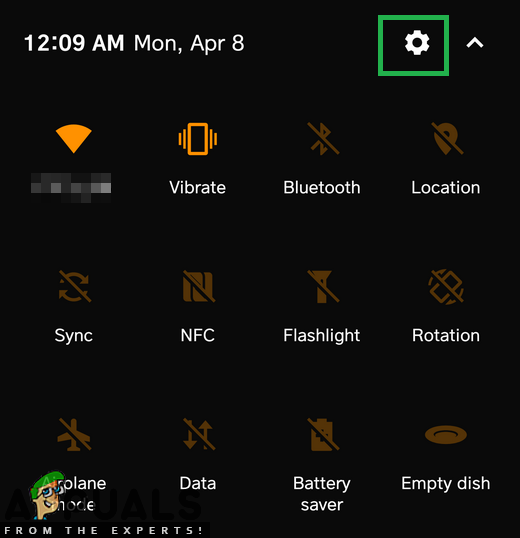
Dragging down the notification panel and clicking on the Settings icon - Tap on the “Storage” option and then on “Internal Storage“.
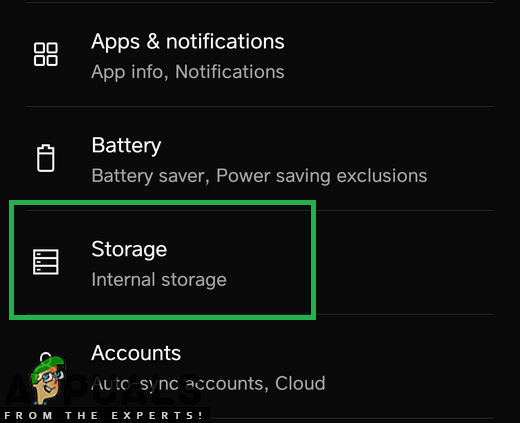
Tapping on the “Storage Icon” in the settings - Check to see in the statistics if there is an option for “Cached Data” if there is then click on it to open it.
- Tap on the “Delete Cached Data” option and click “Yes” on the prompt.
- If there is no “Cached Data” option in the statistics check to see if there is an option for “Smart Cleaning” or “Free Up Space“.
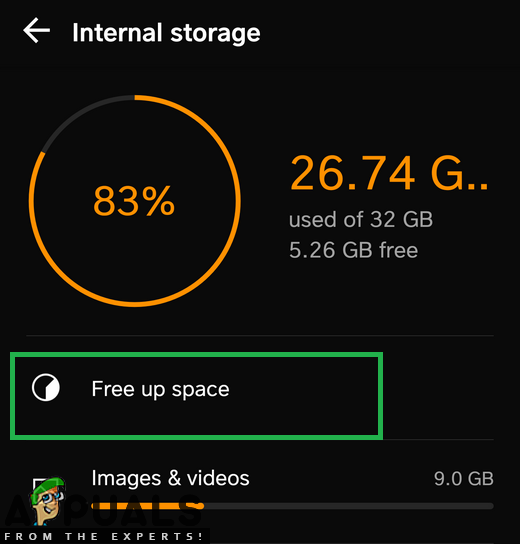
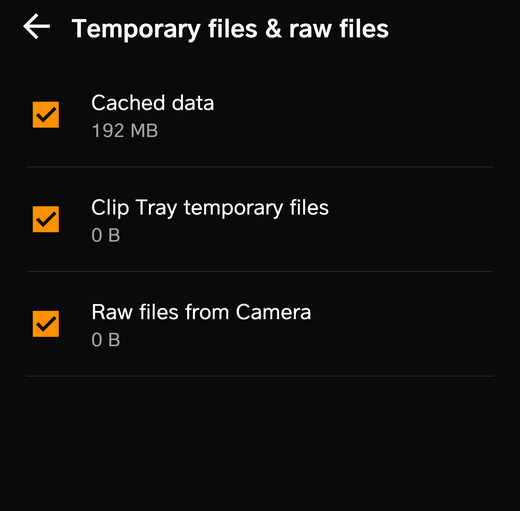
Tapping on the “Free up Space” option inside settings - Tap on the “Temporary & Raw Files” option and then on the “Delete” option.
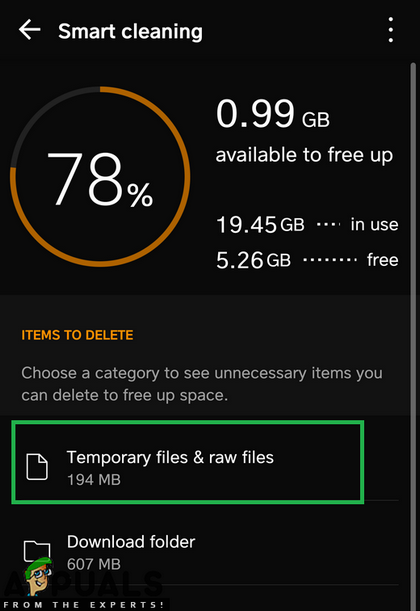
Tapping on the “Temporary and Raw Files” option - This process will delete the cached data on your device.
Note: Some devices don’t include and the cached data has to be deleted through the recovery mood which is explained below.
Deleting Cached Data Through Recovery Settings:
- Hold down the power button and select “Switch OFF“.
- Hold the “Home” button and “VolumeUP” button simultaneously and then press and hold the “Power” button as well.
Note: Hold down the “Bixby“, Volume down button and then press and hold “Power” button for Newer Samsung Devices.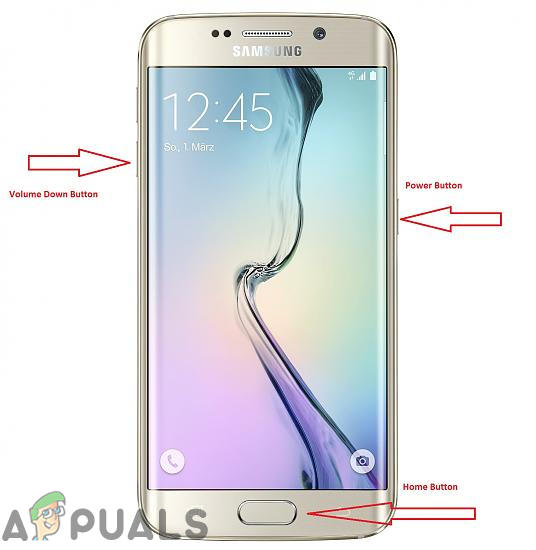
Button location for most devices - When the Manufacturers Logo Screen appears, release only the “Power” key.
- When the Android logo screen shows release all the keys the screen might show “Installing System Update” for a couple of minutes before showing the Android Recovery Options.
- Press the “Volume down” key until the “Wipe Cache Partition” is highlighted.

Navigating down to the “Wipe Cache Partition option” - Press the “Power” button and wait for the device to clear the cache partition.
- When the process is completed, navigate down the list through the “Volume Down” button until “Reboot System Now” is highlighted.
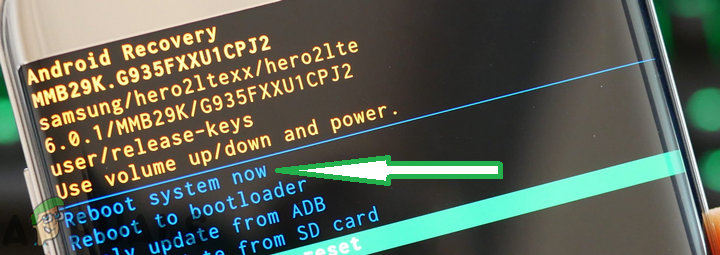
Highlighting the “Reboot System Now” option and pressing the power button - Press “Power” key to select the option and restart the device.
- Once the device is restarted, check to see if the issue persists.
Note: You must be very careful with this process because even a slight mistake during this can cause the phone software to get bricked permanently.


