How to: Uninstall McAfee Livesafe
Some apps and programs are definitely more difficult to install than the other and the reason for this is that some apps simply don’t “want” to be uninstalled. If an app made its way to your computer without your knowledge such as the adware and spamware which gets installed along other freeware you download from the Internet, you will have a hard time getting rid of it completely.
On the other hand, if it is a malicious application, you probably won’t be able to get rid of it by any conventional means and you will have to use an antivirus program. McAfee LiveSafe is an antivirus/security essentials program but it appears that users are actually having a hard time getting rid of it completely off their computers. Find out more about this issue by reading below!
Uninstalling McAfee LiveSafe
McAfee LiveSafe is one of the apps similar to McAfee Internet security and it offers protection against spyware which may be used to steal your personal information and credit card details. It appears that users are having difficulties during the uninstallation process, especially those where this program was preinstalled on their computers,
Luckily, uninstalling it is definitely not impossible and it can be achieved easily if you follow the instructions below carefully.
Notes for Users Whose McAfee LiveSafe Program Came Preinstalled
- Activate your McAfee subscription before you attempt to remove your product.
- This is so that you keep your right to use the product (license) without having to buy a new subscription.
- To activate the McAfee software that came pre-installed, visit the following link on McAfee’s official site.
Solution 1: Uninstalling the Program via Settings or Control Panel
This is definitely the first method you should try if any of your apps is malfunctioning or if it’s acting suspicious recently. If this method fails, don’t feel discourages as there are many different ways of uninstalling an app on Windows 10.
This is definitely the first method you tried yourself but let’s try this again in order to make sure we tried to uninstall it the usual way. If this method helps you deal with McAfee-related error messages, you don’t have to continue with other solutions. This is also the easiest solution for casual users.
- First of all, make sure you are logged in with administrator permissions as you won’t be able to delete programs using any other account.
- Backup the data you want to save because deleting McAfee will remove it from your PC.
- Click on the Start menu and open Control Panel by searching for it. Alternatively, you can click on the gear icon in order to open settings if you are using Windows 10.
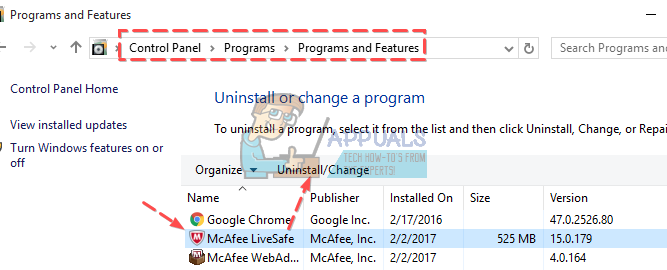
- In Control Panel, select to View as: Category at the top right corner and click on Uninstall a Program under the Programs section.
- If you are using the Settings app, clicking on Apps should immediately open a list of all installed programs on your PC.
- Locate McAfee LiveSafe in Control Panel or Settings and click on Uninstall.
- Its uninstall wizard should open with two options: Repair and Remove. Select Remove and click Next in order to uninstall the program.
- A message will pop up asking “Do you want to completely remove McAfee LiveSafe for Windows?” Choose Yes.
- Click Finish when the uninstalled completes the process and restart your computer to see whether errors will still appear.
Solution 2: Download and Run the Mcafee Consumer Product Removal Tool (MCPR)
McAfee came up with this neat tool which enables you to get rid of their products easily if the Windows default uninstaller fails to remove them. The tool can be found on their website and users have reported that it was able to fix the problem for them.
- There are some things you need to know before downloading the tool:
- Always download a new copy of MCPR before each use.
- This ensures that you have the latest version, and that newer McAfee products can be successfully recognized.
- MCPR will clean up only the components needed for reinstallation. It is not designed to clean up 100% of components.
- Completing this step will require a restart.
If you understood everything above, it’s time to stall with the uninstallation process.
- Download the MCPR tool from McAFee’s official website.
- Double-click on MCPR.exe which is the file you just downloaded. It should be in your Downloads folder by default but you can also open it by double-clicking on the file at your browser Downloads page.
- If you see a security warning asking you whether you allow the app to make changes to your PC, click Yes, Continue, or Run, depending on which version of Windows you have installed.
- At the McAfee Software Removal screen, Click Next and click Agree to accept the End User License Agreement (EULA).
- At the Security Validation screen, type the characters exactly as shown on your screen (validation is case-sensitive).
- Click Next. This step prevents the accidental use of MCPR.
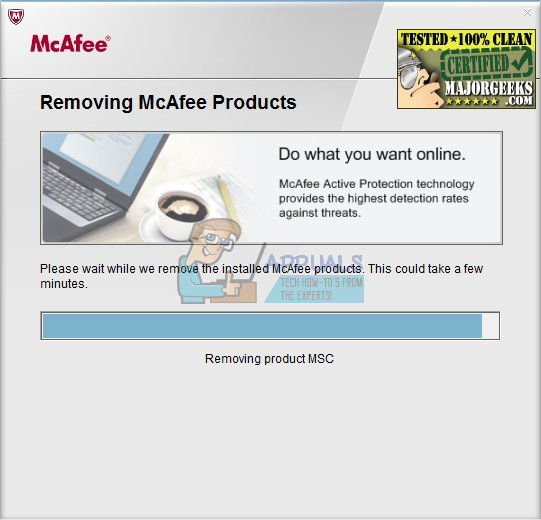
- After the removal process finishes you should see the Removal Complete message which means that McAfee LiveSafe has been removed successfully from your computer.
- However, if you see the Cleanup Unsuccessful message, the cleanup failed and you should restart your PC and try the whole process again.
- Restart your computer after the process finishes and check to see if McAfee LiveSafe is removed from your computer.
Solution 2: Using Windows PowerShell to Uninstall McAfee LiveSafe
Windows PowerShell is a powerful tool which can help you automate tasks using a command-line shell and a scripting language which was built using .NET Framework and .NET Core. It used to be exclusive to Windows but it was made open-source and now it’s available to all platforms. You can use PowerShell to uninstall various apps and you can even use it to delete preinstalled Windows Apps such as Photos, Video, Calculator, etc.
This can fix your issue because using PowerShell with administrator permissions will remove any of the apps you have installed on your computer, no matter who installed them or their size. Try this if everything above fails.
- Type PowerShell in the Search bar located at the bottom left part of your taskbar, right-click on the first result, and select Run as administrator option.
- Copy and paste the following command in order to receive the full list of the apps you have installed along with detailed info regarding every single one. Make sure you click Enter after pasting the text in order to run the command.,
Get-AppxPackage -AllUsers | Select Name, PackageFullName
- The output of the above command will be a list with two columns. Under the first column the full name of the App (Name) is displayed and at the second column the Full Package Name (PackageFullName) is displayed.
- Wait for the list to load and try to search for McAfee LiveSafe. This might take a while but be patient while you look through the installed apps.
- When you find it, copy everything next to the PackageFullName line by selecting the entire text and using the Ctrl + C key combination.
- Use the following command in order to uninstall LiveSafe from your PC. Replace the bolded PackageFullName with the actual name you just copied and click Enter.
Remove-AppxPackage -package PackageFullName
- Restart your computer and see if there are any changes regarding the error messages.
Solution 3: Uninstall MBAM in Safe Mode
If you were somehow unable to uninstall McAfee LiveSafe properly during normal startup, try restarting your computer in Safe Mode and uninstalling it.
- Type “msconfig” in the Search bar and navigate to the Boot tab.
- In the Boot tab, check the box next to the Safe boot option and click on the radio button next to the Minimal option.
- Click on OK and confirm that you are about to restart your computer.
- The computer should restart in Safe Mode.
- Open Settings by clicking on the gear icon in the Start menu and navigate to Apps.
- Locate McAfee LiveSafe on the list of installed apps and click on Uninstall.
- Open msconfig again and disable the Safe boot option.
- Restart your computer in normal boot and check to see if your problem is solved.