How to Uninstall Facebook Messenger on Windows 10
Some Windows 10 users are reporting that they can find no apparent way of uninstalling the UWP version of Facebook Messenger. After they installed the app from the Microsoft Store, the app refuses to be uninstalled conventionally – unlike the vast majority of apps that they previously downloaded from the Microsoft Store.
How to Uninstall the UWP version of Facebook Messenger
We investigated this particular issue and it looks like the problem has been around since the first year after Windows 10 launched. Based on user reports, the issue is occurring with both the regular Facebook Messenger UWP app and the Beta version.
If you’re looking for a way that will finally allow you to uninstall the desktop version Facebook Messenger, this article will provide you with several viable paths. Down below, you’ll discover a collection of methods that a lot of affected users have resorted to before managing to uninstall Facebook Messenger.
All the potential fixes below are confirmed to work, so feel free to follow whichever one seems more approachable to your current situation and your level of expertise.
Method 1: Booting in Safe Mode and uninstalling from Apps and Features
Some affected users have reported that they only managed to resolve the issue after they restarted their computer in Safe Mode and uninstalled the Messenger app from the Apps and Features screen. In most cases, this procedure will bypass any sort of conflict that might be causing the issue in the first place.
Here’s a quick guide on how to do this:
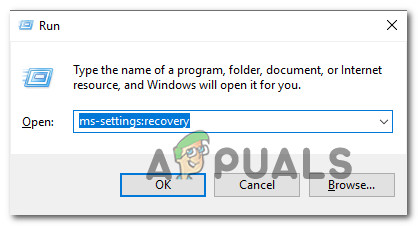
- Press Windows key + R to open up a Run dialog box. Then, type “ms-settings:recovery” and press Enter to open up the Recovery tab of the Update & Security settings page.
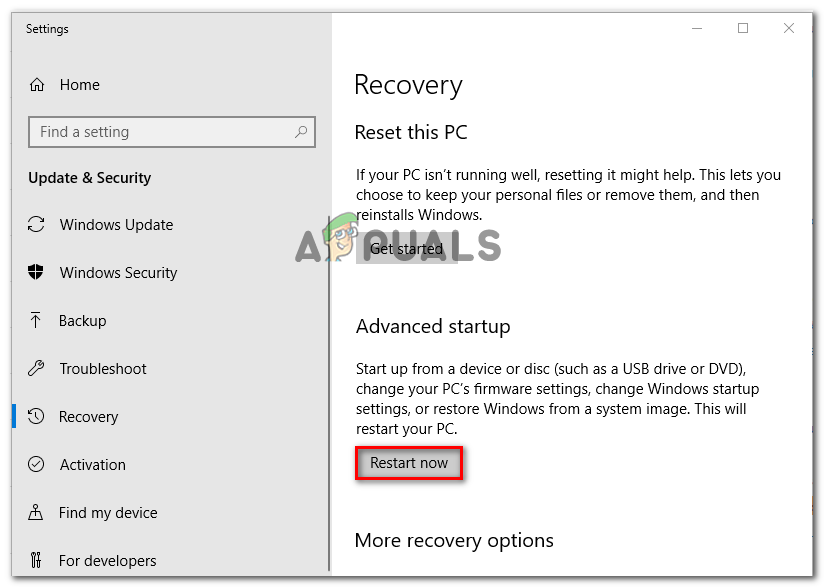
Accessing the Recovery tab - Inside the Recovery tab, scroll down to the Advanced startup tab and click on Restart now. After you do this, your computer will restart directly inside the Advanced startup menu. Then, click on Restart now.
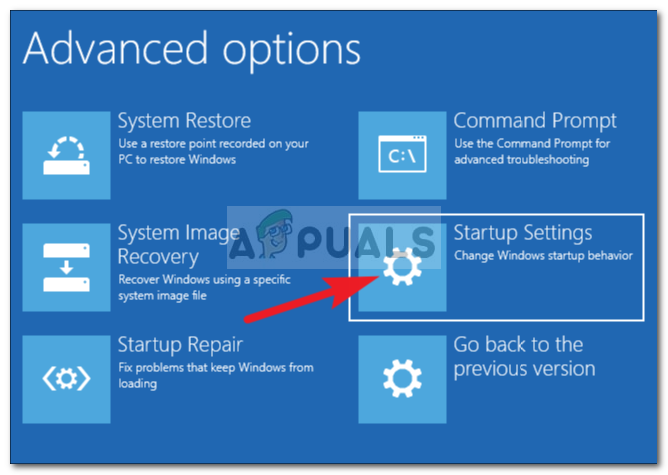
Accessing the advanced startup menu - Once your computer restarts into the Advanced Startup menu, go to Troubleshoot > Advanced Options and click on Startup Settings.
Click Startup Settings - Your computer will restart once more, and it will display the Startup Settings menu. Once you see it, press the F4 key or the 4 key to start your PC in Safe mode.
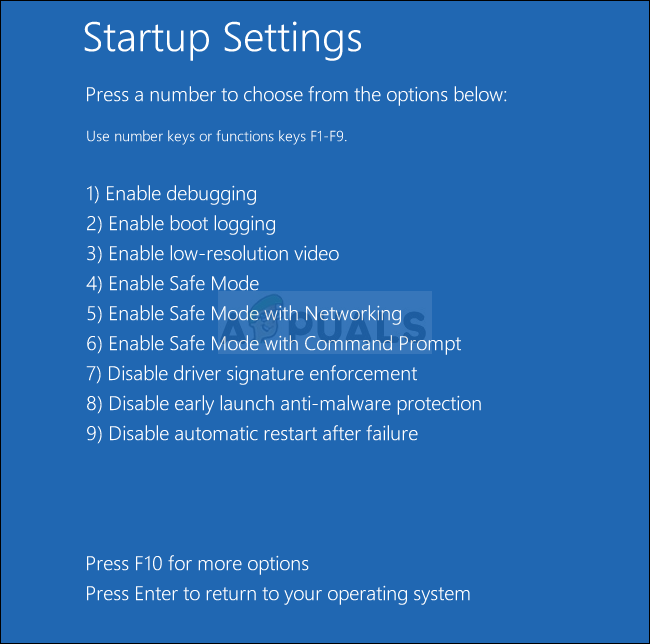
Click 4 or F4 in order to boot into Safe Mode - Wait until the startup sequence is complete.
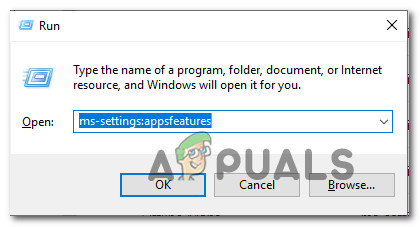
- Once your PC boots into Safe Mode, press Windows key + R to open up a Run dialog box. Then, type “ms-settings:appsfeatures” and press Enter to open up the Apps & Features tab of the Settings app.
Accessing the Apps & Features Menu - Inside the Apps & Features tab, scroll down through the list of application and locate Messenger. Then, click on Messenger and select Uninstall from the button below. You will then be prompted to confirm, so click the Uninstall button once again.
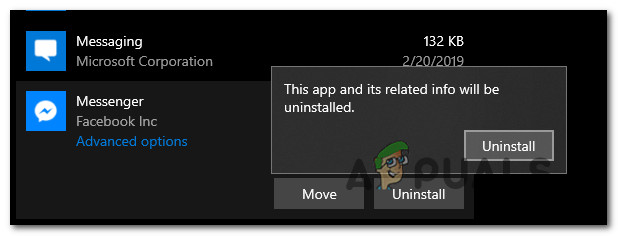
Uninstalling the Messenger app Note: Make sure not to confuse it with the Messaging app. The correct one has Facebook Inc. listed under the name.
- The uninstallation should complete without issues.
If this procedure didn’t allow you to uninstall the Messenger app, move down to the next method below.
Method 2: Using CCleaner to uninstall the Messenger UWP app
Some users that haven’t been able to uninstall the Messenger application conventionally have reported that they finally managed to so by using a 3rd party tool.
CCleaner is an automated cleaning tool that is equipped with a powerful uninstaller that knows how to uninstall corrupted UWP apps. Here’s a quick guide on using CCleaner to uninstall the Messenger UWP app:
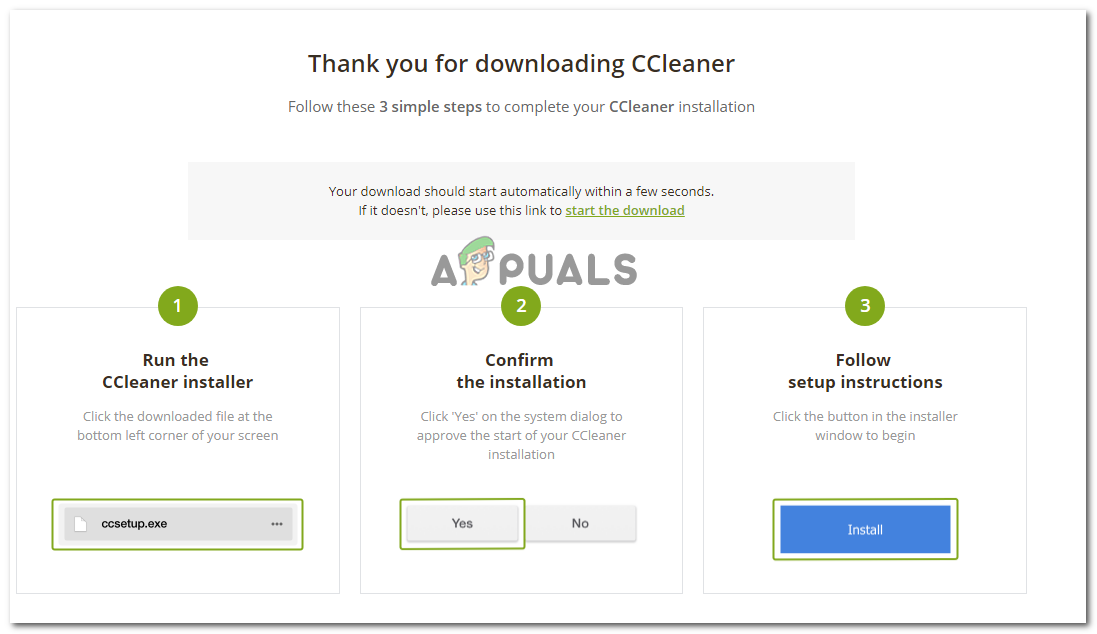
- Visit this link (here) and click on Free Download to download the CCleaner installer on your computer.
- Once the download is complete, open the installation executable and follow the on-screen prompts to install the software on your computer.
Downloading CCleaner - Once Ccleaner is installed on your computer, open the software and click on Tools > Uninstall.
- Then, use the right-hand panel to find Facebook messenger among the list of programs. Once you see it, click on Messenger and then click on Uninstall. Then, click Ok to uninstall Facebook Messenger.
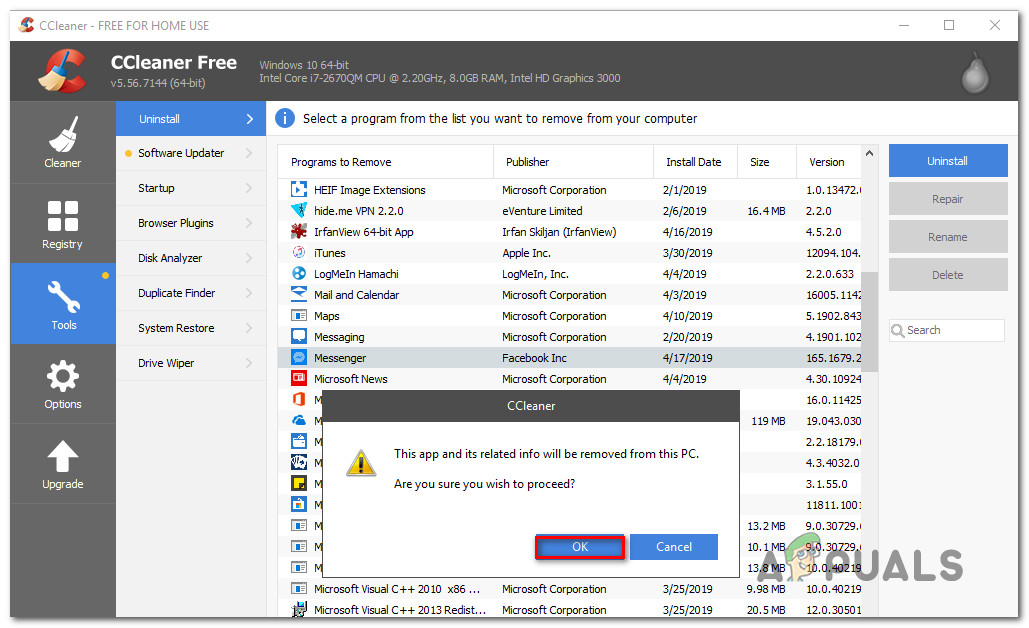
Uninstall Facebook Messenger using CCleaner If this method didn’t resolve the issue or you’re looking for a different way of uninstalling the UWP version of Facebook Messenger, move down to the next method below.
Method 3: Using the Windows 10 Store Apps Uninstaller
Several affected users have reported that the issue was finally resolved and they managed to uninstall the Facebook Messenger UWP version after using the Windows Store Apps Uninstaller instead of the default uninstalling procedure.
Here’s a quick guide on using the Windows 10 Uninstaller to get rid of the Facebook Messenger UWP app:
- Visit this link (here) and click on Apps-cleaner.zip button near Download.
- Once the archive is downloaded, use an archive extraction utility like WinZip, WinRar or 7Zip to extract the contents of the archive.
- When the contents of the archive are downloaded and if you’re Windows 10 version runs on 64 bits, double-click on the Remove-StoreApps_X64 exe. Otherwise, double-click on the Remove-StoreApps_Win32 executable.
- Once the application is launched, click on Get Store Apps to load all the available UWP apps.
- Select the Facebook Messenger app from the list of apps and click on Remove Selected Apps.


I tried methods 1 and 3 and there was no joy. Method 2 required the install of another piece of s/w that I resisted. Then I had an idea. I went to the Start Menu, found Messenger, and right clicked on it. Included in the popup was a choice to Uninstall. I clicked on that and the uninstall was completed very quickly. Hope this works for others.