How to Stop Skype from Running Automatically at Startup on Windows
In the case of most Skype installations on Windows computers, Windows is configured to automatically launch Skype as soon as the computer starts up and the user logs in to it. On a Windows computer, Skype is added to its startup items as soon as it is installed. However, many Windows users like keeping the list of programs Windows automatically launches at startup as short as possible so as to make sure a bunch of programs don’t start hogging computer resources as soon as they log in to Windows. These users, along with users who simply don’t want Skype to be launched at startup for whatever reasons, often wonder how they can prevent Windows from automatically running Skype at startup.
Fortunately, preventing Skype from being launched at startup is not only doable but is also pretty easy. What is noteworthy, however, is that the average Windows user can go about preventing Skype from being launched at startup in three different ways, and the exact method that ends up working for a user varies from one user to the next. That being the case, you should simply try each of these methods out one by one until one of them successfully stops Skype from running automatically at startup. The following are the three methods you can use to prevent Windows from running Skype automatically at startup:
Method 1: Disable the Automatically start Skype option within the program
First and foremost, you need to make sure that Skype is not configured to have Windows automatically launch it when the OS boots up from within the application itself. To do so, you need to:
- Launch Skype and log in to it.
- Click on the Options menu (located next to your display image at the top and represented by three horizontal dots, i.e. …).

- Click on Application settings.

- Locate the Automatically start Skype option under Startup and Close and turn it off.
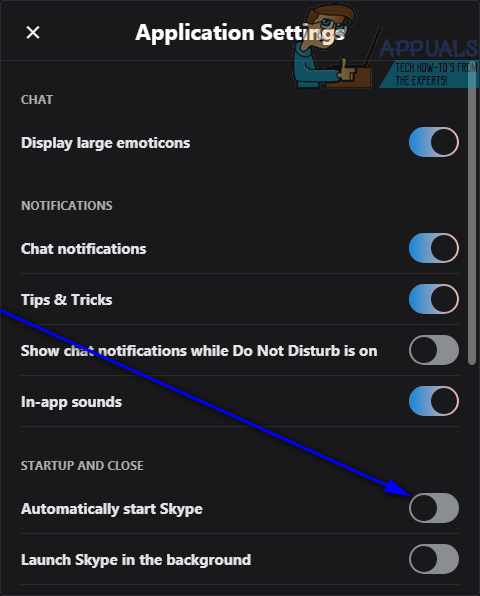
- Close Skype.
- Restart your computer. When it boots up, check to see if Windows automatically starts Skype.
When you use this method, you also get rid of the Skype shortcut in your computer’s Startup folder (if one was there in the first place).
Method 2: Remove Skype from your computer’s startup items
Every application and program configured to be automatically launched at startup is a part of the computer’s startup items. You can prevent Windows from automatically starting Skype when you log in by removing the application from your computer’s startup items. To do so:
On Windows 8 and above
- Press Ctrl + Alt + Delete to open the Task Manager.
- Navigate to the Startup tab of the Task Manager.
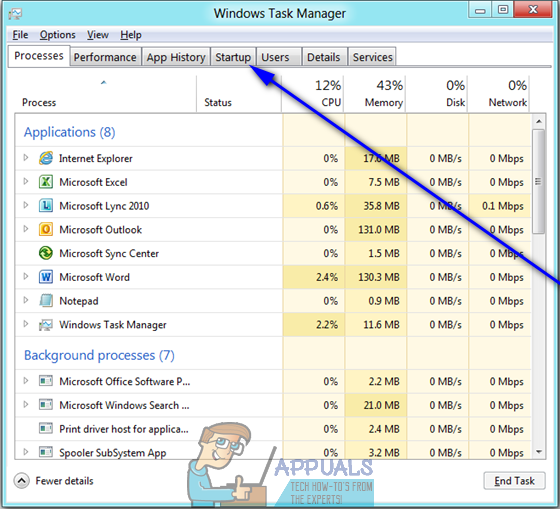
- Locate the entry for Skype in the list of your computer’s startup items, right-click on it and click on Disable.
- Close the Task Manager.
- Restart your computer and check to see if the objective has been completed.
On Windows 7 or older
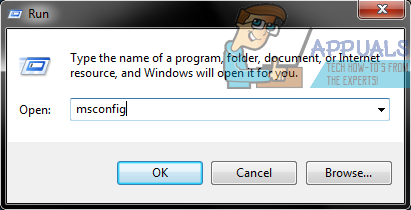
- Press the Windows Logo key + R to open a Run dialog.
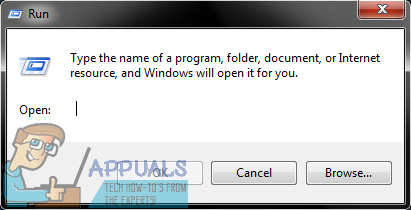
- Type msconfig into the Run dialog and press Enter to launch the System Configuration utility.
- Navigate to the Startup tab of the System Configuration utility.
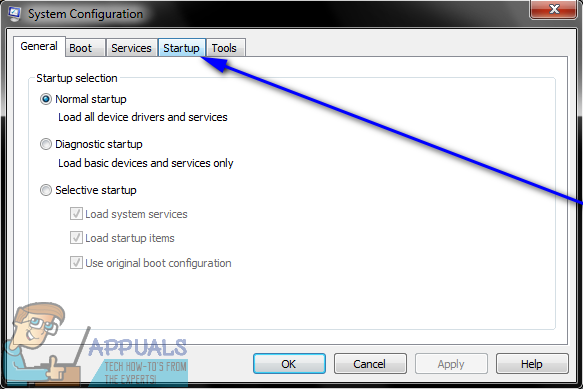
- Locate the listing for Skype within your computer’s startup items, and disable it by unchecking the checkbox located directly beside it.

- Click on Apply and then on OK.
- Click on Restart in the resulting dialog box.
- When your computer boots up, check to make sure Windows doesn’t automatically start Skype after you log in.
Method 3: Use the Registry Editor to make sure Windows doesn’t launch Skype at startup
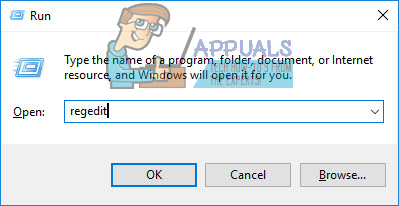
If neither of the methods listed and described above worked for you, fear not – you can still stop Skype from running automatically whenever you log in to Windows using your computer’s Registry Editor. To do so, you need to:
- Press the Windows Logo key + R to open a Run dialog.

- Type regedit into the Run dialog and press Enter to launch the Registry Editor.
- In the left pane of the Registry Editor, navigate to the following directory:
HKEY LOCAL MACHINE > SOFTWARE > Microsoft> Windows > CurrentVersion - In the left pane of the Registry Editor, click on the Run sub-key under the CurrentVersion key to have its contents displayed in the right pane.

- In the right pane of the Registry Editor, you are going to see listings for all of the programs on your computer that are configured to be launched at startup through the Registry. Locate the listing Skype, right-click on it and click on Delete.
- Confirm the action in the resulting popup.
- Close the Registry Editor and restart your computer.
- When the computer boots up, check to make sure you have successfully prevented Skype from running automatically at startup.
I’m sad to say that with the latest version of Skype none of these work anymore.