How to Start Cleanmgr (Disk Cleanup) with All Items Checked
If you’re one of those people that take extra care of their PCs, this next trick is right up your alley. The Disk Cleanup (cleanmgr) tool is pretty solid for the most part, but one of the biggest complains that users have is that it’s not configured to remember your options used in the last cleanup scan.
If you use the Disk Cleanup (cleanmgr) tool regularly, you might grow frustrated with having to re-check all the checkbox options everytime you decide that your PC needs cleaning.
Fortunately, there is one trick that will allow you to start a Disk Cleanup tool with all the checkboxes already enabled. You’ll essentially be able to perform a full cleanmgr scan with a single double-click and even schedule it to run automatically.
If you’re interested in making your cleanup chores more efficient, follow the guide down below to configure the Disk Cleanup to start with all options enabled. Here’s how it can be done.
How to Start Cleanmgr (Disk Cleanup) with All Items Checked
To start Cleanmgr with all the items checked, we’ll need to create a shortcut in which we’ll include the “LOWDISK” argument. The “LOWDISK” argument starts the Disk Cleanup utility normally, with the key difference that all the checkboxes are already ticked.
Here’s a step by step guide on configuring the DIsk CLeanup tool with the “LOWDISK” parameter so that it starts with all items already checked:
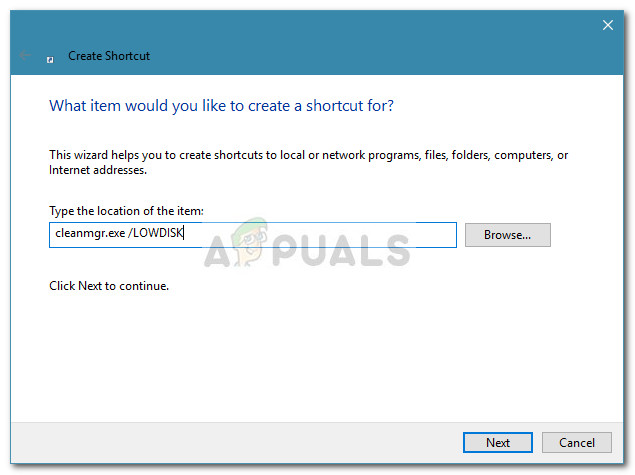
- Right-click on a free desktop section (or in a different location) and go to New > Shortcut.
- In the Create Shortcut box, insert the following command line and hit the Next button:
cleanmgr.exe /LOWDISK
- In the Next window, type out a name for your shortcut and hit the Finish button.
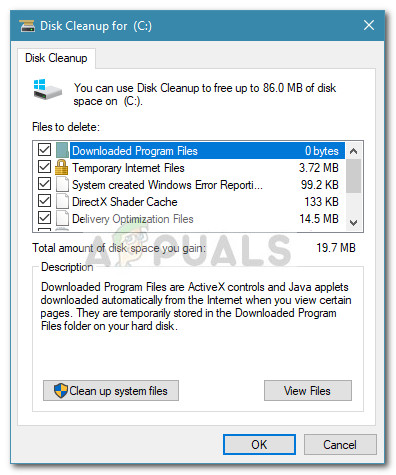
- That’s it. Upon opening the newly created shortcut, you’ll notice that the Disk Cleanup tool (cleanmgr) opens with all the checkboxes already checked. From now on, every time you double-click the cleanmgr icon, all the items will already be checked.
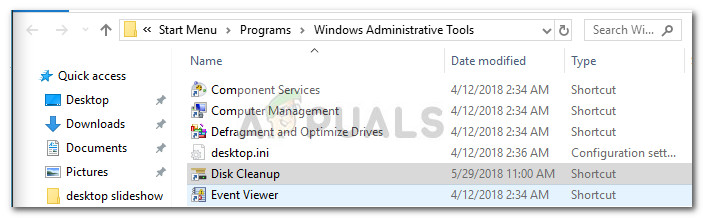
If you usually open the Disk Cleanup tool from the Start bar, you can edit the shortcut located in the Administrative Tools folder in order to achieve the same behavior. To do this, navigate to C:\ ProgramData \ Microsoft \ Windows \ Start Menu \ Programs \ Administrative Tools for Windows 10 or C:\ ProgramData \ Microsoft \ Windows \ Start Menu \ Programs \ Administrative Tools for older Windows versions.
Note: If you can’t locate the Program Data folder, access the View tab of File Explorer and check the box next to Hidden Items.
Once you arrive there, right-click on Disk Cleanup, and choose Properties. Then, navigate to the Shortcut tab and ad the /LOWDISK parameter at the end of the target field and hit Apply to save the changes.
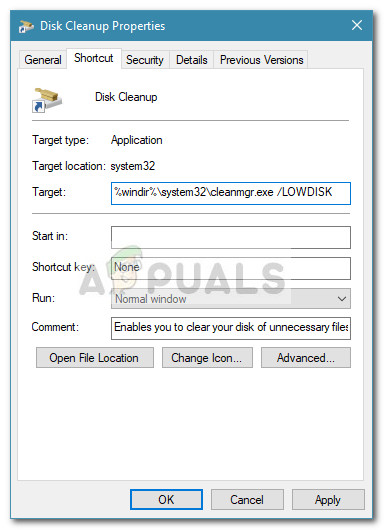
Note: Hit Continue if asked to provide administrator permissions.
After you added the /LOWDisk parameter to the startup shortcut, all of Disk Cleanup checkups will be checked even if you open it from the Start bar.


