How to Select Colors for the Background and Accent in Windows Server 2012 R2?
Users can change the colors for their Windows background and accent in the Windows settings. There are a lot more colors that users can choose to replace the default colors. However, sometimes the settings will be disabled or other users will keep changing the specified colors. By enabling policy and specifying a color for background/accent will set those colors permanent. Users cannot change the specified colors (through policy) in Windows settings. This is a good way to keep the colors that you want and make sure others are unable to change it.

Customizing the Colors for the Background and Accent
In the default settings, a user can choose the colors that are listed or choose a custom color. However, in the below methods, the user must add a hex code for the colors. The colors should meet a contrast ratio of 2:1 with white text to make the below methods work. We have provided the Policy and Registry Key methods.
Important: This policy works on Windows 8.1, Windows RT 8.1, and Windows Server 2012 R2 only.
Method 1: Customizing Colors for Background and Accent through the Policy
The best method to get these settings is to do it through the Policy Editor. This policy already exists in it and the user just needs to enable it. It provides an option for both background and accent color. Follow the below steps to try it out:
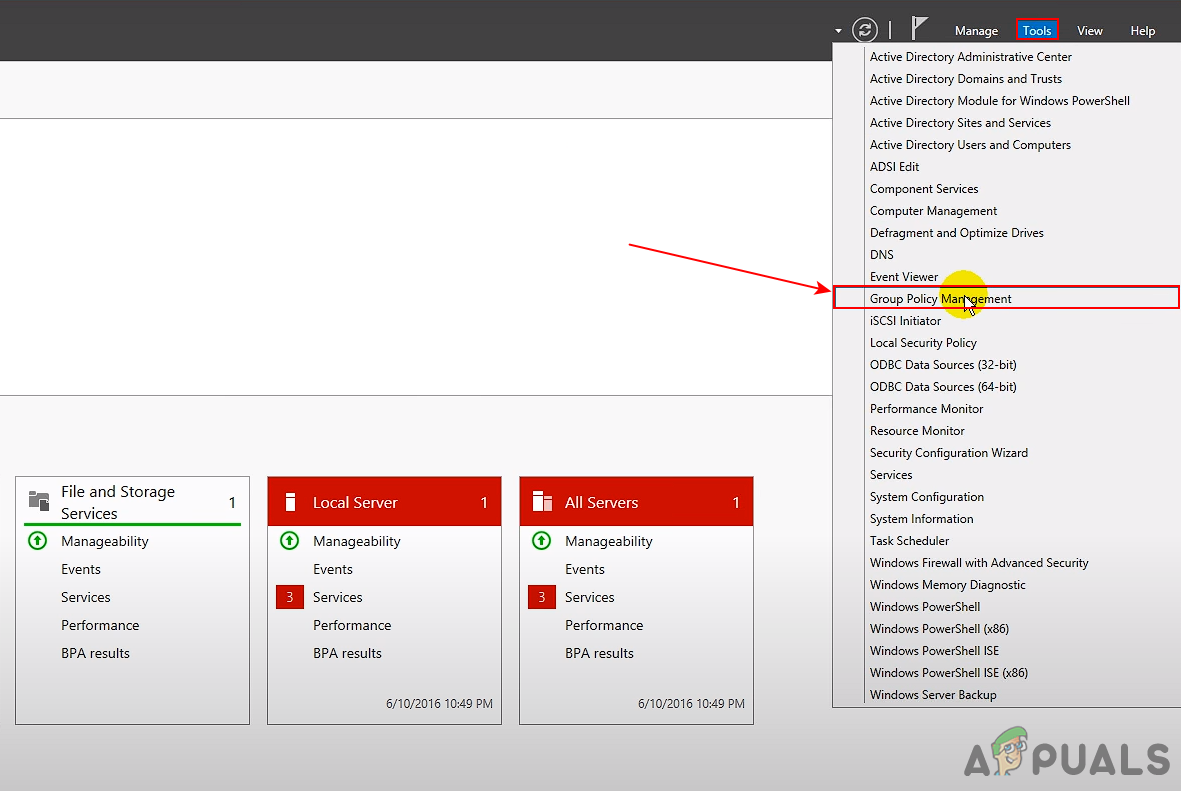
- Open the Server Manager in your Domain Controller. On the Dashboard, click on the Tools menu on the top right corner and choose the Group Policy Management option.

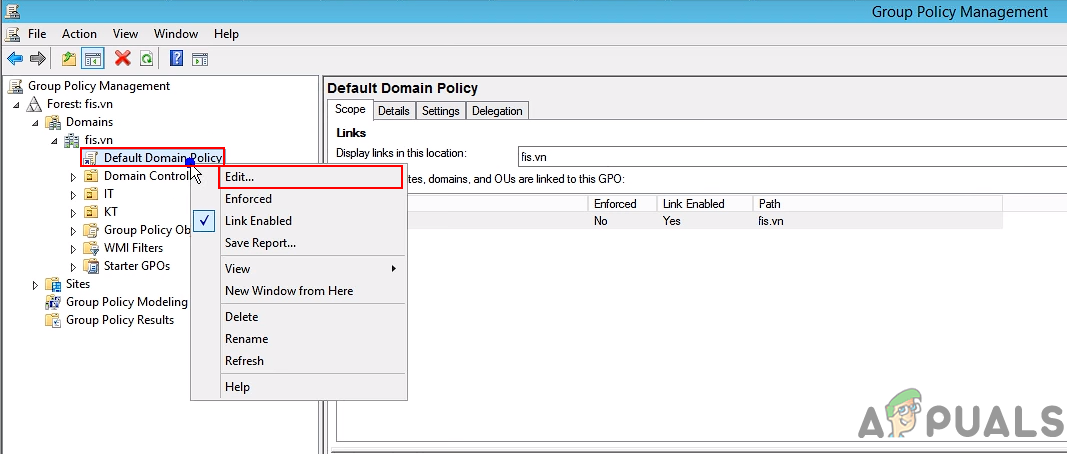
Opening Group Policy Management through Server Manager - Navigate to the Default Domain Policy as shown, right-click on it and choose the Edit option.
Note: You can also choose another domain and set the specific settings for it rather than choosing the default domain which sets for all. For other domains, you need to create a linked GPO and then edit it.
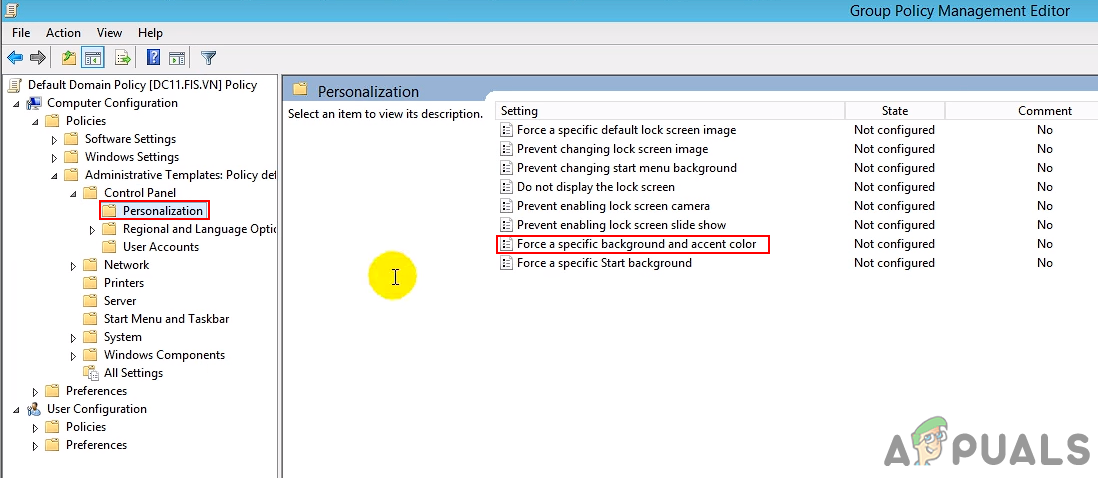
Editing the Default Domain Policy - Navigate to the following location in the left pane of the Default Domain Policy Editor:
Computer Configuration\Administrative Templates\Control Panel\Personalization

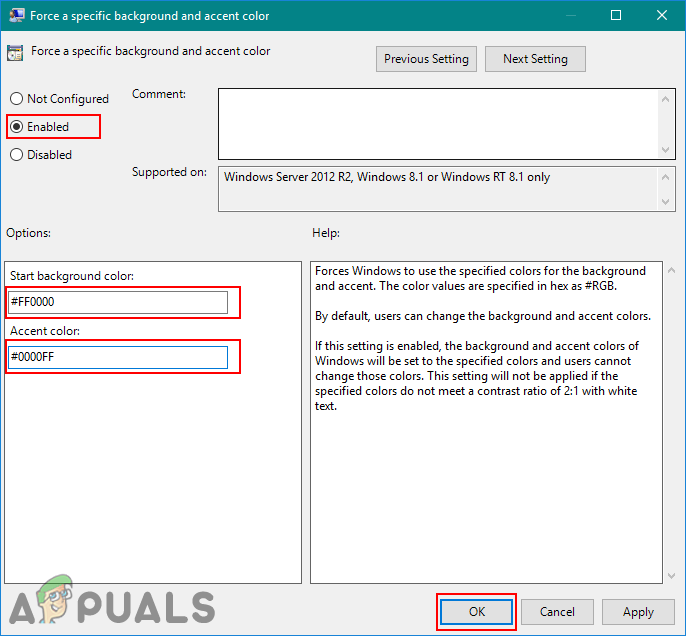
Opening the setting - Double-click on the “Force a specific background and accent color” policy in the list. Now modify the toggle from Not Configured to Enabled and provide the color values in hex as RGB. Then, click Apply/Ok to save the changes.
Note: Here we have added two values for red and blue colors. You can add whatever colors you want, but the colors should meet a contrast ratio of 2:1 with white text.
Adding codes for colors - Check the changes in the background and accent colors.
Method 2: Customizing Colors for Background and Accent through the Registry Key
Another way to accomplish the same settings is by using the Registry Key. This will do the same work as the Policy; however, the user will be required to create the missing key/value for the settings. You need to deploy the registry key through GPO. There will be two different keys for background and accent colors. You can customize the settings by following the below steps:
- Open the Server Manager in your system. On the Dashboard, click on the Tools menu on the top right corner and choose the Group Policy Management option.

Opening Group Policy Management through Server Manager - Right-click on the domain and choose the Create a GPO in this domain, and link it here option. Give it a name and click on the Ok button.
Note: In our case, we named it as Registry Key.
Creating a new GPO - Go to the newly created GPO Settings tab, right-click on the Computer Configuration and choose the Edit option.

Editing Computer Configuration - Navigate to the Registry, right-click on it and choose New > Registry Item.
Computer Configuration\Preferences\Windows Settings\Registry

Creating new Registry Item - Select the Hive as Local Machine and provide the following path in the Key Path box:
HKEY_LOCAL_MACHINE\Software\Policies\Microsoft\Windows\Personalization
- Provide the value name as “PersonalColors_Background“. Choose the value type as String and add the color hex code in the value data. Click the Ok button to save changes.

Creating registry value for background - You can also create another Registry Item with the same Key Path, Hive, and name the value as “PersonalColors_Accent“. Change the value type to String and add the color hex code in the value data. Click the Ok button to save changes.

Creating registry value for accent colors - Once all modifications are made, now users can restart the computer to force the changes to take effect.


