How to Root the Gionee S6 Pro
This guide will teach you how to root the Gionee S6 Pro so that you can get access to a variety of new features that require root file access.
If you can’t use root only apps or want to install a custom ROM, the first step is to root the Gionee S6 Pro. We would suggest putting aside 2-3 hours to root your Gionee S6 Pro, especially if this is your first time rooting.
If you’ve rooted smartphones before, you should be familiar with the methods listed below.
Before you continue with the steps listed in this guide; you acknowledge and accept that any damage to your phone caused by your attempts to root your phone is your own responsibility. Appuals, the (author) and our affiliates will not be responsible for a bricked device, dead SD Card, or anything to do with your phone. If you don’t know what you’re doing; please research and If you do not feel comfortable with the steps, then DO NOT PROCEED.
Before getting started, here are a few preparation tips:
- Make sure you have a PC or Windows laptop and a USB data cable at hand
- Backup all of your Gionee S6 Pro data to the cloud – You will need to factory reset your device!
- Follow all of the steps carefully

Step 1: Prepare Custom Recovery
Before you can root the Gionee S6 Pro you must install a custom recovery. This first step will help you to do this.
To begin with there are a number of drivers and files you must download. Credit goes to XDA member qwerfaseeh for this method and the related files.. We’ll provide a step-by-step guide below so that you can prepare all of the necessary files correctly. Follow the steps carefully.
- First, download the root files here (MEGA Download link)
- Unzip the downloaded files into a new folder on your PC
- Open the SP_Flash_Tool_v5.1612 folder
- Right click flash_tool and click run as administrator
- On the opened program, click the ‘scatter-loading’ button on the right
- Navigate to the S6 Pro Scatter folder
- Select the MT6755_Android_scatter file and press the open button
- Select ‘Download Only’ from the available drop-down box (example image shown below)
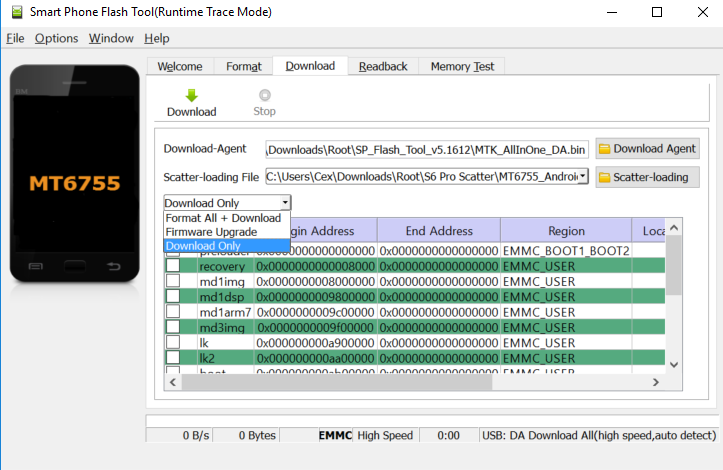
- Click the box next to the ‘recovery’ listing on the Smart Phone Flash Tool (example shown below)

- Next, take your Gionee S6 Pro and switch it off
- Click the Download button on the Smart Phone Flash Tool on your PC
- Hold the Volume Down Button on the Gionee S6 Pro until it enters download mode
- Attach your Gionee S6 Pro to your PC via USB Data Cable
- Wait Until the Smart Phone Flash Tool and Gionee S6 Pro Complete the Download Process
Step 2: Prepare For Root
Now that your Gionee S6 Pro has a custom recovery, you will be able to root your smartphone. Carefully follow the steps below to root your S6 Pro correctly.
IMPORTANT: Before starting this step, backup all of your important files and photos by using a free cloud service such as Google Drive. You will have to factory reset your Gionee S6 Pro so make sure all important files are saved elsewhere.
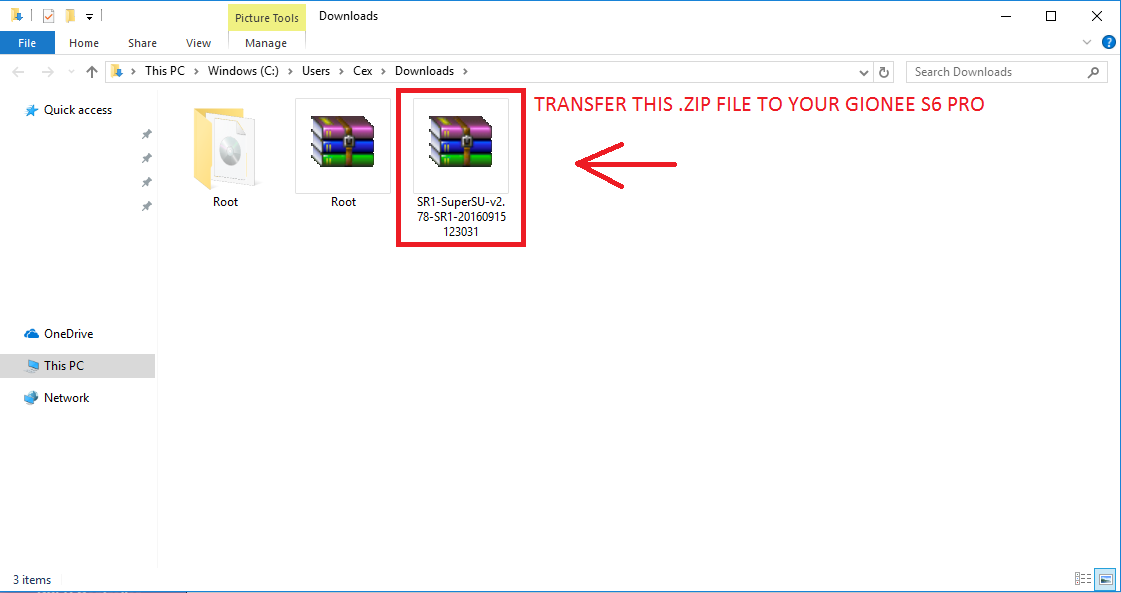
- Download the required root files here. (SuperSU Download)
- Leave the download in the .zip file and transfer the file to your Gionee S6 Pro. You’ll need a USB data cable for this step.
- Next, safely disconnect your Gionee S6 Pro and switch it off.
- Once your Gionee S6 Pro has turned off, hold down the volume down and power button together.
- The Gionee S6 Pro will boot into recovery mode. Use the volume down key to move through the menu.
- Highlight the ‘recovery’ option and then press the volume up key to choose that option.
- Swipe your finger on the display to allow modifications.
- Once booted into the recovery, the Gionee S6 Pro will prompt your for a password.
- Press the cancel button when the password prompt appears.
- Next, choose the Root option and search for the downloaded SuperSU file.
- Tap to install the SuperSU file.
- Next, select the ‘Wipe’ option
- After that, select the Factory Reset option
- Finally, select the Wipe Data button, and then reboot your Gionee S6 Pro.
Your Gionee S6 Pro will now be rooted – if you’re unsure about any of the steps listed in this article, make sure to read through it slowly – it’s very important not to make any mistakes.