How to Reverse Scrolling Direction of Mouse/TouchPad in Windows?
Windows users fall into two categories: those who scroll the default way and those who prefer reversed scrolling. I’m a proud default scroller, but some find reversed scrolling more natural.
Reversing the scroll direction used to be simple, but Microsoft has made it more complex. It’s no longer possible to navigate to Devices > Mouse & Trackpad and toggle “Reverse scrolling direction.”
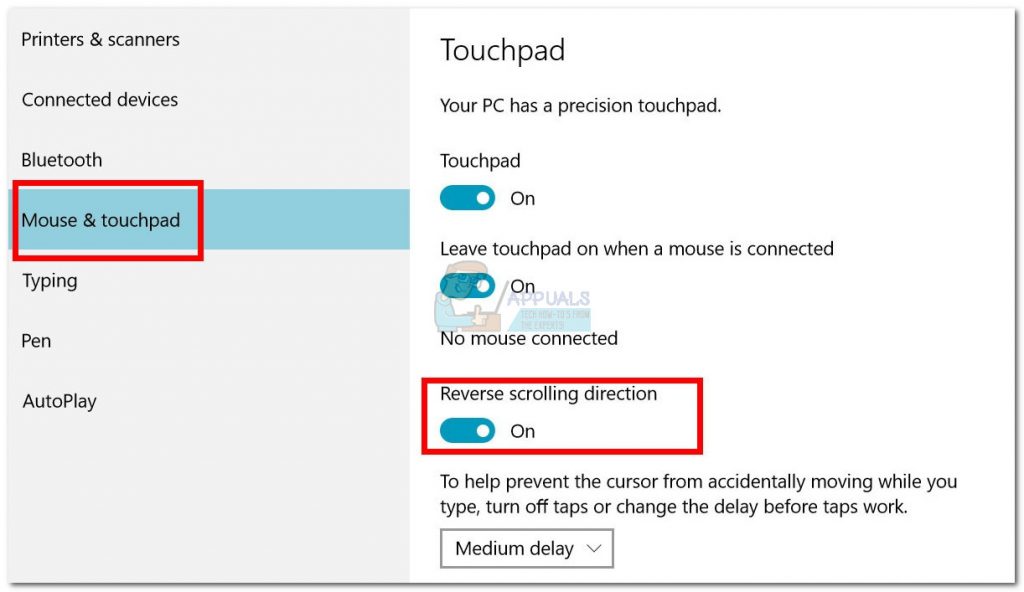
If you’re on the latest Windows, reversing the scrolling direction is still possible. We’ve identified three methods to do this.
Option 1. Reverse the Scrolling Direction (Touchpad only)
The steps for this method depend on your laptop manufacturer. Most use proprietary touchpad tech, so your screen may look different. We reversed the scrolling direction of an ELAN Touchpad.
- Press the Windows key + I to open Settings. Click on Devices.

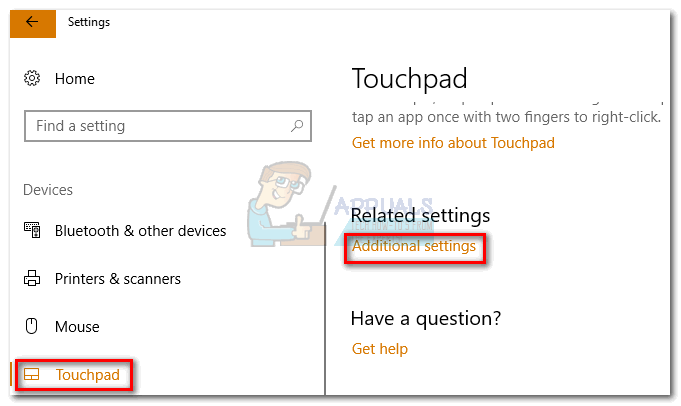
- In the left menu, click on Touchpad. Then, under Related settings, click on Additional settings.
- In the Mouse Properties window, find the tab specific to your touchpad software. For us, it’s ELAN. If another window opens, look for an Options button.
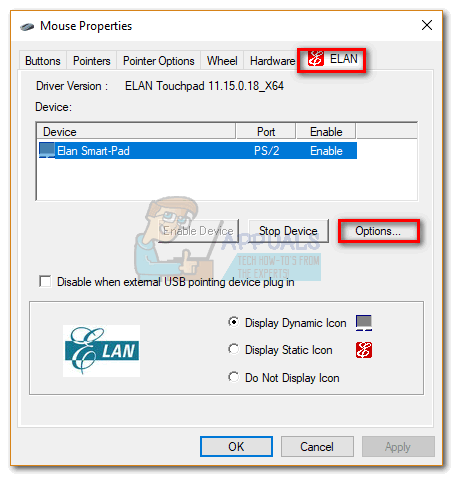 Note: The tab might be named Clickpad settings, Smart Gestures, Synaptics, or Device Settings. It’s usually the last tab and often has a logo.
 - Look for the Multi-finger tab. Then, select Scrolling and check the box next to Reverse.
 Note: Your menu might look different. Find an option similar to Two-finger scrolling and look for a reverse toggle.
Option 2. Reverse the Scrolling Direction for a Mouse Wheel
Touchpad settings won’t affect the mouse wheel. For mouse wheel direction, you need to delve into your Windows Registry.
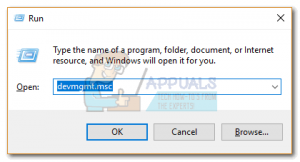
- Press Windows key + R to open a Run dialog. Type “devmgmt.msc” and press Enter.
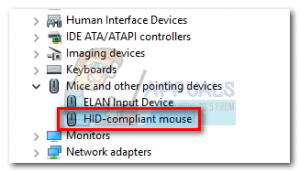
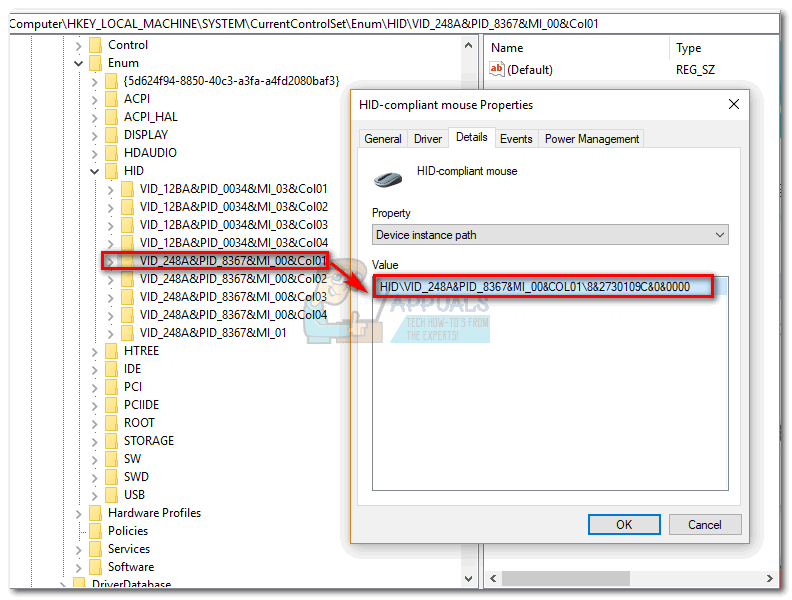
- In Device Manager, expand Mice and other pointing devices. Double-click on your mouse (listed as HID-compliant mouse).
- Go to the Details tab. From the Property drop-down menu, select Device instance path.
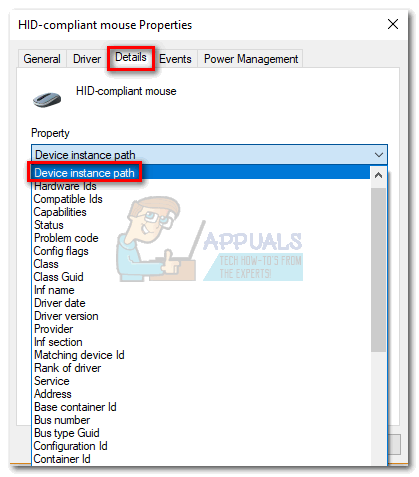
- Right-click on the path and select Copy. You can close Device Manager but keep the HID-compliant mouse Properties window open. Paste it into a Notepad file to ensure you don’t lose the path.

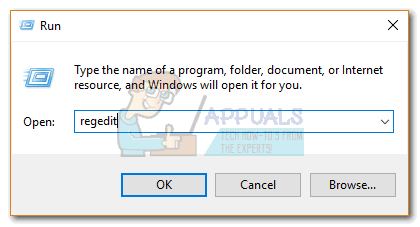
- Press Windows key + R, type “regedit“, and press Enter.
- In Registry Editor, navigate to
HKEY_LOCAL_MACHINE\SYSTEM\CurrentControlSet\Enum\HID
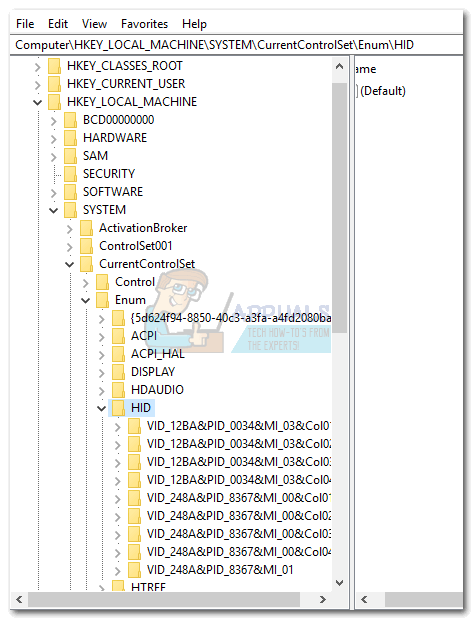
- Compare the registry keys under HID with the path you copied from Device Manager. Find a match and click on the corresponding folder to expand it.
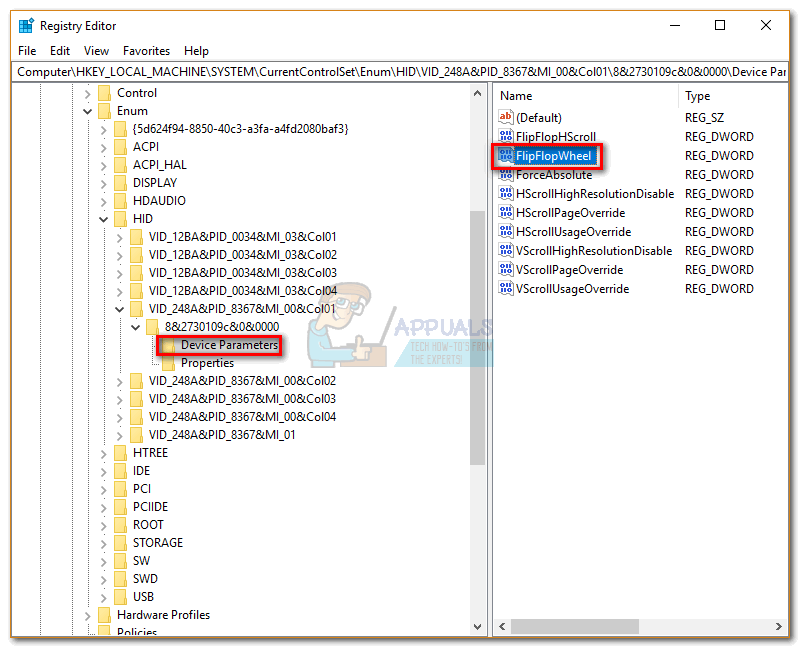
- Continue exploring the key until you reach Device Parameters. Select it. Then, double-click on FlipFlopWheel.
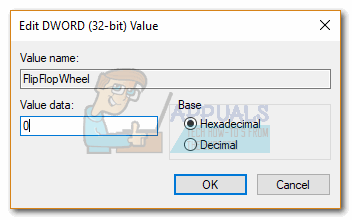
- Set the base to Hexadecimal and change the Value data to 1. Click OK and close Registry Editor to save your changes.

- Restart your computer or log out and log back in for the changes to take effect.
Note: To revert the changes, return to FlipFlopWheel in Registry Editor and set the Value data back to 0.
Option 3. Reverse the Scrolling Direction with a Macro Script (Mouse and Touchpad)
Another way to reverse your scrolling is to use software capable of setting up macro scripts. AutoHotkey is reliable, free, and easy to use. This method will reverse both the touchpad and mouse wheel directions.
- Visit this link and click Download. Follow the installation instructions.

- Right-click on an empty space on your desktop. Select New and then click on Text Document. You can name the file anything for now.

- Open the new text document and paste the following commands into it:
WheelUp::
Send {WheelDown}
Return

WheelDown::
Send {WheelUp}
Return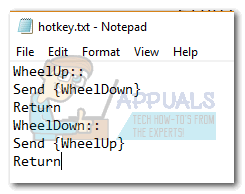
- Save the document. Then, right-click on the file and select Rename. Change the extension from .txt to .ahk. Ignore any warnings and click OK.

Note: If you can’t see file extensions, open File Explorer, go to View, and check the box next to File Name Extensions.

- The file icon should change to an AutoHotkey icon. Double-click the file to activate it and reverse your mouse scrolling direction.

To disable the script and return to default scrolling, press Ctrl + Alt + Delete and select Task Manager. Navigate to the Processes tab, find AutoHotkey Unicode under Background processes, select it, and click End Task.
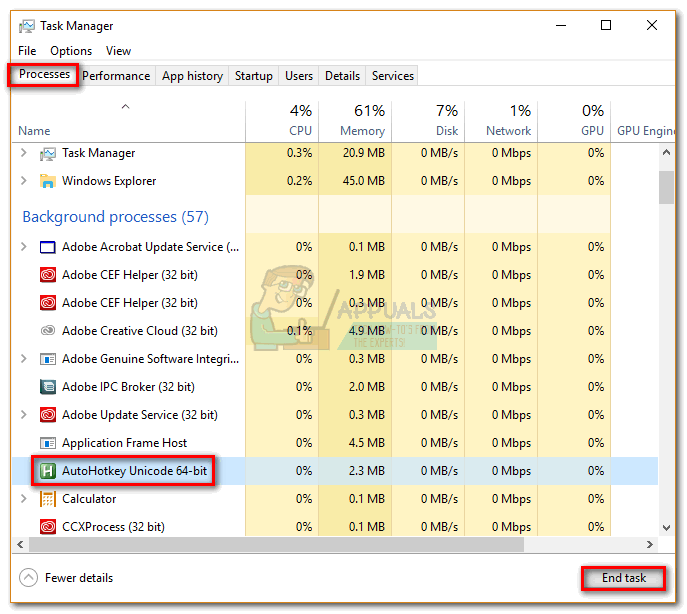
Note: You need to run the script again whenever you restart or turn off your computer.