How to Restore Missing Power Plan Options on Windows?
Power plan choices disappearing in Windows often leave only the “Balanced” plan available, with others like “High Performance” and “Power Saver” missing from the Power Options menu. This problem usually means the system’s power settings have been changed, maybe because of a recent update, broken registry settings, or changes to system rules. The main cause is damaged or wrongly set power plans, often started by system updates or power-related registry edits.
This issue can also happen because of turned-off Modern Standby, problems with connected standby features, or wrong system settings.
In this article, we will discuss solutions to this problem.
1. Restore Them Manually
To get back the missing power plans, you can manually restore them by turning on the default settings that were lost due to system problems or updates.
1.1 Command Prompt:
- Search for Command Prompt in the Search Menu and run it as Administrator.
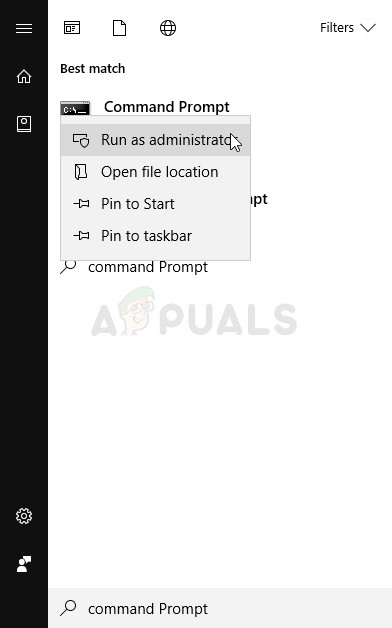
- Type in the following commands one after another.
-
powercfg -duplicatescheme a1841308-3541-4fab-bc81-f71556f20b4a
powercfg -duplicatescheme 381b4222-f694-41f0-9685-ff5bb260df2e
powercfg -duplicatescheme 8c5e7fda-e8bf-4a96-9a85-a6e23a8c635c
powercfg -duplicatescheme e9a42b02-d5df-448d-aa00-03f14749eb61
- Restart your computer and check if the power plans have returned.
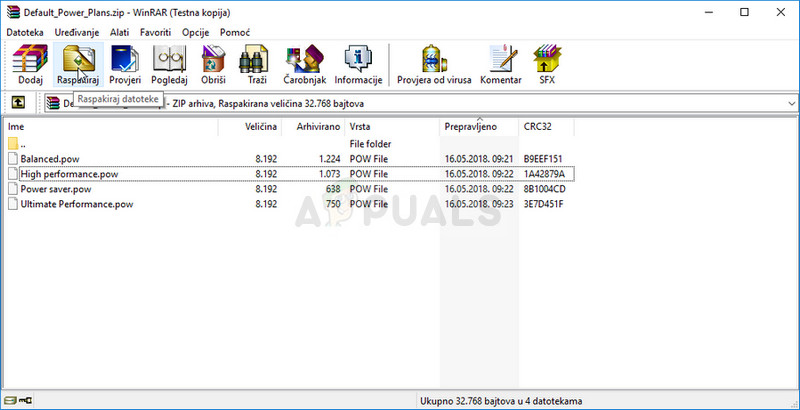
1.2 Download the Files Yourself:
- Click on this link to download the “.zip” file containing the power plans. Locate the file in your Downloads folder, right-click on it, and choose the Extract option. Extract the files to a simple location for ease of access.
- Search for “Command Prompt” in the Start menu and run it as an Administrator.
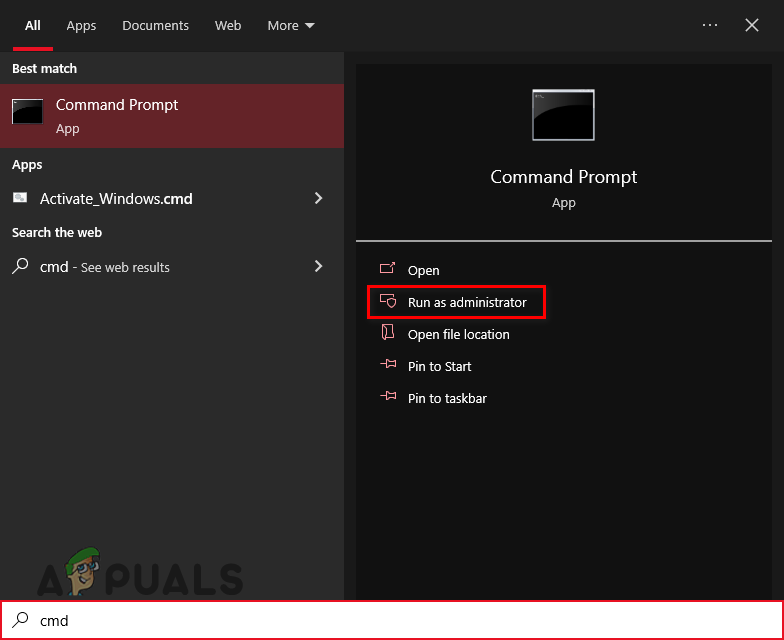
- Use the following command to install the required power plan:
powercfg -import "C:\Users\2570p\Downloads\Default_Power_Plans\Power saver.pow" (or another path depending on the install location)
- Ensure you replace “C:\Users\2570p\Downloads\Default_Power_Plans\Power saver.pow” with the correct path to the file in the folder where you extracted the files.
- Navigate to the folder where the files are located, click the address bar, copy the address, and paste it into Command Prompt. If the files are in a folder called Default_Power_Plans within Downloads, the command should be:
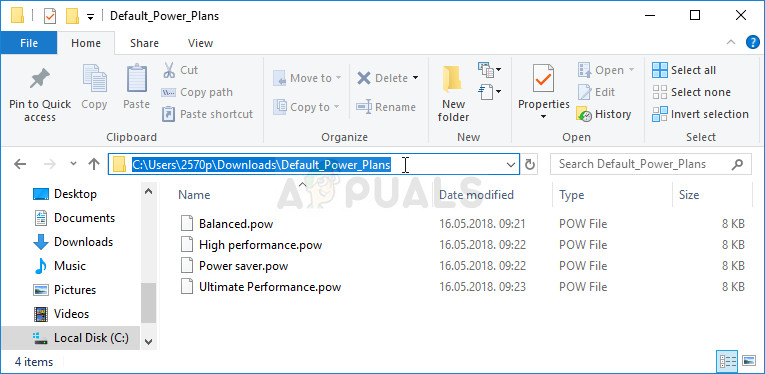
powercfg -import "C:\Users\2570p\Downloads\Default_Power_Plans\Power saver.pow" - Repeat the process for all power plans you want to install and check if they have appeared in Control Panel.
2. Edit the Registry
Editing the registry means changing certain settings that control power management in Windows. By fixing or recreating these settings, you can make sure the system shows all power plan options.
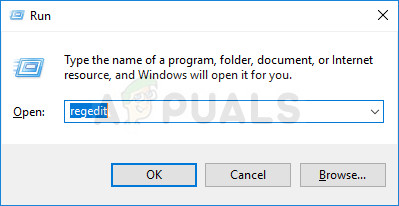
- Press Windows + R, type regedit, and hit Enter.
HKEY_LOCAL_MACHINE\SYSTEM\CurrentControlSet\Control\Power - Click on this key and locate an entry called CsEnabled on the right side of the window. If it exists, right-click on it and choose Modify from the context menu.
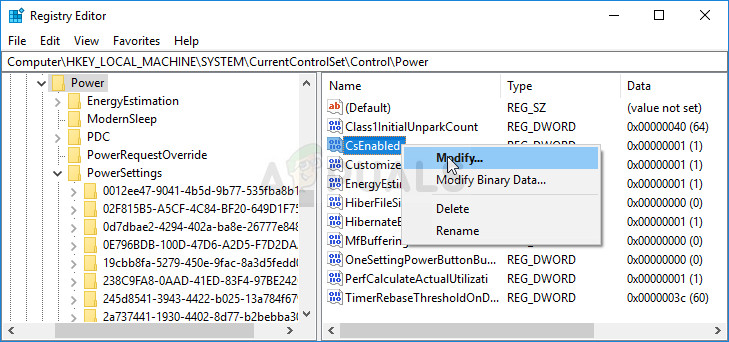
- In the Edit window, change the value from 1 to 0 under Value data and apply the changes. Confirm any security dialogs that appear.
- Manually restart your computer by clicking the Start menu > Power button > Restart, and check if the problem is resolved.
- Note: If this didn’t work, try adding an option to show the power plans individually for each one recognized by your computer.
- Navigate to the following key in your registry by browsing the left pane:
HKEY_LOCAL_MACHINE\SYSTEM\CurrentControlSet\Control\Power\PowerSettings
- You will see many oddly named keys inside the PowerSettings key. Navigate to each one, right-click the blank side of the screen, and choose New > DWORD (32-bit) Value.
- Name each of these values “Attributes” by right-clicking and choosing Rename. Then right-click the newly created attribute value and choose Modify.
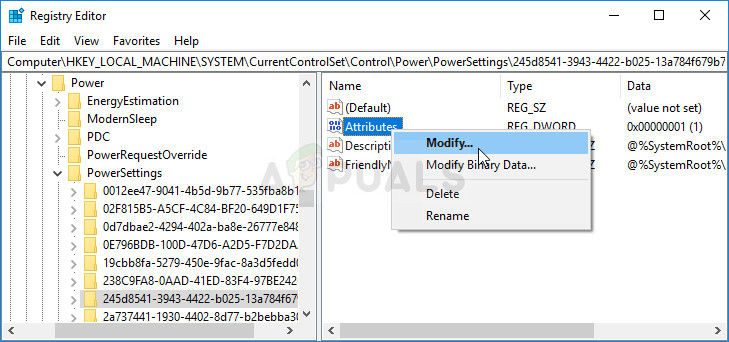
- Set the value to 2 under Value data, keep the base in hexadecimal, and click OK. Repeat this process for each key in PowerSettings.
- Check if the problem is resolved.
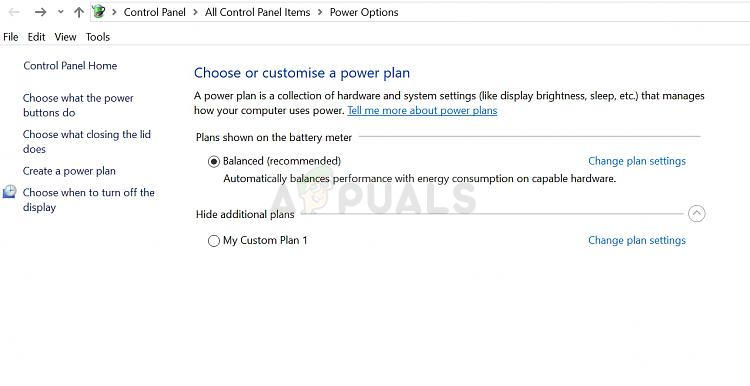
3. Create a Custom Power Plan
Creating a custom power plan lets you avoid any system issues or hidden settings that hide the default options. By starting with a template like “Balanced” or “High Performance,” you can fully control and adjust the power settings to fit your needs.
- Right-click the battery icon in the system tray at the bottom right of your screen, next to the time and date, and select Power Options.
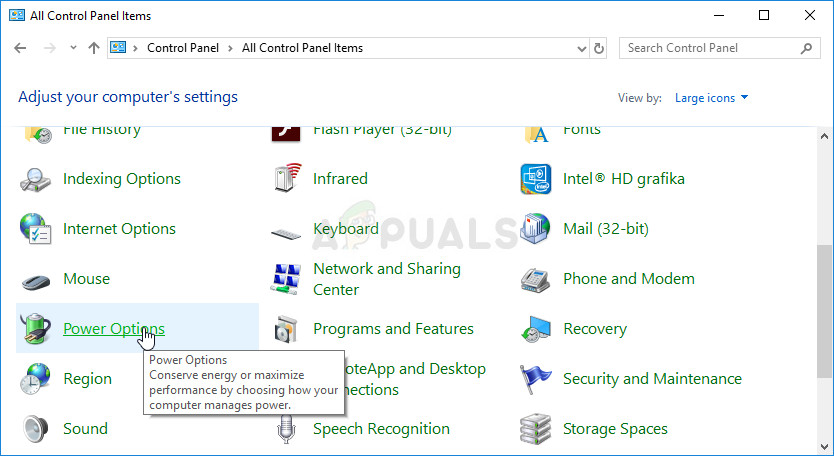
- If it’s not there, click the Start menu, search for Control Panel, change the View by option to Large icons, then click Power Options.
- On the left side of the window, click Create a power plan. In the Create a power plan window, choose the power plan you want to restore.
- Under Plan name, enter the name you prefer, then click Next at the bottom right of the window.

- Adjust additional settings like Turn off the display, Put the computer to sleep, and Adjust plan brightness now or later, then click Create.
- The new power plan is now available. Select it when you need it.


Thanks for this write up! Your commands were exactly what I needed to fix the issue!