How to Reset and Fix a Slow Macbook, Pro or an iMac
With computers, it’s always the same story. You buy a new MacBook Pro or iMac, and it works flawlessly. But, after a while, they may not work the way they used to. Sometimes the performance is slowing down. Or you continually see error messages. Maybe your Mac is frequently crashing. Or you it cannot run your favorite software. In other words, your Mac simply is NOT WORKING PROPERLY.
All these symptoms can be really frustrating. And, you would probably want to start from a clean slate and reset your MacBook or Mac to factory settings.
Macs are known for their simplicity, and they do not suffer from the problems that Windows users regularly report. And, that’s why we love them so much. However, sometimes we come to a moment where our macOS is so baffled that reinstallation or resetting of the system is the only our solution. And, here you can find how to perform it.
Want to Sell or Give Away Your MacBook? Reset it First
We all come to a point when we buy a new Mac and sell or give away our old model. When you are going through this scenario, performing a factory reset is the first thing you should do, before you send your old Mac on its way to a new owner. Firstly, that way you will protect your personal information. And secondly, the owner will get a Mac in a condition closest to never-used.
So no matter if you want to increase your current Mac’s performance or prepare it for the new owner, performing a factory reset on it is recommended. And unfortunately, the reset process is not as simple as we Mac users are used to. But, that fact shouldn’t stop you from doing it, becaus you have this How-to article.
This guide provides you easy steps for resetting MacBook Pro and other Mac computers back to initial factory settings.
Note: This guide can be used for resetting iMac, MacBook, MacBook Pro, MacBook Air, and Mac Pro.
Clone Your Hard Disk Before Resetting Your Mac
When you reset your MacBook or Mac, all the data, and information you have on your hard disk erased. So, if you want to keep your stuff, you need to create a backup. The process of making a full backup of your Hard Disk is called cloning your Hard Disk. When you create a backup, the best practice is to keep 2 local and 2 cloud backups. And, we highly recommend you doing so.
Another good practice before performing a factory reset on your Mac is maintaining a clone. This is a bootable duplicate (clone) of your HDD. The clone is a completely identical copy of your startup drive, and is stored on an external disk. So, you can boot your Mac from it if necessary. And, for creating a true clone of your HD, you need an application and an external hard disk.
What About Time Machine?
If you are using Time Machine on your Mac, then you already have a proper backup. It is not a complete clone, but it has all your applications, information, and other data safely stored in its backups. So, if you decide to use Time Machine only for the backups, make sure you manually backup with Time Machine before performing any of the following steps. If you haven’t done a manual backup on Time Machine before, here is the procedure.
- On your Mac, go to System Preferences and select Time Machine.
- Now, select the checkbox “Show Time Machine in menu bar.”
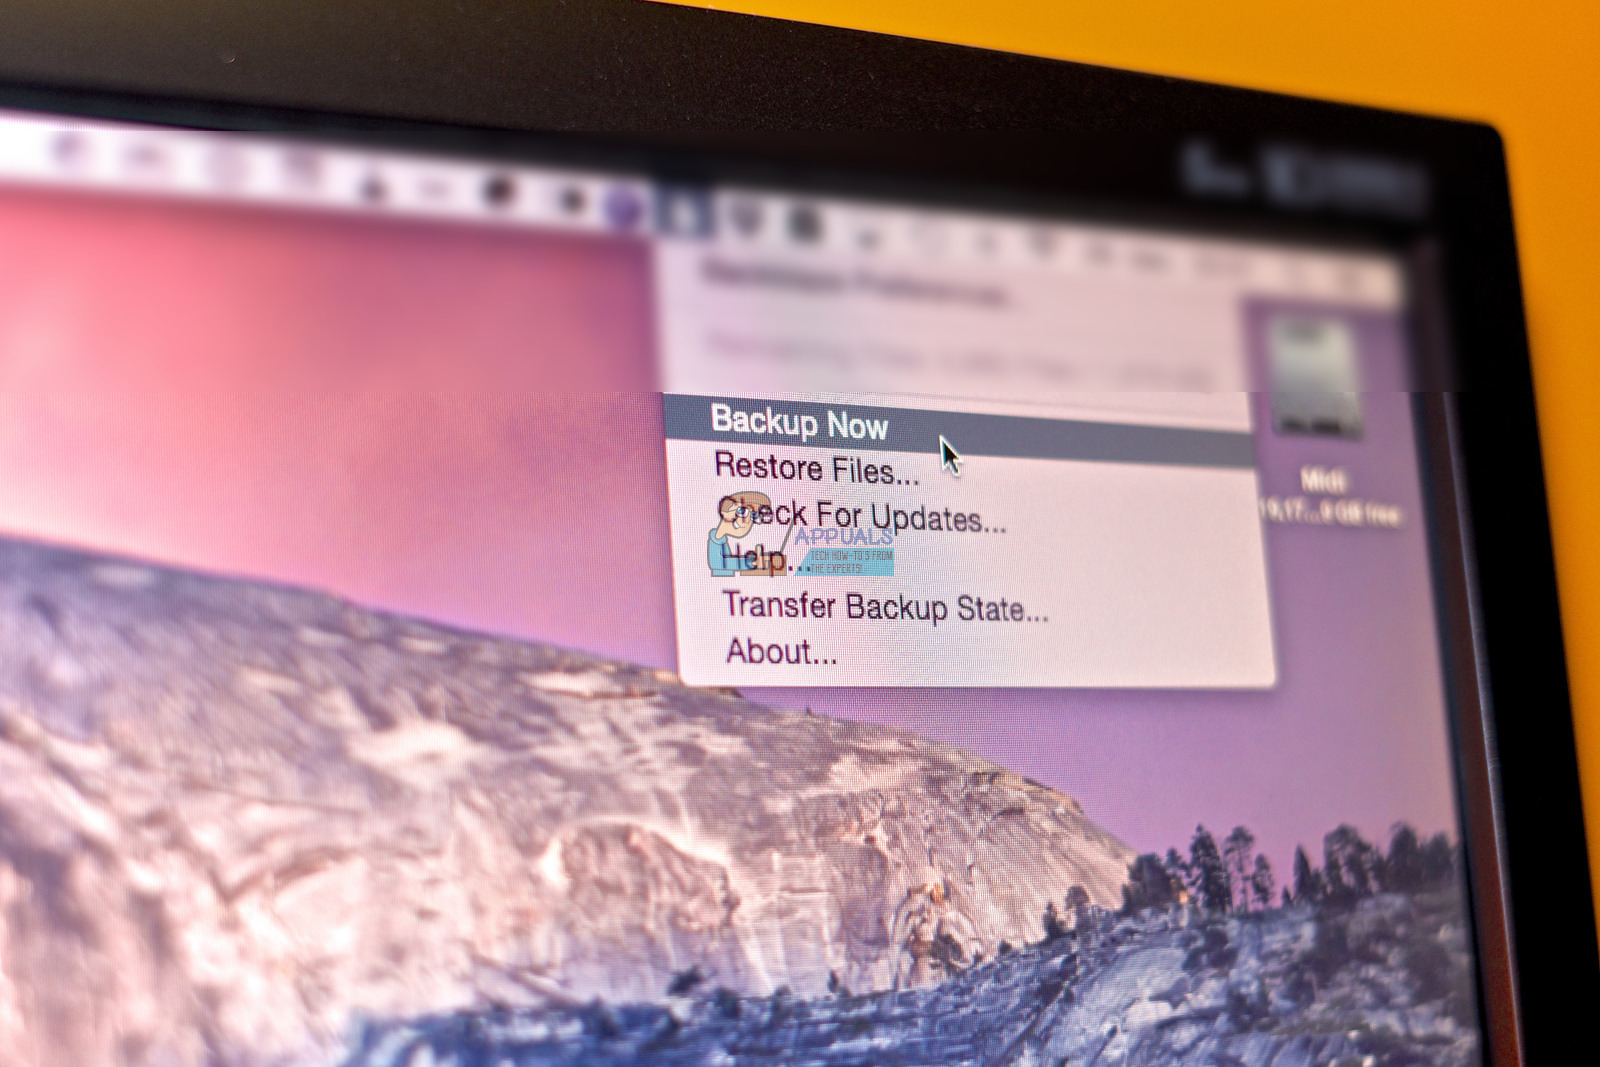
Once you’ve done it, a Time Machine icon will pup up in the right corner of your menu bar. (near the date and time) - Click on that icon and choose Back Up Now. Performing that ensures that you have everything backed up in your Time Machine files.
Time Machine Backup OR Drive Cloning
The most noticeable difference between Time Machine backups and Drive Clones is that clones allow you immediate recovery. When using a clone, you can get back to work immediately after a disk crash or bootup volume problems. Just attach your clone disk, restart your Mac while pressing the Option key, choose the clone drive in Startup Manager, and click Return. Now you are back up and running. You can finish any projects or work before you deal with your drive issues. By running on the clone drive, you can replace or repair your main startup disk when your schedules allows.
When you use Time Machine, restoring your files to a new hard disk or repaired HD can take hours, and sometimes even days. Restoring an entire drive from the cloud backup service can take even longer. And, it directly depends on your internet speed.
What About Third-Party Drive Cloning Software?
The internet is full of software that can back up your Mac to an external drive. For example, you can use Carbon Copy Cloner or SuperDuper. They both are popular applications capable of backing up your Mac. Both have been out there for quite a while, and they have a good track record. SuperDuper and Copy Cloner have a simple and easy-to-use interface, and their main focus is cloning. They include clear features for creating and maintaining bootable duplicates.
Carbon Copy Cloner offers a 30-day trial version while SuperDuper comes in 2 variants. One is the basic limited free version. And, the other one a paid one feature-rich version.
If you use Carbon Copy Cloner, you will notice that the cloning process is really simple. You just set your primary hard drive as a source, and the external drive as a destination. When you are done with this setup, click on “Clone.”
When the process finishes, you can boot your Mac from the external HD without any other adjustments. Just restart your Mac and press the “Option” key. If your system boots up, you have successfully created a clone of your hard drive.
Reset NVRAM Before Resetting Your Mac
If you have been experiencing start-up disk selection, screen resolution or volume issues lately, try resetting the NVRAM on your Mac. That may fix your problem. Also, if a question mark icon shows up briefly while your MacBook or Mac boots up, resetting NVRAM is the thing you need. Aside from the issues, resetting NVRAM is a good idea when preparing your computer for sale or gifting.
What NVRAM is?
Non-Volatile Random-Access Memory or shortly NVRAM is a small amount of your Mac’s memory where your computer stores certain quickly-accessible settings for the Mac Operating System. NVRAM memory stores information that depends on the type of Mac or MacBook you are using, and the types of devices you are connecting to.
NVRAM Memory Information Includes:
- Recent kernel panic info (If there is any)
- Startup disk selection
- Screen resolution
- Speakers volume
How to Reset NVRAM
- First, turn off your Mac.
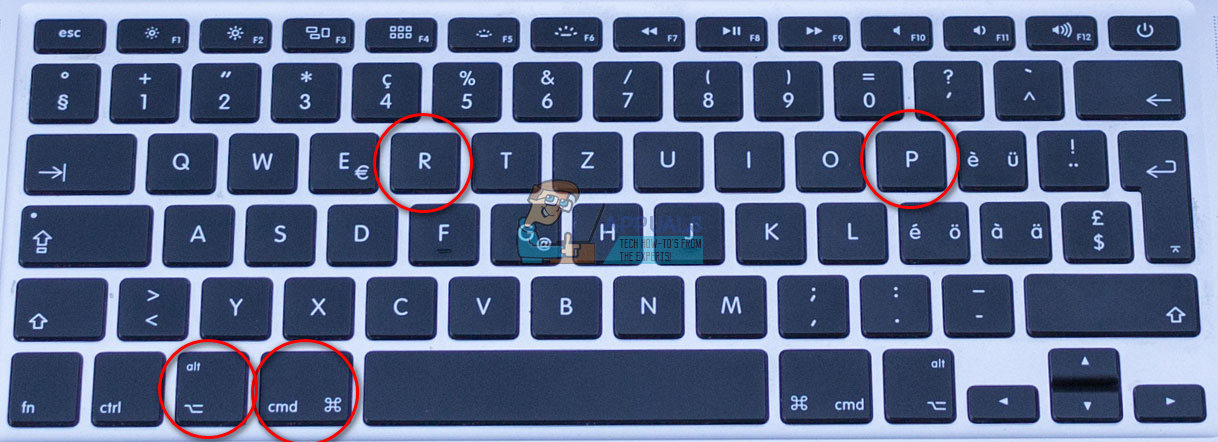
- Locate the following keys on your Mac’s keyboard: Command ⌘, Option, P, R.
- Now, turn on your Mac.
- Press and hold simultaneous the keys you located before: Command–Option–P–R. Press them immediately after you hear the startup sound of your Mac.
- Hold the keys until your Mac reboot and you hear the same startup sound for the second time.
- Now, release the keys.
Note: After you finish with the NVRAM reset, you may need to reconfigure the speaker volume settings, startup disk selection, screen resolution, and time zone information.
Reset (SMC) System Management Controller Before Resetting Your Mac
SMC – System Management Controller is a chip in your Mac that operates a lot of the physical parts of the machine. That include power buttons, keyboards and other peripherals, cooling fans, and LED indicators. System Management Controller also defines some behaviors of your hard disk, such as how it behaves in a sleep mode and how when the computer is connected to a power supply.
Here are the indicators that your SMC may reset:
- Mac’s fans run at high speed, even when the computer is not experiencing heavy usage.
- Mac’s keyboard backlight behaves inadequately on computers that have this feature.
- The battery indicator on your Mac behaves inaccurately on MacBooks that have a non-removable battery.
- Mac’s status indicator light (SIL) behaves inaccurately on computers that have this feature.
- The backlight of your Mac’s display does not respond accurately to ambient light changes on computers that have this feature.
- Your Mac does not respond to the power button when pressed.
- Your Mac shuts down or sleeps unexpectedly.
- Mac’s battery does not charge properly.
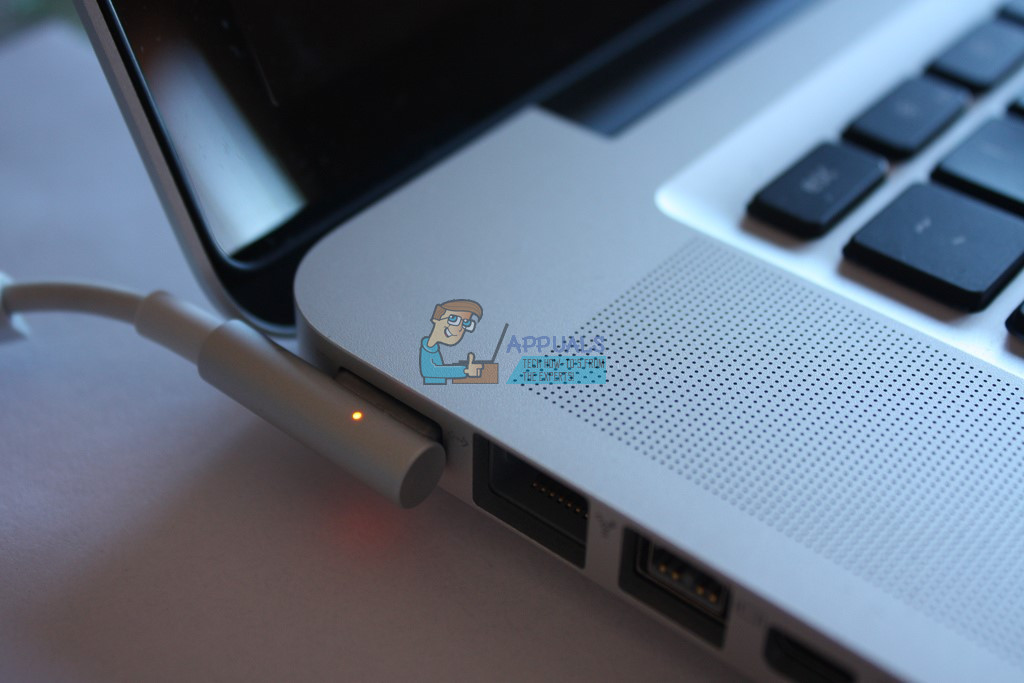
- The MagSafe power adapter LED indicator does not indicate the correct activity.
- Your Mac is performing extremely slow, even when it is not experiencing a high CPU utilization.
- Applications in the Dock may bounce for an extended period of time when opened.
- Some applications may not function properly, or they may stop responding after being launched.
- A Mac computer that supports target display mode does not switch into. Or it switches into target display mode at random times.
- On a Mac Pro (Late 2013), the illumination light around the I/O ports doesn’t turn on when you move the computer.
How to Reset MacBook’s SMC
First, check out if your MacBook has a removable battery. MacBooks with non-removable battery are all models of MacBook Air, MacBook Pro (Early 2009) and later, MacBook Retina 12-inch (Early 2015) and Macbook (Late 2009).
If Your MacBook has a Non-removable Battery
- Turn off your Mac.
- Plug in the USB–C or MagSafe cable in your MacBook and into a power source.
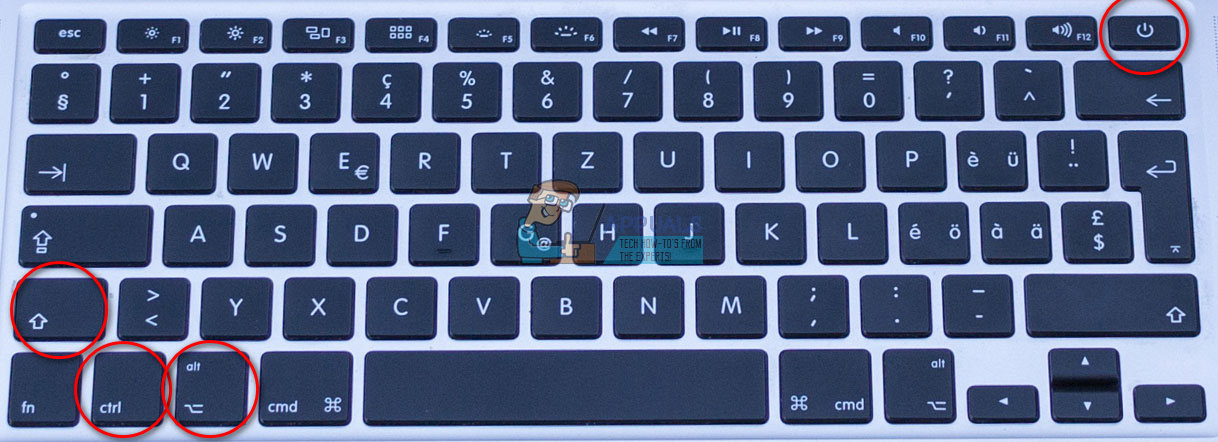
- On MacBook’s keyboard, press Control–Shift–Option and push the power button at the same time.
- Now, release all keys and press the power button again to boot your Mac.
If Your MacBook has a Removable Battery
- Turn off your Mac.
- Disconnect the USB–C or MagSafe cable from the Mac.
- Remove Mac’s battery.
You can check your MacBook’s User Manual for detailed steps on how to remove your particular model MacBook’s battery.
- Long–press the power button for 5 seconds.
- Now, insert the battery into your Mac and reconnect the MagSafe
- Turn on your MacBook by pressing the power button.
Note: The LED indicator on MagSafe power adapter may change colors or temporarily turn off while you are resetting the SMC.
How to Reset SMC on Desktop Macs
These instructions can be used on Intel-based iMac, Mac Pro, Mac Mini, and Xserve.
- First, turn off your Mac.
- Unplug the power cable from your Mac’s power port.
- Keep it unplugged at least 30 seconds.
- Now, plug the cable back
- Wait for at least 5 seconds, and then press the power button to turn on your Mac.
The SMC reset procedure helps in resolving many power and hardware related problems that are otherwise unresponsive to software troubleshooting techniques. After the SMC reset most of the hardware issues you experienced should be resolved. An SMC reset is also recommended before you sell or gift your Mac. And keep in mind that only Intel Macs sports an SMC controller.
Deauthorize iTunes
One of the crucial steps when selling or gifting your Mac is deauthorizing iTunes. If just want to reset your Mac and continue using it, this step is not mandatory. For those of you who are still with me, let’s unlink the Mac from your personal iTunes account.
Note: You can have a maximum of a 5 Macs to one iTunes account. So, make sure you don’t give your account to anyone.
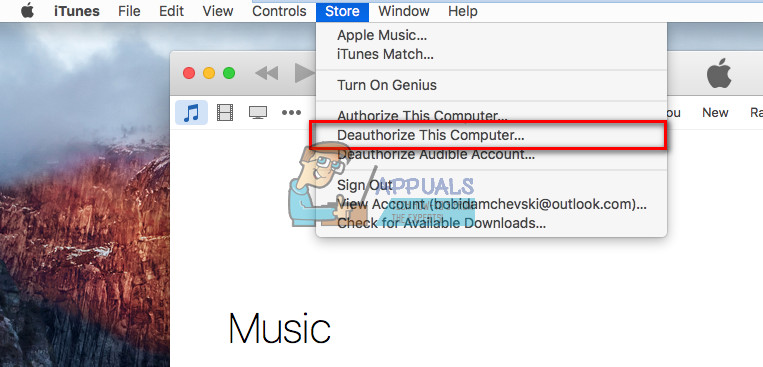
- To unlink the Mac from your account open iTunes.
- Click on Store and then select Deauthorize Computer.
- Now you need to enter your Apple ID and Password.
- Once you provide the credentials, the Mac is no longer linked to your account.
Disable FileVault
Before performing the next steps the best practice is to disable the FileVault feature.
For that purpose follow these steps.
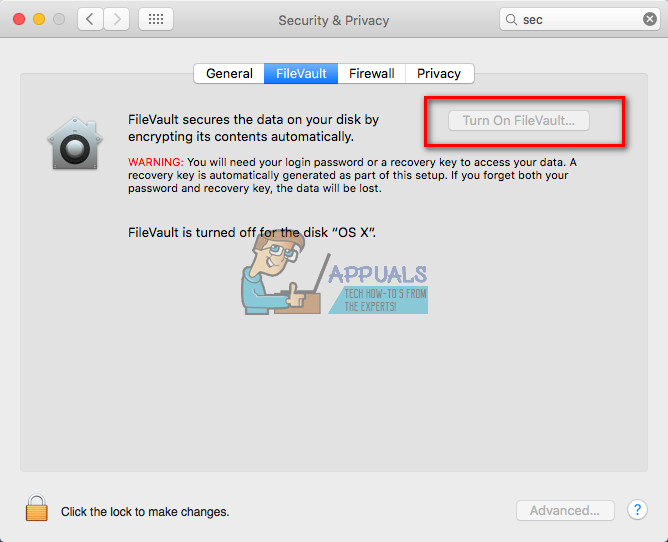
- Go to System Preferences and choose Security and Privacy.
- Now, select FileVault and click on Turn Off.
Disable iCloud
Disabling iCloud is another crucial step when selling or gifting your Mac. If you plan to continue using the Mac after the reset process, this step is not mandatory.
However, when deleting everything off your hard disk, it is always a safer variant to disable and remove your iCloud account before going any further as it may cause some errors.
Here are the steps for disabling the iCloud account.
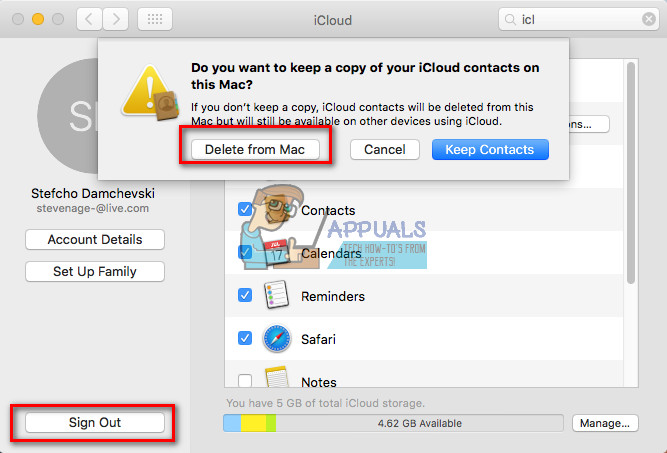
- Go to System Preferences and choose iCloud.
- Now, click Sing Out, in the lower left corner.
- On every popup that appears, make sure you choose Delete from Mac or Remove all data.
Restart Your Mac in Recovery Mode
This process is pretty straightforward.
- Click the apple logo on the bar at the top of your Mac’s screen and select Restart.
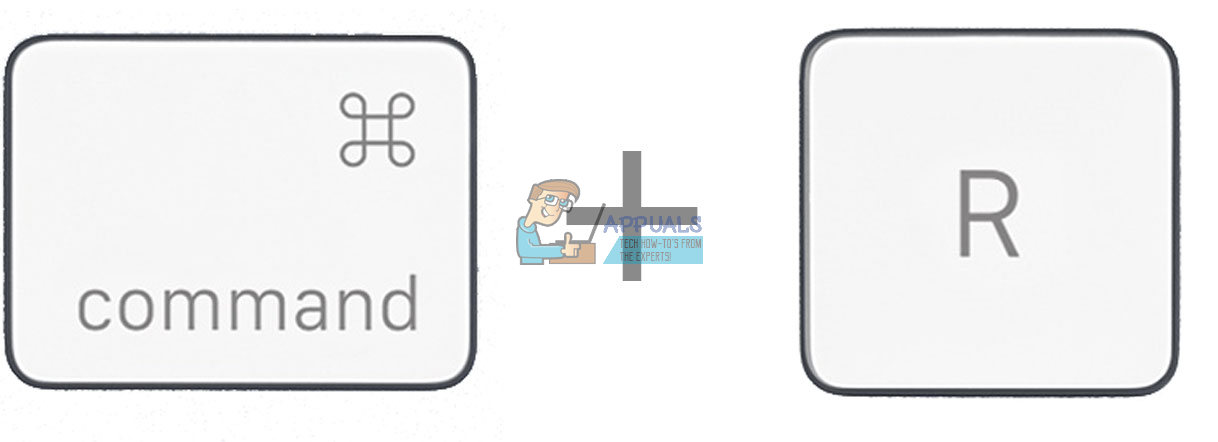
- While the computer restarts, press and hold the Command and R keys simultaneously until you see the recovery mode message on your screen.
Erasing the Hard Drive of Your Mac
Note: Keep in mind that once you click the Erase button there is no coming back. That will delete everything from your hard disk. So make sure you have a complete backup or/and clone of your current hard disk.
If you are unsure about your backup, DO NOT perform the following steps. Go back to the Step 1 of this article
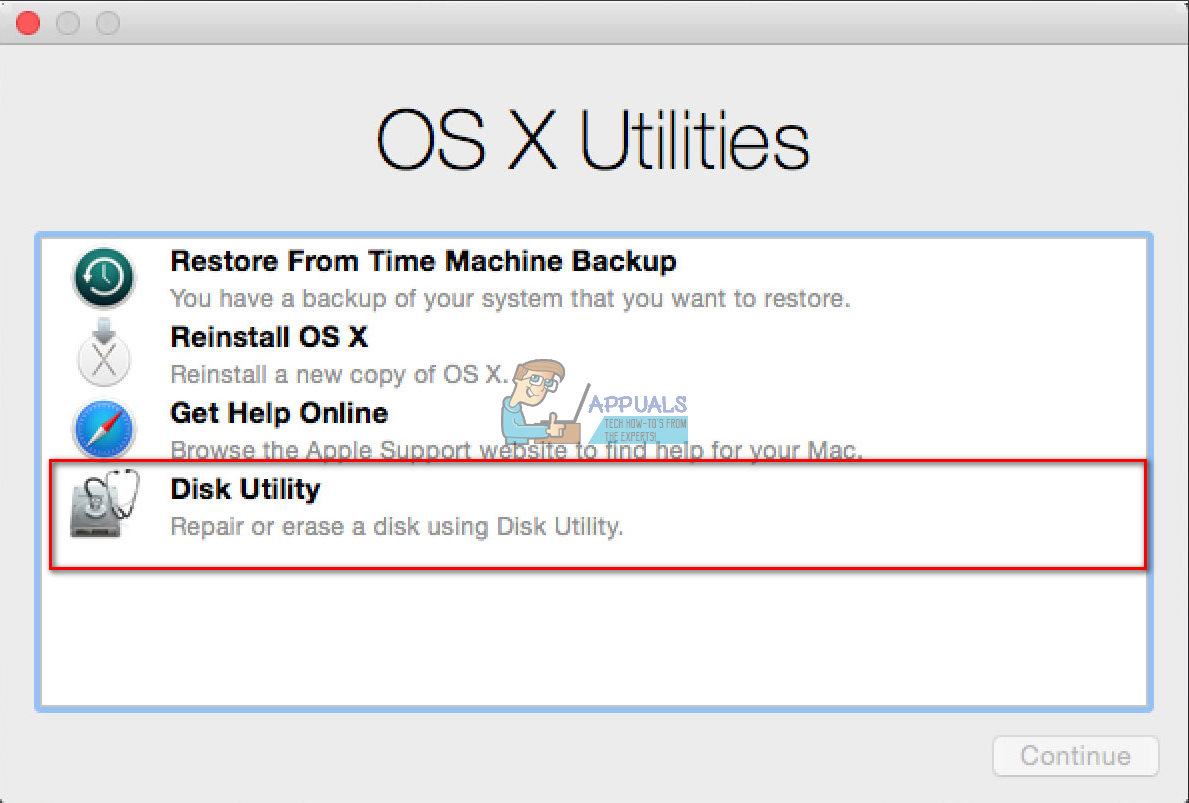
- Once your Mac boots in the recovery mode, select Disk Utility and then click Continue.
- Now, click Unmount and select the Erase tab (you can find it among the top buttons).
- Click on Erase to delete all data.
Reinstall macOS or OS X on Your Mac
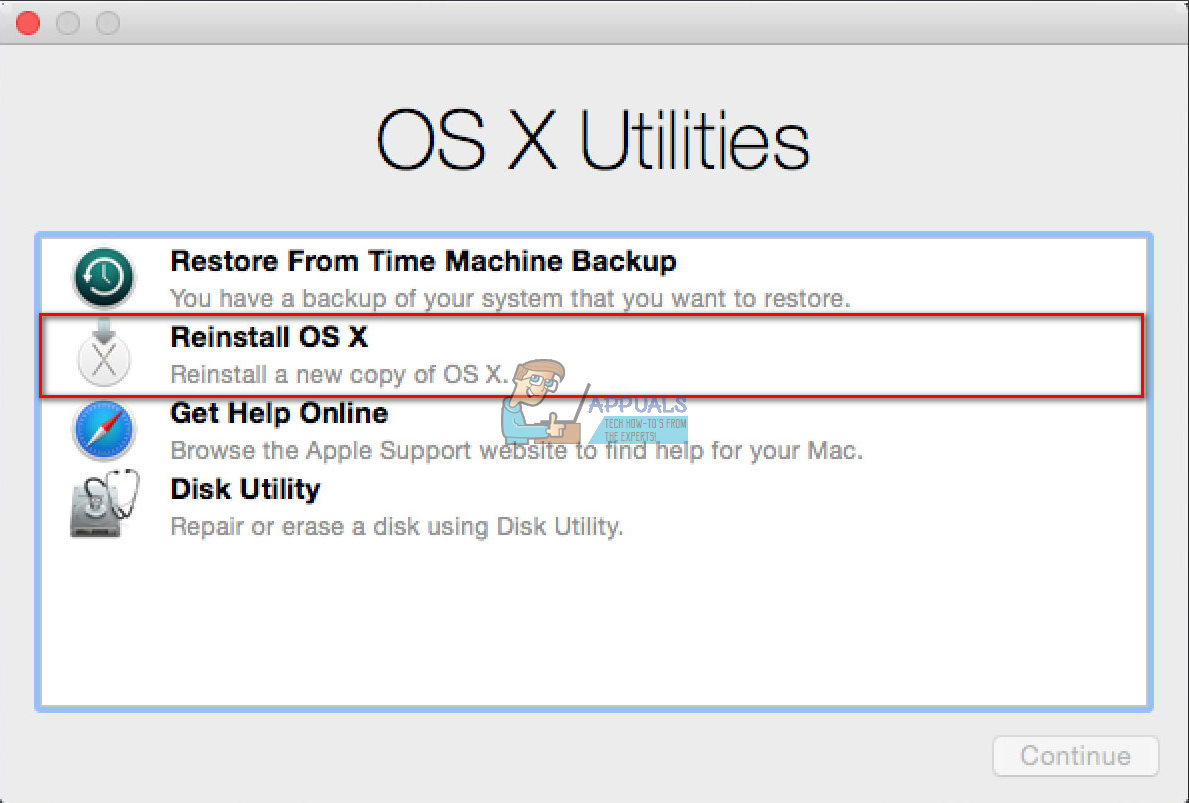
Reinstalling your OS is a simple procedure. You just need to click Reinstall and follow the on-screen instructions. The process automatically downloads the latest mac operating system to your hard disk and installs it.
Note: If you are gifting or selling the Mac, be aware that you DO NOT NEED to enter your Apple ID and Password during the installation process. The person receiving or buying the Mac should type their own Apple credentials later.
Final Words on How to Reset a Slow-Running MacBook or Mac
If you are experiencing slowdowns, display errors, graphical glitch issues, crashing or freezing a couple of times per week or getting really hot, it is time to think about a factory reset.
Other than that, whenever you are selling or giving away your Mac, you surely don’t want to leave all your personal data and files on it. The best practice is to wipe your Mac’s HDD or SSD and reinstall OS X or macOS. That’s how you will protect your personal files and information. Furthermore, the next owner will receive a Mac that runs flawlessly.
Whenever you need to reset your Mac or MacBook, follow the steps in this article and you won’t have any problems.