How to Remove Quick Access from Windows File Explorer?
Quick access in Windows Explorer allows users to easily access frequently used folders and recent files. However, if you find yourself distracted or prefer not to have folders or files shown under Quick Access, you can simply disable it by following this guide.
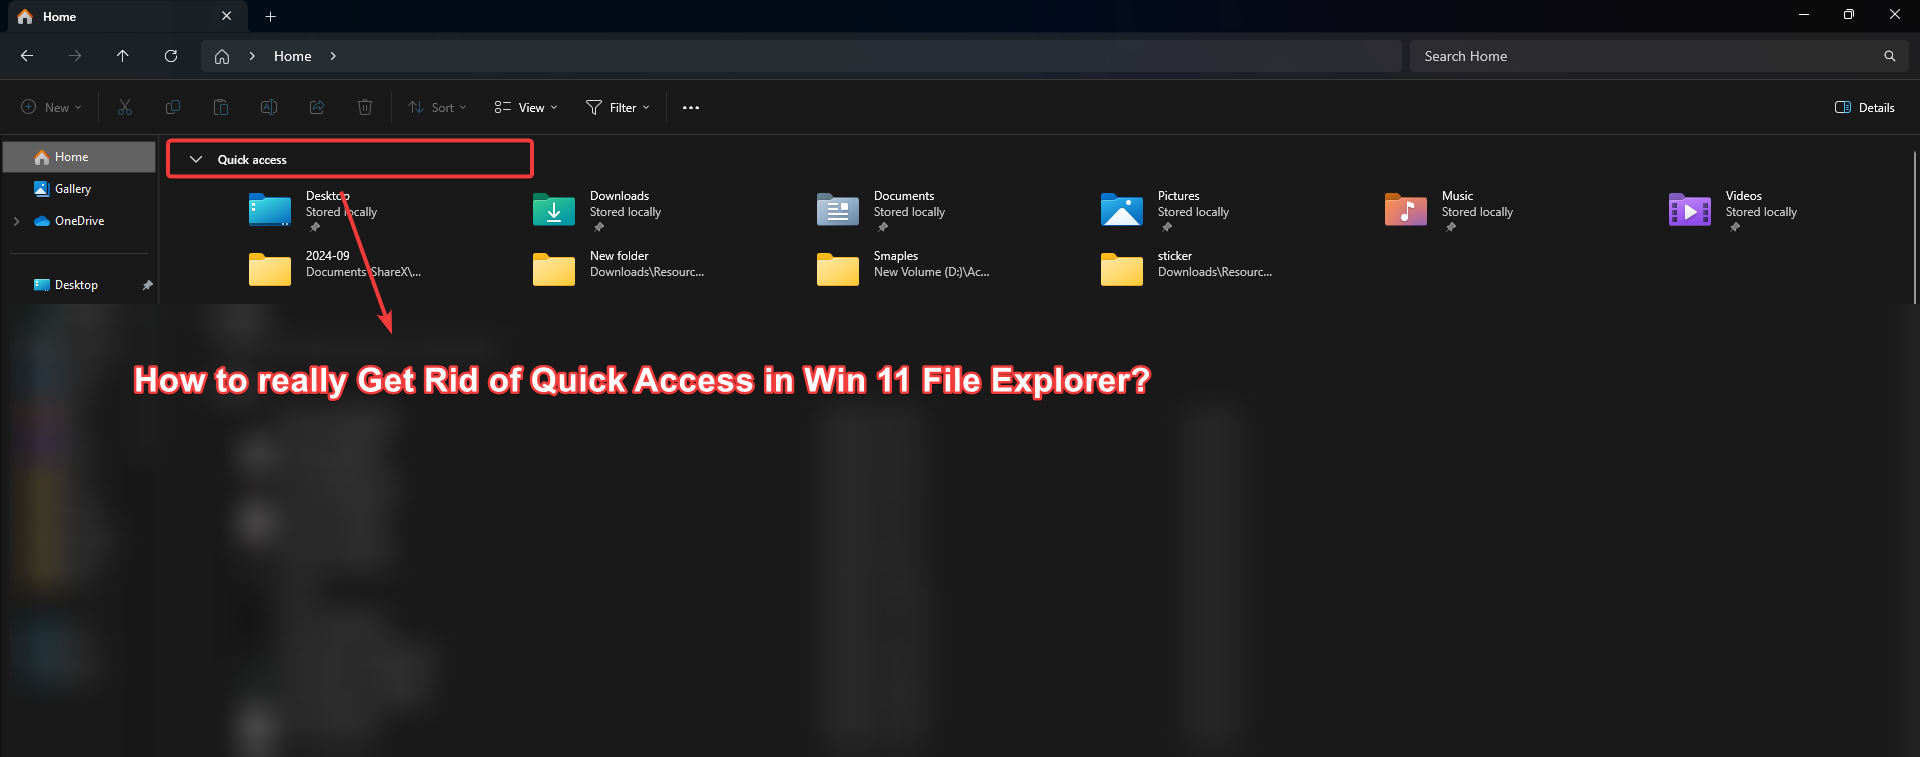
The most common reason for users to disable Quick Access is the simplicity of opening directly to “This PC” rather than the Quick Access options when opening File Explorer. Now, let’s move on to the methods to disable Quick Access.
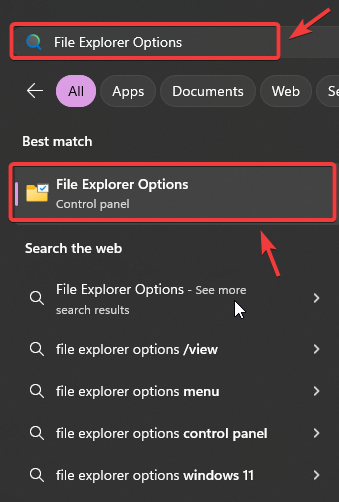
1. Change the File Explorer Options
- Click the Start Menu and type File Explorer Options in the search bar.
- Press the Enter key to open the File Explorer Options window.
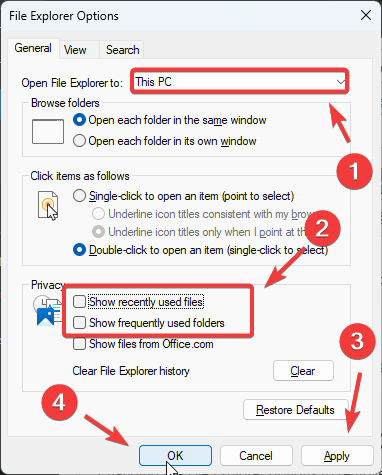
- In the General tab, find the dropdown menu labeled Open File Explorer to: and select This PC from the list.
- Below that, uncheck both Show recently used files in Quick access and Show frequently used folders in Quick access.
- Click the Apply button, then click OK to save your settings. Now, when you open File Explorer, it should go directly to This PC instead of Quick Access.
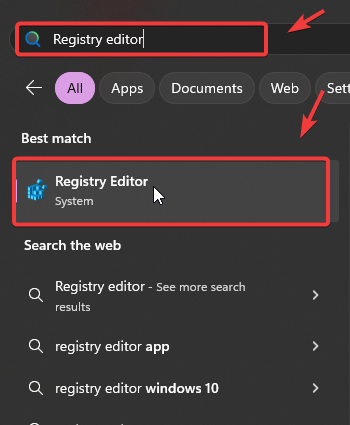
2. Disable Quick Access from Registry Editor
- Click the Start Menu and type Registry Editor. Press Enter to open the Registry Editor.
- In the Registry Editor, navigate to the following path:
HKEY_CURRENT_USER\Software\Microsoft\Windows\CurrentVersion\Explorer\Advanced
- In the right pane, find the entry named LaunchTo. Right-click on it and select Modify.
- In the pop-up window, change the Value data to 1 and click OK.
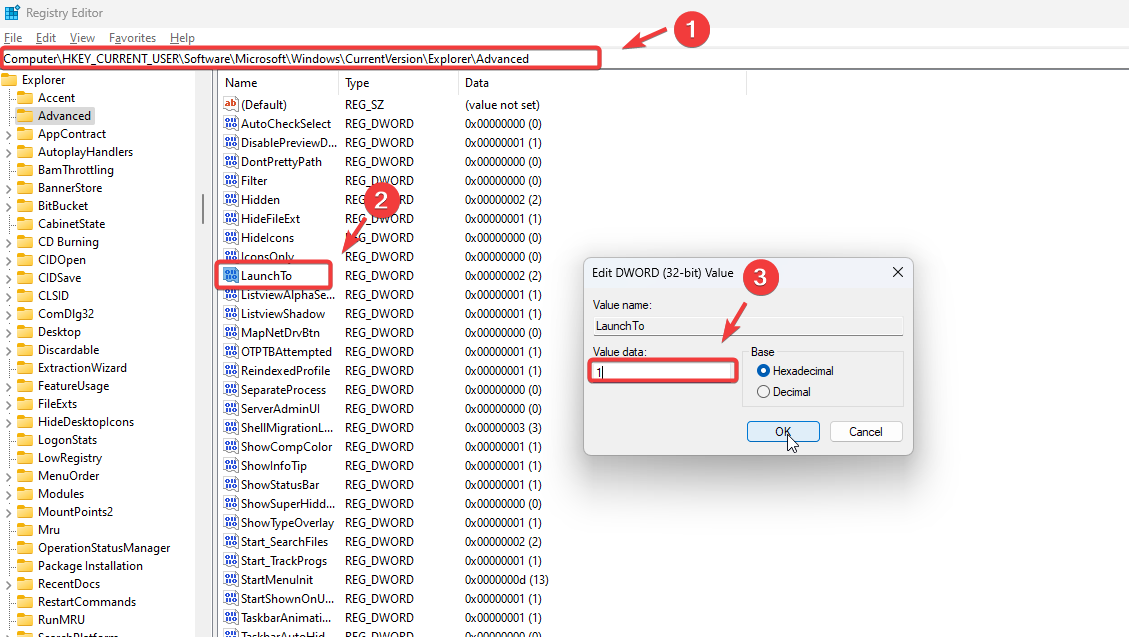
- Close the Registry Editor and restart your computer for the changes to take effect.
3. Remove Pinned Folders from Quick Access
- Open File Explorer and navigate to the Quick Access section.
- Right-click on the folder or file you wish to remove from Quick Access.
- Select Remove from Quick Access from the context menu.
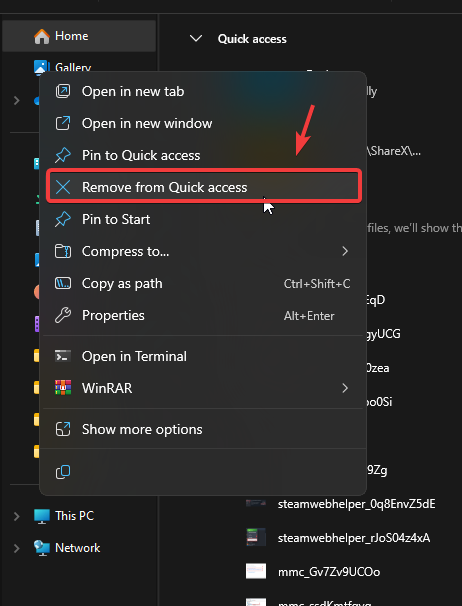
- Repeat these steps for any other items you want to remove. Your Quick Access section should now only display the items you prefer.
By following the methods above, you should be able to remove or disable Quick Access from File Explorer. If you want to enable it again, just follow the steps in reverse.