How to Remove HomeGroupUser$ Account from the Login Screen
The HomeGroupUser$ account usually appears due to corrupted Windows Homegroup user account and can be removed from the login screen through quite a few methods. Sometimes, when you boot up your system, on the login screen you get an unknown account asking for a password and before you’re able to enter the password, it prompts ‘The password is incorrect’ message. This unknown account goes by the name HomeGroupUser$. Despite the appearance of the account, you’re able to login to your real user account and albeit, the account means no harm but having to face the repetition becomes a pain.
Consequently, we’re here to help you out. You can easily overcome this by implementing a few methods like disabling auto logon, editing the registry to stop the account created from logging in etc. The HomeGroupUser$ is a built-in account which means it cannot be deleted from the system.
What causes the HomeGroupUser$ Account to appear on Windows 10?
There are not many reasons due to which this account can emerge, however it can appear due to —
- Windows Homegroup user account corruption. The main cause of this error is user account corruption. If your user accounts have been corrupted due to some recent update, malware etc. it can cause the account to appear.
- Recent changes to the system. If you’ve made changes to your system prior to the appearance of the account, that could’ve been the required kick.
Now, let us get into the methods of removing the account: –
Method 1: Using the Command Prompt
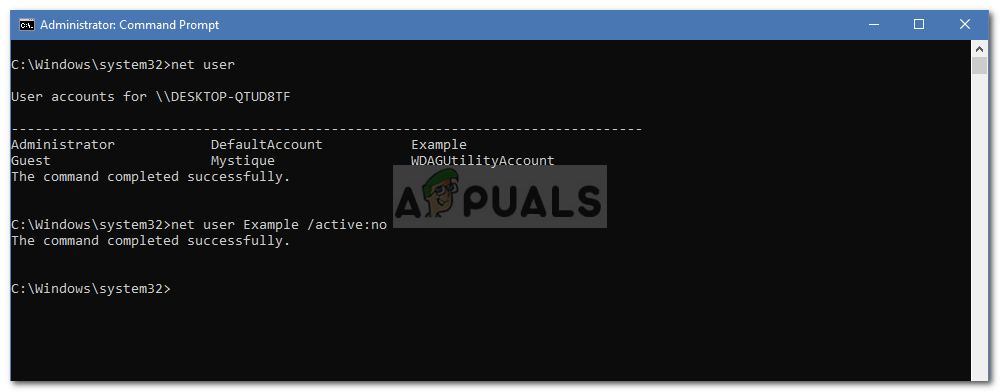
To start off, you can disable the account from the Login screen using the command prompt. This will require an elevated command prompt so make sure you’re logged in as an administrator. Follow the steps:
- Press Winkey + X and open ‘Command Prompt (Admin)’ from the list.
- Once it loads up, type the following command:
net user
3. This command will show you the list of the current accounts on your system. Locate HomeGroupUser$ and type in the following (for the sake of the article we’ll be using the account ‘Example’):
net user HomeGroupUser$ /active:no
Method 2: Using the Local Users and Groups
Another way of disabling the account would be to use the Local Users and Groups utility. This utility shows you all the accounts that are present in your system; hidden and unhidden both. Hence, to remove the HomeGroupUser$ account from the login screen, you’ll have to disable it in Local Users and Groups utility. Here’s how to do it:
- Press Winkey + R to open Run.
- Type in ‘lusrmgr.msc’ and hit enter.
- Once the Local Users and Groups window pops up, click on the Users folder.
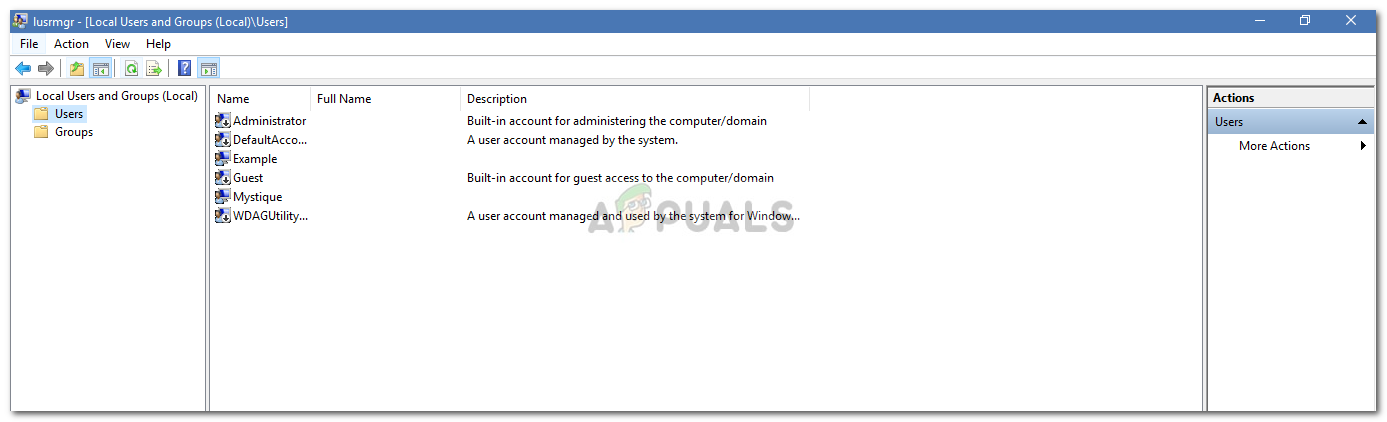
Lusrmgr – Windows Local Users and Groups - In the middle pane, you’ll see all the accounts on your system.
- Right click on ‘HomeGroupUser$’ and click Properties.
- In the Properties window, click the ‘Account is disabled’ box.
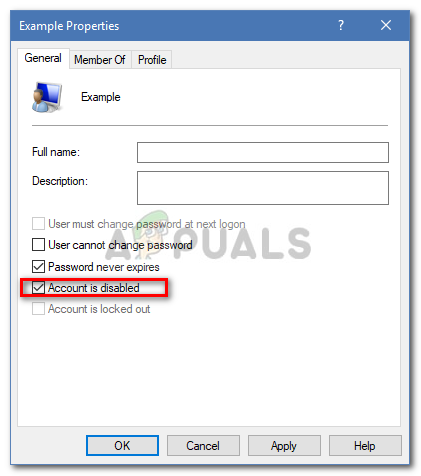
Local User Account Properties - Hit Apply and click OK.
Note: The accounts with the downward pointing arrow mean they are disabled.
Method 3: Using Netplwiz
Netplwiz is a built-in utility in Windows that lets you remove, add users, enable autologon etc. We will use this utility to disable the autologon attempt of HomeGroupUser$ account. Here’s how to do it:
- Go to Start Menu, type in ‘netplwiz’ and open it up.
- Once it loads up if the ‘Users must enter a user name..’ box is unchecked, make sure to click it to check the box.
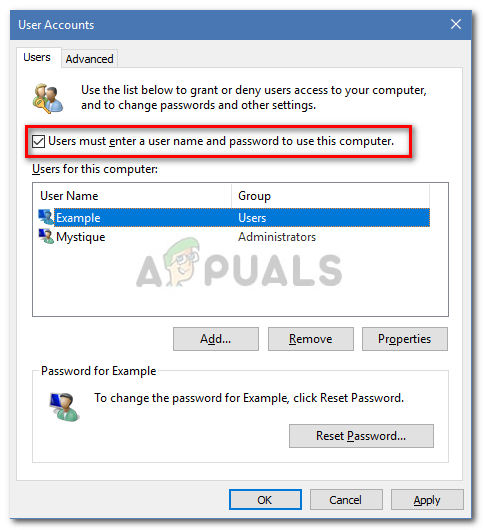
Netplwiz utility - This will stop the autologon attempt of the account.
Method 4: Stopping Homegroup Services
Lastly, another way of removing the account from the Login screen would be to stop the HomeGroup Listener and HomeGroup Provider services. If you are using a homegroup on your network, this might affect it so watch out for that. Here’s how to stop the services:
- Open Start Menu, type in ‘services’ and open it up.
- From the list of Services, locate HomeGroup Listener and HomeGroup Provider.
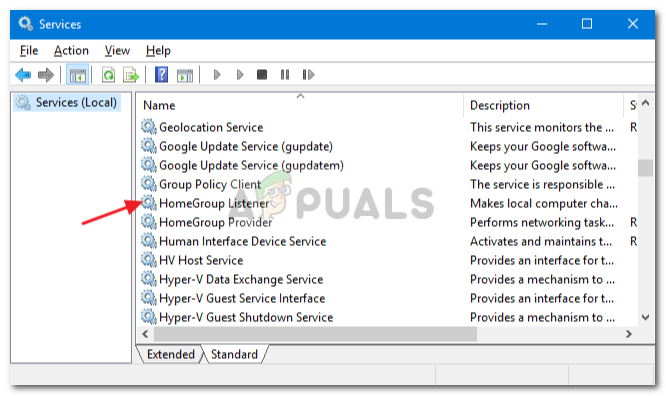
Windows Services - Double-click the services one by one and click ‘Stop’.
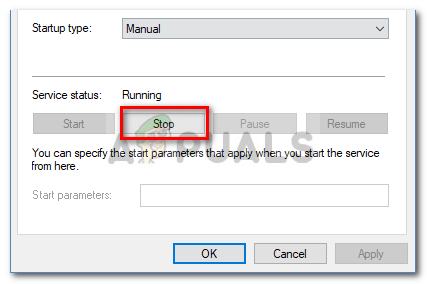
Windows Services Properties - Hit Apply and then click OK.


