How to Read .HLP Files in Windows 10
From Windows 3.0 all the way to Windows XP, Microsoft used to provide online help to its users through their WinHelp files. All of these WinHelp files carried the extension of .hlp. But with the release of Windows Vista, Microsoft discontinued using WinHelp platform for online help and replaced it with Microsoft Compiled HTML Help. It doesn’t makes sense to me but as a matter of fact, Microsoft made almost all their windows backward compatible, meaning older programs many of them would still run on Windows 10. However, the .hlp files associated with those older programs will not open.
Solution 1: Use Patched WinHelp32.exe
WinHelp32.exe is the application which is used to read the .hlp files. Here we will inject the patched WinHelp32 application into your Windows 10 through some really simple steps given below.
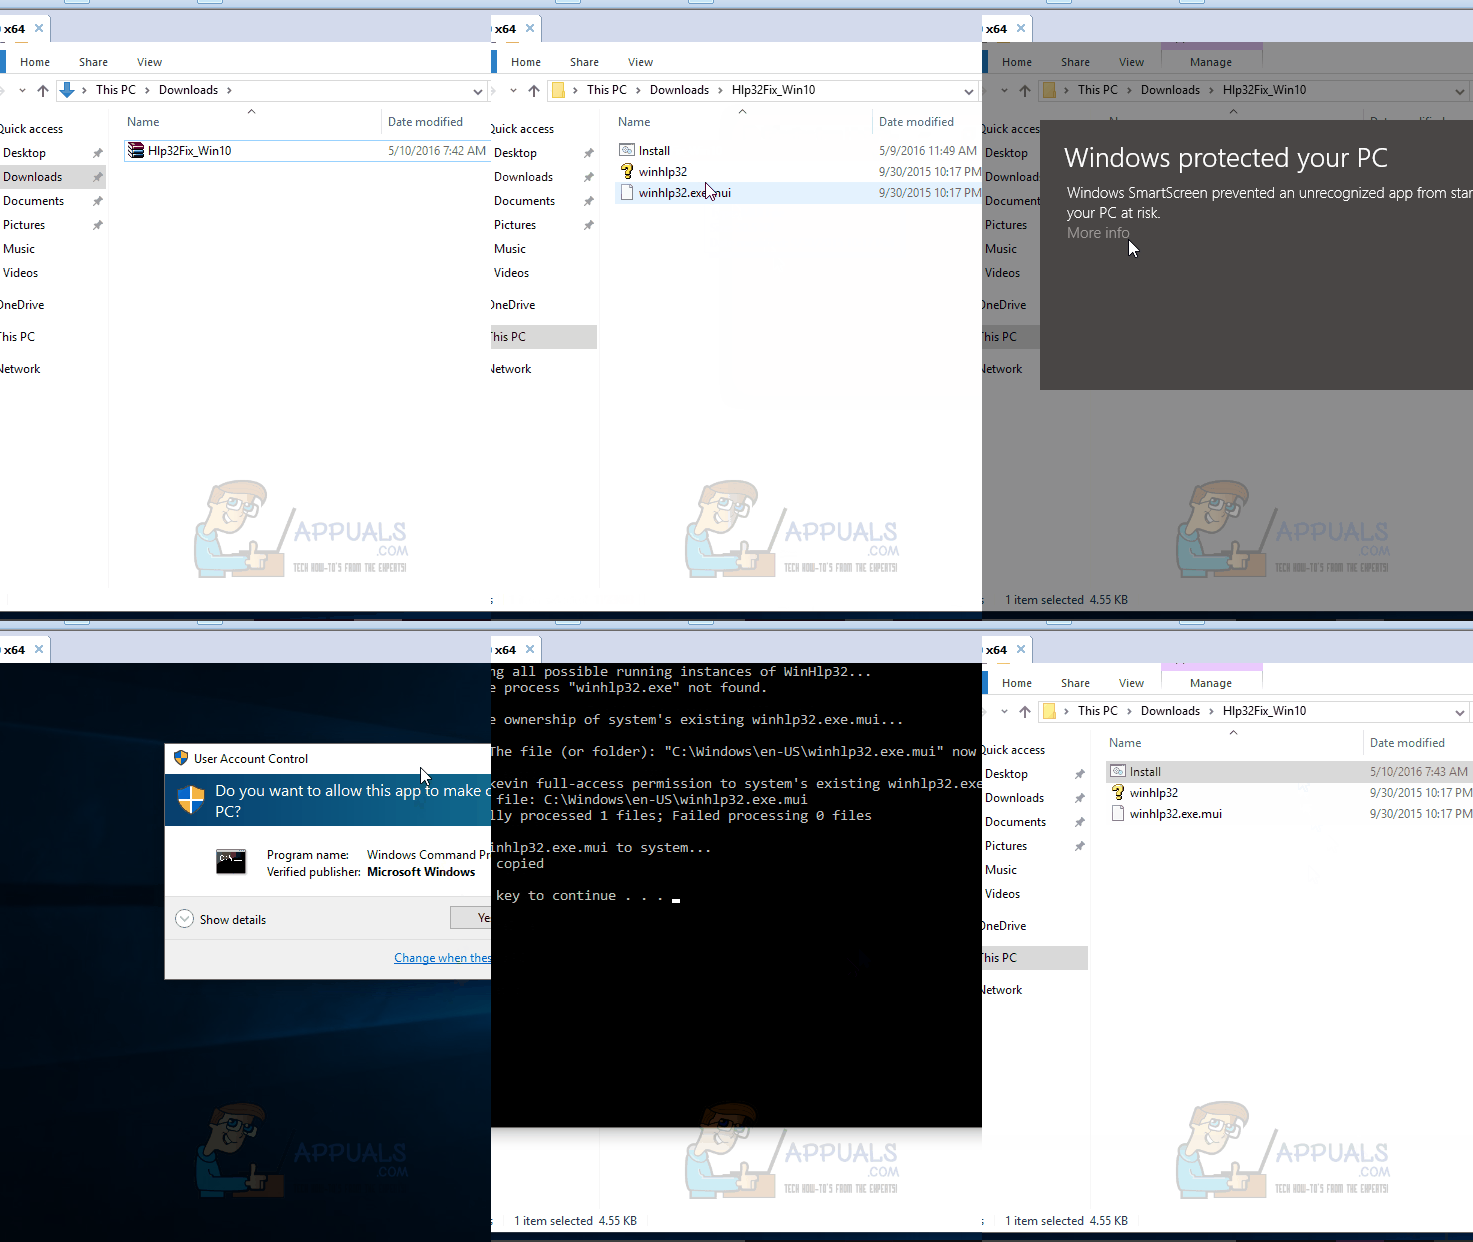
First, Download the zip file from this link that has the patched WinHelp32 files and its installer.
Right Click on the downloaded zip file and Click Extract All…
Enter the path where you want to extract the files, or leave the default path their if you like. Place a Check next to Show extracted files when complete and click Extract.
A folder will open with the extracted content once the extraction finishes. Now Right Click on Install.cmd and Click Run as Administrator. Click Yes if the User Account Control warning message appears.
A couple of commands will run in a black window. Press the Enter key if you see a pause in that black window.
At one point, the black window will close. Now Restart your computer. You should now be able to open the .hlp files in Windows 10. If not, move on to the next solution.

Solution 2: Use Patched WinHelp32.exe Application from Windows 8.1
For one reason or the other, Solution 1 may fail. So in this solution, the patched version of WinHelp32.exe we’ll use will be system type specific, which means it will be depend if your Windows 10 is a 32 bit or 64 bit.
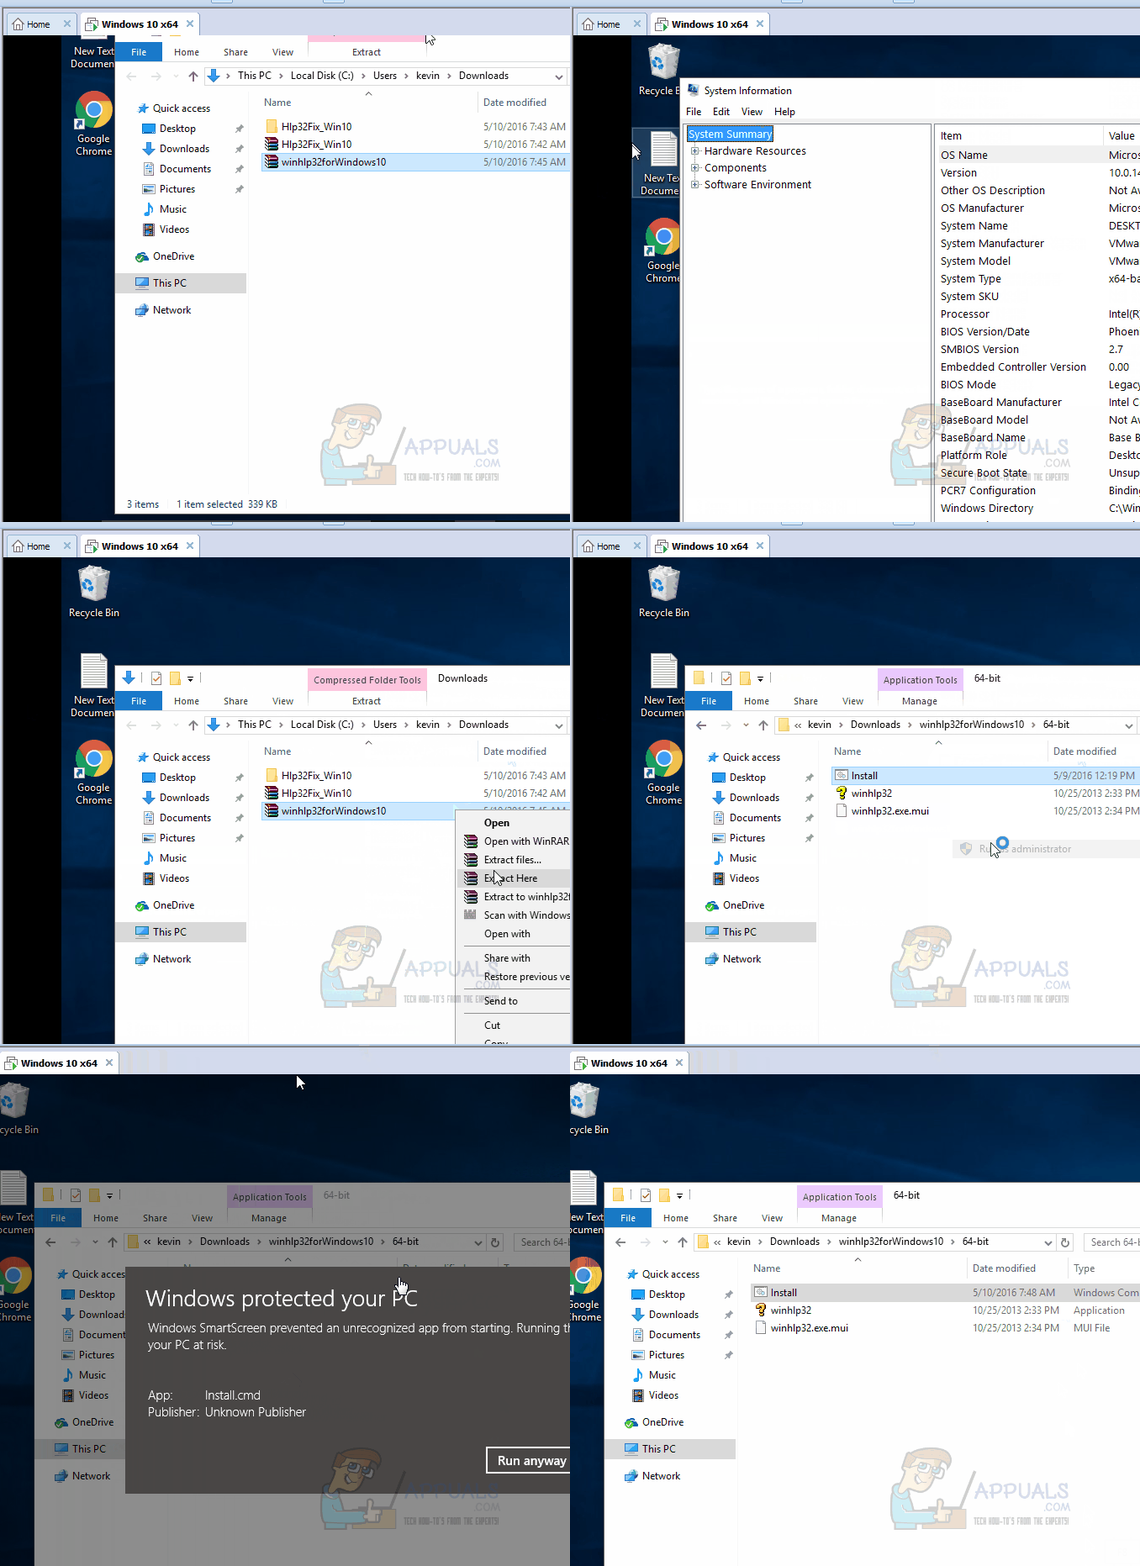
To find out your system type (32 bit or 64 bit), Hold the Windows key and Press R. Type msinfo32 in the Run dialog box that appears and Press Enter.
System Information window will open. In the Right pane, next to System type, if the value is x64-based PC, then your Windows is 64 bit. If it is x86-based PC, then it’s a 32 bit Window. Note it down.
Now Download the zip file with the patched files from this link.
Right Click on the downloaded zip file and Click Extract All…
Enter the path where you want to extract the files, or leave the default path their if you like. Place a Check next to Show extracted files when complete and click Extract.
A folder will open with the extracted content once the extraction finishes. Open the 32-bit folder or the 64-bit folder depending on what you noted earlier for your System type.
In the 32-bit/64-bit folder, Right Click on Install.cmd and Click Run as Administrator. Click Yes if the User Account Control warning message appears.

Once done, reboot PC and test.