How to Prevent Other Users from Changing Background on your Windows 10?
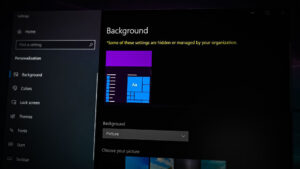
The Background section is listed under the Personalization settings in the Settings app. This is used to change the desktop wallpaper and fit for it. There is also an option for changing the background color of your system on this page. Some related settings like high contrast are also listed at the bottom of the page. An administrator can disable this page from any standard user at home or in any organization. Once the page is disabled, it will grey out all the options on this page and a standard user will be unable to change any option. In this article, we are providing you methods through which you can enable and disable the Background page of the Settings app.
Method 1: Using the Local Group Policy Editor
The Group Policy Editor is a Microsoft Management Console that is used to control the working environment of the operating system. Administrators can use this tool to disable specific settings in the Windows Settings app. The background page is listed under the personalization settings. After enabling this policy setting, it will grey out most of the options on the background page. There are also some other policies that prevent users from changing the desktop wallpaper and desktop icons.
The Group Policy Editor is available only on the Windows 10 pro, education, and enterprise editions. If you are using the Windows Home edition, then you need to skip this method and try using the Registry method.
- Press the Windows + R key together on your keyboard to open a Run dialog. Then, you need to type “gpedit.msc” in the dialog box and press the Enter key or click on the Ok button. This will open up the Local Group Policy Editor window on your computer.
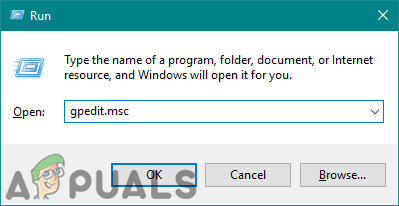
Opening the Local Group Policy Editor - In the Local Group Policy Editor window, head over to the following path:
User Configuration\ Administrative Templates\ Control Panel\ Personalization\
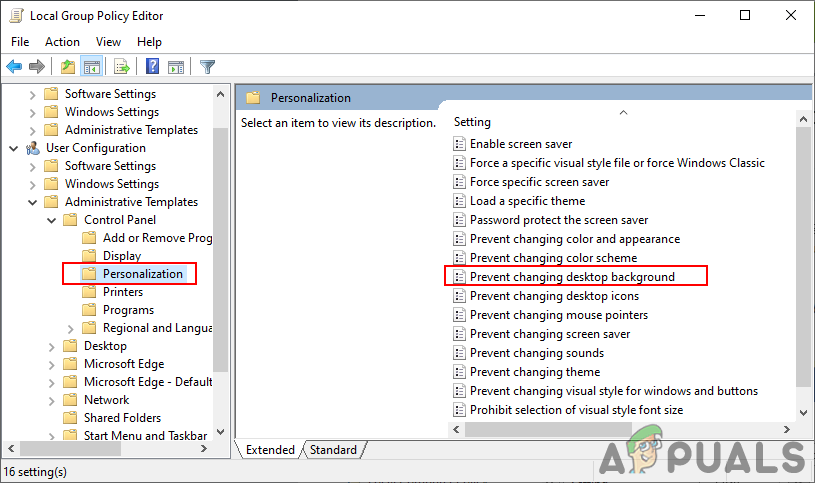
Navigating to the settings - Now double-click on the policy named “Prevent changing desktop background” and it will open another window. Then choose the Enable toggle option.
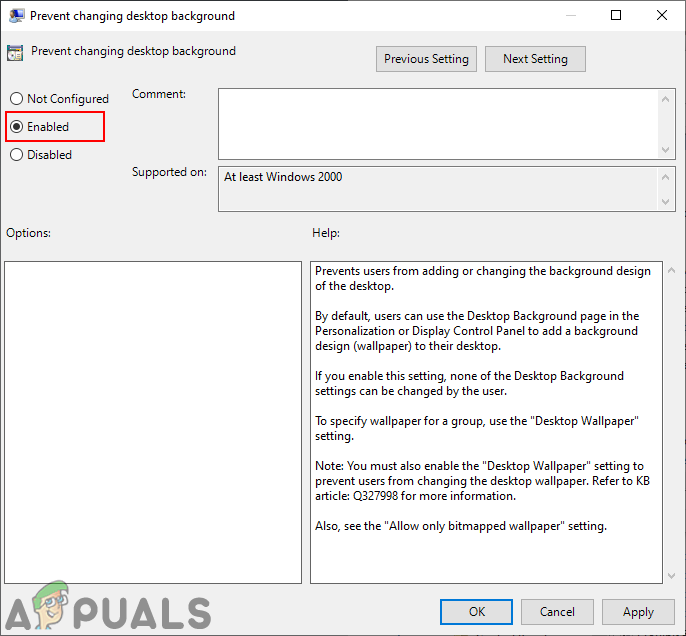
Enabling the setting - After that, just click on the Apply and Ok buttons to save these changes.
- The Group Policy will automatically update the changes. If not, then you must force the update for the group policy.
- Search for Command Prompt in the Windows search feature and run it as an administrator. Now type the following command in Command Prompt (Admin) and press the Enter key. You can also update the group policy by restarting the computer.
gpupdate /force
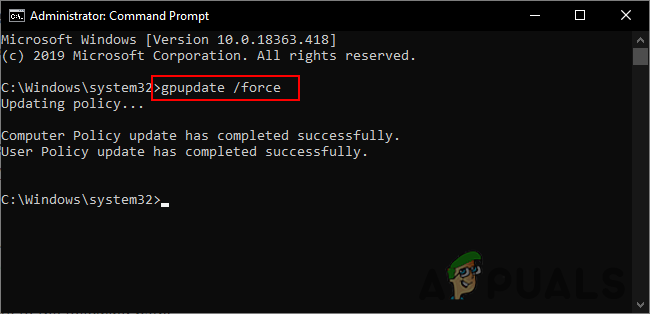
Force updating group policy - If you want to enable the Background settings again, just change the toggle option to Disabled or Not Configured in step 3.
Method 2: Using the Registry Editor
The Registry Editor is the tool to view and modify the Windows Registry values. It contains all the information and settings about applications and operating systems. Unlike the Group Policy Editor, this method requires some technical steps from the user. You need to create the missing value and key for any specific setting. The Windows 10 Home users also have access to the Registry Editor and they can use it to disable the background page.
Follow the below steps carefully without making any mistakes. We recommend users that they should create a backup before making any new changes in Registry every time.
- First, open the Run dialog box by pressing the Windows and R keys together on your keyboard. Then, you need to type “regedit” in the dialog box and press the Enter key to open the Registry Editor. If you get UAC (User Account Control) prompt, then click on the Yes button.
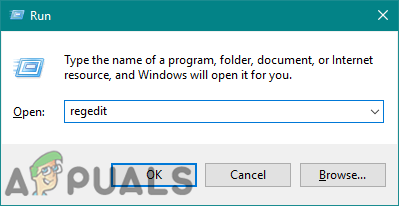
Opening the Registry Editor - To create a Registry backup before making new changes, click on the File menu and choose the Export option. Select the path and name the file as you want. Lastly, click on the Save button to create the backup.
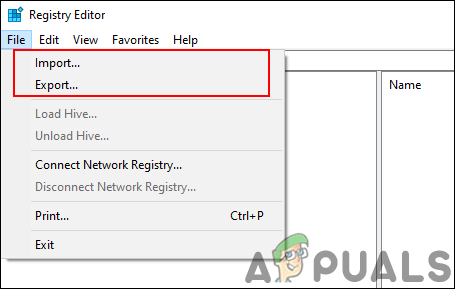
Creating a Registry backup Note: You can always restore a backup by clicking on the File menu and choosing the Import option as shown. Then, you can choose the backup file that you recently created.
- In the Registry Editor window, head to the following location:
HKEY_CURRENT_USER\Software\Microsoft\Windows\CurrentVersion\Policies\ActiveDesktop
Note: If the ActiveDesktop key is missing, just right-click on the Policies key and choose the New > Key option. Then name that newly created key as “ActiveDesktop“.
- Right-click on the right pane of the ActiveDesktop key and choose the New > DWORD (32-bit) Value option. Then rename the value as “NoChangingWallpaper” and save it.
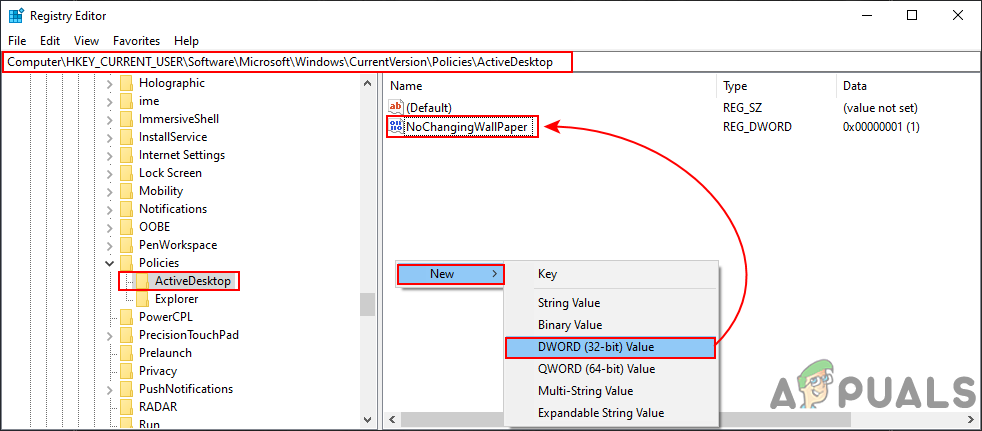
Creating a new value - Double-click on the NoChangingWallpaper value and it will open a small dialog. Now change the value data to 1 and click on the Ok button.
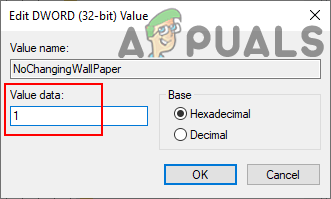
Changing the value data - Finally, close the Registry Editor window, and reboot the computer to apply the new changes.
- You can always enable it back by changing the value data to 0 or by removing the value from the Registry.


