How to Photoshop an Image to Have a Sepia Tone
A sepia tone is a monochrome tint that is reddish brown in color. Back in the days when every single photograph had to be developed, every developed photo used to have this tint because sepia, a substance derived from the ink expelled by cuttlefish, was an ingredient in the emulsion used in photograph development. Photograph development techniques in this day and age, as well as the dawn of digital photography, has resulted in the sepia tone not just being a constant feature of every photograph. However, the monochrome tint we know as sepia is still widely desires – the tint gives an image an antique feel and a flare of nostalgia, making the image seem aged. Believe it or not, that is something that many like to have in their pictures.
Developing your images like people used to back in what now might as well be the Stone Age just so the photographs have a sepia tone would be quite ludicrous. Thankfully, the sepia tone has now been popularized as an ‘effect’ that you can digitally apply to any image you capture using a recording device. Applying a sepia tone to photographs is something that every image editor out there, regardless of complexity, is capable of doing – from the devilishly basic image editor that you used to have on that flip phone of yours to Photoshop, the epitome of image editing software.
Using Photoshop to add a sepia tone as an overlay to any existing image is a pretty simple procedure, and here’s how you can go about it:
Adding a Sepia Tone to Images in Photoshop 2015
If you’re using Photoshop 2015 and are looking to add a sepia tone to any image, you need to:
- Open the image you want to add the sepia tone to in Photoshop.
- If the selected image is grayscale (or black and white, if you will), click on Image > Mode > RGB Color. If the image you have selected is in color, however, click on Image > Adjustments > Desaturate.
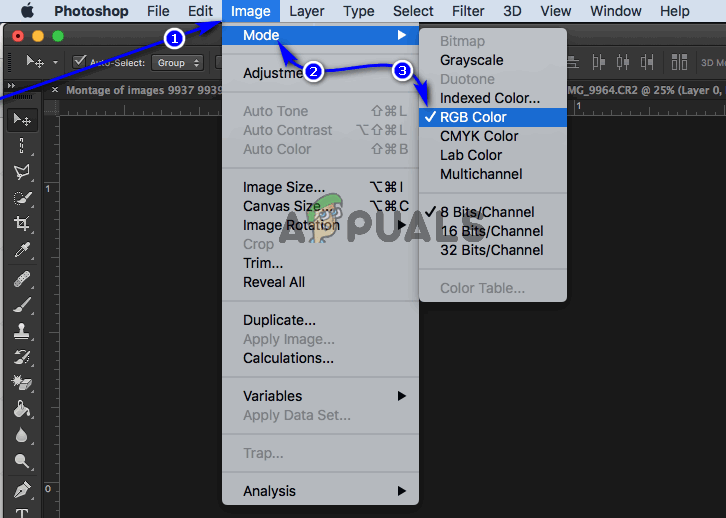
RGB Color option in Photoshop 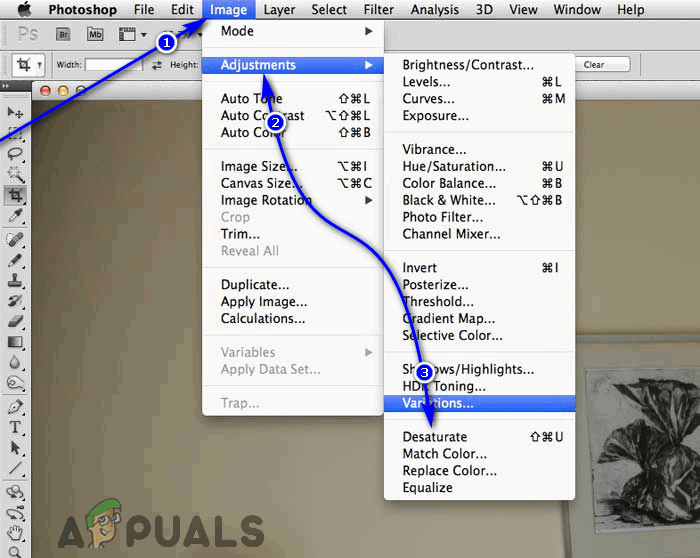
Desaturate option in Photoshop - Click on Image > Adjustments > Variations….
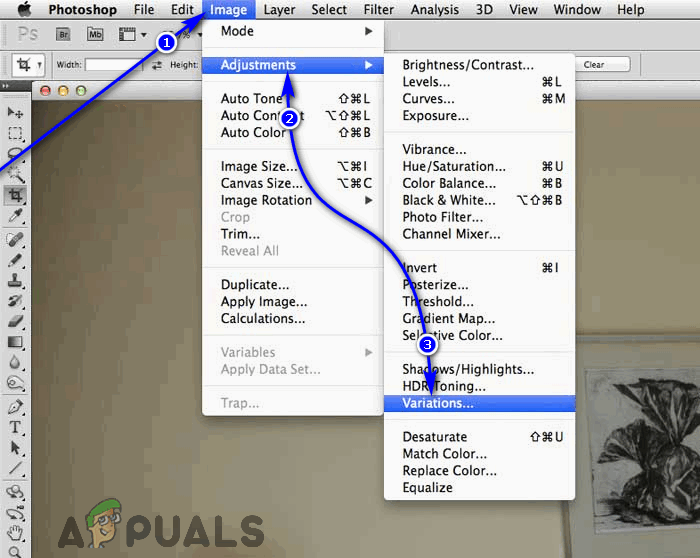
Variations option in Photoshop - Drag the slider for FineCoarse down to a point where it is no more than one notch less than the median (middle) value.
- Click once on More Yellow.
- Click once on More Red.
Optional: In the Variations dialog, you can click on the Save button to save the exact settings for a sepia tone overlay. The next time you want to apply the sepia tone to any image, you can simply apply the settings you have already saved. - Click on OK.
You can experiment with the many options you have within the Variations dialog to apply tints of a variety of different colors to your images.
Adding a Sepia Tone to Images in Photoshop CS6 and CC
If you’re using Photoshop CS6 or CC, you can also apply a sepia tone to any image you want using the Camera Raw Filter. This option is viable only for users of Photoshop CS6 and Photoshop CC. If you would like to use this option, you need to:
- Open the image you want to add the sepia tone to in Photoshop.
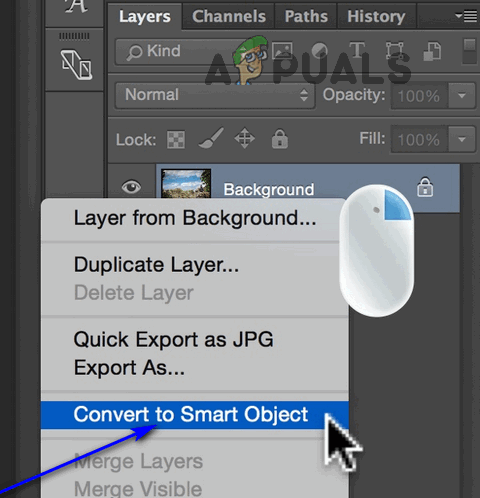
- Navigate to the Layers panel and click on the menu located in the upper right corner.
- In the menu, click on Convert to Smart Object.
Convert to Smart Object in Photoshop - In the menu you see at the top of your screen, click on Filter > Camera Raw Filter….

Camera Raw Filter in Photoshop - In the right pane of the Camera Raw Filter window, you will see a series of icons. Hovering over each of these icons will reveal their respective names in a dialog box. Hover over each one until you arrive at the icon for the HSL/Grayscale button (it will be the fourth button from the left), and click on it once you have located it.
- Check the checkbox next to the Convert to Grayscale option.
Note: With your image in black and white, you can adjust the shading and intensity of the black in the image by messing around with the color sliders in the HSL/Grayscale dialog. Granted, your image no longer has any colors, and making changes to these sliders won’t add color to your image, but modifying the intensity of any of the colors the image contains will modify the shading and intensity of every single part of the image that contains that color. - To the right of the HSL/Grayscale button we previously located and clicked on you will find a button for Split Toning. Click on it.
- When the Split Toning menu pops up, adjust the Hue, located under the Shadows section, to any value between 40 and 50 to add a hue akin to the sepia tone to your image. You can always readjust your selected value to any other value between 40 and 50 to get the exact kind of sepia tone hue you want later on. You won’t actually notice a sepia tone in your image just yet, so do not fret.
- To have the sepia tone hue you selected actually applied to your image, adjust the Saturation slider. For Saturation, any value around 40 is a decent point to start at, and you can readjust the value later on to satisfy your preferences.
- Click on OK in the Camera Raw Filter window.
- You will now notice that the sepia tone you have specified has been added to your image. The hue is added as a filter layer to the image in the Layers pane.
Applying a sepia tone to an image is a task virtually every image editing application out there is adept at, but if you’re looking for the absolute best and want to use the absolute best, Photoshop is the way to go.


