How to Make Forms on Microsoft Word
Creating a form on any program might not be easy as it has so many sub parts which need to be edited. And since it is usually an official piece of paper that you design, you cannot make mistakes in it. You can make forms in various templates in MS word. And to professionally be able to edit the form, there are a few things that you need to do. So let’s begin with that before we select our form template.
- Open MS Word, and press the File tab.
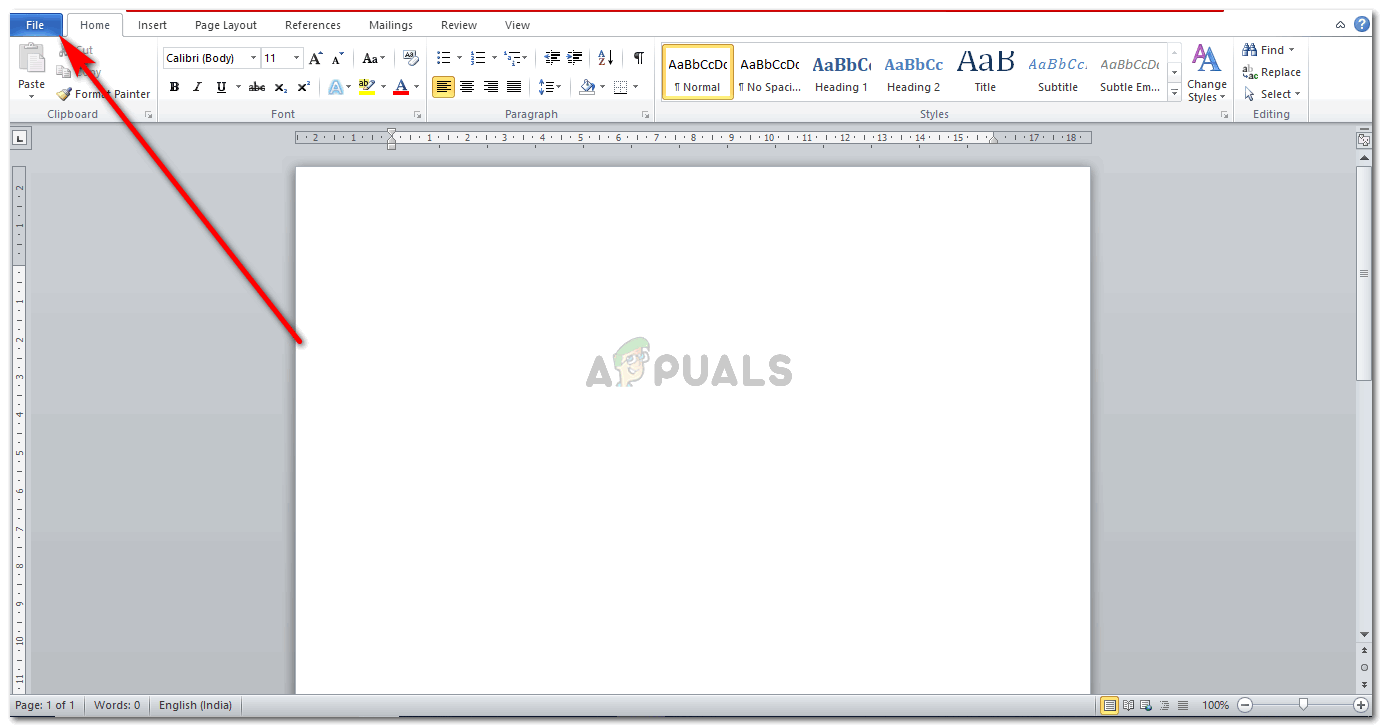
Starting from the scratch.Open MS Word and head to File - Go to ‘Options’, which will lead you to a dialogue box.

Go to Options - Under Word Options, you need to click on ‘Customize Ribbon’. This will direct you to more options where you will finally add a very important tool to your Word Tool bar.
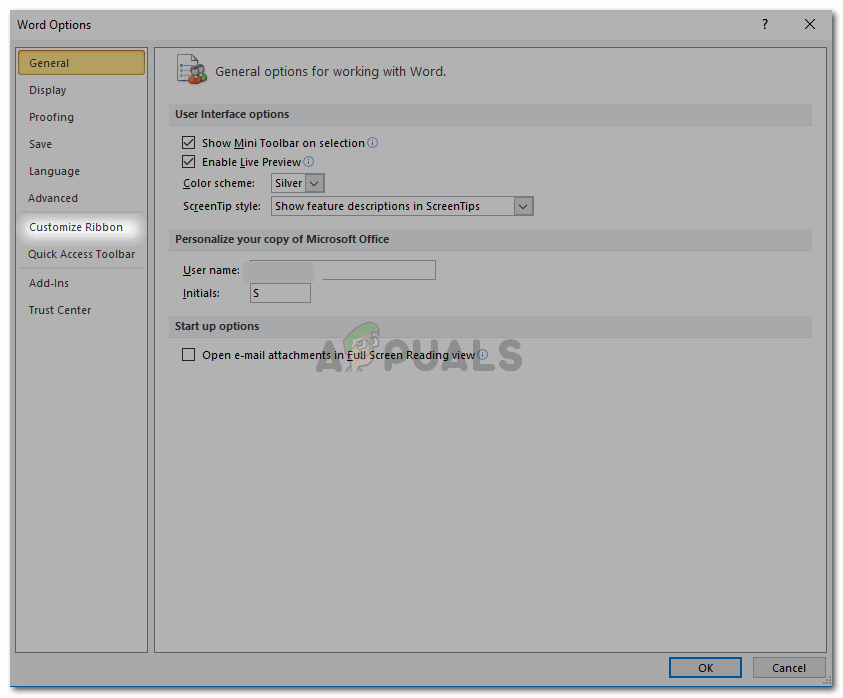
Customize RIbbon to add a new tab to the tool bar - ‘Developer’, is what we are looking for. The list on the right on this window, locate Developer and check the box next to it to select it as shown in the picture below.
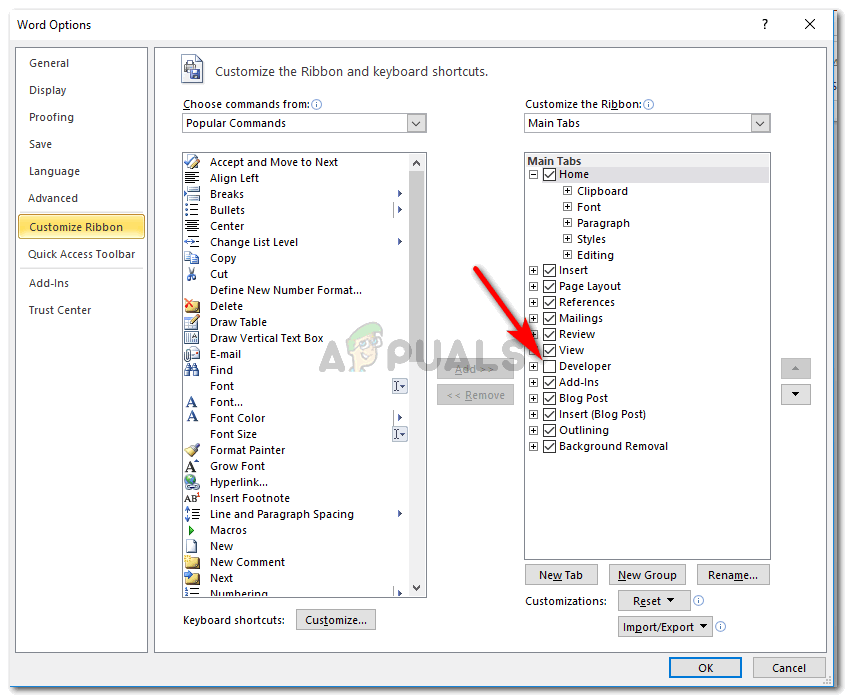
To edit a form, we need ‘Developer’ on the tool bar 
Check the box next to Developer to select it - Press OK after you have checked the box for Developer. Once you click OK, you will notice that a new tab has been added to your tool bar which is titled ‘Developer’.

Your new tab has been added to your Word’s tool bar 
All the options for you to help you with your form editing - This tool is basically used to help users edit their forms and professional papers. With the added features, you can edit your form with more efficiency.
Now that to you have added the ‘Developer’ tool tab on your tool bar, you need to select a form template for your file.
- Go to file again, and go to new.
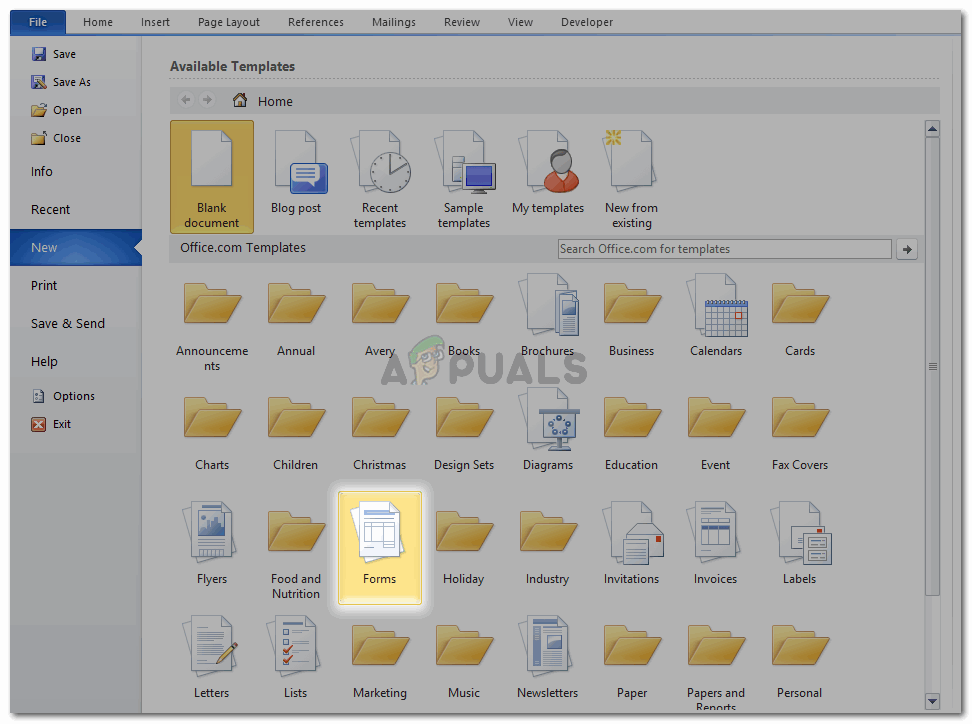
Add the template to your file now - You can either locate the tab for Forms on this window, or you can write ‘Forms’ in the search bar provided on the same window.
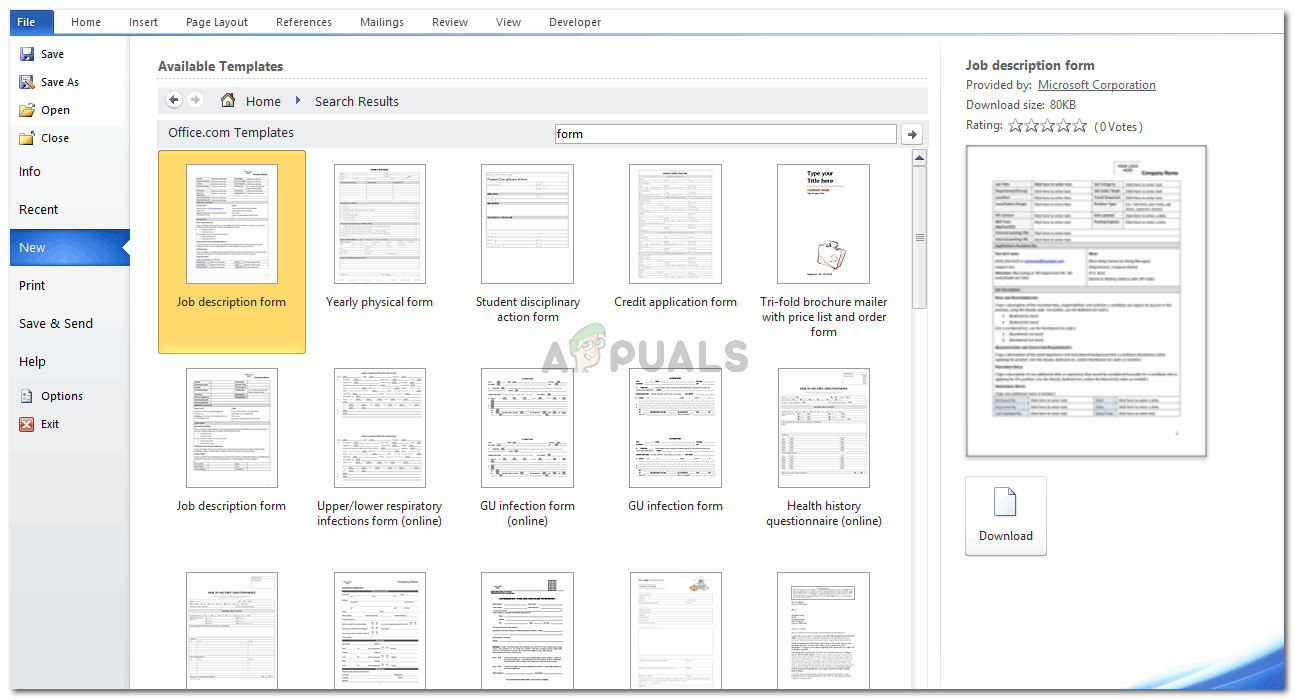
Or search on the search bar for templates - Select any form template that suits your requirements the best and download it. I have downloaded the ‘Job Description’ format as an example to help you understand how you can make a form on Word.
- Once you press download, your form will take a few minutes to download, and this how your screen will look like. Your form appears in front of you, along with all the properties which you can edit as you fill the form for the details.

This is how your form will appear - You can adjust the design and layout of the form according to your taste from the ‘Table Tools’ as shown below. This is for the basic changes in the color schemes, the lines and the displaying edits that you need to make to make your form look decent and appealing.
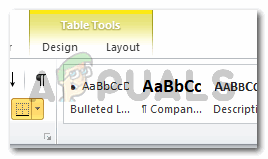
The tabs to design the layout of your form 
The Design tool Options 
Layout tool options
Now moving to the difficult part, and which happens to be the more significant part of creating a form.
- Click on the Developer tab.And locate the ‘Design Mode’ tab under it.

To be able to edit a form, you need to press the Design Mode, which is located under the tab for Developer. Pressing on this one enable the editing mode for the text in the form. While pressing it again will disable it. - When you click on ‘Design Mode’, your form becomes editable. With these arrows-type icons displaying at the edges of the text.

The arrow-sort brackets at the end of the text within the form shows that this can be edited now. - You can edit all the different sections now and change the formatting for each section as well.
- The tab under Design Mode, ‘Properties’, is only clickable once you click the Design Mode. It helps you edit the content.

The ‘Properties’ under the ‘Design Mode’ can only accessed once your editing mode for the form is enabled If you want to keep the text in certain sections unedit-able, you need to select the box for ‘Contents cannot be edited’ and press OK. This will make the formatting of this certain section permanent, until you un-check this box.
- Using the icons in the ‘Controls’ section under Developer, you can make major changes in the formatting of the form.

These options can help you format and add different features to your form. 
You can edit the text to be plain, or make it different to stand out through the options for text in this section. 
Edit it according to your requirements
Once you start making the form, and edit it side by side, you will learn how to do it at a faster pace.


