How To Make A Digital Thermometer Using Arduino?
A Digital Thermometer measures the body temperature of a human body and displays it on the screen. Digital Thermometers that are available in the market are a bit expensive. So, if we have necessary components at home, we can make a low-cost digital thermometer at home with the same efficiency of a thermometer that is available in the market.

How To Use a Temperature Sensor to Measure Body Temperature?
We know that we are going to measure the body temperature of a person using Arduino. So, let us get started to gather further information to start the project.
Step 1: Components
If you want to avoid any inconvenience in the middle of any project, the best approach is to make a complete list of all the components that we are going to use. The second step, before starting to make the circuit, is to go through a brief study of all these components. A list of all the components that we need in this project is given below.
- No products found.
- No products found.
- Breadboard
- No products found.
- No products found.
Step 2: Studying The Components
As we have already made a list of components, let us move a step ahead and go through a brief study of the working of each component.
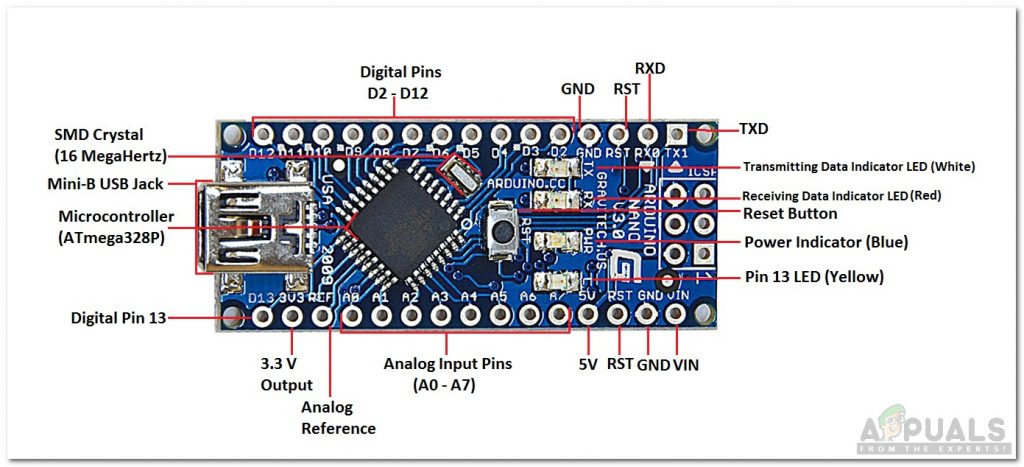
Arduino Nano is a microcontroller board. The microcontroller on it is ATmega328P. It requires a C Code to operate. In this code, we tell the controller how and what operations to carry out.
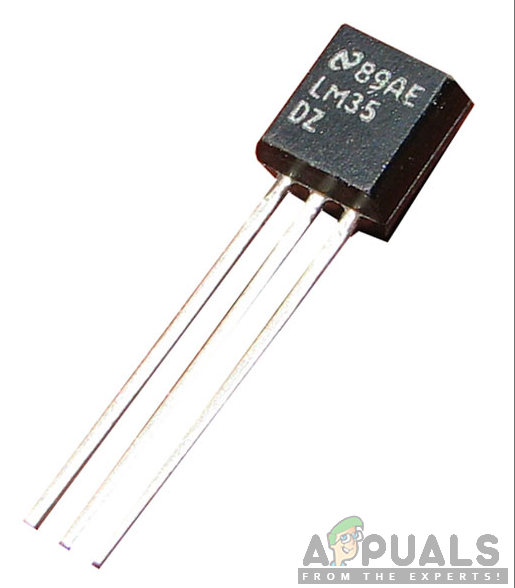
LM35 is a temperature sensor. Its shape is like a transistor. It produces an output voltage that is directly proportional to the temperature. The output voltage can be easily used to tell the temperature in Celcius. It is better than thermistors because it is more sensitive to temperature and provides accurate readings. Its range is from -55 degrees to 150 degrees Centigrade.
Step 3: Making the Circuit
Let us now assemble all the components together to make a circuit.
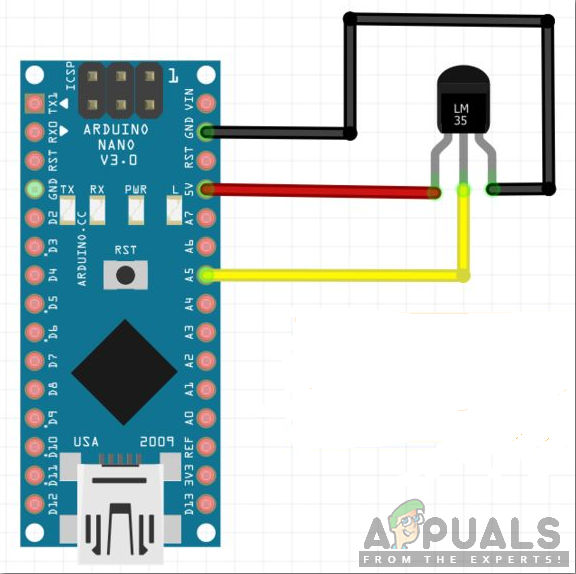
- Insert the Arduino Nano board into the breadboard.
- Take the LM35 sensor and connect its legs through Male to Female jumper wires to the Arduino. Connect the Vcc and ground pin to the 5V and ground of the Arduino Nano board and connect the OUT pin to A5 of Arduino. It is better to connect a ww0-ohm resistor with the Vcc pin of the LM35 temperature sensor.
LM35 (Picture Courtesy: Instructables)
Step 4: Getting Started with Arduino
If you are not already familiar with the Arduino IDE. Don’t worry, because a step by step procedure to set up and use Arduino IDE is given below:
- Download the latest version of Arduino IDE from Arduino.
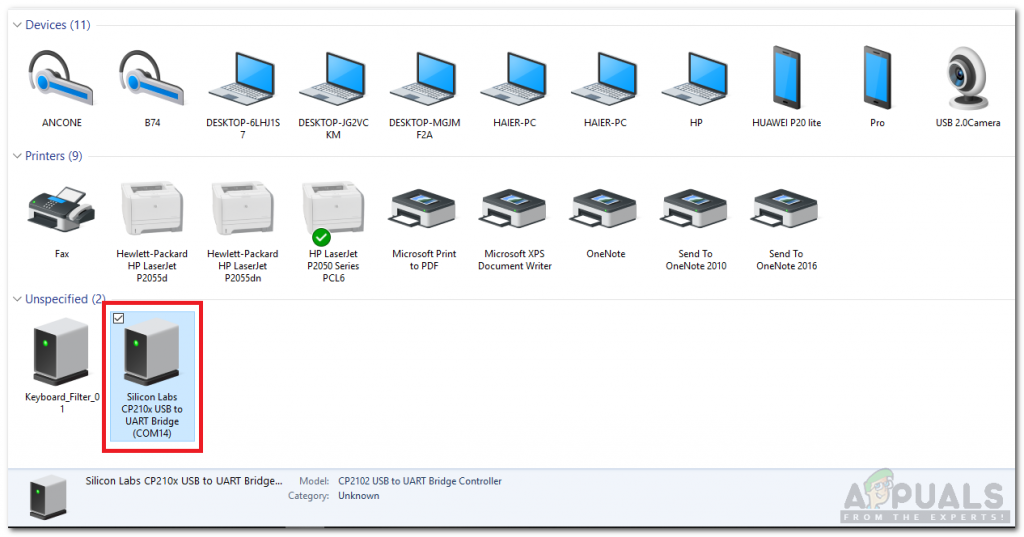
- Connect your Arduino nano board to your Laptop and open Control Panel.
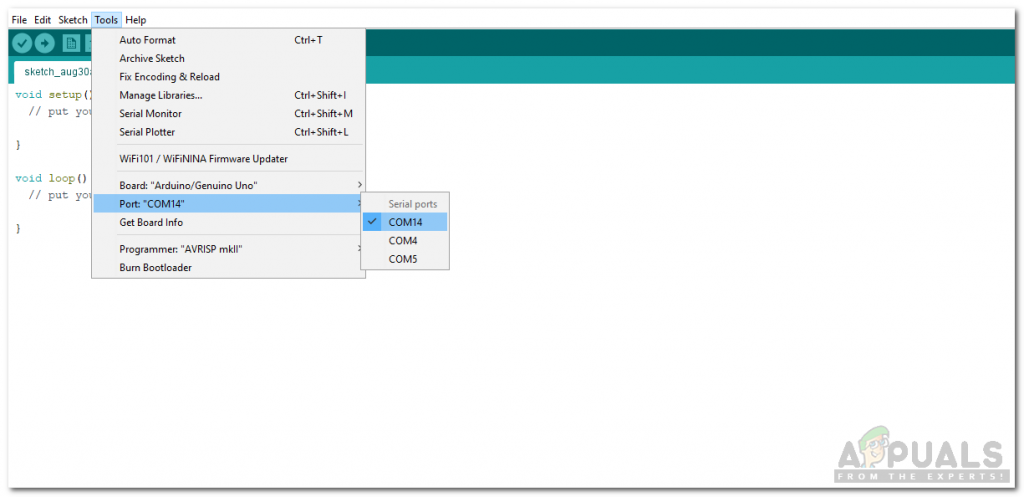
- Click on Hardware and Sound and then click Devices and Printers. Here find the port to which your Arduino Nano board is connected. On my Laptop, it is COM14 but it may be different on your Laptop.
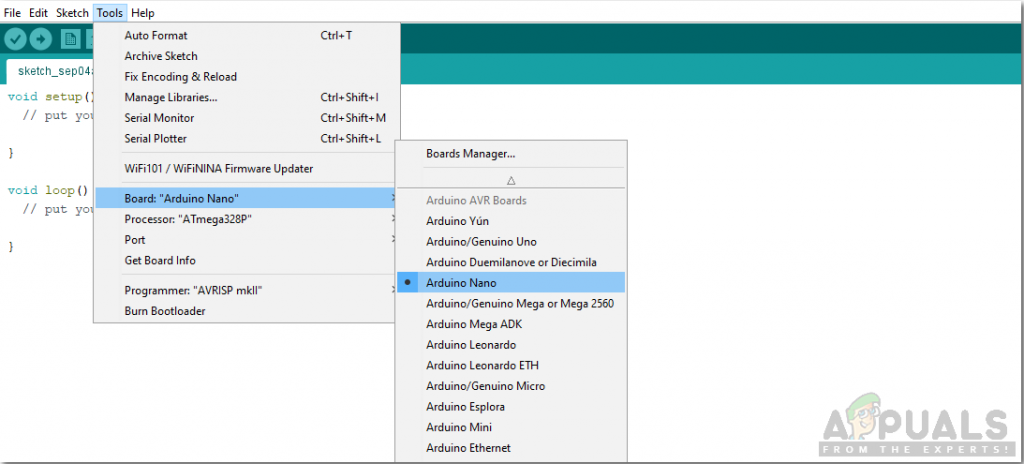
Finding Port - Click on the tool menu and set the board to Arduino Nano.
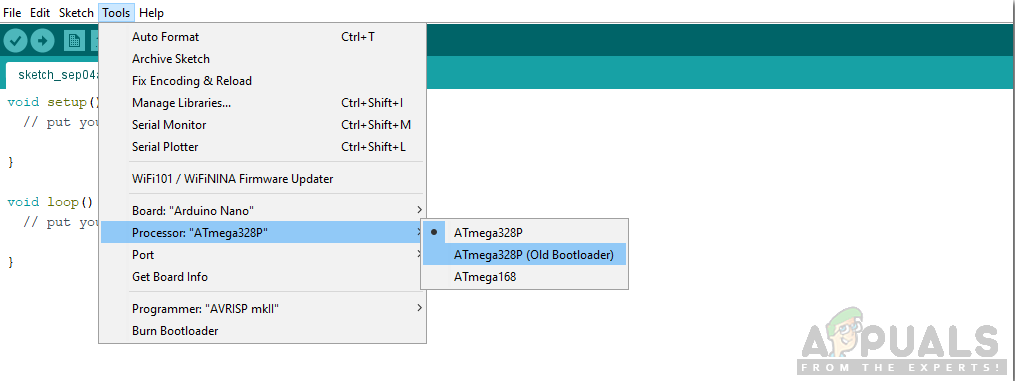
Setting Board - In the same Tool menu, set the processor as ATmega328P (Old Bootloader).
Setting Processor - Now, in the same Tool menu, set the port that you have already observed in the Devices and Printers.
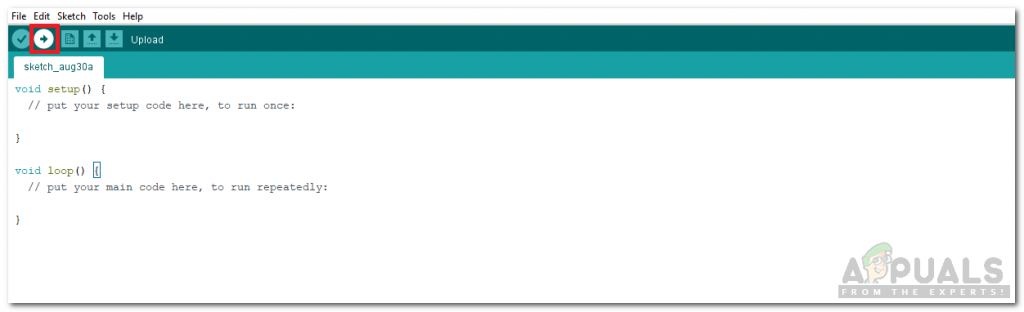
Setting Port - Download the code attached below and copy it on your IDE. click the upload button to burn the code on your Arduino Nano board.
Upload
Click here to download the code.
Step 5: Code.
The code is very simple. It is explained briefly below:
1. The pin of Arduino to take Analog input is initialized at the start. Al the variables that will be used later to store different values are also initialized here.
const int sensor=A5; // Assigning analog pin A5 to variable 'sensor'
float tempc; //variable to store temperature in degree Celsius
float tempf; //variable to store temperature in degree Ferhanite
float vout; //temporary variable to hold sensor reading
2. void setup() is a function in which we initialize the pins of Arduino to be used as INPUT or OUTPUT. Baud Rate is also set in this function. Baud Rate is the communication speed of the microcontroller board to the sensors attached.
void setup() {
pinMode(sensor,INPUT); // Configuring sensor pin as input
Serial.begin(9600);
}
3. void loop() is a function that runs repeatedly in a cycle. In this function, the input to the Arduino board is processed and output is sent to the other pins or displayed on the serial monitor.
void loop() {
vout=analogRead(sensor); //Reading the value from sensor
vout=vout*(5.0/1023.0);
tempc=vout; // Storing value in Degree Celsius
tempf=(vout*1.8)+32; // Converting temp to Ferhanite
Serial.println("in Degree C = ");
Serial.print(tempc);
Serial.println("in Degree F = ");
Serial.print(tempf);
Serial.println(" ");
delay(500); //Delay of 1 second for ease of viewing
}
In the above function, an analog input is coming to the pin A5 of the Arduino. This analog input is converted to digital form by using a formula. In this formula, the analog input is multiplied by the total volts provided of the microcontroller board and divided by the maximum analog value which is 1023.
When this analog data is converted into digital form, it is directly interpreted as the temperature in degree Celcius. To display the Ferhanite temperature on the serial monitor also, we have used a formula to convert this temperature to Ferhanite and than displayed it on screen.
Now as we have made a digital thermometer using Arduino. Put this LM35 sensor on your arm and cover it with a cloth and enjoy measuring your body temperature.


That’s really interesting guide