How To Make A Buzz Wire Game Using Arduino?
Buzz Wire game is a tabletop amusement that is the most popular in the world of steady hand games. The play includes several touches in a limited time and demands, steady hands and concentration of the player. It is a competitive game, in which, t obtain a good score, the player has to maintain a good balance between the time and speed of his hands.
In this project, we are going to make the hardware of this game and use an Arduino microcontroller. When the hook of the handle will touch the loop, a signal will be sent to the microcontroller and it will sound a buzzer.
How to make a Buzz Wire game Using Arduino?
If you don’t know how to play this game, the goal of this game is to take the hook of the handle from one end of the wire loop to the other end of the loop without touching it to the loop. If the hook touches the loop of the wire, a buzzer will sound and the player will have to start again from the beginning of the loop. A person who does this in the shortest time is considered to be the winner.
Step 1: Collecting The Components
If you want to avoid any inconvenience in the middle of a project, the best approach is to make a list of all the components that will be used and going through a brief study of their working. A list of all the components that we are going to use in our project is as follows:
- No products found.
- No products found.
- 36 Inch Copper Tube
- Bare Copper Wire
- Breadboard
- No products found.
- Wooden Board
- 5V Power Adapter For Arduino
Step 2: Studying The Components
Now, as we have a complete list of all the components, let us move one step forward and go through a brief study of the working of every component.
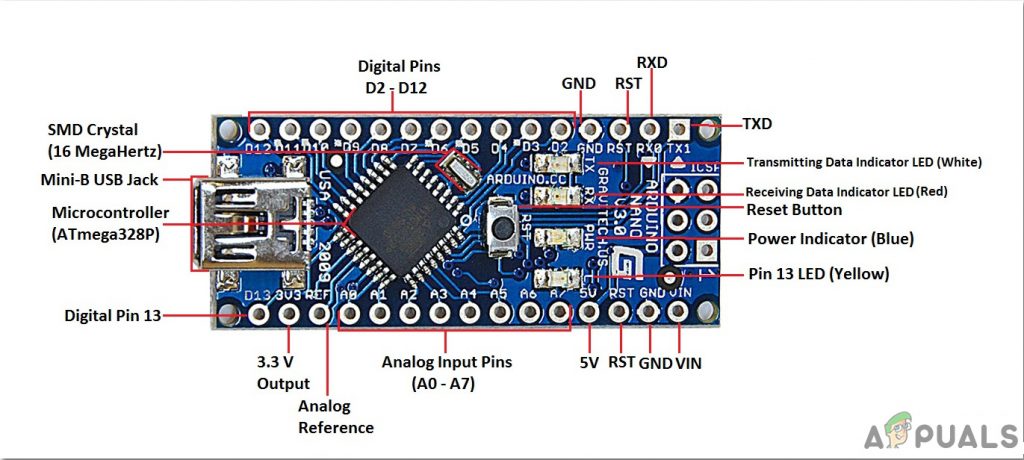
Arduino nano is a breadboard-friendly microcontroller board that is used to control or carry out different tasks in a circuit. We burn a C Code on Arduino Nano to tell the microcontroller board how and what operations to perform. Arduino Nano has exactly the same functionality as Arduino Uno but in quite a small size. The microcontroller on the Arduino Nano board is ATmega328p. if you don’t have an Arduino Nano, you can also use Arduino Uno or Arduino Maga.
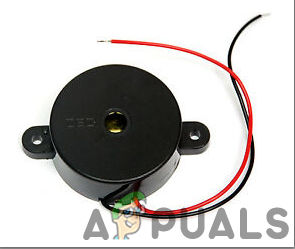
A Piezo Buzzer is an audio signaling device or a loudspeaker in which a piezoelectric effect is used to produce sound. A voltage is applied to the piezoelectric material to produce an initial mechanical motion. Then the resonators or the diaphragms are used to convert this motion into an audible sound signal. These speakers or buzzers are comparatively easy to use and have a wide range of applications. For example, they are used in digital quartz watches. For ultrasonic applications, the operate well in the range of 1-5 kHz and up to 100 kHz.
Step 3: Making The Circuit
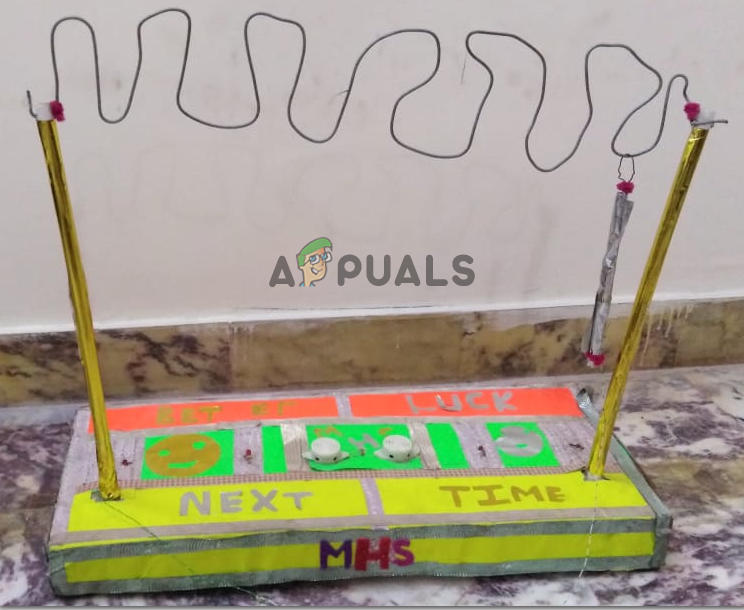
- Decide the size of the board that you want to cut for your buzz wire game. Take proper measurements carefully and cur the wooden plank. Cut two long sticks of the same size, from the leftover pieces of the wooden plank. Now attach these two sticks vertically to the two opposite corners of the board.
- Take the copper tube and bend it into an irregular design. The width of the whole design must be equal to the distance between the verticle wooden poles that you have attached to your board before. Attach both ends of the copper tube to the top of both wooden poles.
- Take a wooden handle and fix the thin copper wire in it so that it forms a hook from the front.
- Now attach a breadboard on one side of the wooden board and fix the Arduino nano in the breadboard. Connect the piezo buzzer and an LED in the parallel configuration on the breadboard. Connect their ground to the ground of Arduino Nano and their positive pins to the hook of the handle.
- Connect the Copper tube to the pin9 of Arduino nano.
- Power up the Arduino through the 5V adapter.
Step 4: Understanding the Working
When the whole hardware of the buzz wire game is made, all the connections of wires are made with the Arduino board. A High signal is sent to pin9 of the Arduino board. As this pin is connected to the wire loop of the board and the hook of the handle is connected to the positive pin of the buzzer, when these two will touch each other, a circuit will be completed and a voltage signal will through the loop wire to the hook of the handle and the positive pin of the buzzer. This will sound the buzzer even if the connection is for a small part of a second.
Step 5: Getting Started With Arduino
If you are not already familiar with the Arduino IDE, don’t worry because a step by step procedure to set-up and use Arduino IDE with a microcontroller board is explained below.
- Download the latest version of Arduino IDE from Arduino.
- Connect your Arduino Nano board to your laptop and open the control panel. in the control panel, click on Hardware and Sound. Now click on Devices and Printers. Here, find the port to which your microcontroller board is connected. In my case it is COM14 but it is different on different computers.

Finding Port - Click on the Tool menu. and set the board to Arduino Nano from the drop-down menu.

Setting Board - In the same Tool menu, set the port to the port number that you observed before in the Devices and Printers.

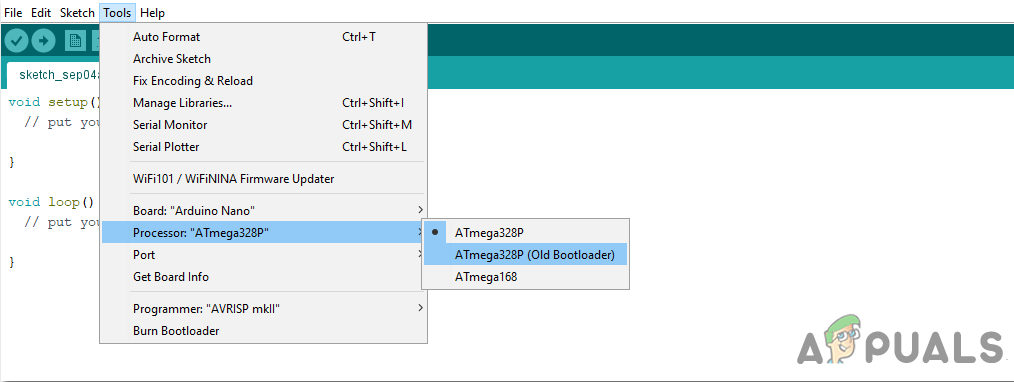
Setting Port - In the same Tool menu, Set the Processor to ATmega328P (Old Bootloader).
Processor - Download the code attached below and paste it into your Arduino IDE. Click on the upload button to burn the code on your microcontroller board.
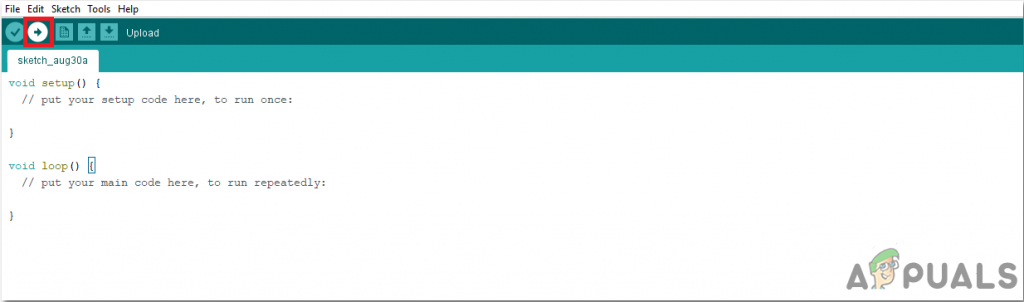
Upload
To download the code, click here.
Step 6: Understanding the Code
The code is very simple and well commented. Still, it is briefly explained below.
1. At the start, a pin is declared to be used on the Arduino board.
int buzzPin = 9; // Initialize the pin that will be connected to the buzzer and LED.
2. void setup() is a function that is used to set the pins as INPUT or OUTPUT. It also sets the baud rate of the Arduino. Baud rate is the communication speed of the microcontroller board and in other words, we can say that it is the bits per second.
void setup() {
 Serial.begin(9600); // Setting up the baud rate to 9600
 pinMode(buzzPin,OUTPUT); // Setng this pin to send otput to the external devices
}
3. void loop() is a function that runs again and again in a cycle. Here we are just sending a HIGH signal to the pin9 of the Arduino board.
void loop() {
 digitalWrite(buzzPin,HIGH); // Sending a HIGH login on the buzzPin
}
Now as you know how to make an awsome buzz wire game at home, enjoy making your own and playing it with friends or family. Let’s see who can manage the hand speed with time.


