How to Get the Microphone Boost Option in Windows?
When the microphone boost option is missing in Windows, it often causes a drop in audio input volume, making communication difficult or your voice barely audible during recordings or calls. This issue typically stems from limitations in the audio hardware or driver, meaning some sound cards do not support the microphone boost feature.
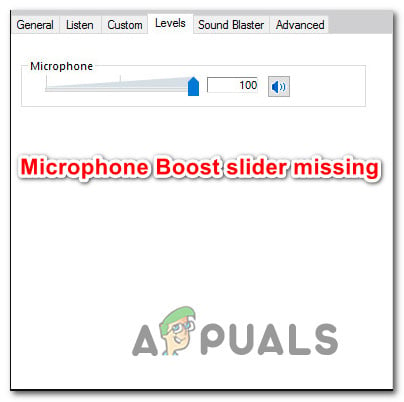
The most common cause is outdated or incompatible audio drivers. Missing enhancements in the audio settings or hardware limitations with USB or 3.5mm jacks can also be an issue. Additionally, settings like “Allow applications to take exclusive control” may interfere with the boost option.
1. Run the Recording Audio Troubleshooter
Before trying anything else, run the Recording Audio troubleshooter to detect and fix issues like driver conflicts or incorrect settings. It can automatically identify why the microphone boost option is missing and apply fixes, saving time and effort.
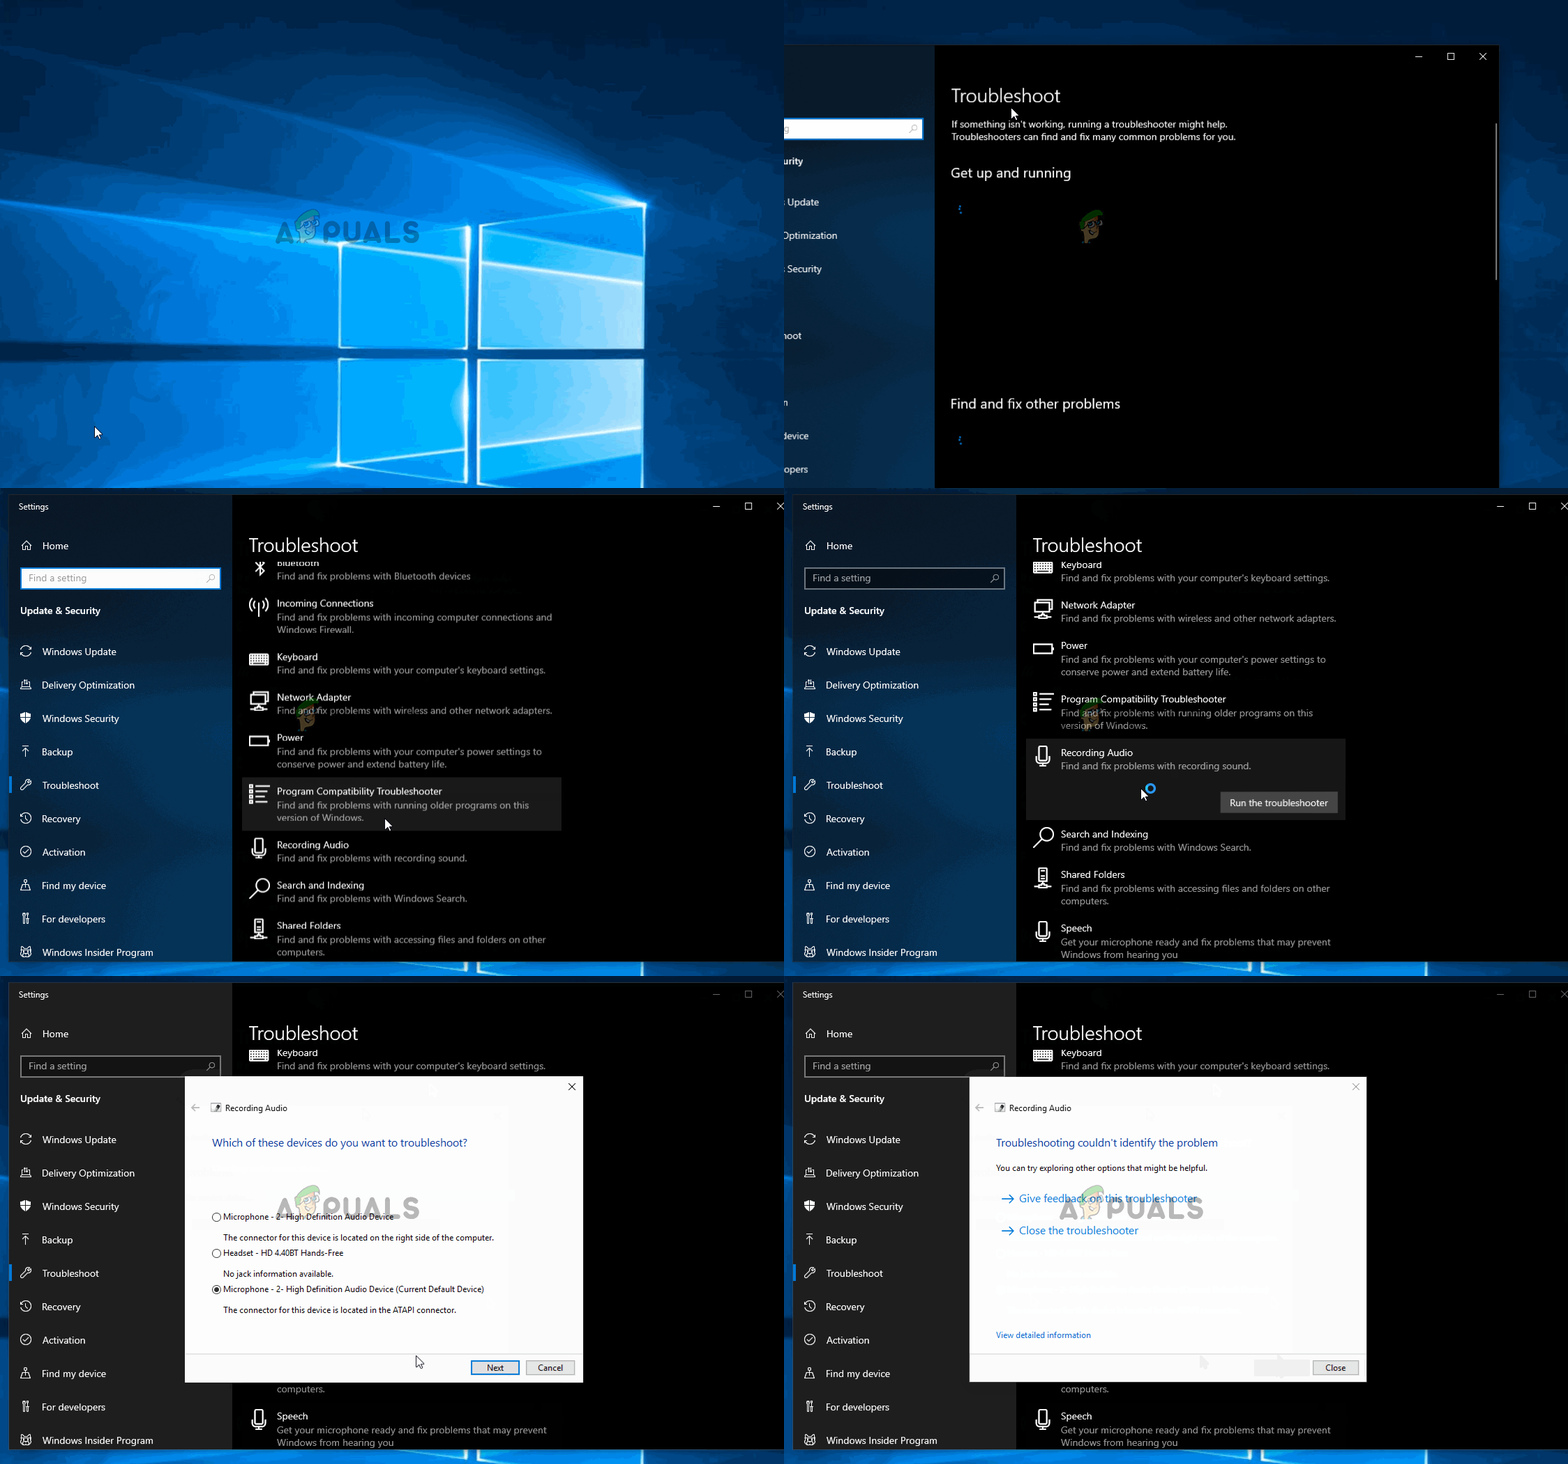
- Press Windows key + R to open a Run dialog box. Then, type “ms-settings:troubleshoot” and press Enter to open the troubleshooting tab of the Settings app.
- In the Troubleshoot tab, scroll down to Find and fix other problems and click on Recording Audio. Then, click on Run the troubleshooter.
- Wait for the initial analysis, then select the Microphone you’re having issues with and click Next.
- Wait for the investigation to complete, then click on Apply this fix if a repair strategy is found.
- Once the procedure is complete, restart your computer to see if the issue is resolved.
2. Change the Port Used to Connect the Microphone
This issue can be caused by the type of port you’re using for the microphone. Some ports, especially USB connections or improperly configured 3.5mm jacks, may not fully support audio features like microphone boost. Changing to a port directly connected to the sound card (like a dedicated mic jack) may activate the boost option and resolve audio enhancement issues that weren’t available with the original connection.
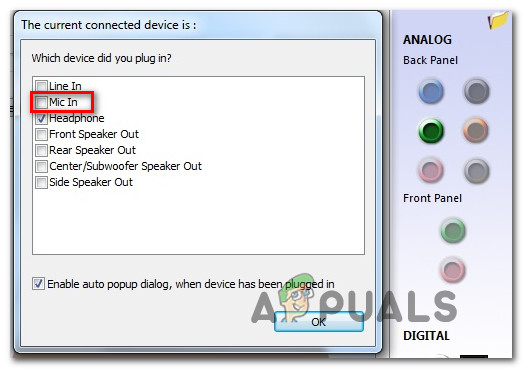
If you’re using a Realtek driver, you’ll get a prompt to identify the device that was plugged in. In this case, check the box for Mic In and hit Ok to save the changes.
3. Update All Windows & Sound Drivers
Some users have fixed this issue by updating all Windows and sound drivers. Outdated drivers can cause compatibility issues, preventing features like microphone boost from appearing. Updating ensures your system uses the latest software versions, which can restore missing options by resolving conflicts between your hardware and the operating system.
- Press Windows key + R to open a Run dialog box. Then, type “ms-settings:windowsupdate” and press Enter to open the Windows Update tab of the Update & security settings menu.
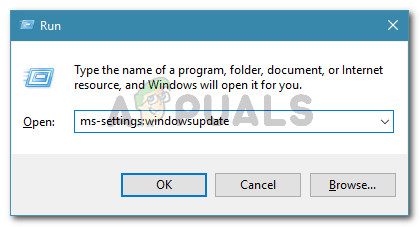
Run dialog: ms-settings:windowsupdate - Inside the Windows Update screen, click on Check for updates and follow the on-screen prompts to install every pending update. If prompted to restart, do so, and return to this menu once the startup is complete to ensure every update is installed.

Checking for Updates – Windows Update - If the Microphone Levels option is still not present, continue with the steps below to update the microphone driver.
- Press Windows key + R to open a Run dialog box. Inside the run box, type “devmgmt.msc” and press Enter to open Device Manager.
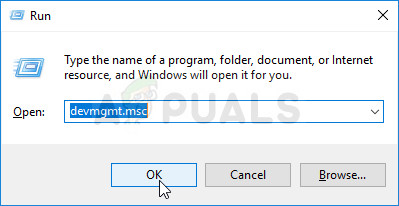
Running Device Manager - Inside Device Manager, expand the drop-down menu for Audio inputs and outputs. Right-click on your microphone device and choose Properties.

Accessing the Properties options of your Microphone - Inside the Properties screen of your Microphone, go to the Driver tab and click on Update driver.

Updating the Microphone driver - At the next screen, click on Search automatically for updated driver software.
Note: For this step to work properly, you need a stable internet connection.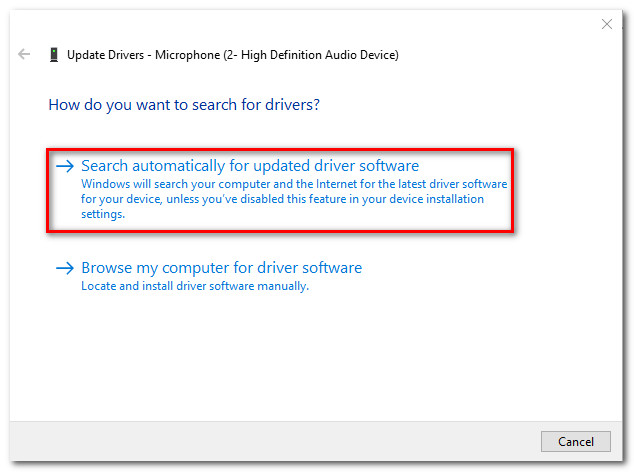
Search automatically for updated software for Microphone Note: If you’re using a dedicated sound card, download and install the latest driver version from your manufacturer’s website.
- If a new driver version is found, follow the on-screen prompts to install it. Once the process is complete, restart your computer and see if the error is resolved.
4. Buy a PCI Sound Card
Upgrading to a PCI sound card provides better audio control and can resolve missing microphone boost issues. Unlike built-in sound chips, these cards support advanced audio features and come with drivers that unlock options like microphone boost, improving input quality and volume.
How to Increase Microphone Volume in Windows
If your microphone is producing low or unclear audio, adjusting the volume in Windows can often fix the issue. By increasing the microphone level in the sound settings, you can improve input levels without needing the specific “boost” feature.
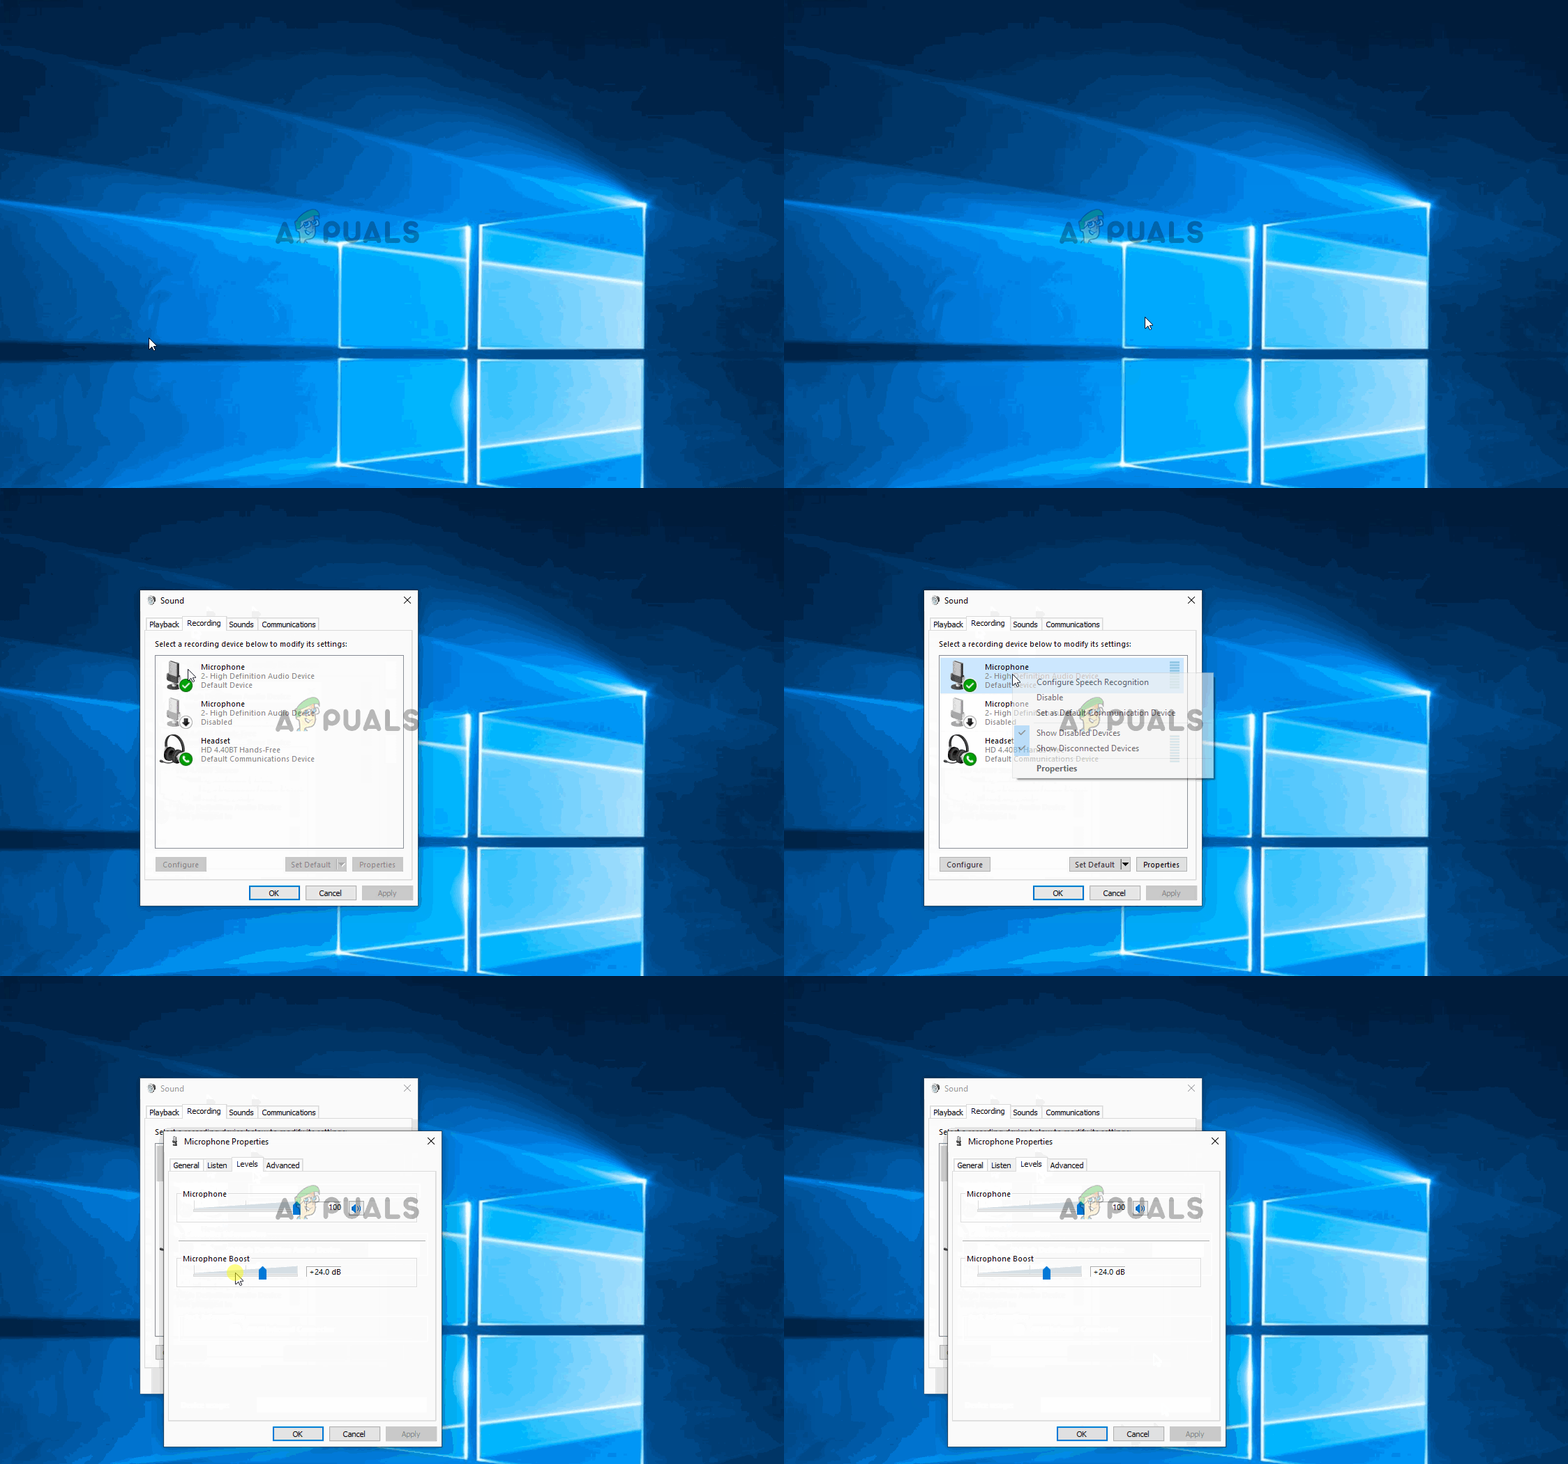
- Press Windows key + R to open a Run dialog box. Type “mmsys.cpl” and press Enter to open the Sound window.
- In the Sound window, click on the Recording tab, select the microphone you want to increase the volume of, and click Properties.
- In the Microphone Properties screen, go to the Levels tab and adjust the Microphone Boost slider as needed.
