How to Fix Your Laptop’s Touchpad Not Working
You cannot use your Windows laptop without a touchpad unless you connect an external pointing device. If your laptop’s touchpad stops responding, use the methods outlined in this guide to troubleshoot. If the issue persists, we recommend taking your laptop to a technician for further assistance.

The touchpad might stop working due to damaged drivers, incorrect settings, being disabled within Windows, or affected by the physical switch. This guide offers various solutions to restore touchpad function. Before proceeding, it is advisable to connect an external mouse or use the laptop’s TrackPoint, if available.
Method 1: Check Mouse Settings
- To adjust your mouse settings, open the Start menu, type ‘Control Panel’, hit Enter, and navigate to Hardware and Sound > Mouse (under Devices and Printers). Alternatively, right-click on the mouse icon in the notifications tray and select Settings/Properties.
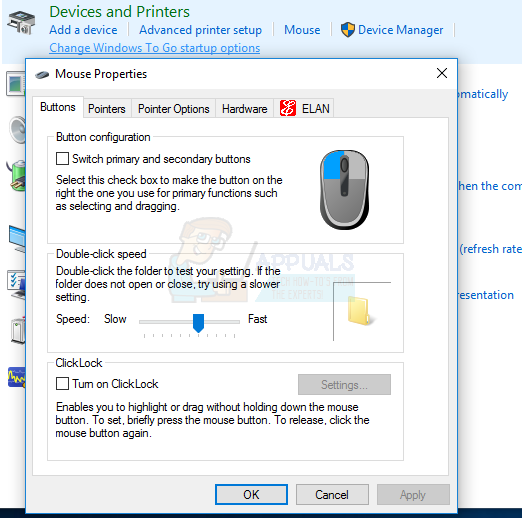
- In the Mouse Properties window, find your touchpad settings typically located in the far-right tab next to the Hardware tab. This tab is often named after the touchpad manufacturer, such as Synaptic or ELAN.
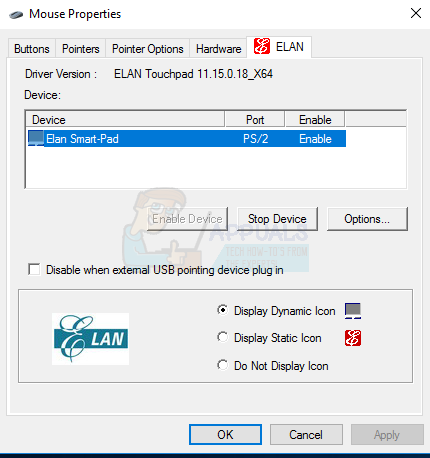
- Ensure the ‘Enable Touchpad‘ checkbox is checked or the ‘Enable Device‘ button is activated.
- Adjust any desired settings, then click Apply and OK.
- Swipe your fingers on the touchpad to ensure it’s working.
On some devices, the touchpad may stop working if an external mouse is connected. You can disable this setting in the same tab.
Method 2: Use the Windows Hardware and Devices Troubleshooter
The Windows Troubleshooter tool can identify and resolve undetected touchpad issues.
- Press the Start button, type ‘Control Panel’, and hit enter to open it.
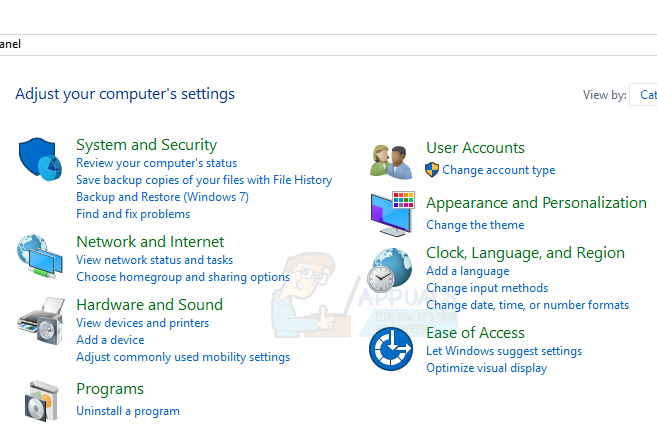
- Please proceed as follows: System and Security > Security and Maintenance > Troubleshooting > Configure a device (under Hardware and Sound).
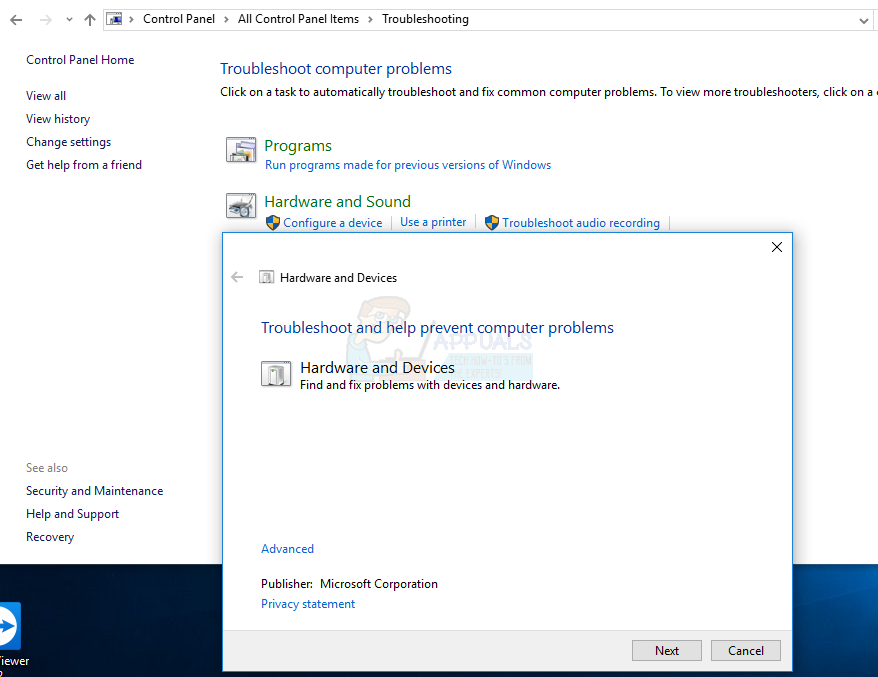
- A troubleshooting wizard will appear, guiding you to scan for issues and provide solutions for your PC’s hardware problems.
Method 3: Reinstall Touchpad Drivers
A malfunctioning or missing mouse driver may prevent your touchpad from working. Reinstalling the original drivers could resolve this issue. Driver failures often occur after a problematic update or when the operating system’s newer version doesn’t support the outdated drivers.
- Visit your laptop vendor’s official website, which can be found in your product manual or through a simple Google search (e.g. HP website).
- Click the vendor’s Support page.
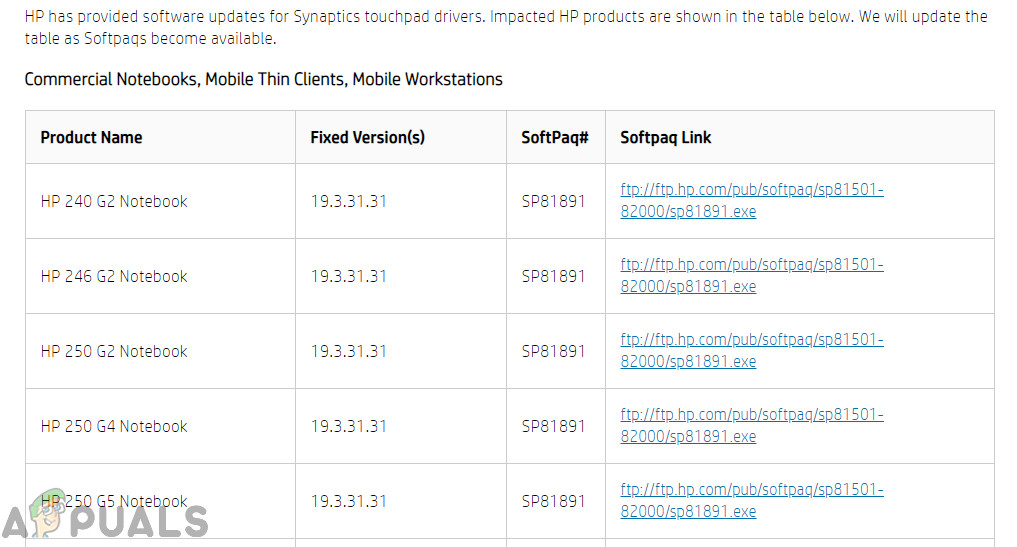
HP Touchpad Drivers - Enter your model, service tag, or serial number in the requested field. Alternatively, you can use the website’s model chooser utility, if available.
- Select ‘Drivers‘ and locate the touchpad/mouse driver for your laptop, typically found under ‘Mouse‘ or ‘Touchpad‘.
- Download and install the latest driver.
- Restart your PC and swipe your finger on the touchpad to confirm it’s working.
Method 4: Update Touchpad Drivers
The device manager provides information on hardware issues and assists with driver updates. For instance, an exclamation sign or X icon next to a device indicates software or hardware problems. Use the following steps to locate and update touchpad drivers.
- Press the Windows Key + R on your keyboard, type “devmgmt.msc“, then press Enter.

- Click the arrow beside ‘Mice and other pointing devices‘.
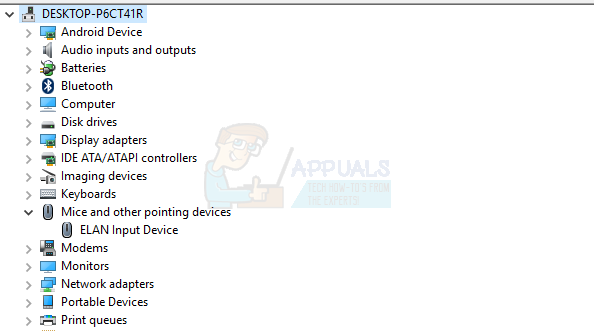
- Locate your touchpad, right-click the icon, and select ‘Properties‘.
- Click the Driver tab and ensure the Disable button is active to verify that the touchpad is enabled.
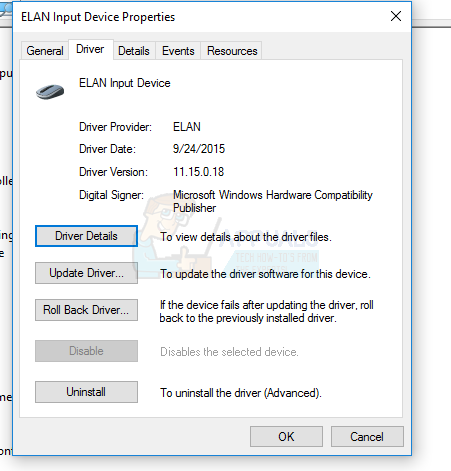
- Click ‘Update Driver‘ in the same tab and select ‘Search automatically for updated driver software.’ An internet connection is required for this process.
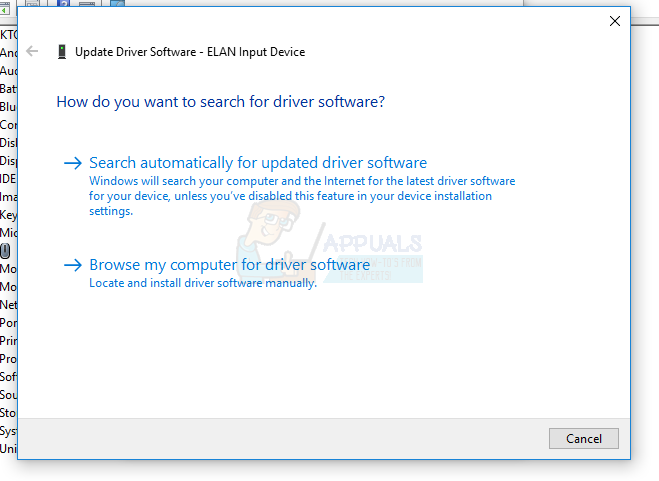
- Follow the prompts to update your touchpad drivers.
Method 5: Checking the Physical Touchpad Switch
Computer users often unintentionally disable the touchpad using the physical switch, especially when it’s located at the corners.
- Press the ‘Fn‘ key, usually next to the ‘ctrl‘ key at the bottom of the keyboard, which may be a different color.
- While holding the Fn key, find the Function Key (F1 – F12) displaying either a touchpad icon with a finger on it or a touchpad with a diagonal line across it.
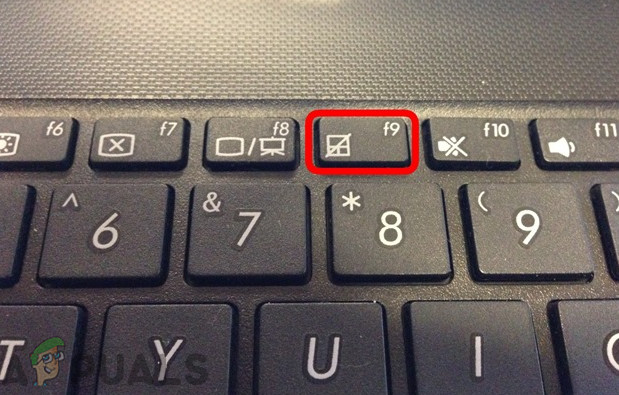
Enabling Touchpad using the Function key - Simultaneously press the Fn key and the touchpad function key to reactivate your laptop’s touchpad.
- Swipe your fingers on the touchpad to confirm it’s working.
With multimedia mode on, you don’t need to press the Function Key to activate the touchpad on keyboards; simply press the touchpad key.
Other laptops, such as HP, have the touchpad switch on the touchpad itself, requiring a different method to activate it.
- Look for a small hollow on your touchpad, usually located at the upper left with an adjacent orange LED.
- Double-tap the small hollow and see if the LED turns off, if applicable.
- Slide your fingers on the touchpad to ensure it’s working.
Method 6: Check BIOS Settings
As a last resort, we will check if the touchpad option is disabled in the BIOS. Each laptop has touchpad settings in its BIOS that a user can enable or disable according to their preference. If the touchpad is defaulted to be disabled in the BIOS, altering other settings will be ineffective.
Note: Do not alter unknown BIOS options.
- Shut down your PC and reboot into the BIOS. This is device-specific and typically shows on the POST screen. The Esc, Delete, F2, F8, F10, F12 keys are most commonly used to enter the BIOS.
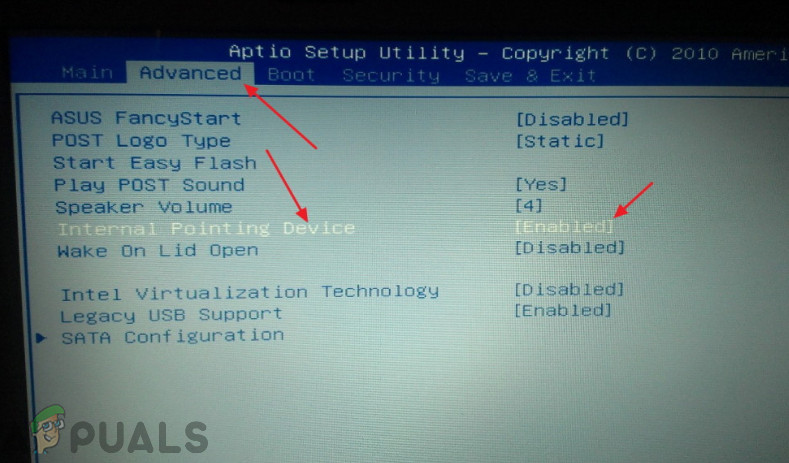
Enabling Touchpad in BIOS - Check and enable the touchpad in the hardware device settings if it’s disabled.
- Exit the BIOS, reboot your PC, and then test your touchpad to confirm it’s working.