How to Fix Windows Update Error Code 8024A000
Some Windows users are unable to search and download new updates for their OS. Most affected users are reporting that the updates start downloading, but the process just never completes and the Error code 8024A000 is displayed. According to the error code, this error occurs when Windows Update is trying to prevent an update session from being aborted while it’s performing an important task. The issue is not exclusive to a certain Windows version since it’s reported to occur on Windows 10, Windows 8.1 and Windows 7.

What is causing the Windows Update Error Code 8024A000?
We investigated this particular issue by looking at various user reports and analyzing several of the most popular fixes for this error code. As it turns out, there are several different potential culprits that might end up triggering this issue:
- Windows Update glitch – This issue can occur due to a recurring WU problem. Under certain circumstances, the updating component will become stuck and unable to install any new pending update. In this case, the Windows Update troubleshooter should be able to resolve the issue automatically after applying the applicable repair strategies.
- Windows update service is stuck in a limbo state – As it turns out, this issue can also occur if one or more Windows services are neither started or stopped. If this scenario is applicable, you should be able to resolve the issue by using an elevated CMD prompt to stop and restart every involved service forcibly.
- WU associated DLLs are not registered properly – Windows Update relies on dozens of Dynamic Link Library files when searching for & installing pending updates. In this case, you should be able to resolve the issue by re-registering the pertaining DLLs from an elevated Command Prompt window.
- System File Corruption – System File corruption can also be responsible for this particular error message. Once a single corrupted file can effectively break the whole WU component. If this scenario is applicable, you should be able to resolve the issue by using a System File Checker or DISM to repair the corrupted files.
- RST driver is missing from the Windows installation – This particular issue can also occur if your computer is missing the Rapid Storage Technology Driver or it’s using a severely outdated version. Several affected users have reportedly managed to resolve the issue by installing the latest version of the RST driver.
- 3rd party AV is closing ports used by Windows Update – Turns out that some 3rd party AV tools are so overprotective that they have a tendency of closing legitimate ports used by Windows Update. McAfee Total Protection, AVAST, and Comodo are top of this list, but there could be others. In this case, you should be able to resolve the issue by uninstalling the 3rd party suite and using the built-in solution (Windows Defender).
If you’re currently struggling to resolve this error message, this article should point you in the right direction. Down below, you’ll discover a couple of potential fixes that other users in a similar situation have successfully used to resolve this problem.
To remain as efficient as possible, we advise you to follow the methods below in the order that they are presented in and discard those steps that aren’t applicable to your scenario. Eventually, you should discover a fix that will resolve the issue in your particular case, regardless of the culprit that’s causing it.
Method 1: Running the Windows Update troubleshooter
If you’re encountering this issue, you should start by running the Windows Update troubleshooter. Several affected have managed to resolve the issue by forcing the Windows Update troubleshooter to automatically fix the Error code 8024A000.
Several affected users have reported that the issue was resolved after they ran the Windows Update troubleshooter and restarted their computer. It’s possible that your Windows version includes a repair strategy for this particular error. If so, the troubleshooter will automatically apply the repair strategy and you’ll be able to fix the issue in just several clicks.
Here’s a quick guide on running the Windows Update troubleshooter:
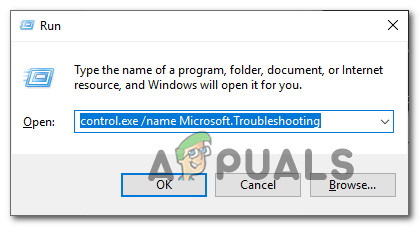
- Press Windows key + R to open a Run dialog box. Then, type “control.exe /name Microsoft.Troubleshooting” inside the text box and press Enter to open up the Troubleshooting tab of the Settings app.
Opening the Troubleshooting tab on every Windows version - Once you’re inside the Troubleshoot tab, scroll down to the Get up and Running tab and click on Windows Update. Then, from the newly appeared menu, click on Run the troubleshooter.
- Wait until the initial scan is complete, then click on Apply this fix if a viable repair strategy is found.
- If a fix is implemented, restart your computer and see if the issue is resolved once the next startup sequence is complete.
If the same Error Code 8024A000 is still occurring when you try to install a Windows Update, move down to the next method below.
Method 2: Restarting the Windows Update services
As it turns out, this particular issue can also occur due to a Windows Update service that becomes stuck in a limbo state (it’s neither started or stopped). Several affected users have reported that they were able to resolve the issue by restarting every service used by the WU (Windows Update) component.
This procedure has been confirmed to be effective on every recent Windows version (Windows 7.1, Windows 8.1 and Windows 10)
Here’s a quick guide on how to do this:
- Press Windows key + R to open up a Run dialog box. At the next screen, type “cmd” inside the text box and press Ctrl + Shift + Enter to open up an elevated command prompt. When prompted by the UAC (User Account Control), click Yes to grant administrative privileges.

Running CMD as an administrator - Once you’re inside the elevated CMD prompt, type the following commands in order and press Enter after each one to restart every Windows Update service:
net stop wuauserv
net stop bits
net stop cryptsvc
- Once very WU service has been stopped, type the following commands and press Enter after each one to restart the services:
    net start wuauserv
    net start bits
    net start cryptsvc
    exit
- Once the procedure is complete, restart your computer and see if the issue is resolved once the next startup sequence is complete.
If the same Error Code 8024A000 is still occurring when you try to install a pending Windows update, move down to the next method below.
Method 3: Re-registering DLLs associated with Windows Update
As it turns out, it’s also possible that the reason for the constant 8024A000 Error Codes is a DLL (Dynamic Link Library) file that is no longer registered correctly. This is typically reported to occur on older Windows version and usually occurs due to corruption or after a security scanner quarantines some items due to a virus infection.
If this scenario is applicable to your current situation, here’s a quick guide on how you can re-register the DLLs pertaining to WU (Windows Update) in order to fix the 8024A000 Error Codes:
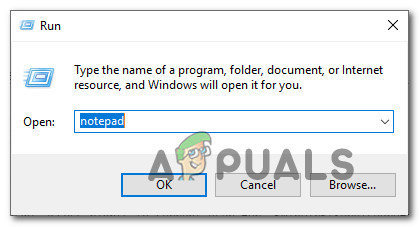
- Press Windows key + R to open up a Run dialog box. Then, type “notepad” in the text box and press Ctrl + Shift + Enter to open up a Notepad window with elevated access. When prompted by the UAC (User Account Control)
Opening Notepad via Run dialog box - Inside the new Notepad document, paste the following commands:
regsvr32 c:\windows\system32\vbscript.dll /s regsvr32 c:\windows\system32\mshtml.dll /s regsvr32 c:\windows\system32\msjava.dll /s regsvr32 c:\windows\system32\jscript.dll /s regsvr32 c:\windows\system32\msxml.dll /s regsvr32 c:\windows\system32\actxprxy.dll /s regsvr32 c:\windows\system32\shdocvw.dll /s regsvr32 wuapi.dll /s regsvr32 wuaueng1.dll /s regsvr32 wuaueng.dll /s regsvr32 wucltui.dll /s regsvr32 wups2.dll /s regsvr32 wups.dll /s regsvr32 wuweb.dll /s regsvr32 Softpub.dll /s regsvr32 Mssip32.dll /s regsvr32 Initpki.dll /s regsvr32 softpub.dll /s regsvr32 wintrust.dll /s regsvr32 initpki.dll /s regsvr32 dssenh.dll /s regsvr32 rsaenh.dll /s regsvr32 gpkcsp.dll /s regsvr32 sccbase.dll /s regsvr32 slbcsp.dll /s regsvr32 cryptdlg.dll /s regsvr32 Urlmon.dll /s regsvr32 Shdocvw.dll /s regsvr32 Msjava.dll /s regsvr32 Actxprxy.dll /s regsvr32 Oleaut32.dll /s regsvr32 Mshtml.dll /s regsvr32 msxml.dll /s regsvr32 msxml2.dll /s regsvr32 msxml3.dll /s regsvr32 Browseui.dll /s regsvr32 shell32.dll /s regsvr32 wuapi.dll /s regsvr32 wuaueng.dll /s regsvr32 wuaueng1.dll /s regsvr32 wucltui.dll /s regsvr32 wups.dll /s regsvr32 wuweb.dll /s regsvr32 jscript.dll /s regsvr32 atl.dll /s regsvr32 Mssip32.dll /s - Once you pasted the commands, go to File (from the ribbon menu at the top) and click on Save As.
- From the Save As window, name the file whatever you want but make sure to set the extension of the File Name to .bat. We saved it WindowsUpdateRegister.bat. Then, select a convenable location and click on Save.
- Double-click on the newly created BAT file and click Yes at the confirmation prompt. If you’re also prompted by the UAC (User Account Control) click Yes to grant admin access.
- Once the DLL files have been re-registered, restart your computer and see if the issue has been resolved once the next startup sequence is complete.
If the 8024A000 issue is still occurring, move down to the next method below.
Method 4: Performing SFC and DISM Scans
This particular issue can also occur due to some degree of system file corruption. Although the issue is less common on Windows 10, it’s still possible to get this error code due to some corrupted system file even if you’re system is up to date.
Both DISM (Deployment Image Servicing and Management) and SFC (System File Checker) are built-in utilities capable of repairing system files. The only difference is they do it in different ways.
While SFC scans and repairs system files by replacing corrupted files with locally stored copies, DISM relies on Windows Update to fix corruption. That’s why it’s important to start this procedure with the SFC scan – if WU has a corruption problem, the System File Checker should resolve it, allowing you to use DISM effectively.
Here’s a quick guide on running an SFC and DISM scan from an elevated Command Prompt:
- Press Windows key + R to open up a Run dialog box. Then, type “cmd” inside the text box and press Ctrl + Shift + Enter to open up an elevated Command Prompt. When you’re prompted by the UAC (User Account Control), click on Yes to grant administrative privileges.
Running CMD as an administrator - Once you’re inside the elevated Command Prompt, type the following command and press Enter immediately to start the SFC scan:
sfc /scannow
Note: Keep in mind that once you start this process, there’s no way to stop it without running the risk of producing even more disk errors. Be patient and don’t close the CMD window or attempt to restart your computer.
- When the procedure is complete, you can safely close the elevated command prompt and restart your computer to see if the issue has been resolved at the next system startup.
- If the same issue is still occurring even after you’ve performed the SFC scan, follow step 1 again to open another elevated Command Prompt. Then, type the following command and press Enter to perform a DISM scan:
DISM /Online /Cleanup-Image /RestoreHealth
Note: DISM requires a stable Internet connection in order to be able to download fresh copies of the files that are affected by corruption.
- Once the scan is finished, perform one final restart and check if the issue has been resolved once the next startup sequence is complete.
Method 5: Instaling the Intel Rapid Storage Technology Driver (if applicable)
Another possible culprit that might end up causing the 8024A000 error code is a missing our updated Intel Rapid Storage Technology Driver. Several affected users have reported that the issue was no longer occurring after they installed the latest version of this driver and restarted their computer.
Based on our investigations, this scenario is mostly reported to occur in instances where the user is encountering the issue on Windows 7 or below. If this is applicable, follow the steps below to install the latest driver of Intel Rapid Storage:
- Visit this link (here) and click on Intel Rapid Storage Technology *RST) User Interface and Driver to initiate the download.
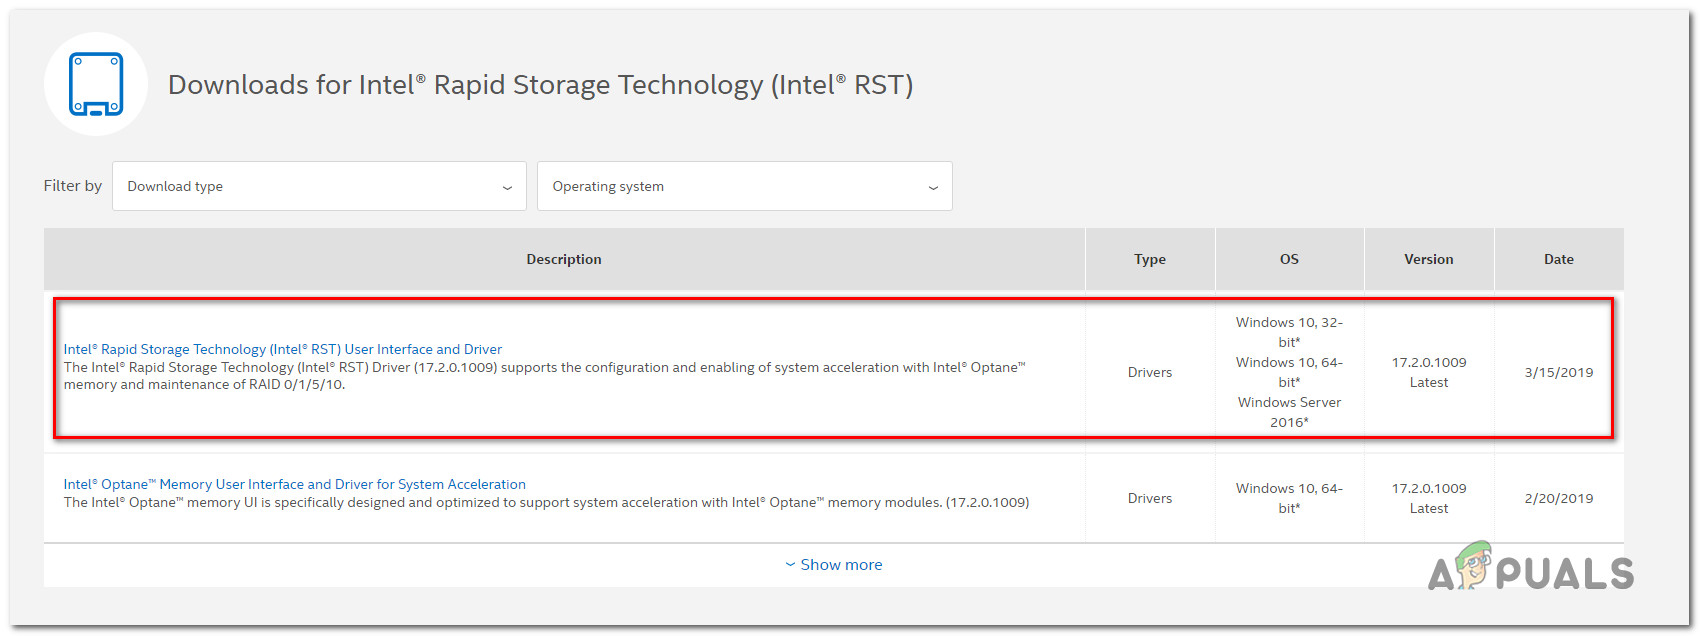
Downloading the latest version of the RST driver - Once the download is complete, open the installation executable and follow the on-screen prompts to complete the installation of the latest RST driver.
- Restart your computer once the driver is installed and see if the issue has been resolved once the next startup sequence is complete.
If you’re still encountering the 8024A000 Error Code, move down to the next method below.
Method 6: Uninstalling 3rd party AV
As it turns out, it’s also possible that the issue is actually being caused by an overprotective 3rd party AV suite. Several affected users have reported that the issue was resolved after they uninstalled the 3rd party security scanner and reverted back to the default AV (Windows Defender).
McAfee Total Protection, AVAST, and Comodo are commonly reported as being responsible for causing the 8024a000. Users are speculating that the issue occurs because the AV ends up blocking some ports that are actually being used by the WU component.
UPDATE: Based on several user reports, this issue can also be caused by the premium version of Malwarebytes. If you’re using a premium subscription for Malwarebytes, you should be able to resolve the issue by disabling Ransomware protection from the Settings menu.
If you’re suspecting that your third-party AV/firewall is causing the issue, follow the steps on this article (here) to completely uninstall your AV suite without leaving any remnant files.
If this scenario is not applicable or the issue is still occurring even after you’ve uninstalled your 3rd party AV suite, move down to the next method below.
Method 7: Performing a repair install
If none of the methods above have helped you to resolve the issue, a repair install should end up repairing the Windows Update problems. This procedure will reset all Windows components, including booting-related processes.
However, it does things a bit more efficiently than a classic clean install in the sense that it allows you to keep all personal data including photos, videos, applications, and games). The only thing that will get deleted and replace are all Windows components – which is exactly what you need.
In case you want to go for a repair install, you can follow the instructions on this article (here) for step by step instructions on how to do this efficiently.


