How to Fix Windows Script Host Errors on Startup
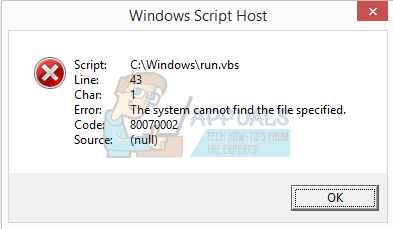
The Windows Script Host Error can seem like a virus or malware infection to the untrained eye, however, it is nothing more than an error with the VBScript file. It appears with all versions of the operating system, and it doesn’t depend on any specific software that may trigger it.
If this error happens, people could advise you to scan your system for malware, but certain users have even reported that their antivirus cleaned the virus but left the entry to trigger the .vbs file intact, and they still received the error.
Even so, there are a few things that you can try to solve this issue, and all have been reported to work by different users, meaning it might take a little trial and error to get things right, but the methods are guaranteed to help you.

Method 1: Run the System File Checker to scan the system
This is a solution for a number of problems, and it’s also been reported to work with this one as well.
- Open an Elevated Command Prompt. This is done by pressing the Windows key on your keyboard, typing cmd, and right-clicking the result, then choosing Run as administrator.
- From within the Elevated Command Prompt, type sfc /scannow , and press Enter on your keyboard. The command will scan the entire system integration, and will also fix any corruption found within. Afterward, you shouldn’t be having this problem.

Method 2: Use the Registry Editor to solve the issue
Option 1: Return the default value of .vbs to VBS file
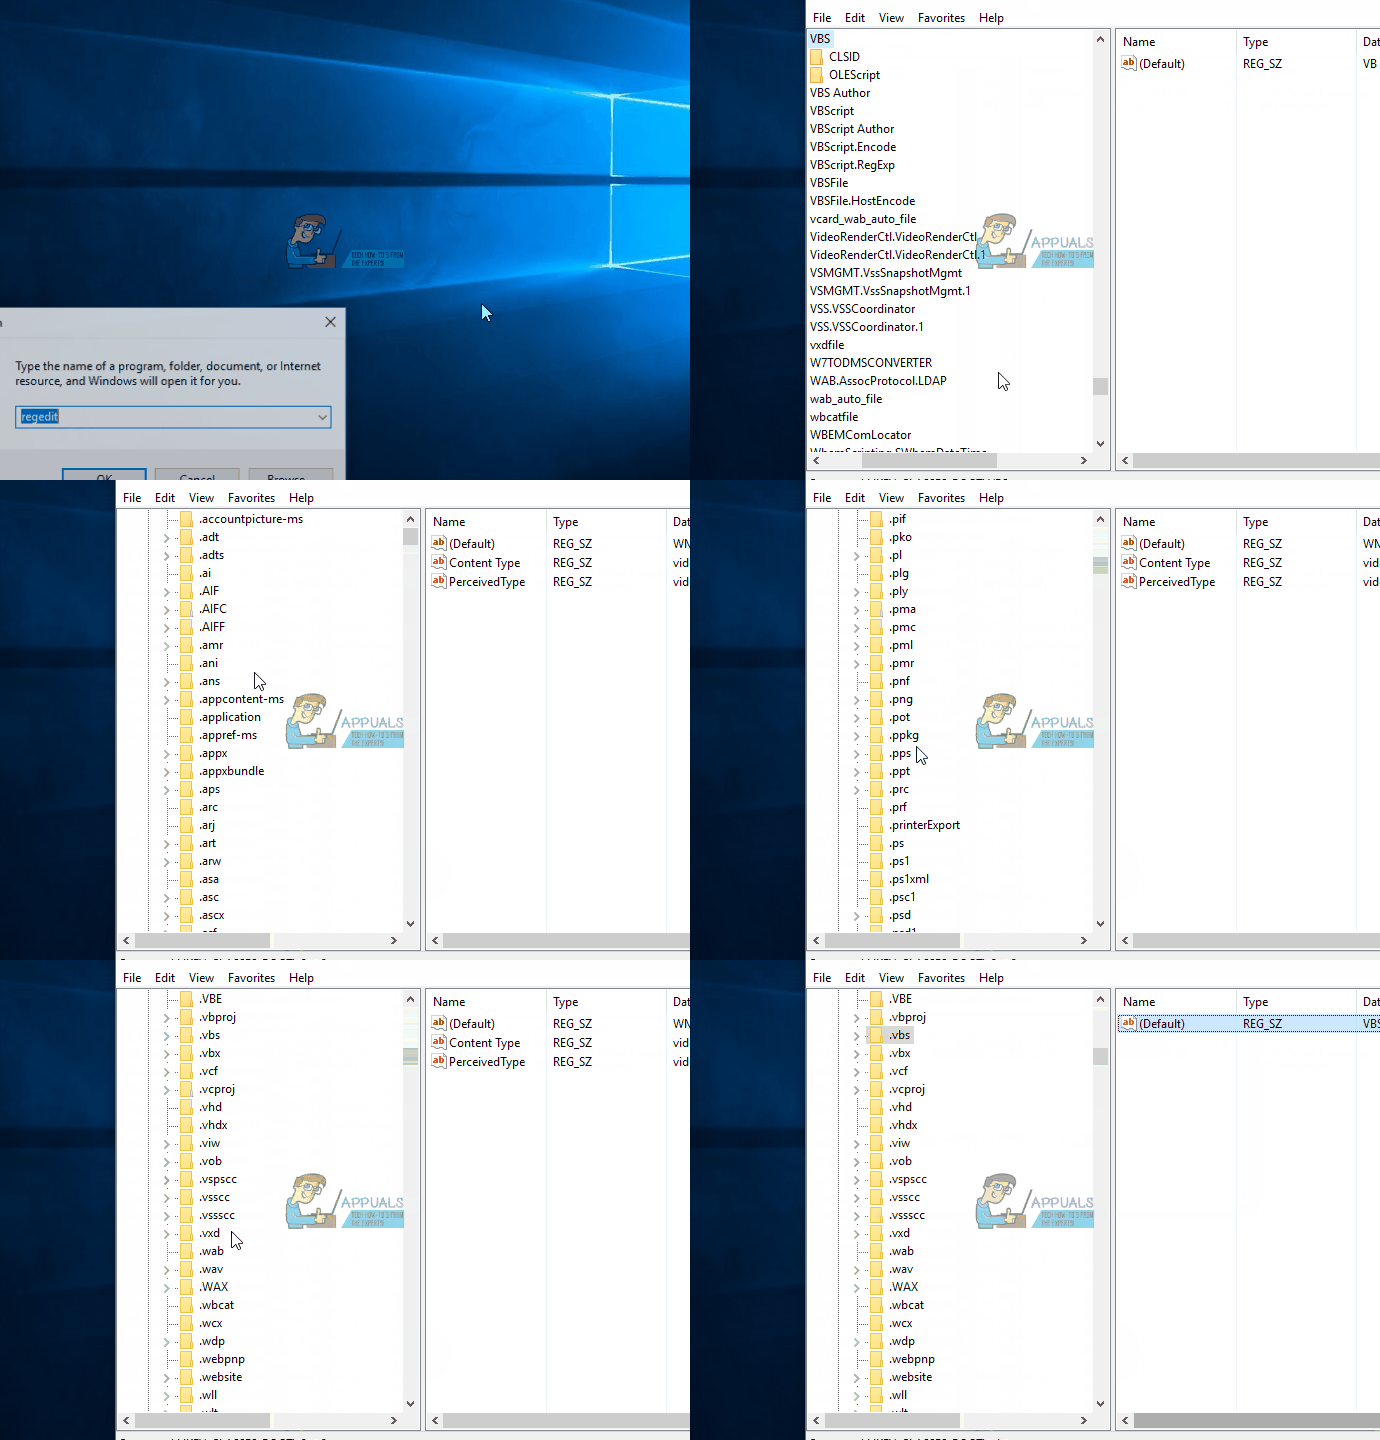
- Press simultaneously the Windows and R keys on your keyboard to open the Run dialogue. Type regedit and press Enter to open the Registry Editor.
- In the left navigation pane, expand the HKEY_CLASSES_ROOT folder, and click on the .vbs folder inside.
- In the right side, double-click the (Default) key, and set its value to VBSfile. Close the registry editor and your system should be working alright now.

Option 2: Delete the entries after userinit.exe
- Open the Registry Editor as described in Step 1 of the previous method.
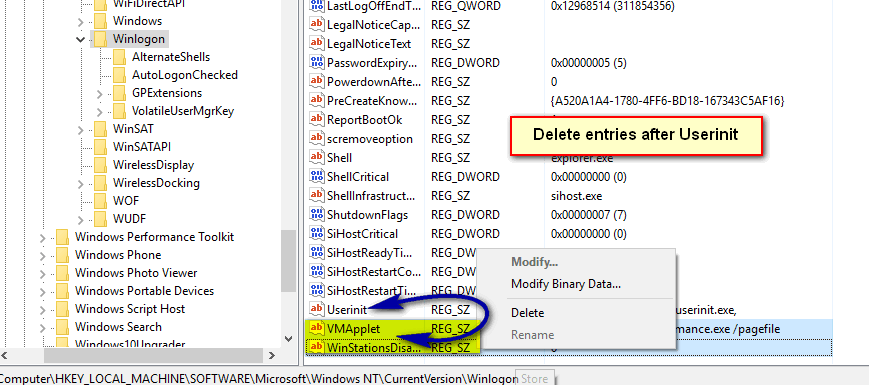
- From the left navigation pane, expand the following folders: HKEY_LOCAL_MACHINE, then SOFTWARE, then Microsoft, then Windows NT, followed by CurrentVersion and in the end, click on Winlogon.
- In the right side window, delete all entries after userinit.exe. This will probably include wscript.exe and NewVirusRemoval.vbs. Close the Registry Editor when you’re done, and everything should be working again.

Option 3: Delete the *.vbs entry which shows up on your startup
This method requires you to boot into Safe Mode, which is done by pressing F8 when you turn on your computer, right before Windows boots and choosing the Safe Mode option in the menu on a Windows Vista and 7 system.

For Windows 8 and 10 see steps at “boot Windows 8 or 10 in Safe Mode”
- Once you’ve booted into Safe Mode, open the Registry Editor again as described earlier.
- Press simultaneously the Ctrl and F keys on your keyboard to open the Find menu. In the box type nameofthe.vbs (File) that shows up at startup and press the Find Next button.
- This search will end up in a folder at the userint key. Double click it, and you will see a number of paths, separated by commas. Find among the paths “the VBS file”, and delete the path. Be careful not to change any of the other paths.
- Press F3 on your keyboard to see whether the path is also somewhere else in your registry. If it is, delete it using the instructions from the previous step. Repeat this process until you get a message that says that the search has finished. Close the Registry Editor.
- Press Windows and E at the same time on your keyboard to open the File Explorer. Run a search for the VBS file, which showed up at startup in the partition where your operating system is installed, and delete that file as well.
At the end of the day, this problem can be a tedious task to solve. However, if you simply follow the instructions in the aforementioned methods, you will get rid of it and you won’t have to deal with it again.