How to Fix Windows Reporting Wrong Hard Disk Free Space
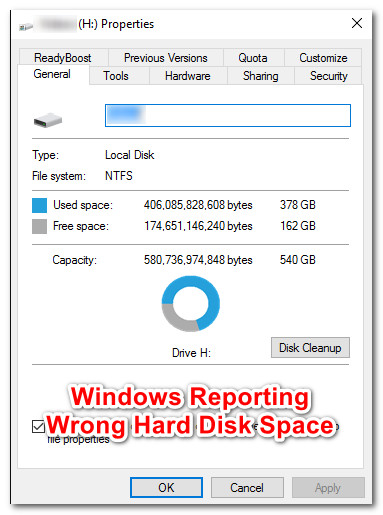
Several users have been approaching us with questions after noticing that Windows is reporting wrong free space. The majority of users have discovered this after comparing the amount reported in Windows Explorer with the amount reported when selecting all the files inside the drive. In most cases, the size reported by built-in utilities like Chkdsk or Disk Cleanup is also wrong. As it turns out, the issue is not exclusive to a particular Windows version since the error is confirmed to occur on Windows 7, Windows 8.1 and Windows 10.
What is causing Windows to report the Wrong HDD/SDD space?
We investigated this particular issue by looking at various user reports and the repair strategies that are commonly being used to fix this problem. Based on our investigations, there are several potential culprits that can be responsible for the inaccuracy.
Here’s a list with the potential culprit and a short explanation on why they’re causing this issue:
- System Restore Points are taking up a lot of space – In a lot of cases, this issue turned out to be caused by the System Restore tool. It’s likely that the tool is allowed to use a huge chunk of your free space, so it uses it to create a lot of different restore points, instead of deleting older points as new ones are created. If this scenario is applicable, you should be able to resolve the issue by freeing up the space blocked by System Restore, making it available for general use.
- System maintenance bug – It’s also possible that the issue is being caused by a System maintenance bug that is causing the available space to be incorrectly estimated. Several affected users have reported that they managed to resolve this particular issue by running the System Maintenance troubleshooter to automatically find & fix problems that might cause this behavior.
- ‘Rogue’ trashbin folder – As pointed out by several users, this particular issue can also be caused by a ‘rogue’ trash folder. This can affect both Windows 10, Windows 8.1 and Windows 7 and is linked to file corruption. In this case, you should be able to resolve the issue by opening an elevated Command Prompt and deleting the trashbin folder.
- Version 1803 bug (Windows 10 only) – Microsoft has unknowingly introduced an Explorer.exe bug with version 1803 that causes inconsistencies in regards with metadata file types. This leads to incorrect free space measurements. If this scenario is applicable, you should be able to resolve the issue by ensuring that your Windows is updated to the latest version.
- A large hidden file is not detected conventionally – It’s possible that one or more hidden files are taking up space but aren’t detected by Windows conventionally. In this case, you should be able to resolve the issue by using a 3rd party utility to detect the files and delete them for good.
If you’re currently struggling to resolve the same error message, this article will provide you with a selection of troubleshooting steps that should allow you to fix the Windows wrong reporting on your HDD/SDD space. Down below, you’ll find a collection of potential fixes that other users in a similar situation have successfully used to fix this problem.
Each of the potential fixing methods below is confirmed to work by at least one affected user. For the best results, we advise you to follow the troubleshooting guides in the order that they are presented and disregard the ones that are not applicable to your current scenario.
Let’s begin!
Method 1: Deleting Previous System Restore points
As it turns out, one common culprit that is known to take up a lot of space that doesn’t end showing up inside the Windows reporting tool is System Restore. It’s not uncommon to inspect the usage of System Restore only to find out that it’s taking a huge size from your HDD. Some affected users have reported that in their case, System Restore ended up taking over 250 GB of data
One way to resolve the issue quickly if this scenario is applicable is to simply delete all restore points for your OS drive. This procedure will end up freeing the space that was previously blocked by System Restore, making it available for general use.
Warning: System Restore is a useful feature to have enabled, so we don’t recommend disabling it completely. A better approach will be to delete all restore points up to this point and limit the Max Usage of the tool for the future.
Here’s a quick guide on deleting the previous system restore points and adjusting the Max usage of System Protection:
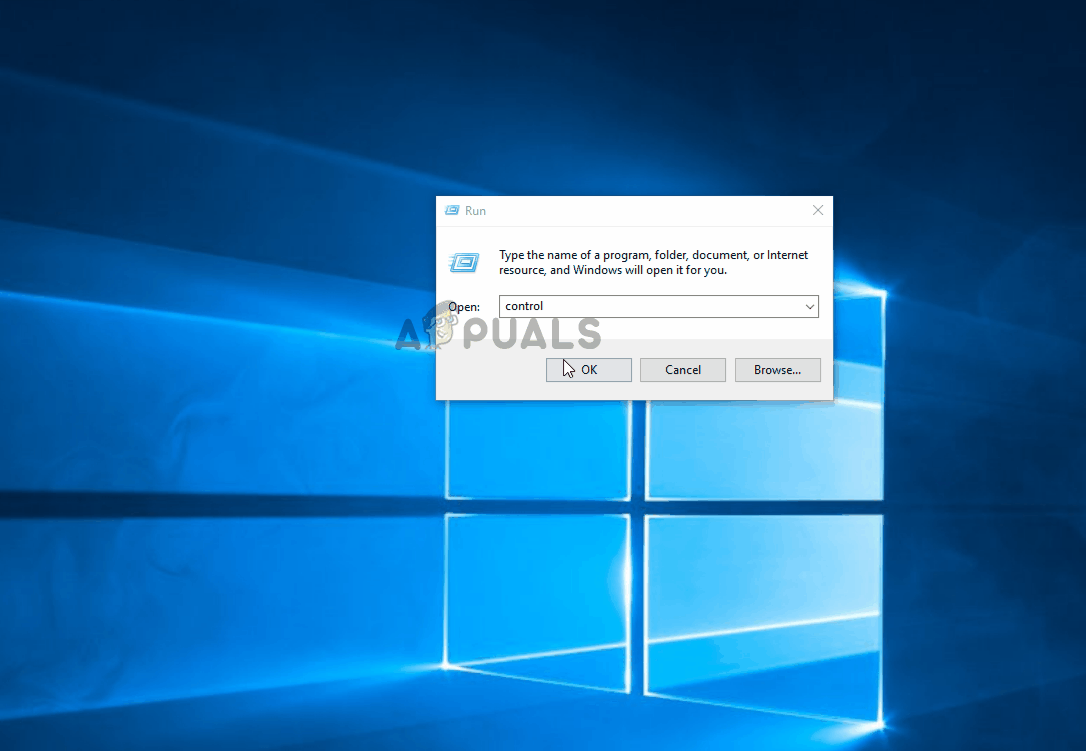
- Press Windows key + R to open up a Run dialog box. Then, inside the run text box, type “control” and press Enter to open up the classic Control Panel interface.
- Once you’re inside the classic Control Panel interface, use the search function in the top-right corner of the screen to search for ‘system’. Hit Enter to make the search and click on System from the list of results.
- When you’re inside the System menu, click on System Protection from the vertical menu on the left section of the screen.
- You should then be taken to the System Properties screen. Make sure that the System Protection tab is enabled.
- Inside the System Protection tab, scroll down to Protection Settings, select your Windows drive (dubbed System) and click the Configure button below.
- Once you arrive inside the System Protection screen for your Windows drive, scroll down to Disk Space Usage and ensure that the Max Usage is not set above 10%. If you have a 1 TB HDD, that’s more than enough.
Note: For HDD/SSD smaller than 500 GB, I’d go with a percentage of 15%. - Click the button associated with Delete all restore points for this drive to clear the space that is currently used by System Restore.
- Click Apply to save the current configuration, then restart your computer to enforce the change. At the next system startup, your computer will restart and the previously locked space should become available.
If this method didn’t help you or wasn’t applicable in your particular situation, move down to the next method below.
Method 2: Running the System Maintenance troubleshooter
Windows 10 is known to sometimes report inconsistencies related to your available free space. Several affected users have reported that the issue was resolved after they ran the System Maintenance troubleshooter and restarted their computer.
If the issue is being caused by a Windows glitch, this troubleshooter should automatically identify the inconsistencies and resolve the issue automatically. Here’s what you need to do:
- Press Windows key + R to open up a Run dialog box. Then, type “control” inside the text box and press Enter to open up the classic Control Panel interface. If you’re prompted by the UAC (User Account Control), click Yes to grant administrative privileges.
- Once you’re inside the classic Control Panel interface, use the search function on the right to search for “troubleshooter”. Then, click on Troubleshooter from the list of results.
- When you’re inside the Troubleshooting menu, click on System and Security.
- Then, from the System and Security troubleshoot problems menu, right-click on System Maintenance and choose Run as Administrator from the context menu. This will allow the utility to resolve more problems that require admin access.
- Inside the System Maintenance, start by clicking on Advanced and then ensure that the box associated with Apply repairs automatically is checked. Then, click Next to advance to the next section.
- Wait until the utility finishes analyzing your system for inconsistencies.
- If a fix is recommended, click on Apply this fix at the next prompt and wait until the repair strategy is applied.
- Once the process is finished, restart your computer and see if the issue is resolved once the next startup sequence is complete.
If you’re still seeing inconsistencies in relation to your available free space, move down to the next method below.
Method 3: Deleting the “rogue’ trashbin folder
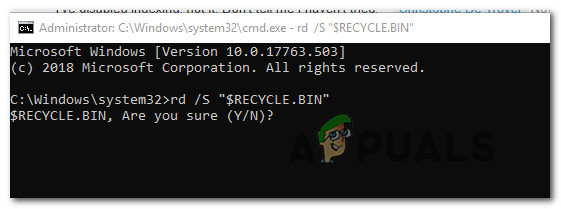
As it turns out, this particular issue can also be caused by a ‘rogue’ trash bin folder. This issue is confirmed to occur on both Windows 10 and Windows 7. If this scenario is applicable, you should be able to restore your missing free space by deleting the $RECYCLE.BIN – this will force your OS to create a new, healthy file that doesn’t take this much space.
The vast majority of users that have been able to resolve the issue by deleting the $RECYCLE.BIN file have reported that they were able to do so via an elevated Command Prompt. Here’s a quick guide on how to complete this procedure:
- Press Windows key + R to open up a Run dialog box. Then, type “cmd” and press Ctrl + Shift + Enter to open up an Elevated Command prompt. If the UAC (User Account Prompt) pops up, click Yes to grant admin access.
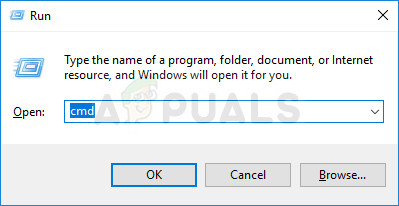
Running administrative Command Prompt from Run dialog box - Once you’re inside the elevated Command Prompt, run the following command to execute the deletion of the $RECYCLE.BIN file:
rd /S "$RECYCLE.BIN"
- When prompted by the ‘Are you sure?’ dialog, type the letter Y and press Enter to confirm your choice.
Deleting the “$RECYCLE.BIN” file - Once the procedure is complete, you can safely close your elevated command prompt. Then, restart your computer to force the changes to take effect.
- When the next startup sequence is complete, your missing free space should become available.
If you’re still having space issues where free space is unaccounted for, move down to the next method below.
Method 4: Update Windows 10 to the latest version
If you’re using Windows 10 (version 1803) or older and haven’t updated to the latest version, chances are your system is struggling with an Explorer.exe bug. What happens is, the utility will be unable to correctly read metadata of file types.
Consequently, it cannot correctly calculate the correct size of folders, which leads to incorrect free space calculations. Fortunately, Microsoft has since patched the bug that was introduced with version 1803.
So if this scenario is applicable, you should be able to resolve the issue by updating to the latest Windows version. Here’s a quick guide on how to do this:
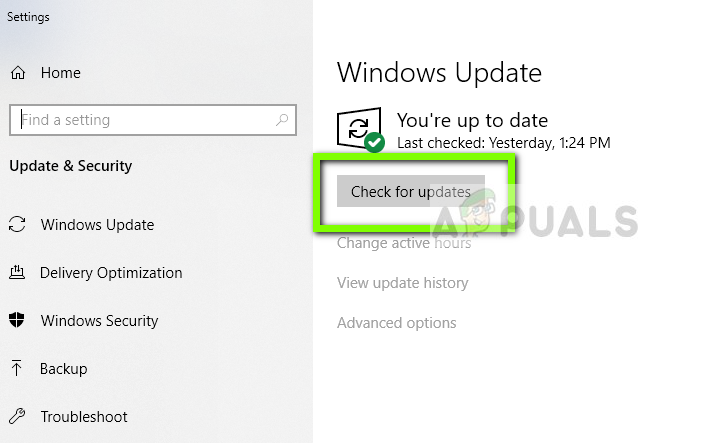
- Press Windows key + R to open up a Run dialog box. Then, type or paste “ms-settings:windowsupdate” inside the text box and press Enter to open up the Windows Update tab of the Settings app.

Run dialog: ms-settings:windowsupdate - Once you’re inside the Windows Update tab, click on Check for updates to trigger an update scan.
Checking for Updates – Windows Update - Follow the on-screen prompts to install every pending Windows update until your system is up to date.
Note: If you’re prompted to restart before the last update is installed do so, but make sure to return to the Windows Update menu once the next startup sequence is complete so you can complete the updating process.
If the issue is still occurring even after you update your Windows 10 computer to the latest build, move down to the next method below.
Method 5: Using a 3rd party utility to identify the missing space
Other users have reported that in their case, the missing space was actually taken up by a huge file that Windows Explorer failed to identify. In this case, you will be able to find the culprit by using a third party utility. In most cases, affected users have used WinDirStat to instantly discover the missing space.
SQL database files (.mdf) are notoriously known for taking a lot of space while remaining hidden from Windows indexing (especially on Windows 10). If this scenario is applicable, deleting the file should restore everything back to normal.
Here’s a quick guide on installing and using WinDirStat to identify the space hogger file:
- Visit this link (here) and select Downloads, permalinks from the vertical menu on the left section of the screen. Then, use any download location to download the WinDirStat utility.
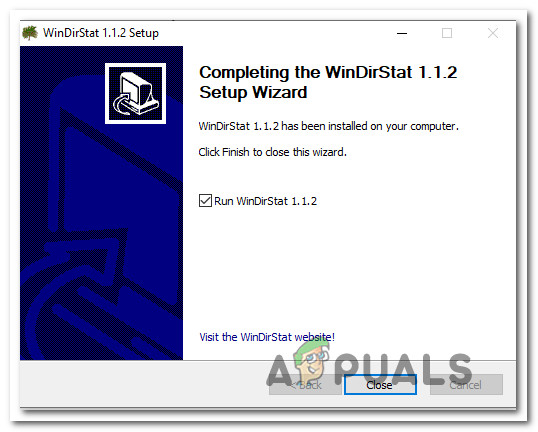
- Once the download is complete, double-click on the windirstat executable and follow the on-screen instructions to complete the installation.
- Double-click on the launch executable to open WinDirStat. At the initial screen, select All Local Drives and click Ok to initialize.
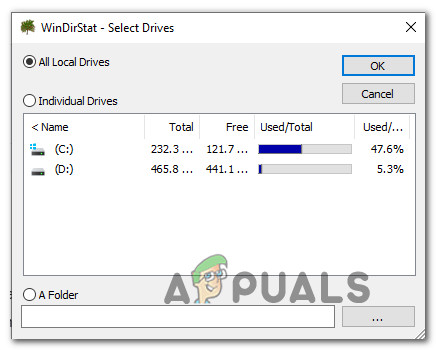
Selecting all local drives - Wait until the analyzing procedure is complete – Depending on your disk size and format (HDD or SSD) you can expect the procedure to last over 5 minutes.
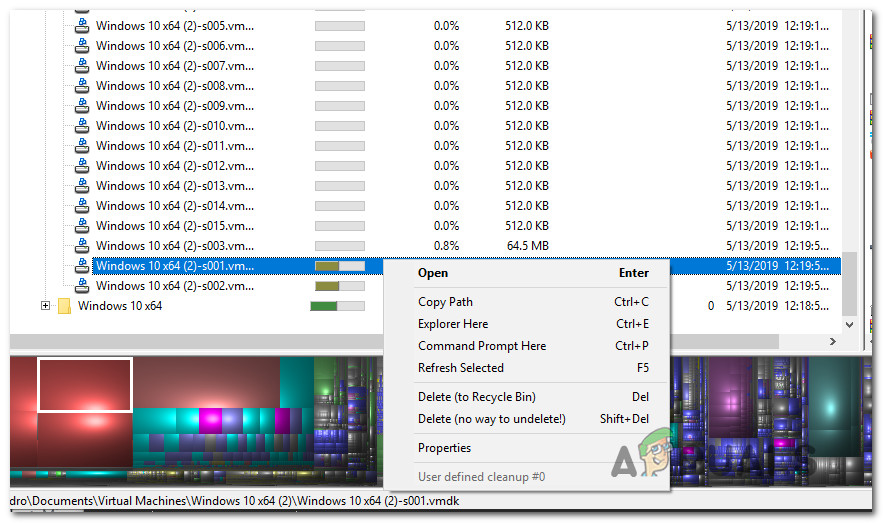
- Once the scan is complete, select your Windows drive and order the files by size (descending order). Check through the results and see if you see any abnormally large files that Windows File Explorer has not discovered.
- When you manage to identify your culprits, right-click on the file and choose Delete (no way to undelete!) from the context menu.
Deleting the large hidden file(s) permanently - After the file has been deleted, restart your computer. At the next startup sequence, the previously missing space should now become available.


Method 1 immediately freed up 7GB, thank you!