How to fix Windows Defender not Turning on
Windows Defender is the default Antivirus that comes preloaded in almost all versions of windows. It is no doubt the most convenient way to defend your computer against malware and virus attacks. However, quite recently a lot of reports have been coming in where users are unable to turn their Windows Defender on and it seems like it has been disabled permanently.
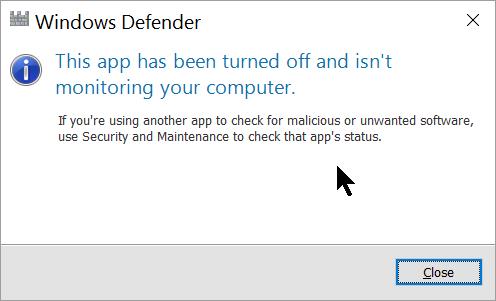
What Prevents Windows Defender from Turning On?
After receiving numerous reports from multiple users we decided to investigate the issue and devised a set of solutions that fixed the issue for most of our users. Also, we looked into the reasons due to which this error is triggered and listed them below.
- Damaged Drivers/Registry: It is possible that important drivers or registry entries have been corrupted due to which this error is being triggered. Sometimes, certain malware or viruses implement themselves on the computer along with an application and disable the Windows Defender through the registry.
- Group Policy: In some cases, the group policy might be configured to disable the Windows Defender. It might have been configured automatically or the user might have configured it manually.
- Third Party Application/service: It is also possible that a third party service or an application might be interfering with important elements of the Windows Defender and preventing it from functioning correctly.
- Disable AntiSpyware: This is the name of a registry value that implements itself in the computer’s registry and prevents the Windows Defender from running. The registry controls every function and service inside the computer, therefore, if the Windows Defender has been disabled by any malicious software or virus through the registry it won’t turn on unless the value is cleared.
- Updates: If the computer has not been updated to the latest version provided by Microsoft it might be vulnerable to certain viruses that can’t be stopped by the Defender.
Now that you have a basic understanding of the nature of the problem, we will move on towards the solutions. Make sure to implement these in the specific order in which they are provided to avoid any conflicts.
Solution 1: SFC Scan
An SFC scan checks the whole computer for any missing/corrupted drivers and registry files. After checking, it automatically prompts Windows to replace them. Therefore, in this step, we will be initiating an SFC scan. For that:
- Press “Windows” + “X” button simultaneously.
- Select “Command Prompt(Admin)” or “Powershell(Admin)” from the list.
Note: If you are running the “creator’s update” version of the Windows 10 only then you will see the Powershell option instead of the command prompt option. - Inside PowerShell, type “sfc /scannow” and press “Enter“.
- Wait for the scanning process to be completed.
- Restart the computer and check to see if the issue persists.
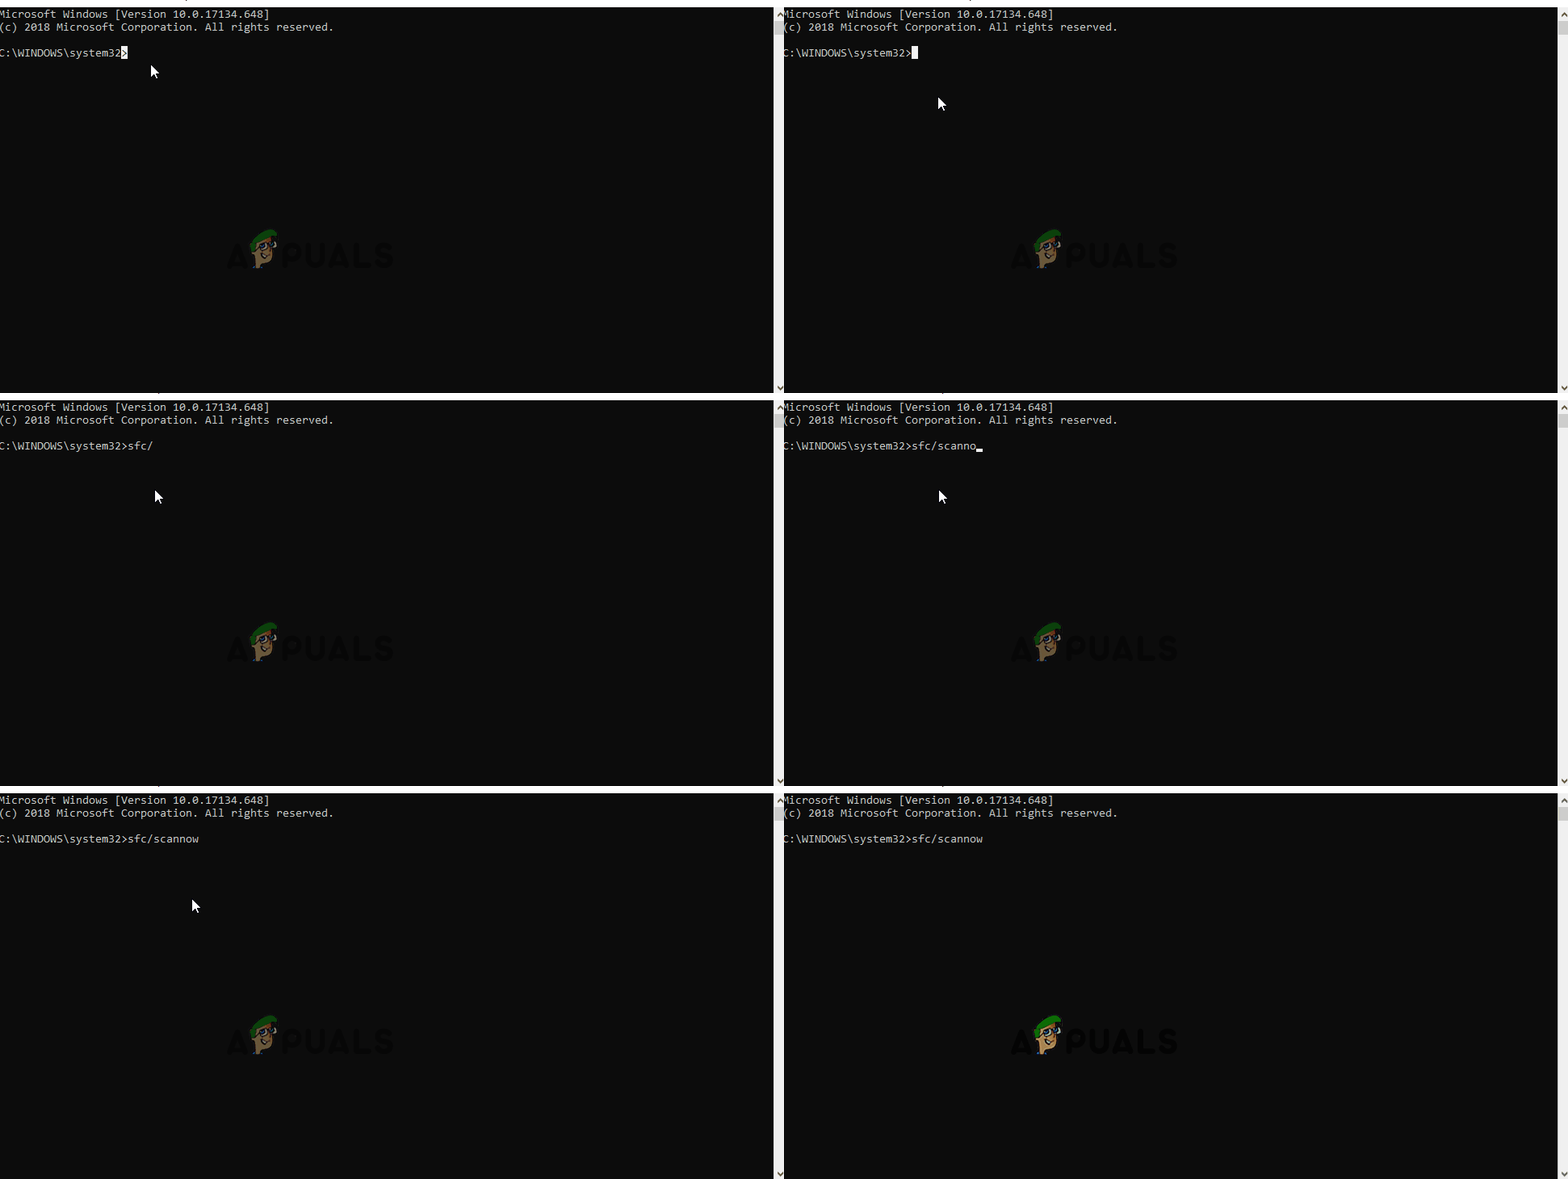
Running an SFC scan
Solution 2: Enabling Through Group Policy
If the Windows Defender has been disabled through the Group Policy you will not be able to turn it on unless it is re-enabled. Therefore, in this step, we will be enabling the Windows Defender from the group policy. For that:
- Press “Windows” + “R” buttons simultaneously.
- Type in “gpedit.msc” in the run prompt and press “enter“.
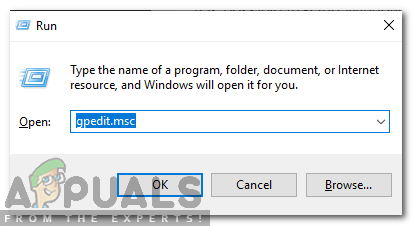
Typing gpedit.msc in the run prompt - Under the “Computer Configuration” heading double click on “Administrative Templates“.
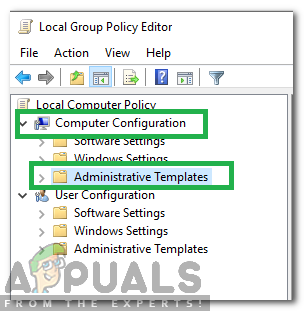
Clicking on “Computer Configuration” and then on “Administrative Templates” - Double click on “Windows Components” and then double click on “Windows Defender Antivirus“.
- In the right pane, double click on the “Turn off Windows Defender Antivirus” option.

Double clicking on the “Turn of Windows Defender Antivirus” option - Click on the “Disabled” option and then select “Apply“.
- Close the window and restart your computer.
- Check to see if the issue persists.
Solution 3: Enabling Windows Defender Service
It is possible that the Windows Defender Service might be configured to be started manually after startup. Therefore, in this step, we will be enabling Windows Defender Service from the “Services” menu. For that:
- Press “Windows” + “R” buttons simultaneously.
- Type in “services.msc” and press “Enter“.
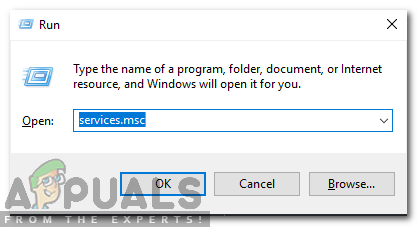
Typing services.msc in the run prompt - Scroll down and double click on the “Windows Defender Antivirus Service“.
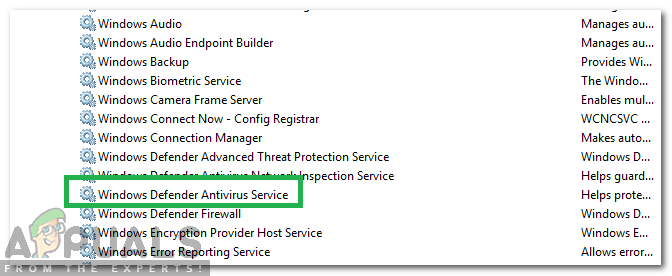
Double clicking on “Windows Defender Antivirus Service” - Click on the “Startup Type” dropdown and select the “automatic” option.
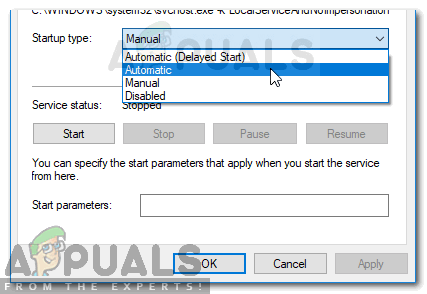
Settings the Startup type to Automatic and Starting the Service - Click on the “Start” button and then click on the “apply” option.
- Close the Window and check to see if the issue persists.
Solution 4: Checking for Updates
In some cases, the Windows Defender’s definitions might be outdated. Due to this, it might not be functioning properly. Therefore, in this step, we will be checking and installing new Windows Updates. For that:
- Press “Windows” + “I” keys simultaneously.
- Click on the “Updates & Security” option.

Open Windows Settings and Click Update & Security To Check For Updates - Select “Windows Update” from the left pane and click on the “check for updates” option.

Checking for Updates – Windows Update - Wait for the updates to be downloaded and installed.
- Restart your computer for the changes to take effect.
- Check to see if the issue persists.
Solution 5: Changing AntiSpyware Value in Registry
It is possible that a certain malware or virus installed a script in the registry which prevents the Windows Defender from functioning properly. Therefore, in this step, we will be disabling that value. For that:
- Press “Windows” + “R” buttons simultaneously to open the Run prompt.
- Type in “regedit” and press “Enter“.

Running the Registry Editor - Double click on the “HKEY_LOCAL_MACHINE” folder and then on the “SOFTWARE” folder.
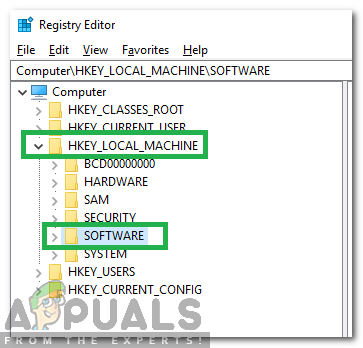
Opening HKEY_LOCAL_MACHINE and then opening SOFTWARE folder - Open the “Policies” and then the “Microsoft” folder.
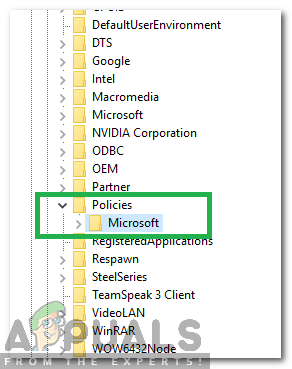
Opening Policies and then the Microsoft Folder - Double click on the “Windows Defender” folder and in the right pane double click on the “Disable AntiSpyware” value.
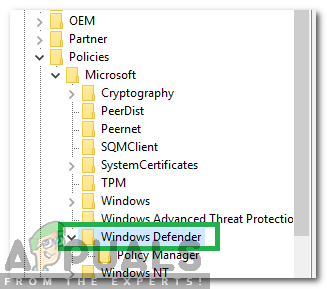
Double clicking on the Windows Defender folder - Change the value to “0” and click on “Apply“.
- Close the window and restart your computer.
- Check to see if the issue persists.
Solution 6: Performing a Clean Boot
In rare cases, certain third-party applications or services might be preventing Windows Defender from turning on. Therefore, in this step, we will be initiating a clean boot which will prevent any of these applications from starting. For that:
- Log in to the computer with an Administrator account.
- Press “Windows” + “R” to open up the run prompt.

Opening Run Prompt - Type in “msconfig” and press “Enter“.
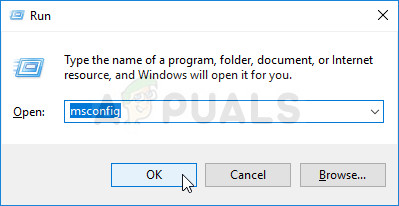
Running MSCONFIG - Click on the “Services” option and uncheck the “Hide all Microsoft Services” button.
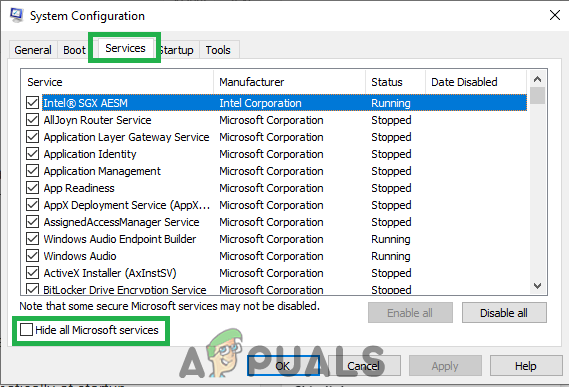
Clicking on the “Services” tab and Un-checking the “hide all Microsoft Services” option - Click on the “Disable All” option and then on “OK“.
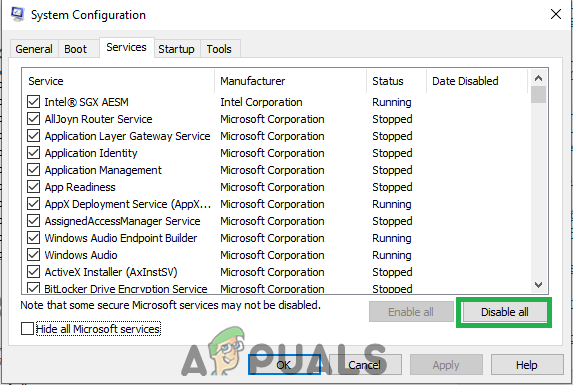
Clicking on the “Disable All” option - Click on the “Startup” tab and click on the “Open Task Manager” option.
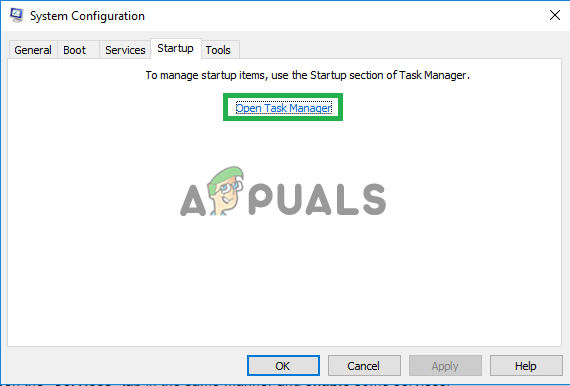
Clicking on the “Open Task Manager” option - Click on the “Startup” button in the task manager.
- Click on any application in the list that has “Enabled” written next to it and select the “Disable” option.
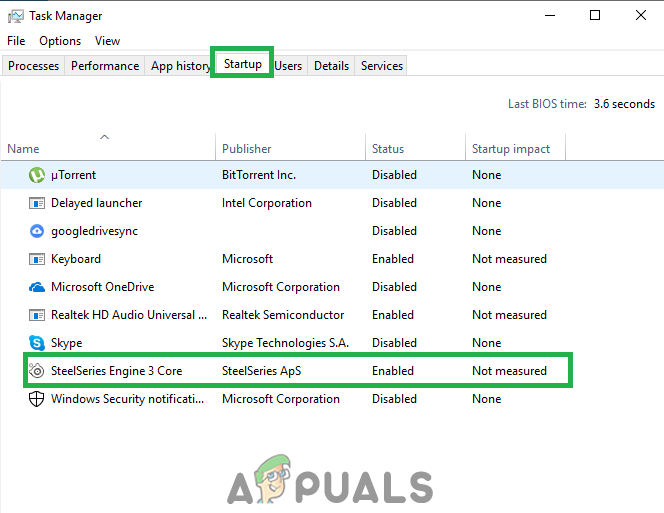
Clicking on the “Startup” tab and selecting an application listed there - Repeat this process for all applications in the list and restart your computer.
- Now your computer has been booted in the “Clean Boot” state.
- Check to see if the issue goes away.
- If the issue is no longer observed, start enabling one service at a time in the same manner and note down the service by enabling which the issue comes back.
- Either uninstall the service or keep it disabled.


