How to Fix Windows 10 Pin Issues when Logging In
Windows 10 provide a very convenient way of logging in to your Windows using a pin code. However, some users are experiencing problems with the Windows 10 pin login. After a Windows Update, users can’t sign in using their previous pin code. And this isn’t related to users forgetting their pin codes. It seems like their old pin code has been removed from the Windows and their PCs aren’t recognising it.
Now, there are a lot of scenarios of this. Some people can’t sign in because the system doesn’t recognise their PIN. On the other hand, some people can’t even enter their pin because there isn’t a pin option available for them.
What Causes the Pin to Stop Working?
Here is a list of things that can cause this issue
- A bug in the Windows Update that might have broken the PIN sign in option
- Corrupt files in the Ngc folder
Usually it happens after a Windows Update so it’s a bug that breaks the PIN sign in option.
Tips
Before you dive deep in to the methods given below, try these few tricks that might work for you.
- Try to restart your system a couple of times. The login pin option might work after a few restarts
- Try to disconnect from the internet and then try again. You can take out the Ethernet cable if that’s what you are using. If you are wirelessly connected, get to the login screen and you should be able to see your Wi-Fi option on the right bottom corner. Turn off your Wi-Fi from there and reboot.
- Use your password option by clicking on the Sign-in options at the login screen. Once you are in your Windows, go to Settings > Accounts > Sign-in Options > Remove PIN and then Add PIN.
Method 1: Sign in With Safe Mode (If you can’t get into Windows)
Try signing in with Safe Mode to see if that works. If you can get into the Windows with Safe Mode then you can change the pin or password from there. Follow the steps given below to enter in the Safe Mode
- Start your computer.
- At the login screen, click the power button from the bottom right corner
- Hold Shift key and select the Restart option
- Keep holding the Shift key until you see the Advanced recovery options menu
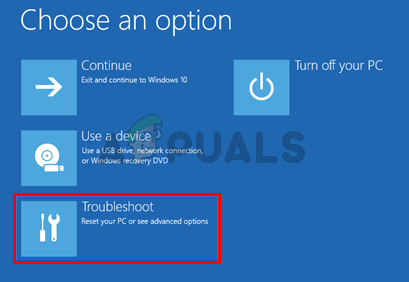
- Select Troubleshoot
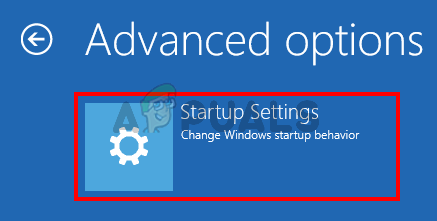
- Click Advanced options

- Click Startup Settings
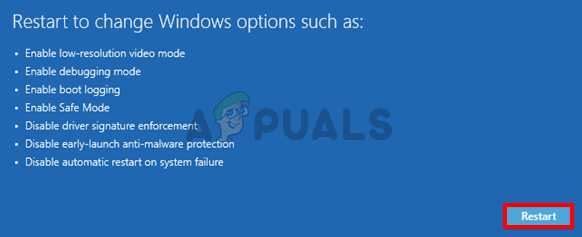
- Click Restart
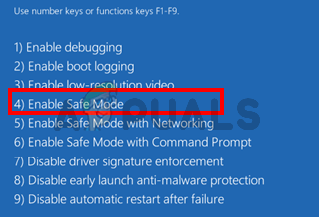
- Now you should be able to see a list of options with numbers beside them. You just need to press the number that is allocated to the Safe Mode. This should be 4. So simply press (F4) to Enable Safe Mode
- Wait while Windows 10 starts in safe mode.
Log in and change the settings of your password or pin login. You can hold the Windows key and press I to open up the settings screen. Click Accounts. From here, you can click Sign-in Options and manage your accounts, PINs, and passwords. We will suggest you remove your PIN and then use the Add PIN option to activate the pin.
Method 2: Reset Account Control Lists Ngc Folder
You can reset your ACLs to reset the PIN of your system via the command prompt. Follow the steps given below.
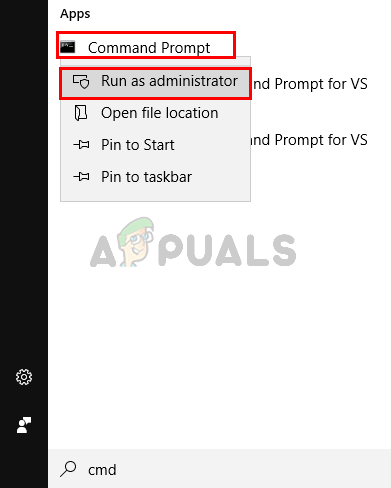
- Press Windows key once
- Type command prompt in the Start Search menu
- Right click command prompt from the search results and select Run as administrator
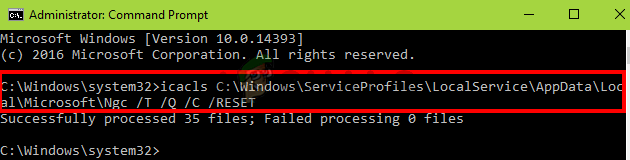
- Type icacls C:\Windows\ServiceProfiles\LocalService\AppData\Local\Microsoft\Ngc /T /Q /C /RESET and press Enter

This should solve the issue for you. You might need to set a new PIN again but the issue with the PIN should be gone.
If you can’t login to Windows
You won’t be able to follow the steps given above if you can’t even sign in to Windows. You can still use the command prompt without signing in to Windows. Follow the steps given below
- Turn on your computer and get to the login screen
- At the login screen, click the power button from the bottom right corner
- Hold Shift key and select the Restart option
- Keep holding the Shift key until you see the Advanced recovery options menu
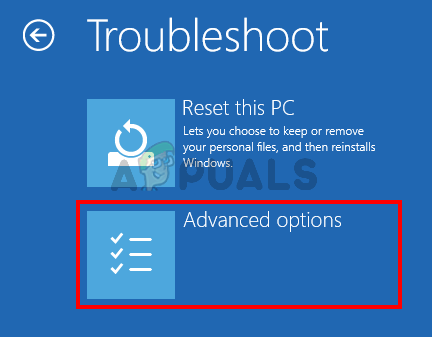
- Select Troubleshoot

- Click Advanced options
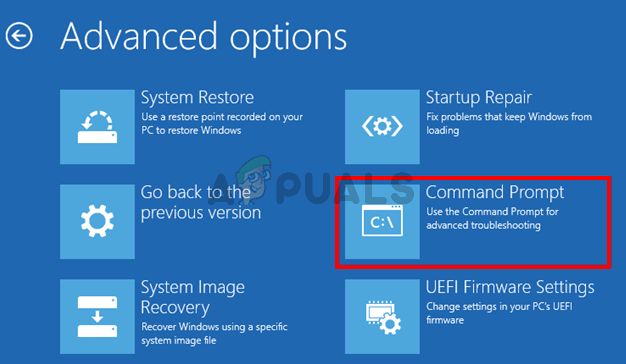
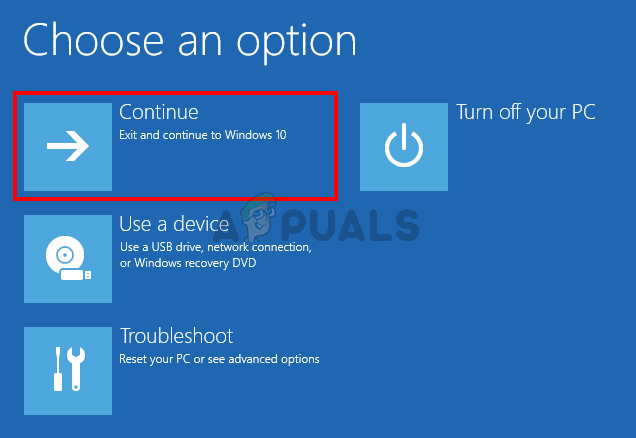
- Click Command Prompt
- Type icacls C:\Windows\ServiceProfiles\LocalService\AppData\Local\Microsoft\Ngc /T /Q /C /RESET and press Enter
- Close the command prompt
- Click Continue
Reboot and check if this resolves the issue
Method 3: Delete NGC Folder Contents
If you are able to sign in with a password but your PIN still isn’t working then you can try to delete the contents of the NGC folder. Deleting the contents of the NGC folder will reset your PIN and you will be able to add a new pin of your choice.
Make sure you are signed in with the administrator account because you will need admin access to delete the contents of Ngc folder
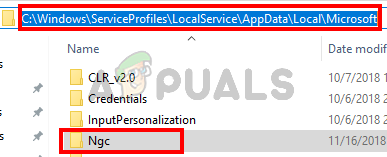
- Hold Windows key and press E to open the Windows Explorer
- Some folders, especially the AppData folder, might be hidden. So, you need to make sure that hidden folders can be seen. Click View from the top in File Explorer and check the option Hidden Items from Show/Hide section

- Navigate to this path C:\Windows\ServiceProfiles\LocalService\AppData\Local\Microsoft\Ngc. You can copy/paste this whole path in the address bar of File Explorer and see if it works. If it doesn’t then you will have to manually navigate to the given path.
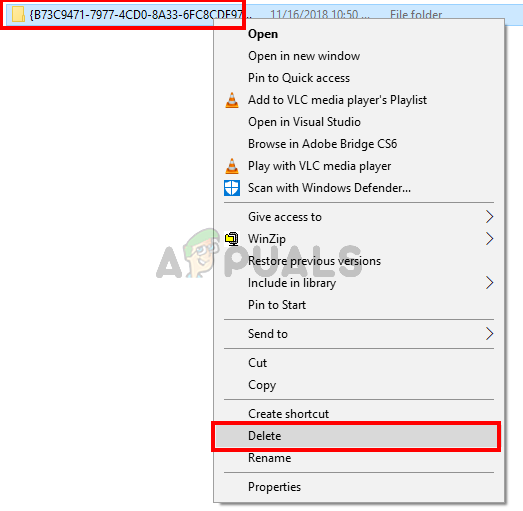
- Once you are in the Ngc folder hold CTRL key and press A to select all the files and folders. Press Delete and follow any additional on-screen instructions or prompts. Note: You can also just rename the Ngc folder by right clicking it and selecting Rename.
Once done, you should be good to go. You can go to Settings > Accounts > Sign-in Options > Add PIN.
Method 4: Use a Local Account
You can also get around this problem by using a local account or creating a local account if you don’t already have one. Follow the instructions given below to make a local account and set a PIN via that account
- Sign in to Windows
- Press and hold Windows key and press I
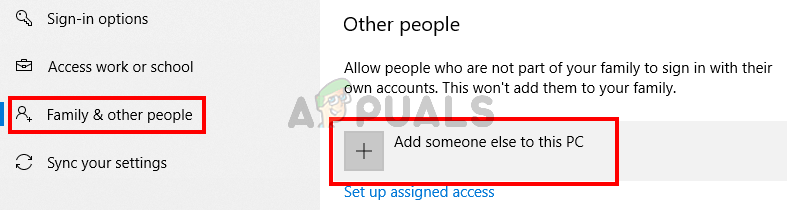
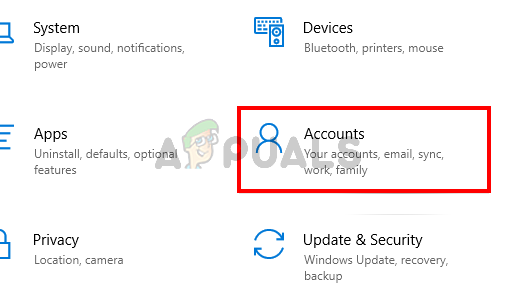
- Select Accounts

- Click Family & Other people from the left pane
- Select Add someone else to this PC under the Other People section
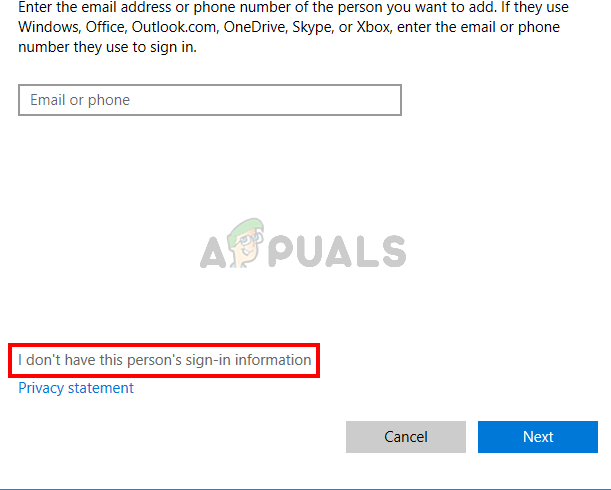
- Click I don’t have this person’s sign in information
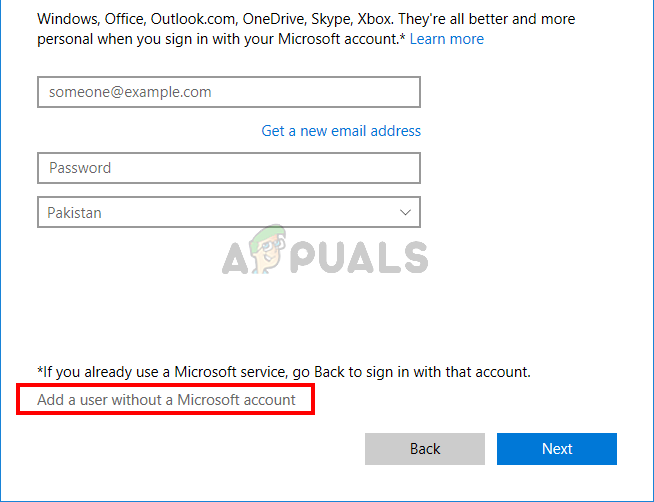
- Click Add a user without a Microsoft account
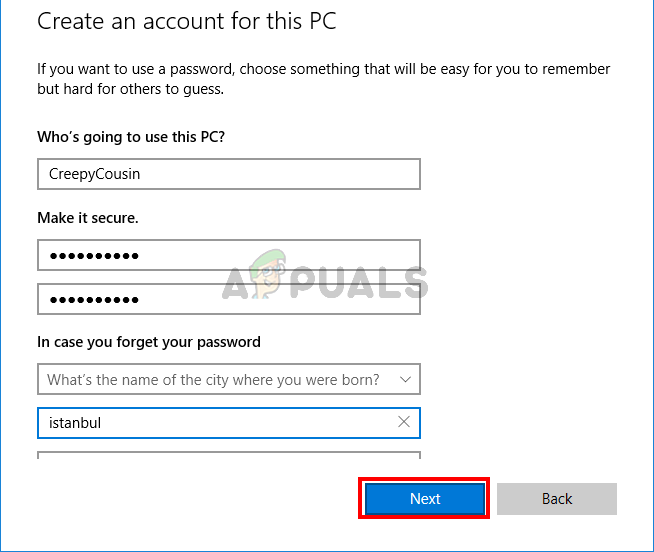
- Fill in the details and click Next
- Now sign out and sign back in with your local account
- Press and hold Windows key and press I
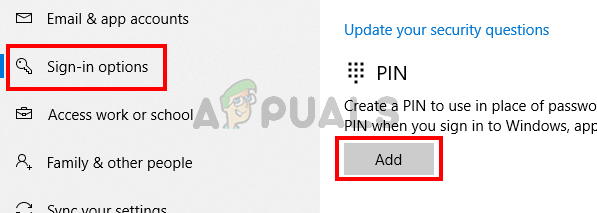
- Select Accounts
- Click Sign-in Options from the left pane
- Click Add and set up your PIN
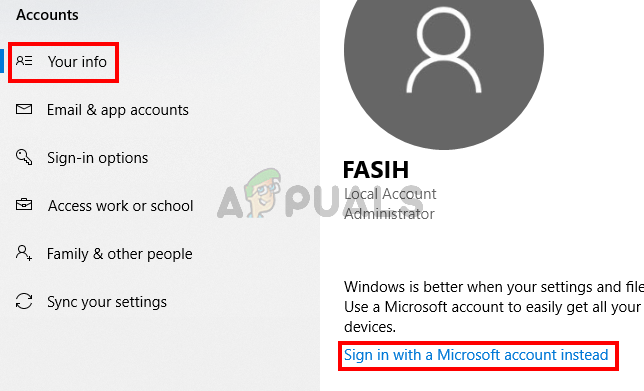
- Now all you have to do is switch back to using the Microsoft account for your login. Click Your Info from the left pane
- Select Sign in with a Microsoft Account option and follow any additional on-screen instructions
Now you should be able to use the PIN code when signing in.


Hi,
I am having trouble accessing my admin account. I cant run cmd or Powershell as admin with out Admin permission and I cant install application with admin permission. How to change my admin password?
Hoping you can help me please