How to Fix WiFi Authentication Error Occurred on Android
A WiFi authentication error on Android stops your device from connecting to a known network, even if it’s listed as available. This usually happens because of a wrong password or a problem with the network’s security settings. The most common cause is typing the password incorrectly.
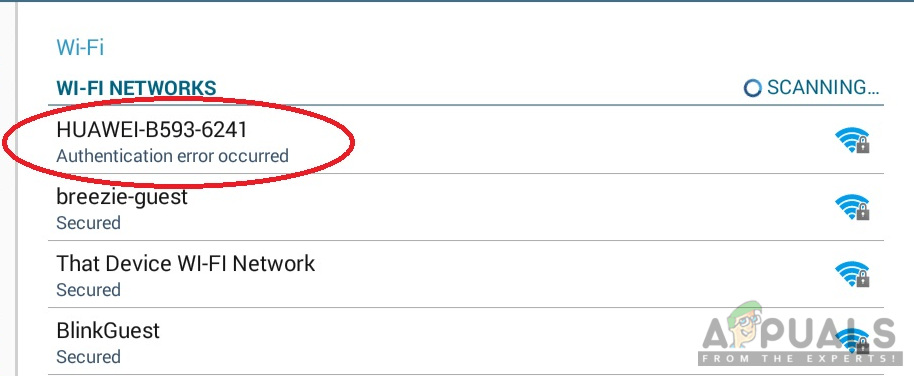
Other causes include old router software, wrong network settings like conflicting IP addresses, or changing network security types like WPA and WEP.
In this article, we will discuss several ways to fix this error.
1. Recheck Your Password for the Network
A small mistake in the WiFi password can block connection. Ensure it matches the network exactly, considering letters, numbers, and symbols.
- Go to Settings and tap WiFi.
- Tap the WiFi network with the error and select Forget Network. Note: On some phones, tap and hold the network name to forget it.
- Tap the WiFi network again, enter the password, and check the show password icon to see it while typing.
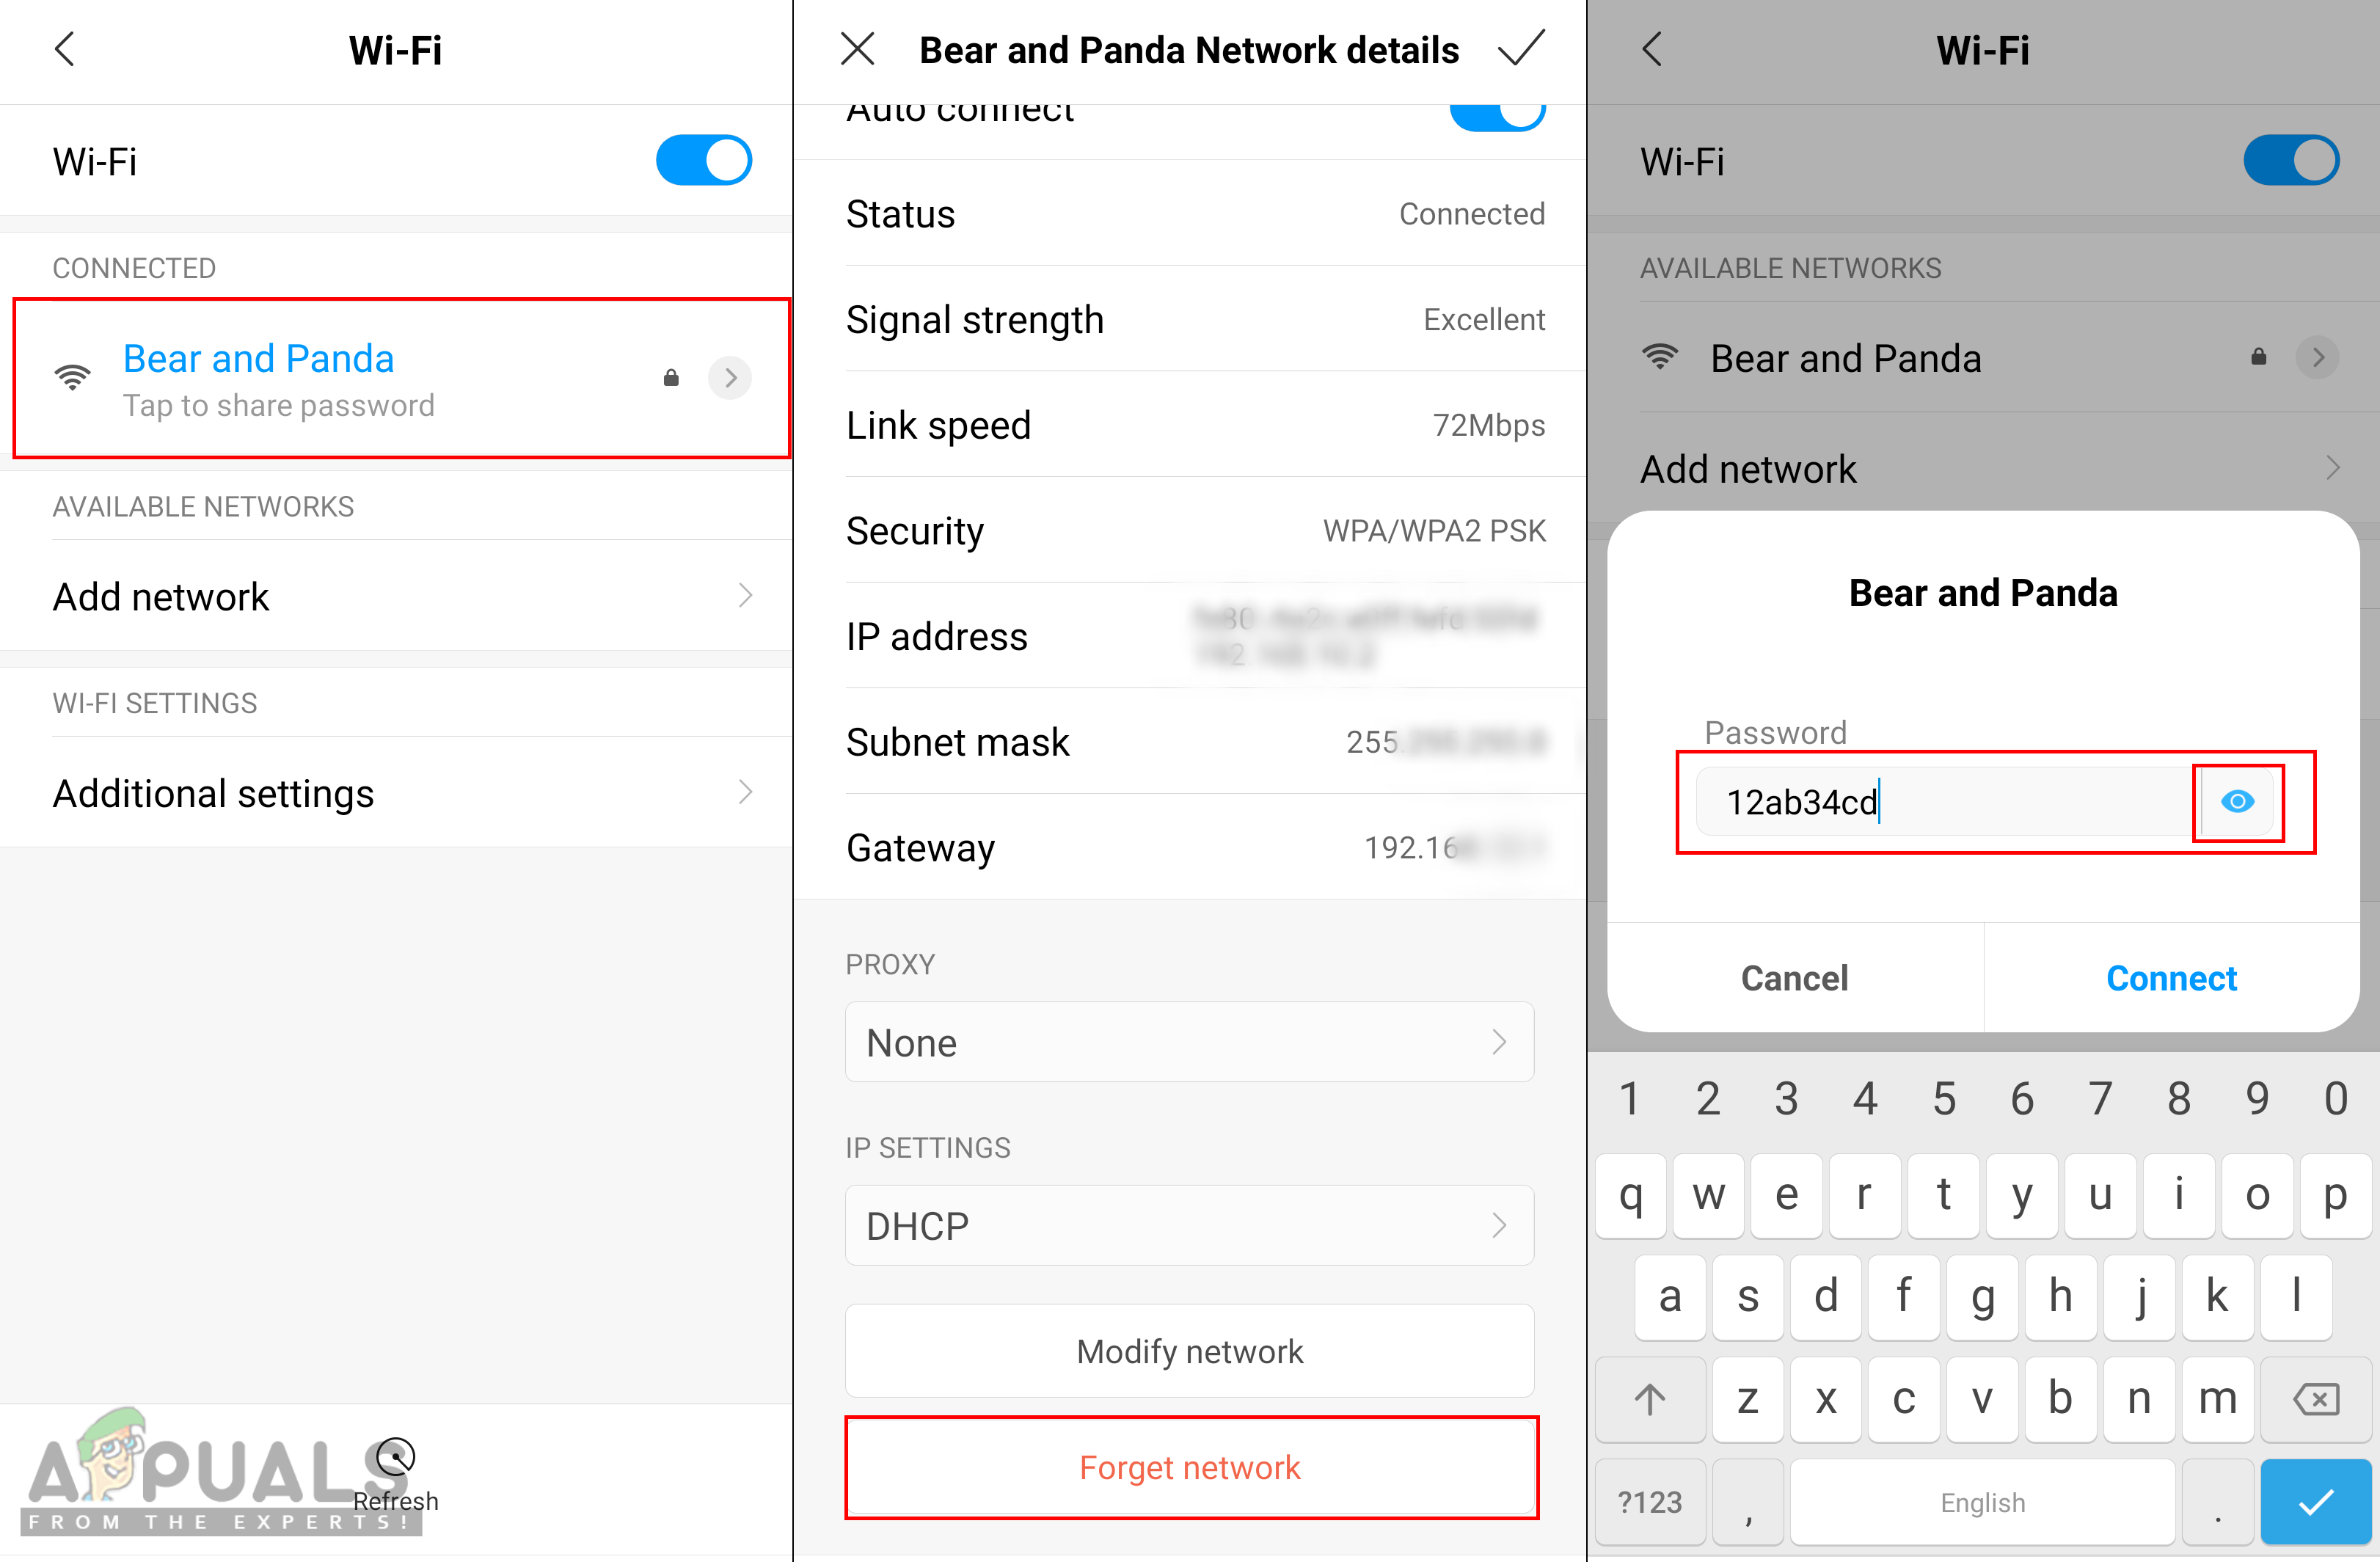
If the error persists, check your router settings.
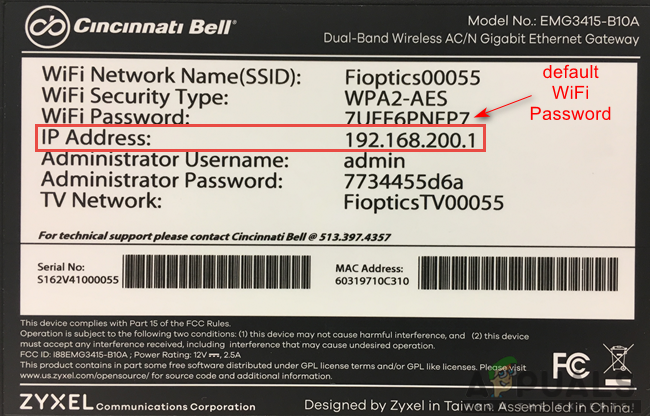
- Enter ‘192.168.1.1‘ in your computer browser, and log in with your username and password. Note: The IP is usually the default; find yours with “ipconfig” in Command Prompt.
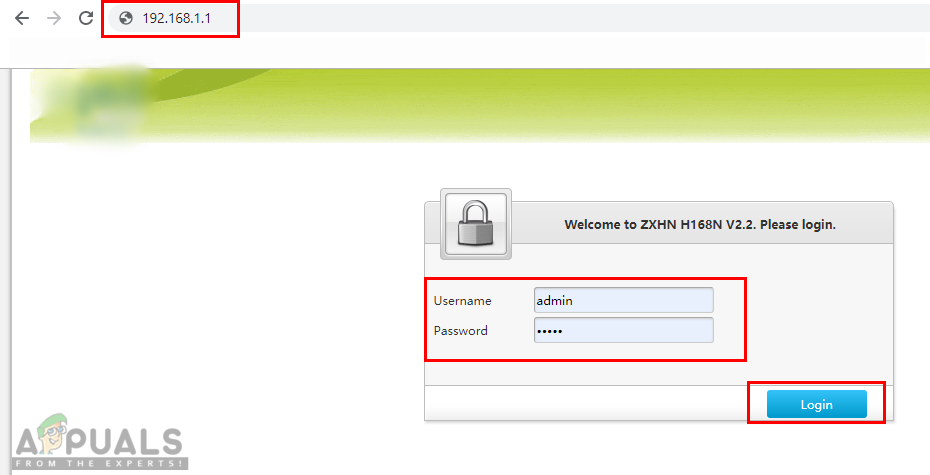

- Once logged in, go to Wireless > Security to check your password.
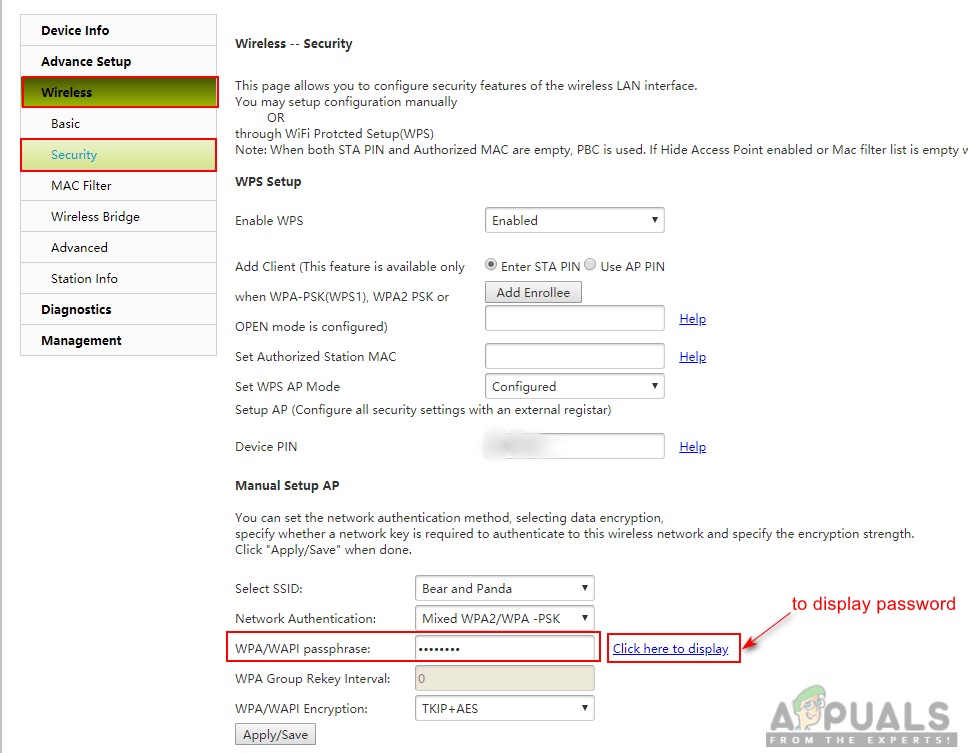
Checking the WiFi password in the router.
- Some routers list the login and WiFi password on the back.
2. Turn On Airplane Mode
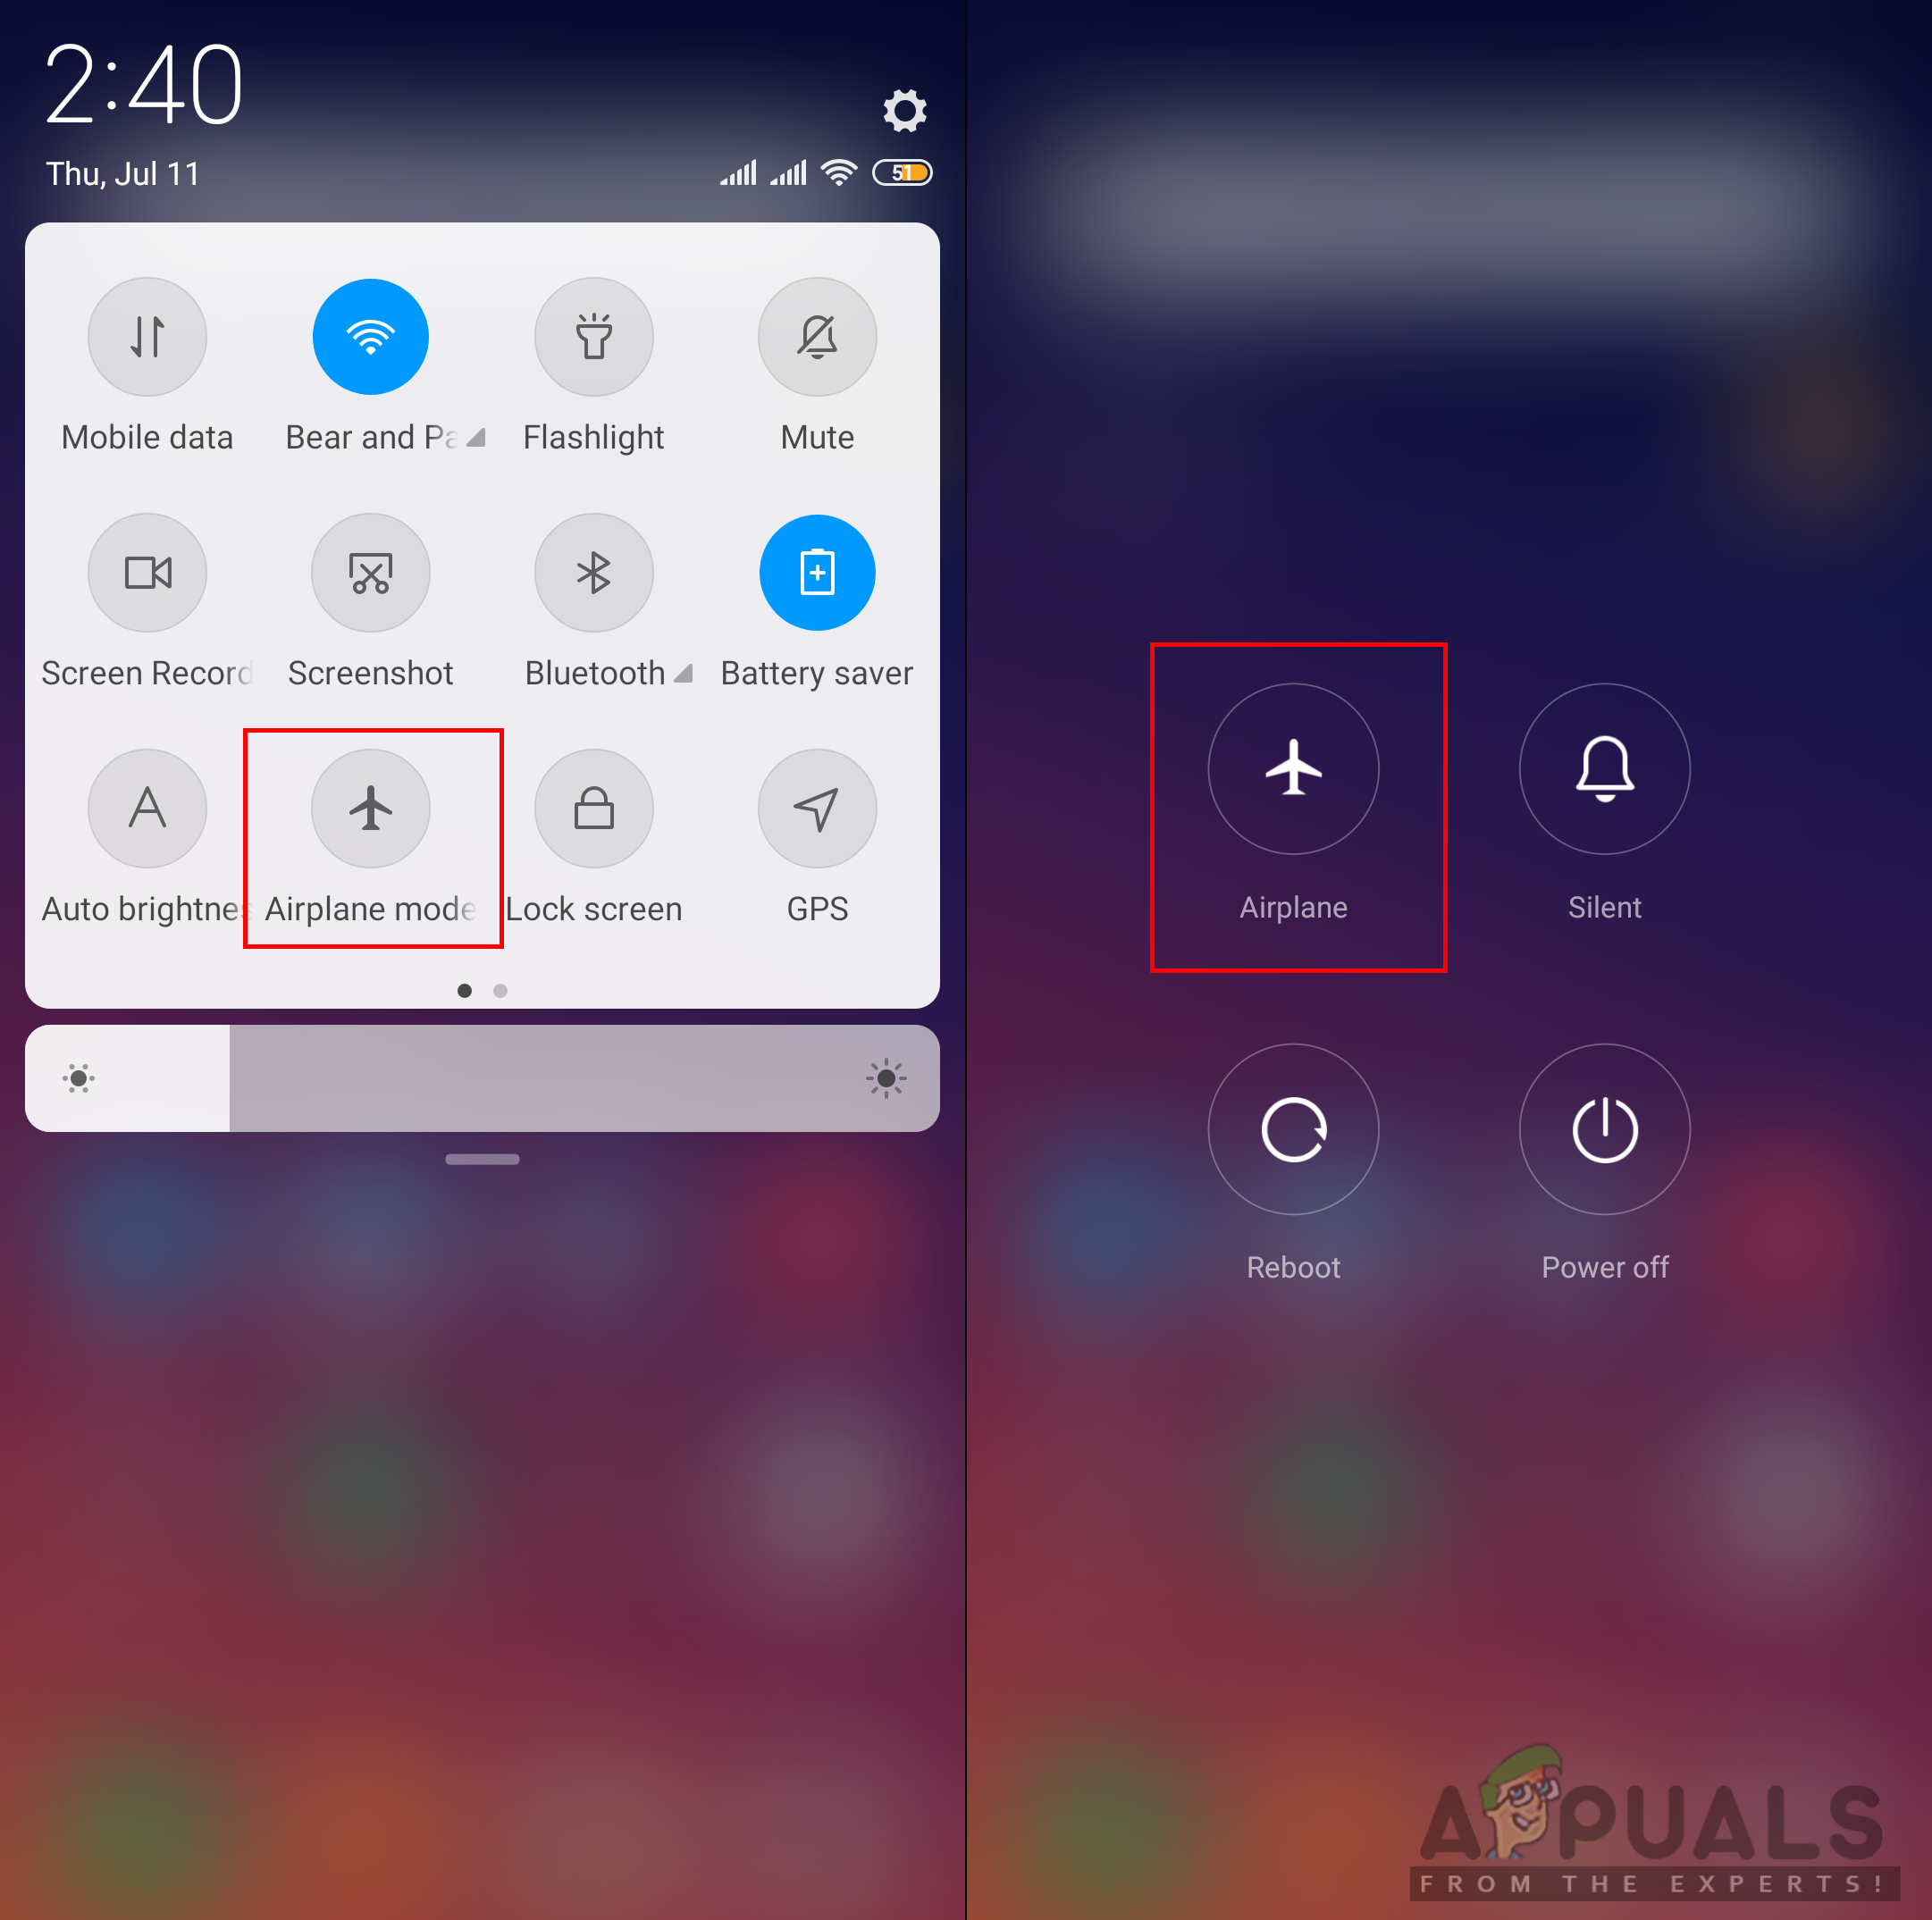
Turning on Airplane Mode stops all network connections, including WiFi, to help fix network problems. Switching it on and off makes your phone try to reconnect to WiFi, clearing any temporary issues.
- Swipe down the notification bar and click on “Airplane mode“
3. Reset Network Settings
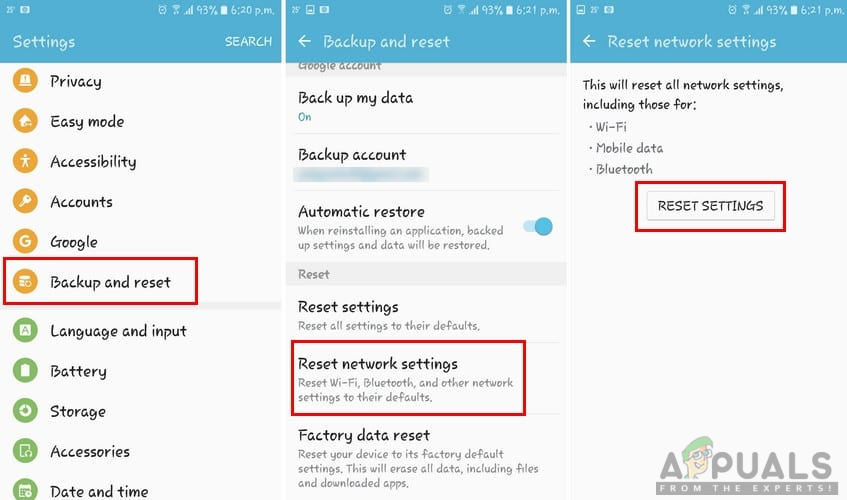
If your Android device has ongoing connection problems, resetting network settings can help. This clears all saved WiFi networks, Bluetooth connections, and mobile data settings.
- Open Settings, then go to Backup and Reset.
- Tap Reset Network Settings.
- Select Reset Settings and confirm.
- Reconnect to the WiFi network.
4. Configure IP Address
Sometimes, configuring a static IP address can fix WiFi authentication errors by preventing conflicts with the router’s DHCP server. This occurs when your device gets an IP address that overlaps with another or if automatic assignment fails. Manually setting the IP helps your device connect properly to the router.
- Open Settings, then tap on WiFi.
- Tap the WiFi network with the error, then select Modify. Note: On some phones, tap and hold the network name to modify.
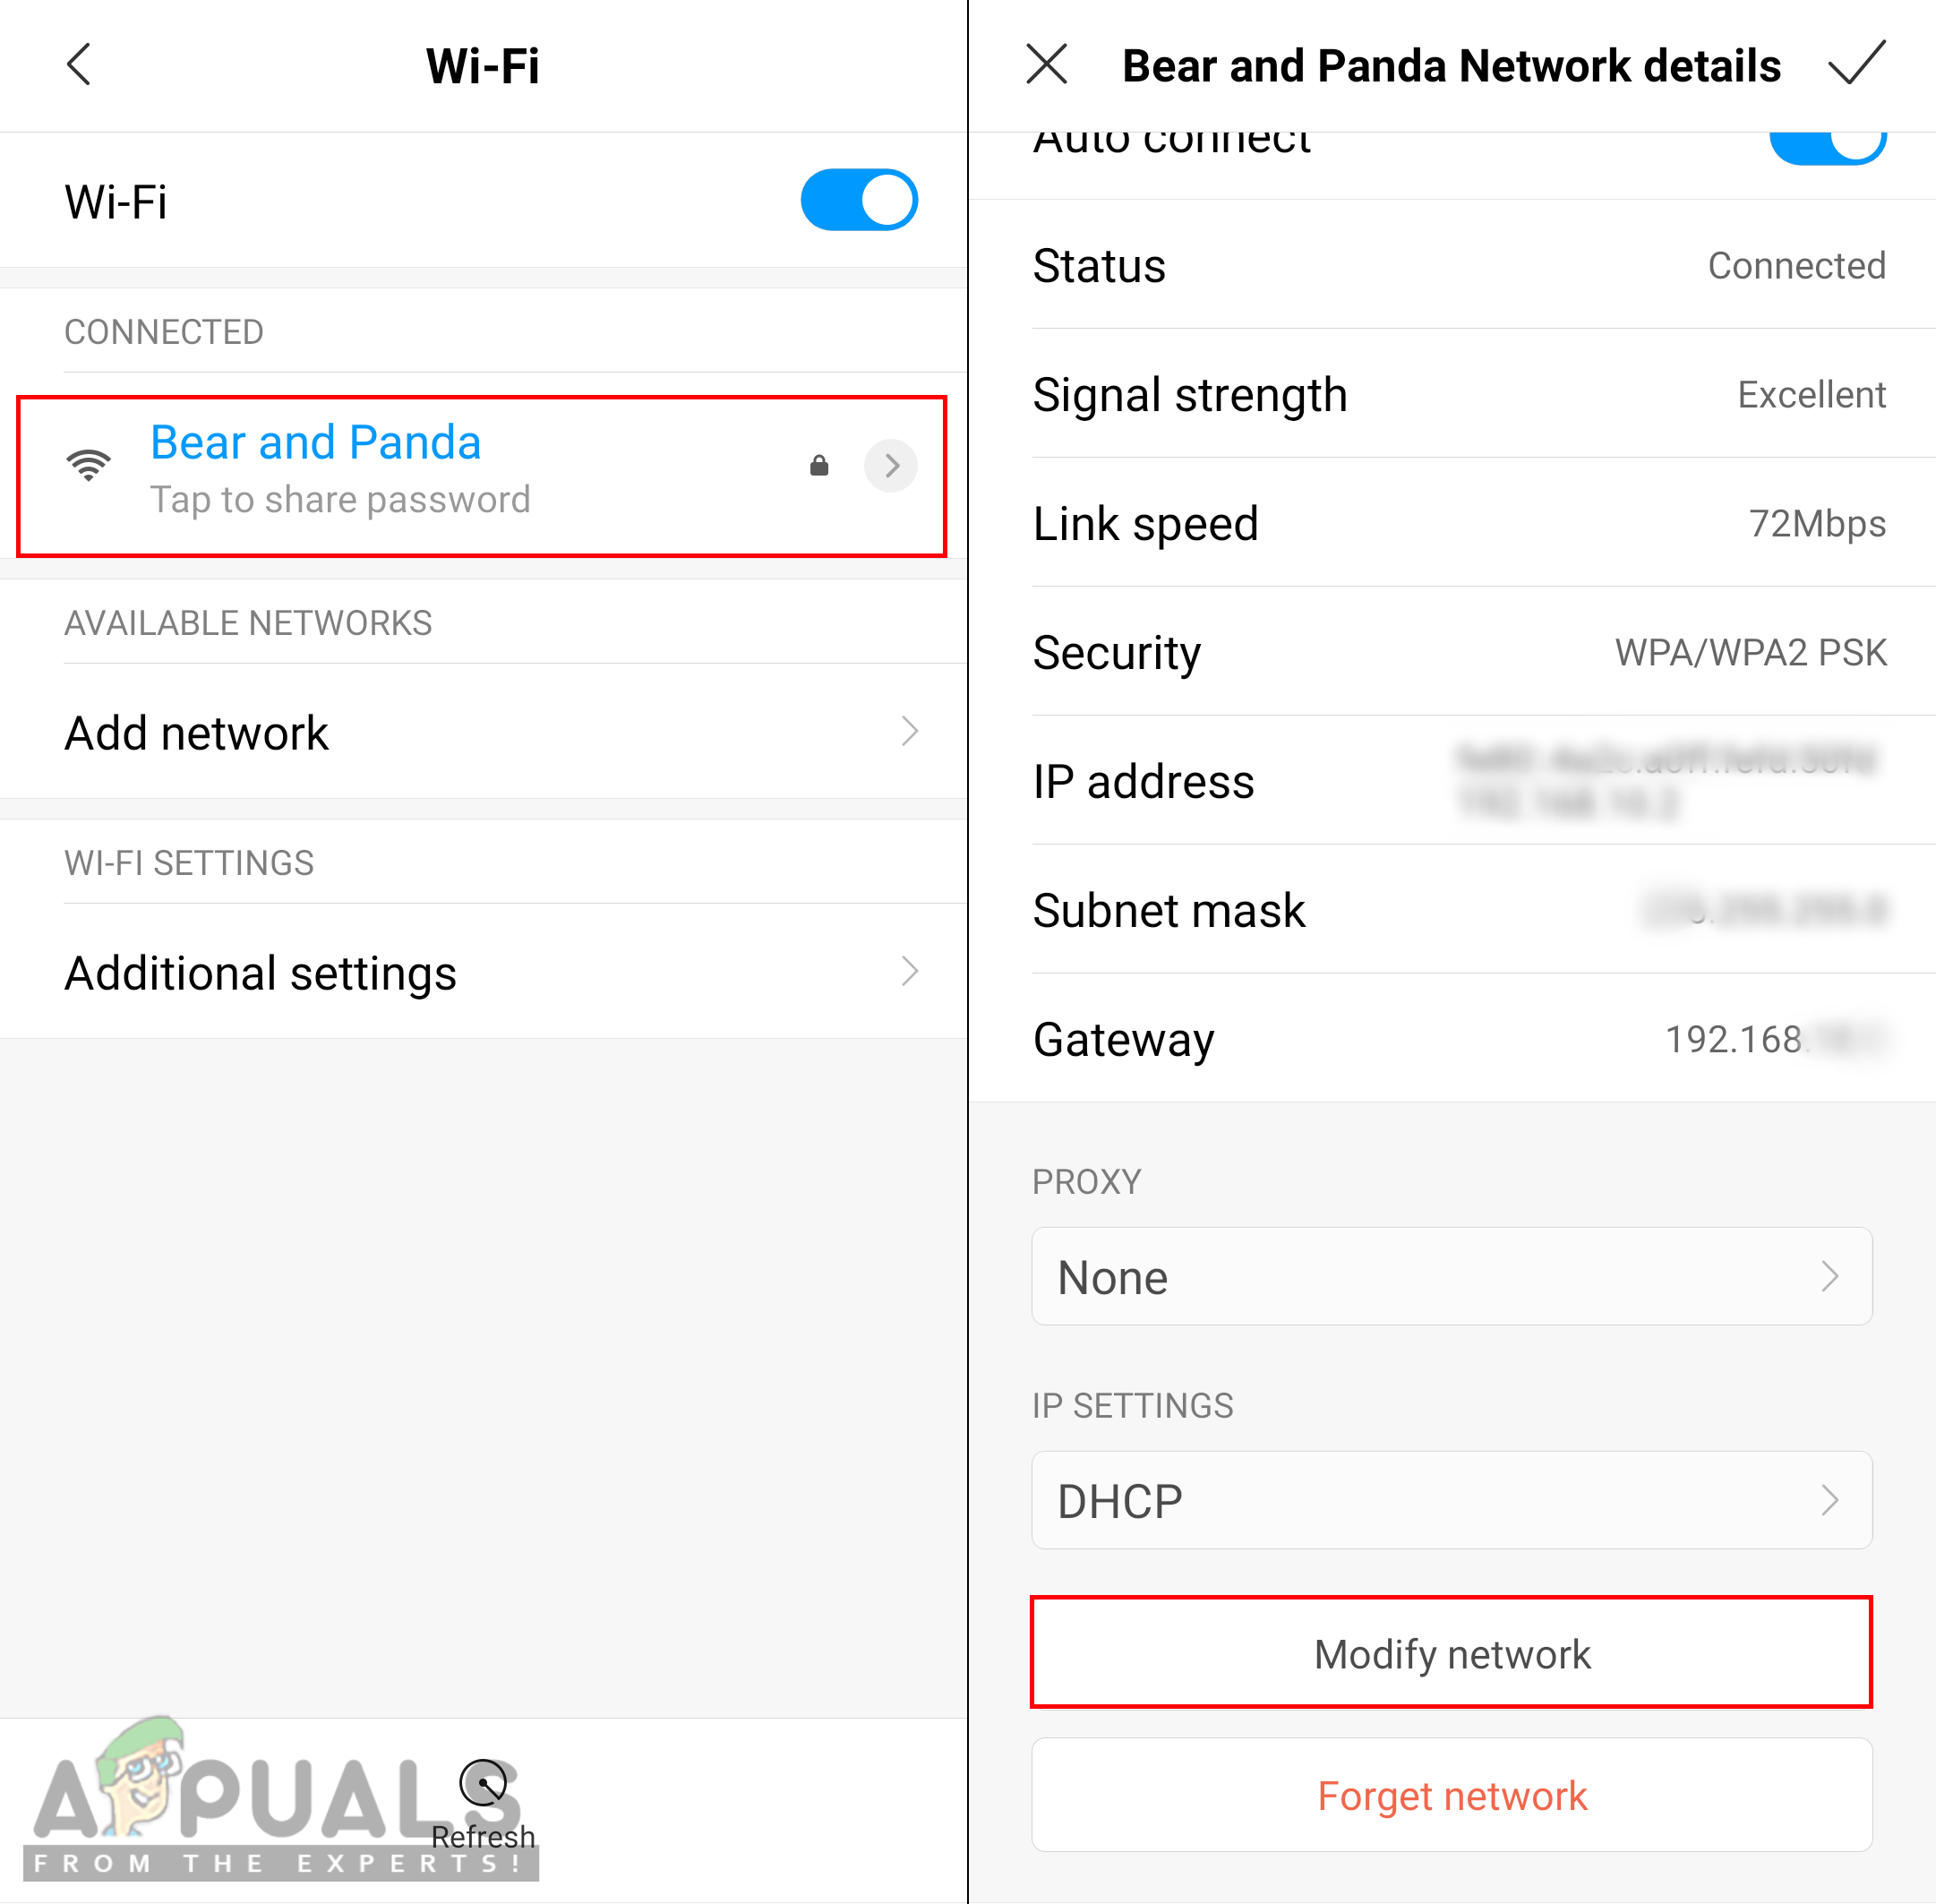
- Select Show Advanced Options or directly change the settings.
- Tap IP settings and choose Static.
- Change the IP address to “192.168.1.14” or alter the last digit (1-255).
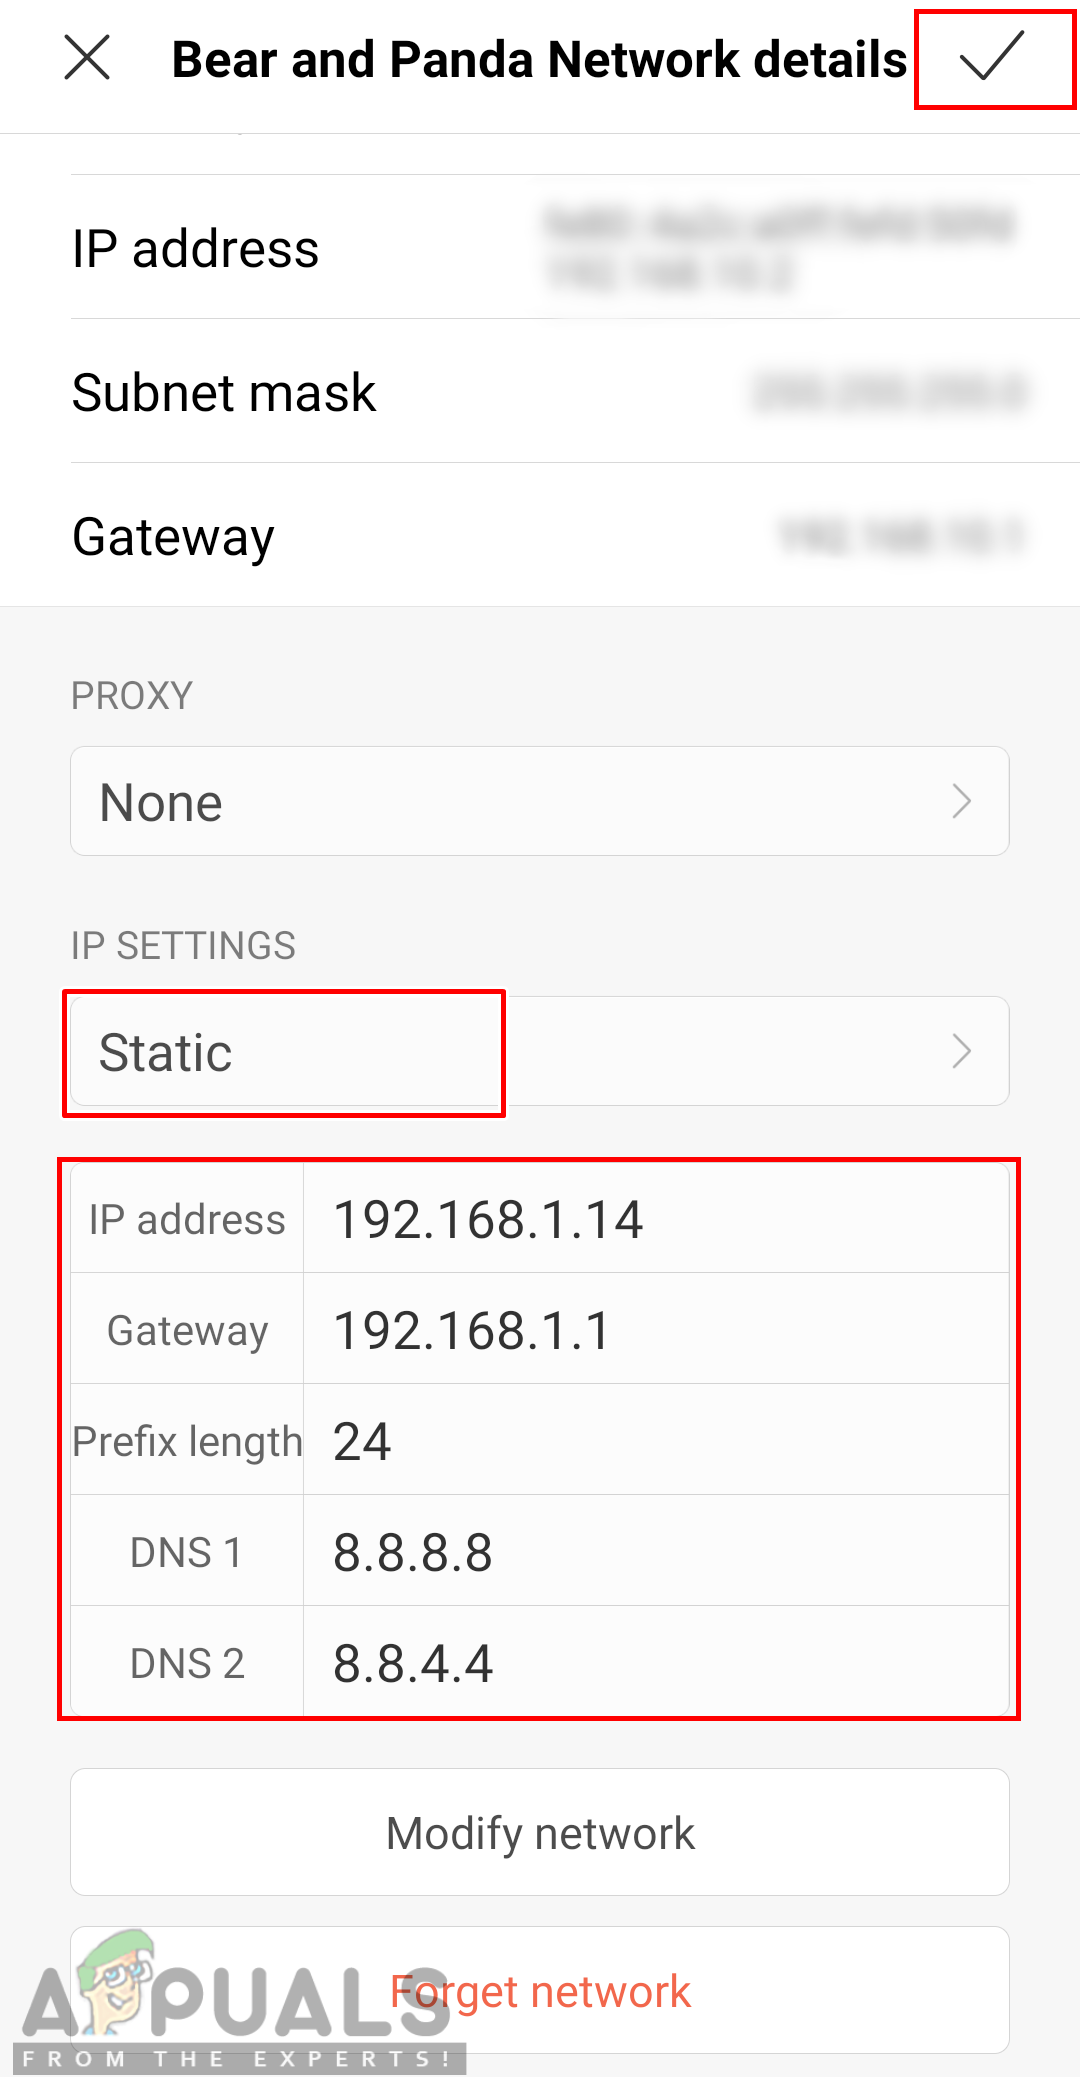
Configuring IP manually Note: To match network settings, copy from other connected devices.
- Tap Connect and wait for connection.
If none of the methods shown above helped you at all, you will need to contact your ISP for further assistance regarding this issue.


