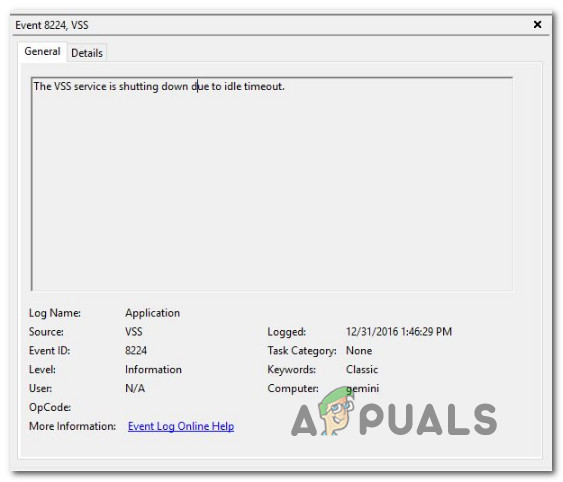
How to Fix ‘VSS Service is Shutting Down Due to Idle Timeout’ Error?
Some users have been reaching us with questions after discovering that the Volume Shadow Copy Service (VSS) is typically not running, even though it’s configured to start automatically. Upon investigating the problem with Event Viewer, some users have discovered a message pointing towards the problem “The VSS service is shutting down due to idle timeout“. As it turns out, the issue is not exclusive to a certain WIndows version since it’s confirmed to occur on Windows 7, Windows 8.1 and Windows 10.
What’s causing the ‘The VSS service is shutting down due to idle timeout’ error?
We investigated this particular issue by looking into various user reports and the repair strategies that are commonly being used by affected users to fix this particular problem. As it turns out, several different scenarios are known to cause this particular service behavior. Here are a couple of culprits that might be responsible for the apparition of the ‘The VSS service is shutting down due to idle timeout’ error:
- VSS service is set to Manual – As it turns out, this particular issue can occur in instances where the Startup type of the VSS service is not configured to Automatic. This might prevent certain process by calling the service, and might also leave it opened in instances where it’s not needed. In this case, you will be able to resolve the issue by changing the startup type to Automatic.
- System file corruption – System file corruption is the most common cause that will trigger these weird Event Viewer recurring errors. Affecting users are speculating that some dependencies of the VSS service become corrupted and end up causing this problem. If this scenario is applicable, you will be able to resolve the issue by performing DISM or SFC scans. In more serious cases, you might need to resort to using a System Restore snapshot to avoid the issue.
Method 1: Setting the VSS service to Automatic
One likely scenario in which the ‘The VSS service is shutting down due to idle timeout’ error will occur is an instance where the Volume Shadow Copy service is not configured to be started automatically. This will prevent any other processes and services from calling upon it when it’s needed – which might end up producing the idle timeout error inside Event Viewer.
By setting the service to Automatic, you will also ensure that the service will not be opened unless it’s needed.
Several affected users have confirmed that they managed to stop new ‘The VSS service is shutting down due to idle timeout’ Event Viewer errors by changing the startup type of the Volume Shadow Copy service to Automatically from the Services screen.
Follow the steps below to modify the status type of the Volume Shadow Copy Service to Automatic:
Note: These instructions will work regardless of the OS version that you’re encountering the issue on.
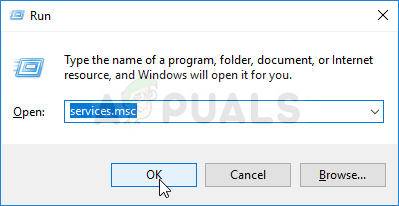
- Press Windows key + R to open up a Run dialog box. Next, type ‘services.msc’ in the text box and press Enter to open up the Services screen.
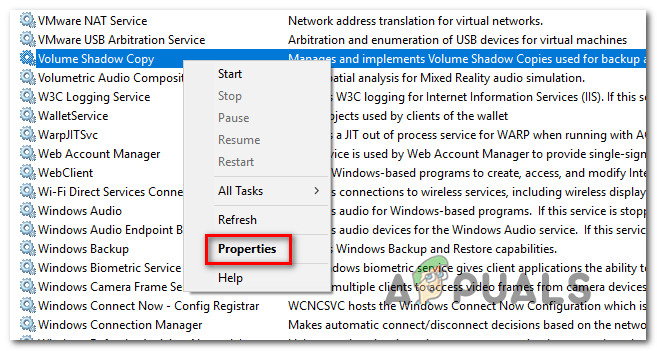
Running Services - Once you’re inside the Services screen, scroll down through the list of Services (Local) and locate Volume Shadow Copy. Once you see it, right-click on it and choose Properties from the newly appeared context menu.
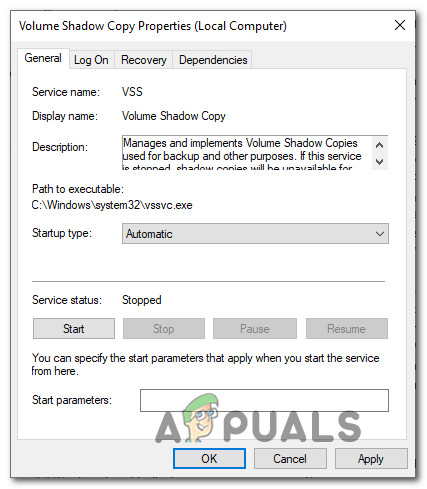
Accessing the Properties screen of the VSS service - Inside the Properties screen of the Volume Shadow Copy service, select the General tab and change the Startup type to Automatic. Next, click Apply to save the changes.
Change the status tab to Automatic - Restart your computer and see if the issue is resolved once the next startup sequence is complete.
If you’re still encountering the same ‘The VSS service is shutting down due to idle timeout’ error, move down to the next method below.
Method 2: Repairing System File Corruption
By far, the most common cause that will cause the ‘The VSS service is shutting down due to idle timeout’ error is system file corruption. As a lot of affected users have reported, it’s likely that some VSS dependencies or even some files used by WU have become tained by corruption and preventing the Volume Shadow Copy service from running properly.
If this scenario is applicable, you should be able to resolve the issue by resolving file corruption and logical errors with utilities like SFC and DISM.
System File Corruption (SFC) is a built-in utility that allows users to scan for corruption and replace the bad files with healthy copies fetched from a locally stored archive. It’s especially useful in cases where Windows Resource Protection (WRP) files have become corrupted.
Another relevant utility that will help you to resolve this problem, in this case, is DISM (Deployment Image Servicing and Management). This built-in tool is especially good in instances where the error is facilitated by a problem with a WU component or inside the System Update Readiness Tool.
Since both of these utilities are geared towards repairing different essential Windows components, we highly recommend that you deploy both to ensure that you cover every possible aspect that might trigger the ‘The VSS service is shutting down due to idle timeout’ .
Here’s a quick guide on running both SFC and DISM scans from an elevated CMD window:
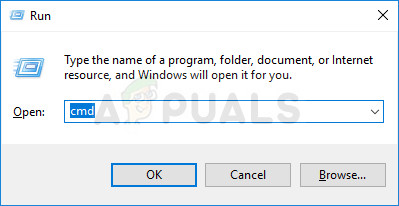
- Press Windows key + R to open up a Run dialog box. Next, type “cmd” inside a text box and press Ctrl + Shift + Enter to open up an elevated Command Prompt. When you’re prompted by the UAC (User Account Control), click Yes to grant administrative privileges.
Running Command Prompt as an administrator - Once you’re inside the elevated Command prompt, type the following commands in order and press Enter after each one to initiate a DISM scan:
Dism.exe /online /cleanup-image /scanhealth
Dism.exe /online /cleanup-image /restorehealth
Note: The first command will scan your system for any inconsistencies while the other will start the repairing process. If no health issues are found from the first command, then there’s no point in running ‘/restorehealth’ and you should jump directly to step 3. Also, make sure you are connected to a stable internet connection before starting a DISM scan.
- Once the scan is finished, restart your computer and see if the issue was resolved by checking the Event Viewer for new VSS errors once the next startup sequence is complete. If the same events are still popping up, move down to the next method below.
- Follow Step 1 again to open up another elevated Command Prompt. Next, type the following command and press Enter to initiate a System File Checker (SFC) scan:
sfc /scannow
Important.: If you try to stop this scan while it’s running, you run the risk of causing other system file errors. So don’t close the CMD window or restart your computer under no circumstances until the process is complete.
- Once the scan is finished, restart your computer and see if the error is resolved at the next system startup.
If you’re still encountering the ‘The VSS service is shutting down due to idle timeout’ error, move down to the next method below.
Method 3: Using a System Restore point
If none of the methods above have helped you to get rid of the annoying ‘The VSS service is shutting down due to idle timeout’ events, chances are you’re dealing with a severe corruption issue that cannot be resolved conventionally.
In this case, we recommend that you use System Restore – a utility capable of resolving most problems that leave behind a recurring error message. System Restore functions by restoring your entire Windows installation to a healthy state in which the problem doesn’t occur.
But for this operation to function, you need to have a previously created System Restore point when the problem was not occurring. Fortunately, Windows is automatically configured to create restore snapshots are fixed intervals, so unless you modified the default behavior, you should be able to follow the instructions below.
Important: Keep in mind that your system will be restored to that exact state it was when the snapshot was created. This means that any app/games installation, user preferences or any other OS changes will be reversed.
If you decide to perform a system restore, follow the instructions below to perform a System restore:
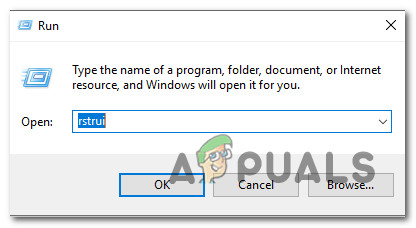
- Press Windows key + R to open up a Run dialog box. Next, type “rstrui” inside the newly appeared text box and press Enter to open up the System Restore wizard.
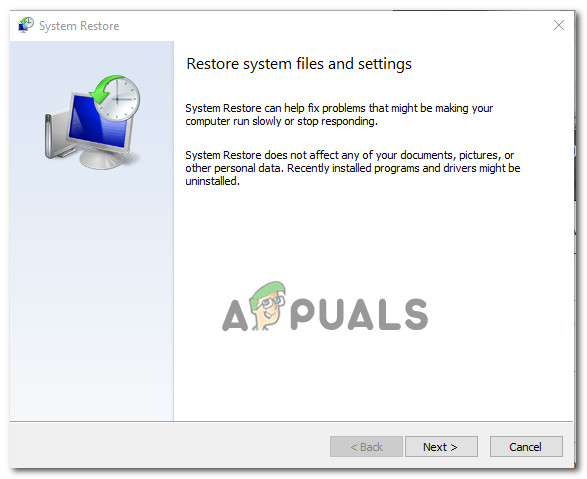
Opening the System Restore wizard via Run box - Inside the initial screen of System Restore, click Next to proceed to the next screen.
Using System Restore - Next, make sure to start by checking the box associated with Show more restore points. Then, choose a restore snapshot point that is dated before the apparition of the issue. Once the appropriate point is selected, click Next once again to advance to the next menu.
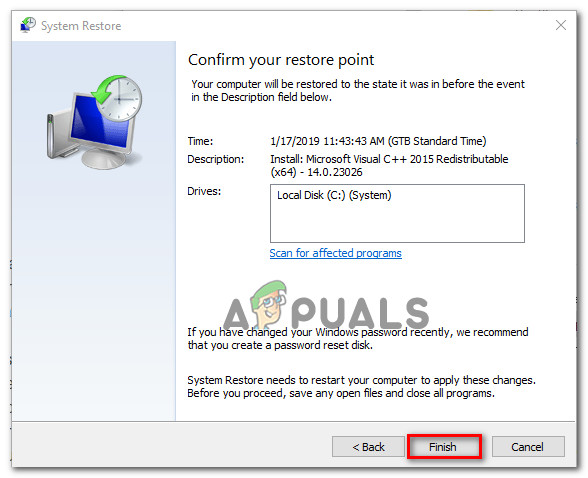
- Once you get this far, the utility s ready to go. To start the process, simply click on Finish. After you do this, your computer will restart and the older state will be enforced at the next system startup.
Starting the System Restore process - After your computer boots back up, visit the Event Viewer and see if you still get VSS error messages.


I don’t get this – There’s nothing in the log message to suggest the VSS service shutting down because it’s idle as an error (the severity level is “Information”) and Microsoft’s own documentation describes this as normal here.Why is this log message a problem in the first place to need an article like this?