Fix: ‘Windows Push Notification User Service has Stopped Working’ Error?
Windows Push Notification User Service is a notification service available on the Windows 10 operating system. It’s a platform which provides support for local or push notifications and, without it, users are not able to receive notifications from the operating system and they have installed.
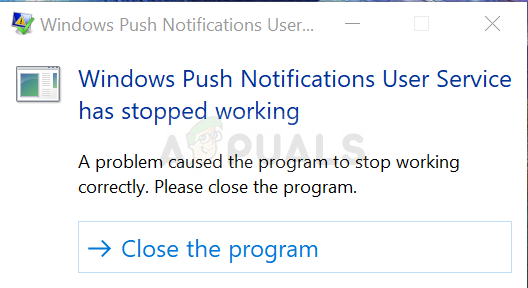
Unfortunately, some users have reported that the service simply keeps crashing on their computers no matter what they do and they fail to receive any notifications as they normally did. We have gathered some working methods and we hope you would be able to benefit and resolve the problem!
What Causes the Windows Push Notification User Service to Stop Working?
Here is a list of the most common causes of this problem. Make sure you check it out in order to deduct the correct scenario for your issue and resolve the problem more easily.
- Memory leaks caused by the service – Huge memory leaks appear as a result of missing or corrupt system files used by the service. Make sure you replace these files using the SFC scanner.
- Notifications database is corrupt – Notifications database is a file located on your computer which may have gone corrupt and which may cause the service to crash. Users have reported that deleting it will cause Windows to recreate it which resolves the problem.
- Avast Antivirus’ Do Not Disturb component – The Do Not Disturb component of Avast prevents users from receiving notifications but it causes this problem even if it’s not turned on. Make sure you uninstall it.
Solution 1: Use SFC to Scan for Memory Leaks
It has been reported that the Windows Push Notification User Service sometimes causes huge memory leaks which result in massive memory consumption and, ultimately, crashes of the service. These problems are rooted deep inside the system files and the only way to try to resolve them is by running the System File Checker (SFC). It will scan your system files for errors and possible repair or replace them. Follow the steps below in order to do so!
- Search for “Command Prompt” by typing it either right in the Start menu or by pressing the search button right next to it. Right-click the first entry which will pop up as a search result and select the “Run as administrator” context menu entry.
- Additionally, you can also use the Windows Logo Key + R key combination in order to bring up the Run dialog box. Type in “cmd” in the dialog box which appears and use the Ctrl + Shift + Enter key combination for admin Command Prompt.

- Type in the following commands in the window and make sure you press Enter after typing each one. Wait for the “Operation completed successfully” message or something similar to know that the method worked.
sfc /scannow
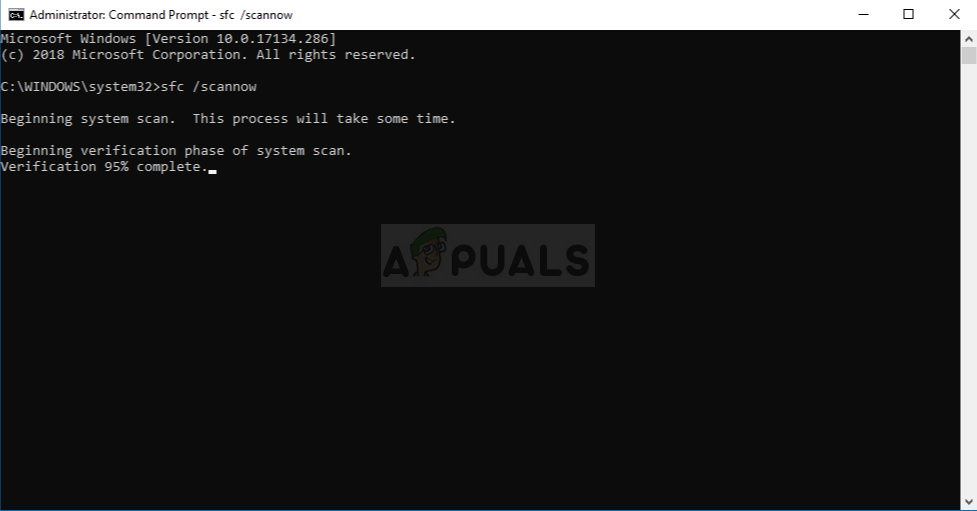
- Try to restart your computer and check to see if the Windows Push Notification User Service continues to crash on your computer.
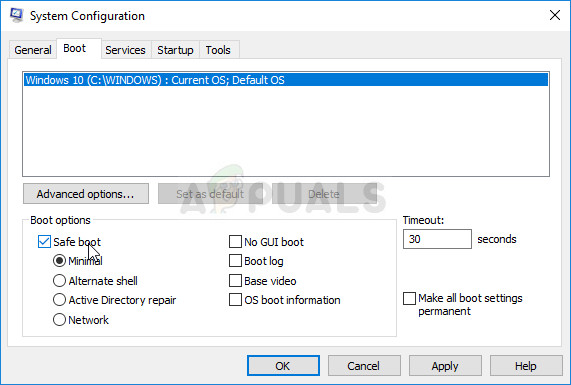
Solution 2: Rename or Delete the Notifications Folder in Safe Mode
Users who have used this method successfully in order to resolve their occurrence of this problem reported that they believe that the Notifications database (wpndatabase.db) became corrupted after the last Windows 10 update. You can recreate a new database simply by renaming or deleting the Notifications folder on your computer in Safe Mode. It will be recreated automatically and the problem should seize to appear!
- This method is valid for all versions of Windows. Use the Windows + R key combination on your keyboard in order to start the Run dialog box and type in “msconfig” before clicking OK.
- In the System Configuration window, navigate to the Boot tab to the right and check the box next to the Safe Boot Click OK and restart your computer in order to boot into Safe Mode.
- Navigate to the following location on your computer by opening the Windows Explorer and clicking on This PC:
C:\Users\YOURUSERNAME\AppData\Local\Microsoft\Windows
- If you are unable to see the AppData folder, you may need to turn on the option which enables you to view hidden files and folders. Click on the “View” tab on File Explorer’s menu and click on the “Hidden items” checkbox in the Show/hide section. File Explorer will show the hidden files and will remember this option until you change it again.
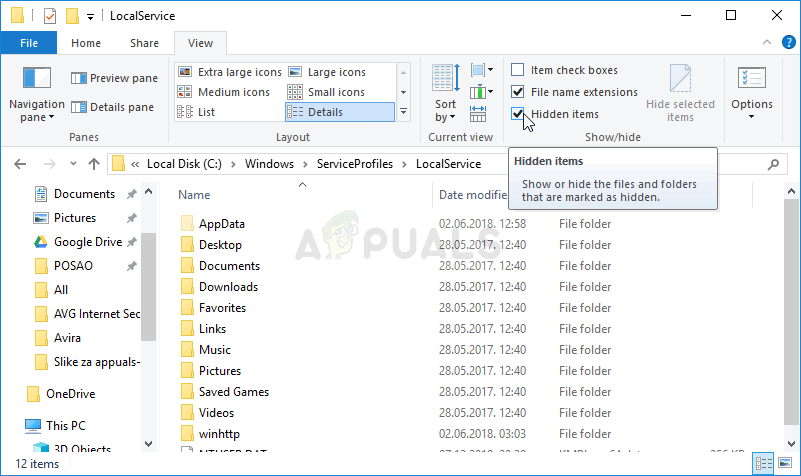
- Locate the Notifications folder inside the Windows folder, right-click on it, and choose Rename from the context menu which will appear. Rename it to something like old and confirm the changes.
- Restart your computer and check to see if the problem persists!
Solution 3: Uninstall the ‘Do Not Disturb’ Component of Avast/AVG
Users have reported that they managed to resolve the problem simply by removing a single component from Avast Antivirus. The ‘Do Not Disturb’ component is not a vital part of the internet security package and it’s only used to prevent notifications from interrupting you.
Apparently, it can prevent the normal functioning of the notifications service even if it’s turned off. Follow the steps below in order to remove it from your Avast installation for good!
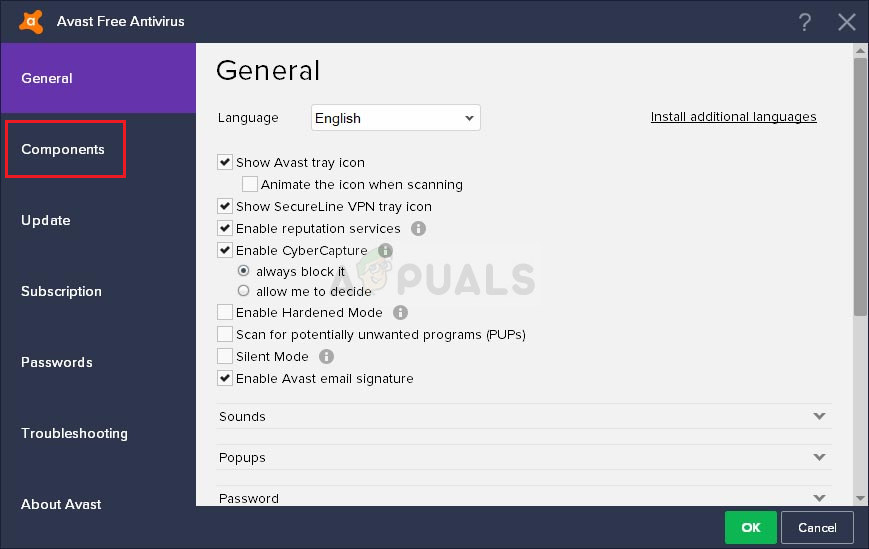
- Open the Avast user interface by clicking its icon which is located at the lower right part of your screen at the system tray. You can also do the same by locating it in your Start menu or by double-clicking its icon on the Desktop.
- Navigate to Settings and click the Components tab which should be the second one from the top.
- Click the downward facing arrow next to the component that you want to remove (Do Not Disturb Mode in this particular example), click Uninstall Component, and then click OK to confirm the uninstallation of the component.
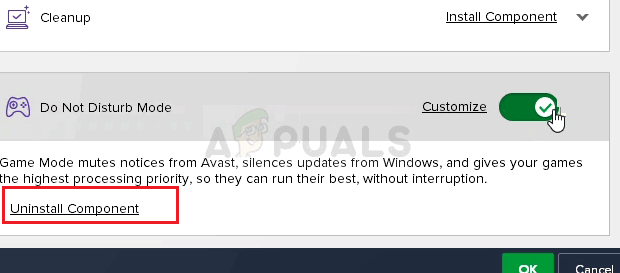
Uninstalling the Do Not Disturb Component in Avast - Restart your PC if Avast prompts you with that option in order to confirm the changes. Check to see if the Windows Push Notification User Service continues to crash from now on.
Solution 4: Update Windows 10 to the Latest Version
The latest versions of Windows 10 seem to have resolved this problem for good as long as it wasn’t caused by Avast or other third-party programs. Updating your operating system to the latest version is always helpful when it comes to dealing with similar errors and users have reported that the latest Windows 10 versions actually deal with this problem in specific
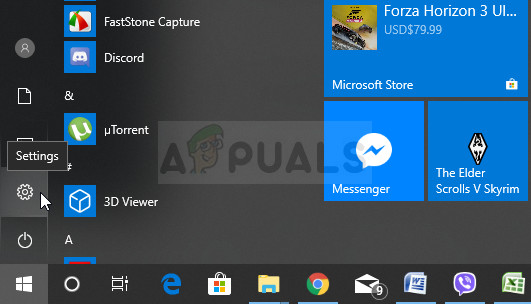
- Use the Windows Key + I key combination in order to open Settings on your Windows PC. Alternatively, you can search for “Settings” by using the search bar located at the taskbar.
- Locate and open the “Update & security” section in the Settings Stay in the Windows Update tab and click on the Check for updates button under the Update status in order to check whether there is a new version of Windows available.
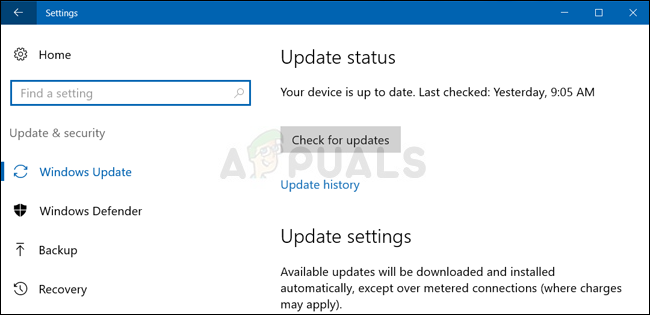
- If there is one, Windows should install the update immediately and you will be prompted to restart your computer afterward.
Solution 5: Replace Your Antivirus
Free antivirus tools can be quite helpful and they can do their job protecting your computer but sometimes they just don’t get along well with other things on your computer. Consider replacing your antivirus if it causes this problem while it’s turned on!
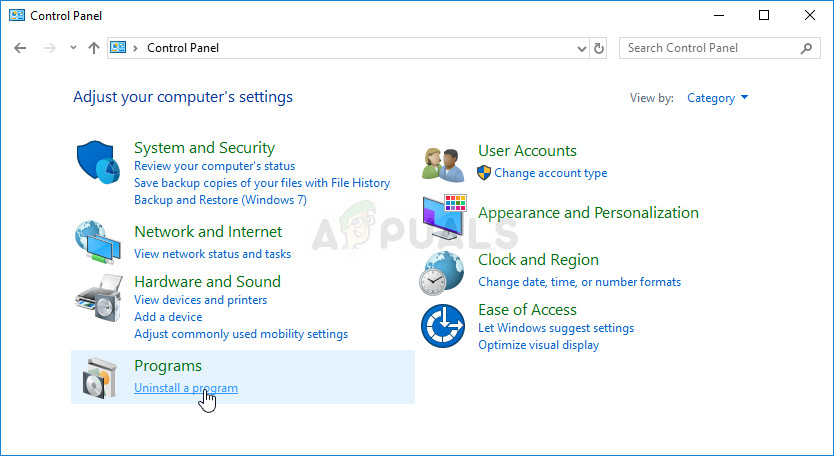
- Click on the Start menu and open Control Panel by searching for it. Alternatively, you can click on the gear icon in order to open settings if you are using Windows 10.
- In Control Panel, select to View as – Category at the top right corner and click on Uninstall a Program under the Programs section.
- If you are using the Settings app, clicking on Apps should immediately open a list of all installed programs on your PC.
- Locate your antivirus tool in Control Panel or Settings and click on Uninstall.
- Its uninstall wizard should open so follow the instructions to uninstall it.
- Click Finish when the uninstaller completes the process and restart your computer to see whether errors will still appear. Make sure you choose a better antivirus option.


Hi am not receiving push notifications sounds on Facebook on comments on my photo and reply to others solve my problem to get back all push notifications sounds on Facebook my email address is mithun.shabudin@gmail.com