How to Fix the ‘Unhandled Exception has Occurred in your Application’ Error on Windows?
The “Unhandled Exception has Occurred in your Application” error often forces an application to terminate unexpectedly, resulting in potential data loss. This error usually indicates that the application encountered a condition it could not handle, often due to programming flaws or unforeseen issues during execution.
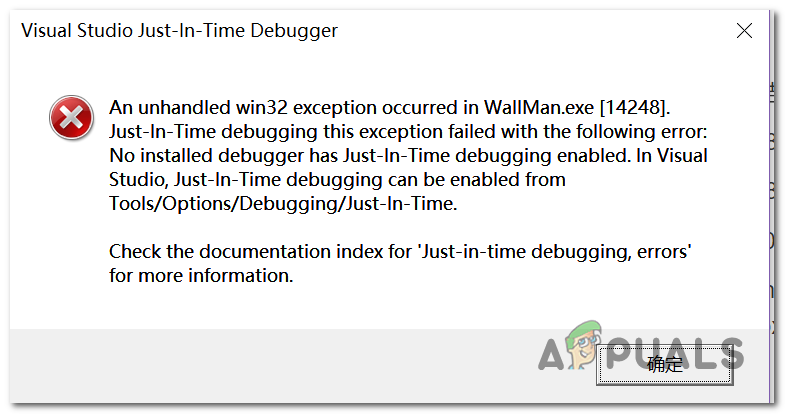
A specific variation, the “An unhandled win32 exception occurred in application_name” error, typically arises when launching applications built in Visual Studio, with frequent reports linked to Uplay, Internet Explorer, and older games designed for previous Windows versions.
The most common cause of these errors is a corruption or misconfiguration of the .NET Framework, though outdated software, incorrect registry settings, and conflicts with other applications can also trigger this issue.
Solution 1: Install All Pending Windows Updates
A common cause for the following error is an app built for the x64 platform using MSVCR90.DLL, which calls the strncpy function. This can cause an access violation in the MSVCR90.DLL file, making the app unresponsive in the strncpy function. This issue is often due to an exceeding source buffer or an incorrect final byte.
Luckily, Microsoft knows about this and has released a hotfix to fix it. You just need to update your OS to the latest version available.
Note: This hotfix was included in a Visual Studio 2008 revision, which Windows auto-updates, so the steps below are universal and should work regardless of your OS version.
- Press the Windows key + R, type ‘ms-settings:windowsupdate’, and press Enter to open the Windows Update tab in the Settings app.

Opening the Windows Update screen Note: On Windows 7 or Windows 8.1, use the command ‘wuapp’ instead.
- Click on Check for updates and follow the on-screen prompts to install all Windows Updates.

Installing every pending Windows update Note: Make sure to install all updates, including optional ones.
- If prompted to restart, do so and return to the Windows Update screen to complete remaining updates.
- After all updates are installed, restart your computer once more and check if the issue is resolved.
Solution 2: Replace Your Antivirus
Free antivirus tools can be useful and protect your computer, but sometimes they don’t get along with other software, leading to errors. These errors can be caused by conflicts between the antivirus and other programs or system processes.
The antivirus may interfere with certain operations or block essential files, causing unexpected issues. Consider replacing your antivirus if it causes problems when active to ensure stable system performance.
- Press Win + X on your keyboard and select Apps and Features.
- Scroll through the list of installed programs and locate your antivirus tool.
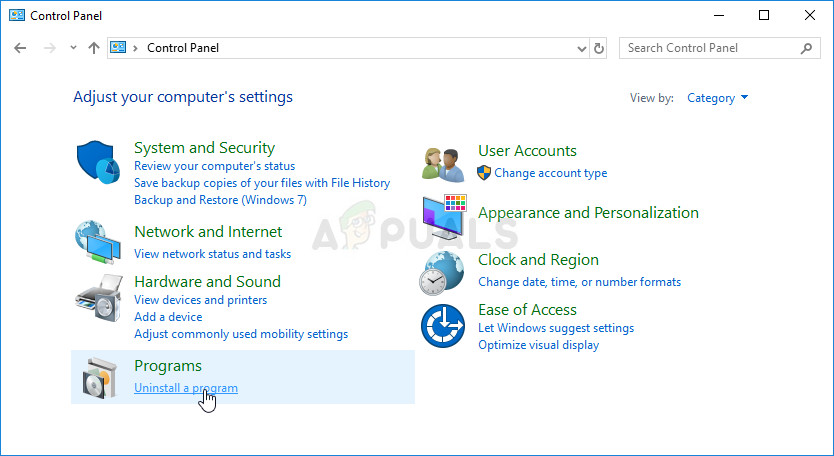
Uninstall a program - Click on the antivirus tool, and then click Uninstall.
- Follow the on-screen instructions in the uninstall wizard.
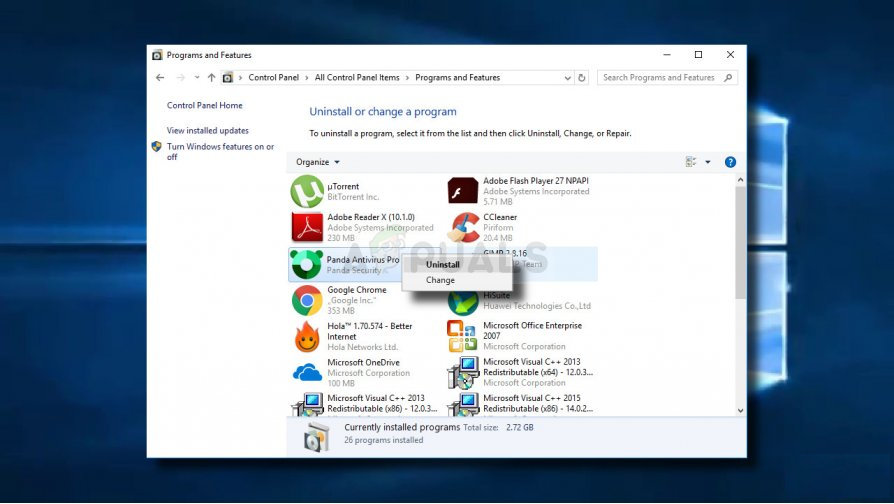
Uninstalling your antivirus - Click Finish when the uninstallation completes. Restart your computer to check for any remaining errors. Consider choosing a better antivirus option.
Solution 3: Delete the Launcher Registry Value (if applicable)
If you’re encountering the “An unhandled win32 exception occurred” error when trying to launch Uplay.exe or another Ubisoft application, it’s likely due to a bug in their Ubisoft Game Launcher. This is a common issue on Windows 10, especially for users with both Steam and Uplay installed.
Several users have successfully resolved this by using the Registry Editor to locate and delete the launcher’s string registry value. This action removes the conflict, allowing both apps to run smoothly on the same machine.
The error generally occurs because of conflicts or corruption within the launcher’s registry entries, which affects the proper functioning of Uplay and other Ubisoft applications.
- Press Windows key + R to open the Run dialog box.
- Type ‘regedit’ and press Enter to open the Registry Editor. Approve the UAC (User Account Control) prompt by clicking Yes.
Open Regedit - Navigate to the following location by copying and pasting it directly into the navigation bar at the top, then press Enter:
Computer\HKEY_LOCAL_MACHINE\SOFTWARE\WOW6432Node\Ubisoft
- On the right-hand side, right-click on Launcher and select Delete.

Deleting the Launcher value Note: If you can’t delete the key, take ownership of the registry key first.
Note: Deleting this key forces the launcher to create a new string value with fresh data, which should fix the issue.
- Close the Registry Editor and restart your computer.
- After restarting, check if the issue is resolved.
Solution 4: Reset Internet Explorer (if applicable)
Another potential cause of this issue is a series of corrupted Internet Explorer (IE) files. If you’re encountering the “An unhandled win32 exception occurred in iexplore.exe” error, chances are it appears after a failing script. Corrupted IE files can disrupt normal browser operations, leading to various errors.
To fix this, reset your Internet Explorer settings via the Internet Options menu. This solution has been confirmed to work by many users facing this error.
- Open the Start menu and type ‘Internet Options’.
Accessing Internet Options from Start Menu - Click on the Internet Options result to open it.
- In the Internet Properties window, go to the Advanced tab.
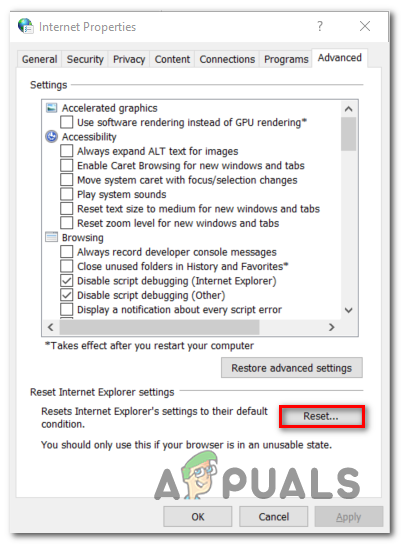
Resetting the Internet Explorer settings - Under the Reset Internet Explorer settings section, click on the Reset button.
- When the confirmation screen appears, make sure the checkbox for Delete personal settings is selected.
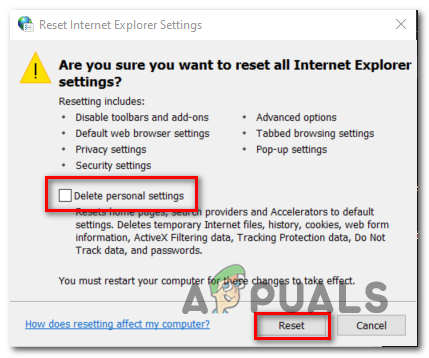
- Then, click Reset.
- Wait for the process to finish, then restart your computer to apply the changes.
Solution 5: Disable Script Debugging and Associated Registry Keys (if applicable)
Script debugging is typically used by developers to identify and fix errors in scripts, but when enabled on a user’s system, it can sometimes trigger unnecessary interruptions, especially in older applications like Internet Explorer. Common causes of this issue include corrupted scripts, outdated software, or compatibility problems with newer operating systems.
By disabling this feature and cleaning up associated registry keys, you reduce the chances of your application getting caught up in script-related issues that it’s not designed to handle, which can often resolve various error messages that disrupt normal function.
These script-related errors are closely linked to debugging scripts that fail to execute properly, resulting in application performance issues.
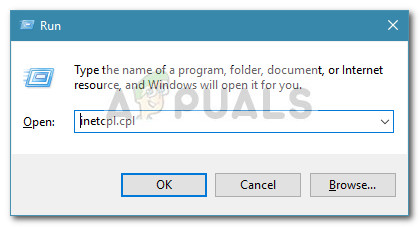
- Press Windows key + R to open the Run dialog box.
- In the text box, type ‘inetcpl.cpl‘ and press Enter to open the Internet Options menu. (If prompted by the User Account Control (UAC), click Yes to grant administrative privileges.)

Opening the Internet Properties screen - In the Internet Properties screen, click on the Advanced tab at the top.
- Scroll down the Settings menu, then check the box that says Disable script debugging (Internet Explorer).
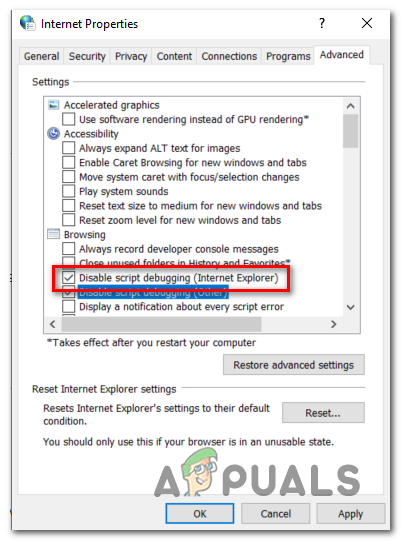
Disabling script debugging - Click Apply to save the changes, then close the Internet Properties window.
- Press Windows key + R again to open another Run dialog box. This time, type ‘regedit‘ and press Enter to open the Registry Editor. Grant admin access by clicking Yes when prompted by the User Account Control window.

Opening the Registry Editor - In the Registry Editor, navigate to one of the following locations depending on your system:
HKEY_LOCAL_MACHINE\SOFTWARE\Microsoft\Windows NT\CurrentVersion\AeDebug
(32-bit machine)
HKEY_LOCAL_MACHINE\SOFTWARE\Wow6432Node\Microsoft\Windows NT\CurrentVersion\AeDebug
(64-bit machine)
Note: The location varies depending on your Windows version. Use the first location for 32-bit and the second for 64-bit Windows.
- When you arrive at the correct location, right-click on Debugger on the right side and select Delete from the context menu.
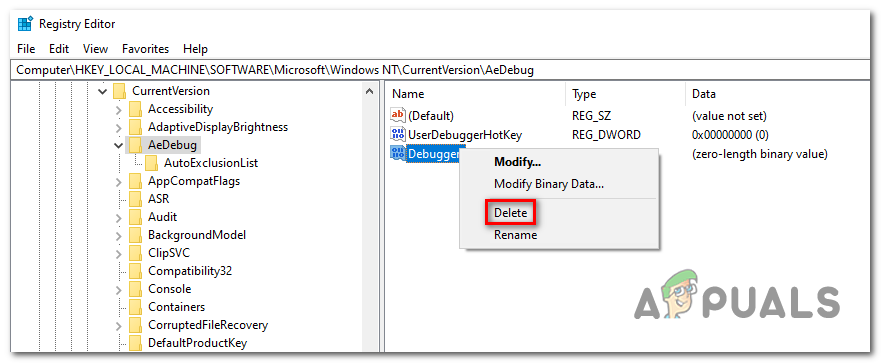
Deleting the Debugger registry value - Next, navigate to one of the following locations depending on your machine:
HKEY_LOCAL_MACHINE\SOFTWARE\Microsoft\.NETFramework\
(32-bit machine)
HKEY_LOCAL_MACHINE\SOFTWARE\Wow6432Node\Microsoft\.NETFramework
(64-bit machine)
Note: Access the registry key according to your Windows version.
- When you arrive at the correct location, right-click on DbgManagedDebugger in the right-hand section and select Delete from the context menu.
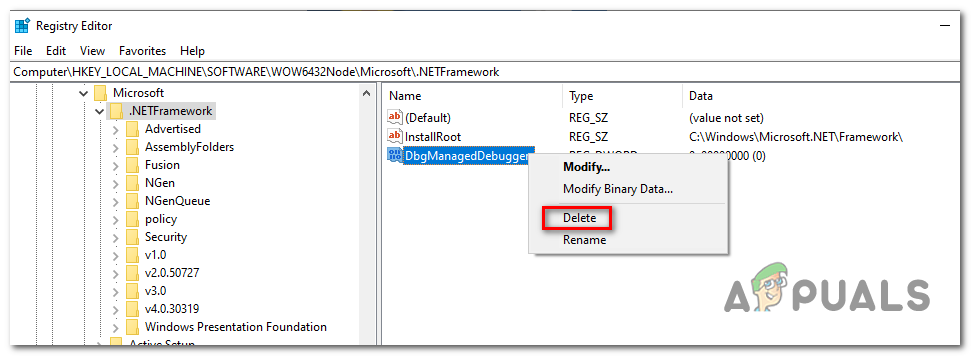
Deleting the DbgManagedDebugger value - Close the Registry Editor and restart your computer.
- After the restart, check if the issue still occurs.
Solution 6: Install the Latest Version of .NET Framework
Having .NET Framework installed on your computer is vital as many modern games and programs rely on it. Often, errors are caused due to missing or corrupted .NET Framework files. These errors can prevent applications from running smoothly or starting at all. A common related issue is the ‘Unhandled Exception’ error, which typically occurs when a software component encounters a problem it cannot resolve.
Navigate to this link and click the red download button to get the latest version of the Microsoft .NET Framework. Once the download is complete, locate the file you downloaded and run it.
Solution 7: Perform a Clean Boot
We recommend performing a clean boot, which disables all non-Microsoft programs and services from starting up. This can help identify which program is causing the error. Interference in .NET Framework operations may lead to application issues and errors, often rooted in conflicts with other installed software or services.
- Press Windows + R on your keyboard. In the Run dialog box, type MSCONFIG and click OK.
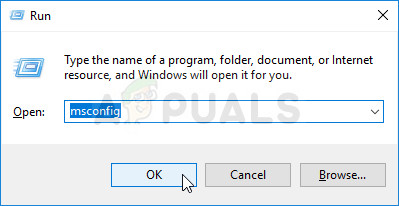
Running MSCONFIG - In the Boot tab, make sure the Safe Boot option is unchecked.
- Go to the General tab, select Selective startup, and uncheck Load startup items.
- Move to the Services tab, check the box for Hide all Microsoft services, and then click Disable all.
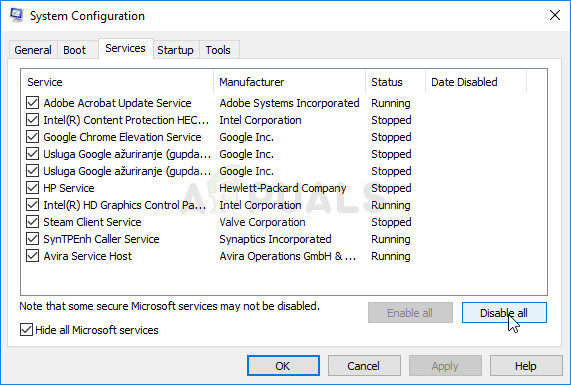
Disabling all non-Microsoft services - Go to the Startup tab and click on Open Task Manager. In Task Manager, disable each startup item by right-clicking on it and selecting Disable.
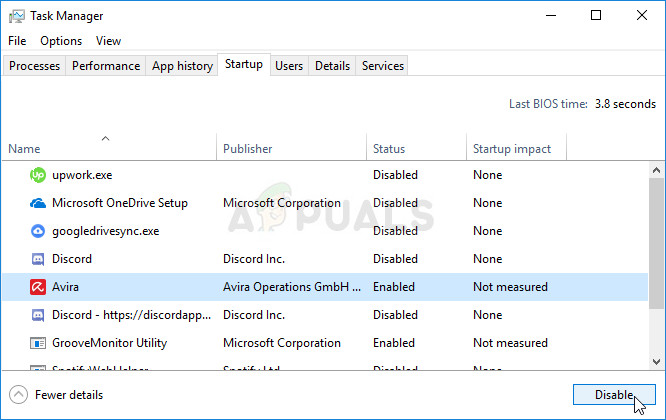
Disabling all startup items - Reboot your computer and check if the issue persists. If the issue is resolved, re-enable the startup items and services one by one, rebooting each time to identify the problematic item.
- Once you identify the problematic program or service, either reinstall or repair the program, or disable the problematic service.
Solution 8: Use SFC to Repair Corrupted System Files
It has been reported that the Microsoft .NET Framework corruption is related to faulty system files. These problems are rooted deep inside the system files and the only way to try to resolve them is by running the System File Checker (SFC). It will scan your system files for errors and possibly repair or replace them.
- Press Windows Key + X, then select Command Prompt (Admin).
- In the Command Prompt window, type the following command and press Enter:
sfc /scannow
- Wait for the message “Operation completed successfully” or a similar confirmation.
- Restart your computer.
Solution 9: Performing a Clean Install
If none of the methods presented below have managed to help you in resolving the issue, it’s very likely that you’re dealing with some kind of Windows inconsistency that cannot be resolved conventionally.
If the methods below haven’t resolved the issue, you’re likely dealing with a Windows inconsistency that can’t be fixed with standard solutions.
- Repair install (in-place repair) – This is the best approach if you need to refresh every OS component. Some find it a bit tedious, but it preserves all personal data (games, apps, media). You’ll need compatible installation media.
- Clean install – This is simpler and can be done through the Windows GUI without installation media. However, if you don’t back up your data first, you’ll lose everything.


