How to Fix the Roblox Won’t Install Issue on Windows?
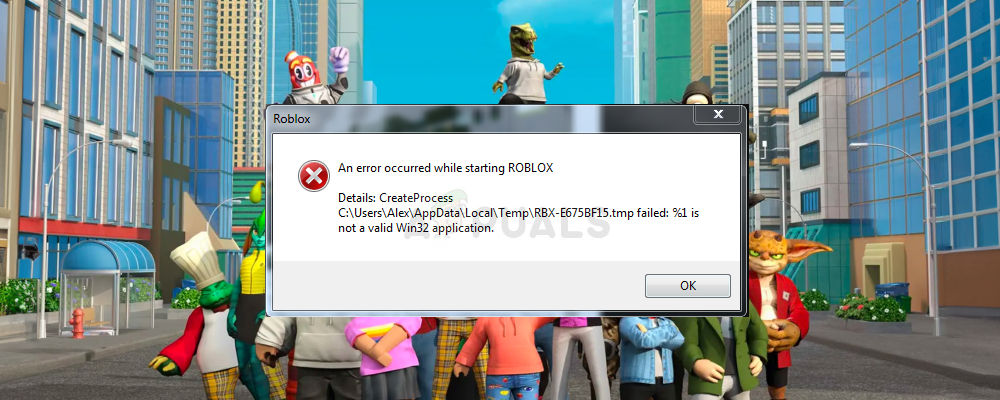
When attempting to install Roblox on Windows, users often encounter an issue where the installation process starts but abruptly stops, causing the installation window to close without completing.
A common cause of this installation error is the interference from security software, such as antivirus programs or Windows Defender Firewall, which can mistakenly identify the Roblox installer as a potential threat.
This article outlines troubleshooting methods to effectively bypass these problems and ensure a smooth installation process for Roblox on your Windows machine.
1. Disable Your Antivirus Temporarily
The Roblox installer may encounter difficulties gaining the necessary permissions to access critical files during the installation process due to antivirus software blocking the installer.
Disabling antivirus varies between different software, but if you are using Windows Defender, follow these steps to disable it:
- Access the Settings app by clicking the Start menu button and selecting the gear icon.
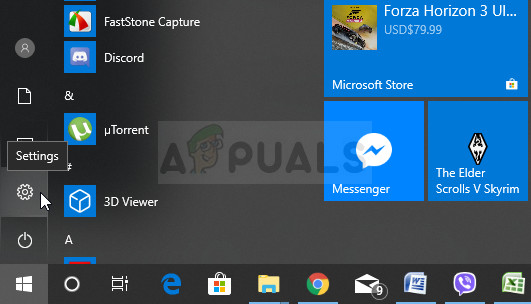
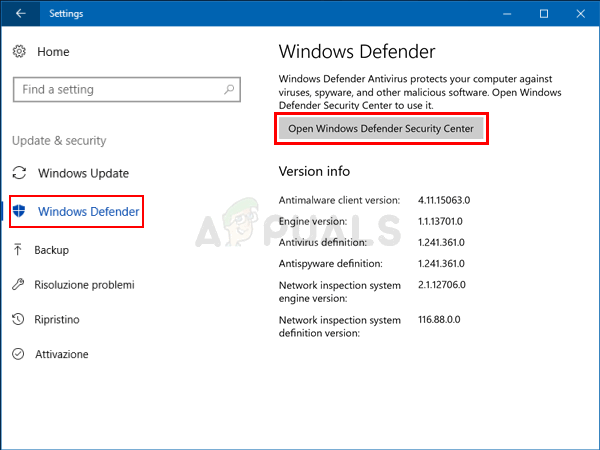
Windows 10 Settings in the Start Menu - In Settings, click the Update & Security section, navigate to Windows Security, and then click Open Windows Defender Security Center.
Opening Windows Defender - In the Windows Defender Security Center, click on the shield icon below the home icon, open Virus & threat protection settings, and turn off Real-time protection and Cloud-based protection.
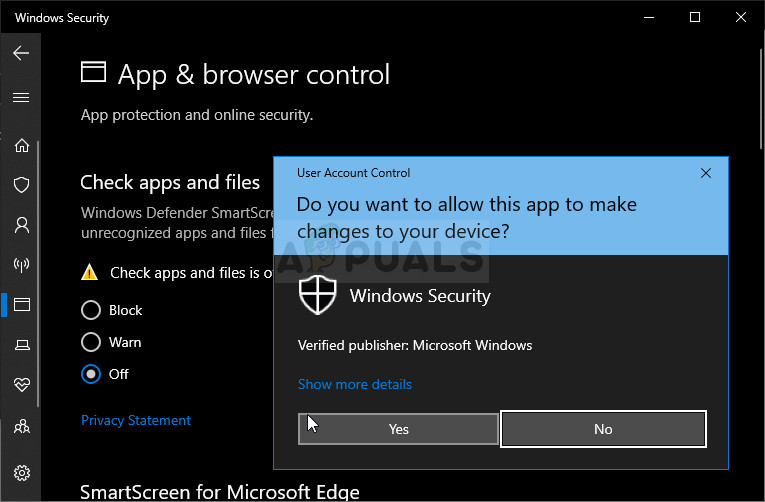
- Go to the browser icon (second from the right in the right-side menu) and disable the Check apps and files option.
Disabling the Apps & Files Scanner - Remember to re-enable these settings once Roblox is installed, as leaving them off can make your computer vulnerable.
2. Delete the Roblox Folder in AppData
Deleting the Roblox folder in AppData can resolve installation problems by removing potentially corrupted or incomplete installation files. This step helps Roblox create fresh files during a new installation attempt, bypassing any previous errors.
- Navigate to the following location on your computer by opening File Explorer and clicking on This PC:
C:\Users\YOURUSERNAME\AppData\Local
- If the AppData folder is not visible, enable the viewing of hidden files and folders. In File Explorer, click the View tab and select the Hidden items checkbox within the Show/hide section. File Explorer will then display hidden files.

Revealing the AppData Folder - Delete all files and folders with Roblox in their names from the Local folder. If a message appears that certain files could not be deleted because they are in use, end any Roblox-related processes in Task Manager, or move the files and folders to another location.
- Verify whether Roblox can now install correctly.
3. Allow Roblox in Windows Defender Firewall
Allowing Roblox through the Windows Defender Firewall can resolve installation issues as firewalls can block certain applications from accessing the internet.
- Open Control Panel by searching for it using the Start button or clicking on the Search button on the bottom left of your taskbar.
- Once the Control Panel is open, switch the view to Large or Small icons and select Windows Defender Firewall.
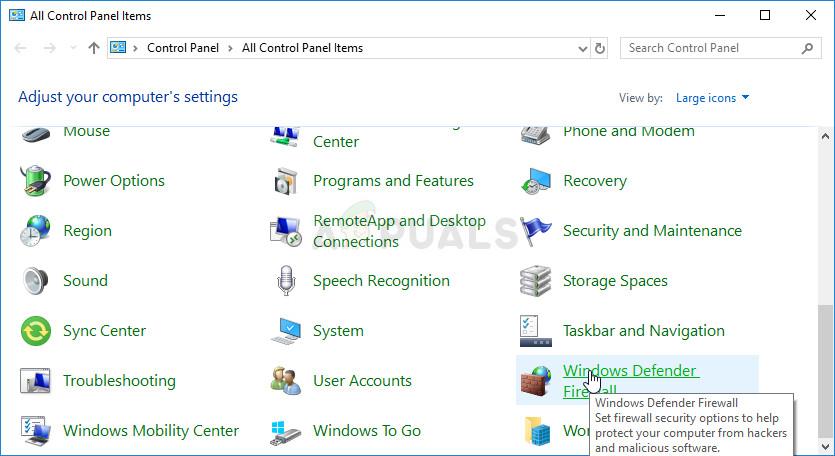
Windows Defender Firewall in Control Panel - Click on Allow an app or feature through Windows Defender Firewall from the list of options on the left and add the Roblox installation file, typically located at C:\Users\YourUserName\Downloads.
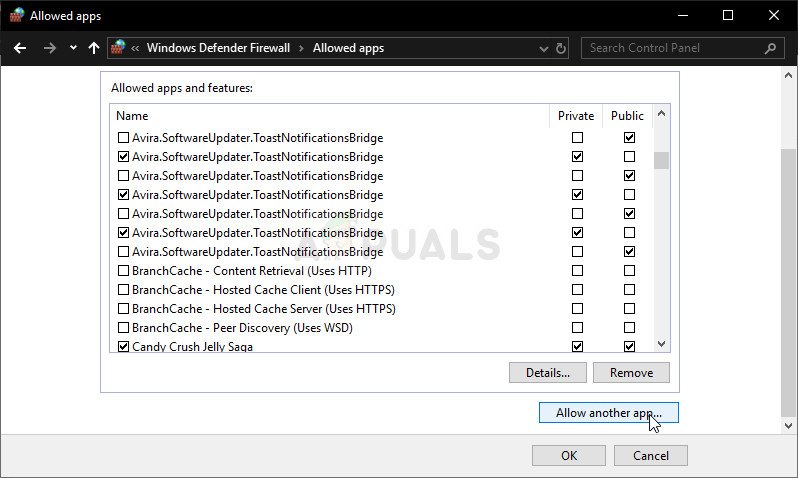
Allowing an App Through Windows Firewall
- Click OK and restart your computer. Verify if Roblox can now install without issues.
4. Run the RobloxPlayerLauncher as an Administrator
Running the RobloxPlayerLauncher as an Administrator grants the program higher-level permissions, allowing it to access necessary system files and settings, which might be restricted otherwise.
- Locate the RobloxPlayerLauncher in its default location, typically
C:\Users\YourUserName\Downloads
- Right-click the RobloxPlayerLauncher.exe file and select Properties. In the Properties window, go to the Compatibility tab and check the box next to Run this program as an administrator.
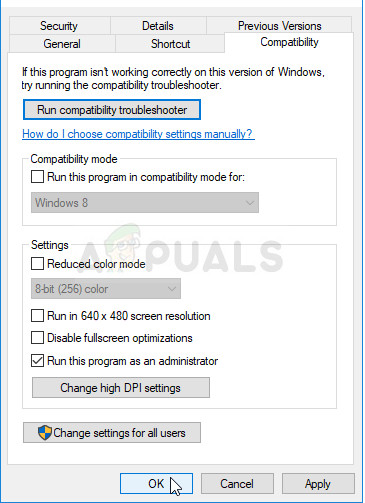
Running the File as an Administrator - In the Compatibility mode section, ensure the box next to Run this program in compatibility mode for is unchecked before accepting the changes.
- Confirm any dialogs to grant admin privileges. The launcher should now execute with admin privileges. Try running it and verify if the installation completes successfully.


hello, im from philippine,republic.