How to Fix the ‘Printer Cannot be Contacted over the Network’ Error on Windows?
The “Printer cannot be contacted over the network” error appears to users who have a printer added as a network printer. When they try to use it, it often fails to print anything and the printer troubleshooter displays this error message.
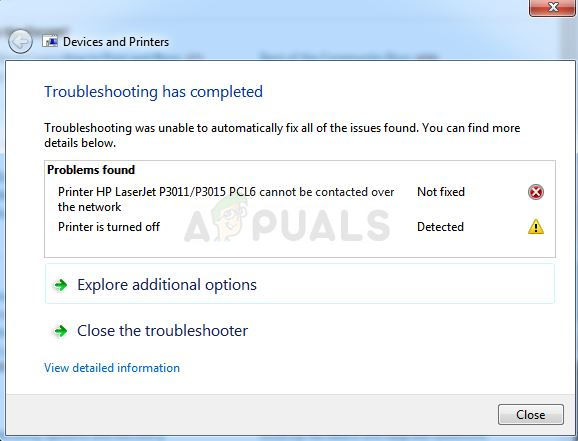
There is often an error symbol which pops up when viewing the printer in Devices and Printers. There have been many different methods used to resolve this problem so make sure you check them out below! Follow the instructions carefully!
What Causes the “Printer Cannot be Contacted over the Network” Error on Windows?
There is a couple of distinct causes for this specific problem. It’s quite important to determine the right cause in order to be able to resolve the problem more quickly and more efficiently. Check out the list below!
- Core services are disabled – Printer’s functionality depends on several services running, especially if it’s a network printer. Make sure all required services are enabled.
- Printer’s IP is dynamic – While this isn’t always a problem, some printer’s display problematic behavior when their IP isn’t static so make sure you change that.
Solution 1: Make Sure Certain Services are Enabled
Printer usage is dependent on several services in order to run properly. A recent Windows Update or a change in your computer’s setup may have changed something about the startup of these services. Make sure you set them to run automatically and the problem should be resolved.
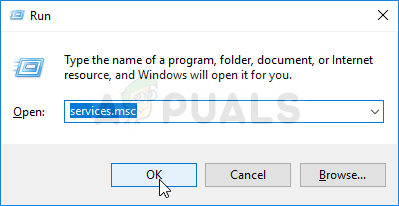
- Open the Run utility by using the Windows Key + R key combination on your keyboard (press these keys at the same time. Type “services.msc” in the newly opened box without the quotation marks and click OK in order to open the Services tool.
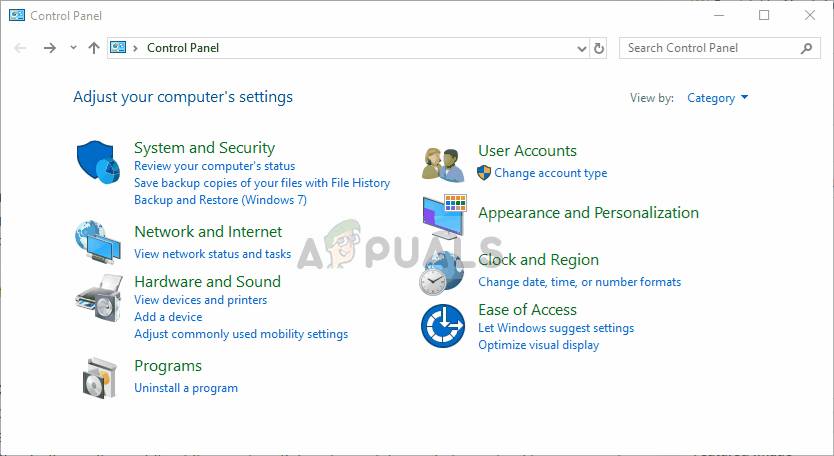
- The alternative way is to open the Control Panel by locating it in the Start menu. You can also search for it using the Start menu’s search button.
- After the Control Panel window opens, change the “View by” option at the top right part of the window to “Large Icons” and scroll down until you locate the Administrative Tools Click on it and locate the Services shortcut at the bottom. Click on it to open it as well.
- Locate the Remote Access Auto Connection Manager, Remote Access Connection Manager, Secure Socket Tunneling Protocol Service, Routing and Remote Access services on the list, right-click on each one and select Properties from the context menu which appears.
- If the service is started (you can check that just next to the Service status message), you should stop it for now by clicking the Stop button in the middle of the window. If it is stopped, leave it stopped until we proceed.
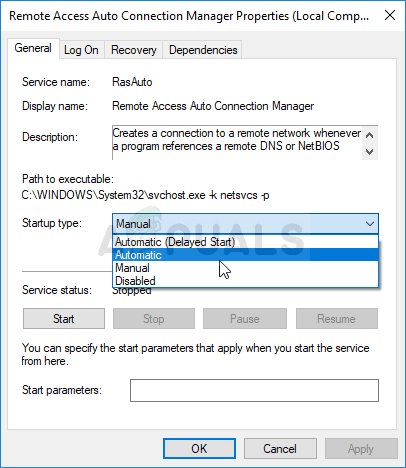
- Make sure that the option under the Startup type menu in the service’s properties window is set to Automatic before you proceed with other steps. Confirm any dialogue boxes which may appear when changing the startup type. Click on the Start button in the middle of the window before exiting. Make sure you repeat the same process for all services we mentioned.
You may receive the following error message when you click on Start:
"Windows could not start the service on Local Computer. Error 1079: The account specified for this service differs from the account specified for other services running in the same process."
If this happens, follow the instructions below to fix it.
- Follow the steps 1-3 from the instructions above in order to open the service’s properties window. Navigate to the Log On tab and click on the Browse…
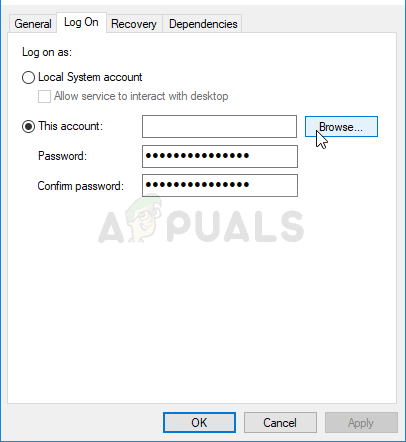
- Under the “Enter the object name to select” entry box, type in your account’s name, click on Check Names and wait for the name to become available.
- Click OK when you are finished and type in the password in the Password box when you are prompted with it if you have set up a password. Your printer should now work properly!
Solution 2: Remove the Printer and Add it Again
This is pretty much a basic solution but it has helped plenty of users as they were able to resolve the problem simply by removing the printer entirely and adding it again using the Add a Printer wizard. Make sure you try it out by following the steps below!
- Open Control Panel by searching for the utility in the Start button or by clicking the Search button (Cortana) button at the left part of your taskbar (bottom left part of your screen.
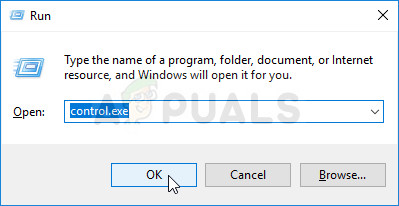
- You can also use the Windows Key + R key combo where you should type “control.exe” and click Run which will also open Control Panel directly.
- After Control Panel opens, change the view to Category and click on View devices and printers under Hardware and Sound in order to open this section.
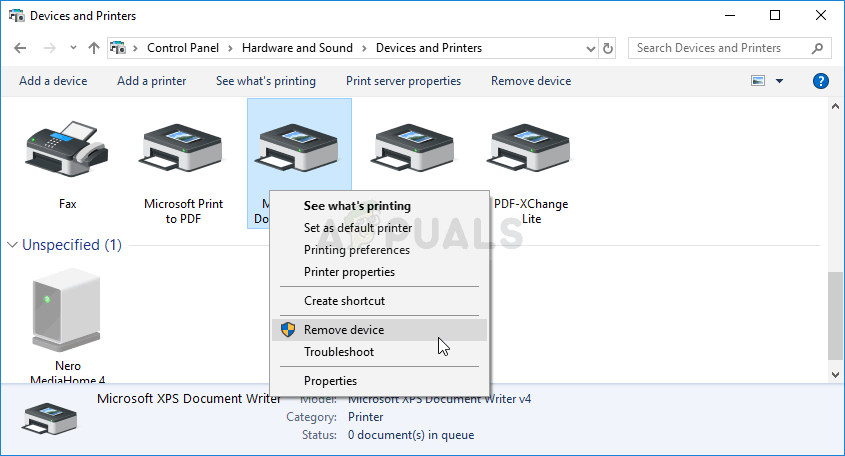
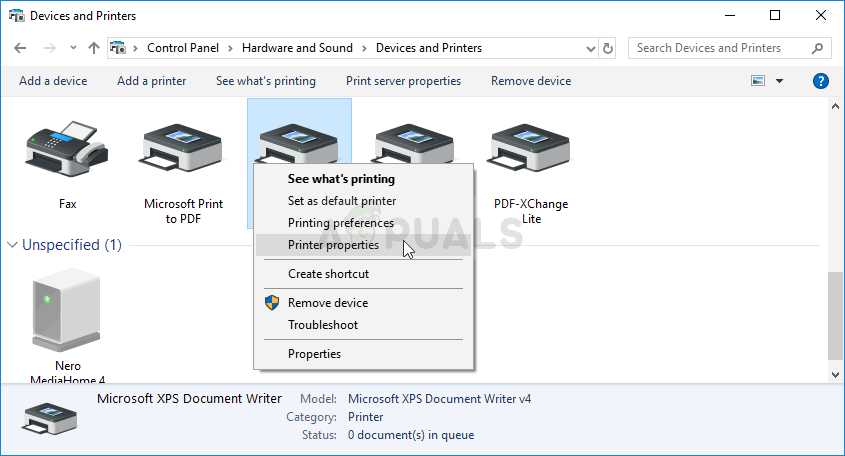
- Head over to the Printers section, right-click the printer you want to remove (the one which is causing these issues) and choose the Remove device Confirm any dialog options which may pop up.
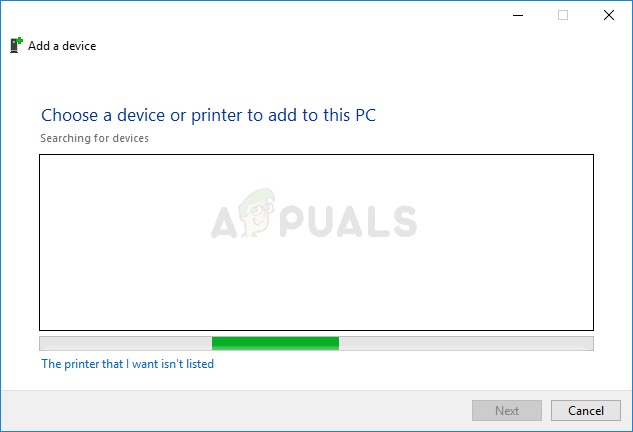
- Next, click the Add a printer button at the top of the window. A new window will appear and your computer will start to look for a printer which is either connected to your PC or your local network. Select the one you just removed before clicking Next.
- Make sure you follow the instructions which will appear on the screen. After the process is over, check to see if you are now able to use your printer properly!
Solution 3: Set up a Static IP Address for Your Printer
IP addresses for various devices in a network are usually dynamic, which means they generally change over time, usually when a device is restarted. However, it’s possible to assign a static IP address to each device, including a printer, which can also be used to resolve this printer problem. Check it out below.
- Open Control Panel by searching for the utility in the Start button or by clicking the Search button (Cortana) button at the left part of your taskbar (bottom left part of your screen.
- You can also use the Windows Key + R key combo where you should type “control.exe” and click Run which will also open Control Panel directly.
- After Control Panel opens, change the view to Category and click on View devices and printers under Hardware and Sound in order to open this section.
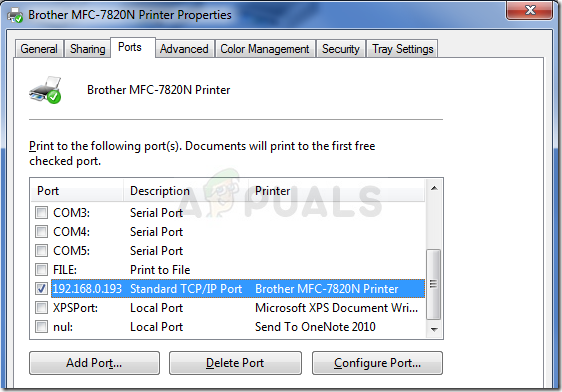
- Head over to the Printers section, right-click the printer you want to remove (the one which is causing these issues) and choose the Printer Properties.
- Navigate to the Ports tab in Printer Properties. Expand the Port column and scroll inside it until you see an entry which resembles the format of an IP address, e.g. 15.119.112.13. Make sure you write this address somewhere.
- Open up a web browser and simply input the IP address you found out in the last step and press the Enter key afterward.
- Input the printer’s name and password and click OK in order to log into your printer’s network settings.
- Locate the IP Configuration button or something similar, depending on the printer and try to locate an option named “TCP/IP” or “IP Address Configuration” and make sure you set its value from Auto to Static or Manual.
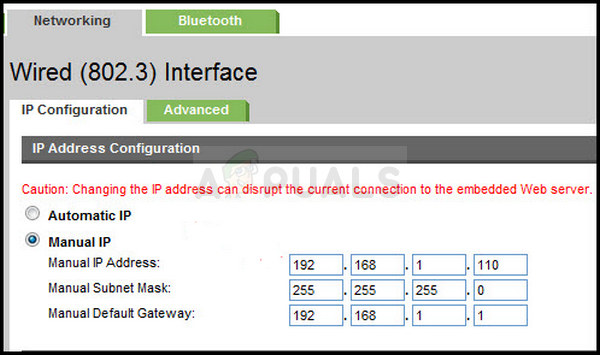
Assigning the static IP to the printer - Enter the static IP address you actually want to use and click the Apply button in order to save the changes. Restart your computer and printer and check to see if the problem still appears.


This is one of the best solutions I found to solve my remote printer connection problem, the instructions are so clear and so easy to follow. A really great solutions presented in this article. Thank you so much for providing such a succinct, clear and easy to follow instructions. Salute and thank you.