Fix: ‘The Local Security Authority Cannot be Contacted’ Error on Windows
This error appears when users try to login to other computers via a remote desktop connection. The problem prevents them from connecting and it displays the “The Local Security Authority Cannot be Contacted” error message. The problem often appears after an update has been installed on either the client or the host PC and it causes plenty of problems on many different versions of Windows.
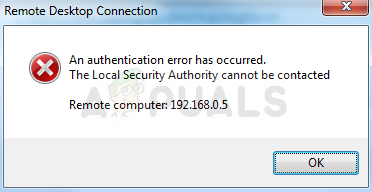
There have been many unofficial fixes for the problem which were created by the users who had the same unfortunate experience. We have gathered the working methods in this article so make sure you follow it in order to resolve the problem.
What Causes “The Local Security Authority Cannot be Contacted” Error on Windows?
Pinpointing the correct cause for the problem is one of the most important steps when it comes to resolving one. That is why we have created a list of possible causes for the problem so make sure you check it out below:
- DNS addresses may be wrongly configured – If this is indeed the case, try using the DNS addresses provided by Google or OpenDNS
- Remote Desktop connections may be disabled by default on either the host or the client PC – Make sure you turn the option on to connect properly without errors.
- IP and DNS address conflicts – Running a certain command may help you resolve the problem
Solution 1: Change Your DNS Address
The problem is often caused by a faulty DNS setup which is simply not accepted by the host or its service. The problem can be resolved easily by changing your default DNS settings to use the ones provided by OpenDNS or Google. This can be done easily in Control Panel so make sure you follow the steps below carefully.
- Use the Windows + R key combo which should immediately open the Run dialog box where you should type ‘ncpa.cpl’ in the bar and click OK in order to open the Internet Connection Settings item in Control Panel.
- The same process can also be done by manually opening Control Panel. Switch the View by setting at the top right section of the window to Category and click on Network and Internet at the top. Click the Network and Sharing Center button in order to open it. Try to locate the Change adapter settings button at the left menu and click on it.
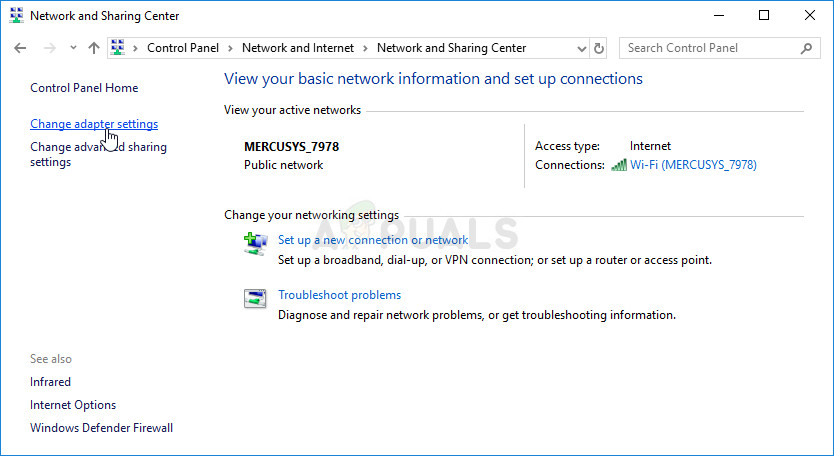
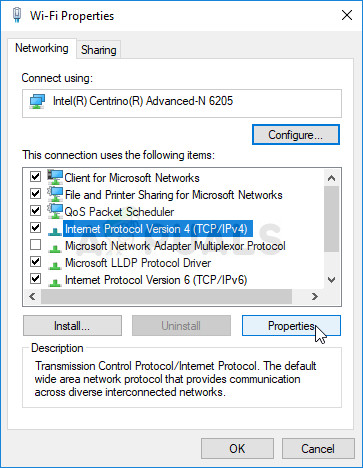
- Now that the Internet Connection window is open using any method above, double-click on your active network adapter and click on the Properties button below if you have admin permissions.
- Locate the Internet Protocol Version 4 (TCP/IPv4) item on the list. Click on it in order to select it and click the Properties button below.
- Stay in the General tab and switch the radio button in the Properties window to “Use the following DNS server addresses” if it was set to something else.
- Set Preferred DNS server to be 8.8.8.8 and the Alternate DNS server to be 8.8.4.4
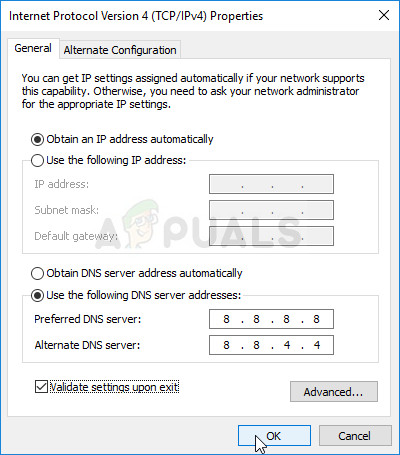
- Keep the “Validate settings upon exit” option checked and click OK in order to apply the changes immediately. Check to see if the same problem still appears!
Solution 2: Enable Remote Connections in Group Policy Editor
Sometimes the Group Policy on the client computer is preventing the remote Desktop connection completely. This can be changed quite easily in Group Policy Editor if you are running any version of Windows besides Windows Home. Follow the steps below in order to enable remote connections in Group Policy Editor.
- Use the Windows Key + R key combination (tap the keys simultaneously) to open the Run dialog box. Enter “gpedit.msc” in the Run dialog box, and press the OK button in order to open the Local Group Policy Editor tool. On Windows 10, you can try simply type Group Policy Editor in the Start menu and click the top result.

- On the left navigation pane of Local Group Policy Editor, under Computer Configuration, double click on Administrative Templates, and navigate to the Windows Components>> Remote Desktop Services >> Remote Desktop Session Host >> Connections.
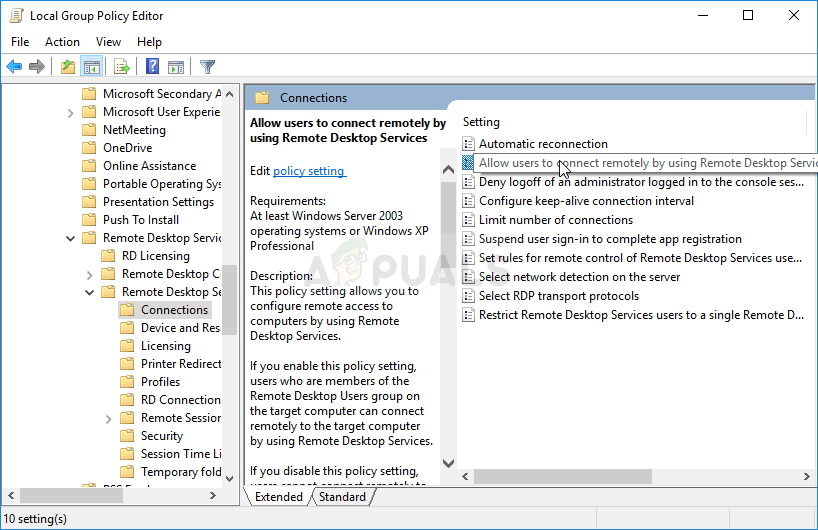
Allow users to connect remotely by using Remote Desktop Services - Select the Connections folder by left-clicking on it and check out its right side section.
- Double click on the “Allow users to connect remotely by using Remote Desktop Services” policy and check the radio button next to the “Enabled” option.
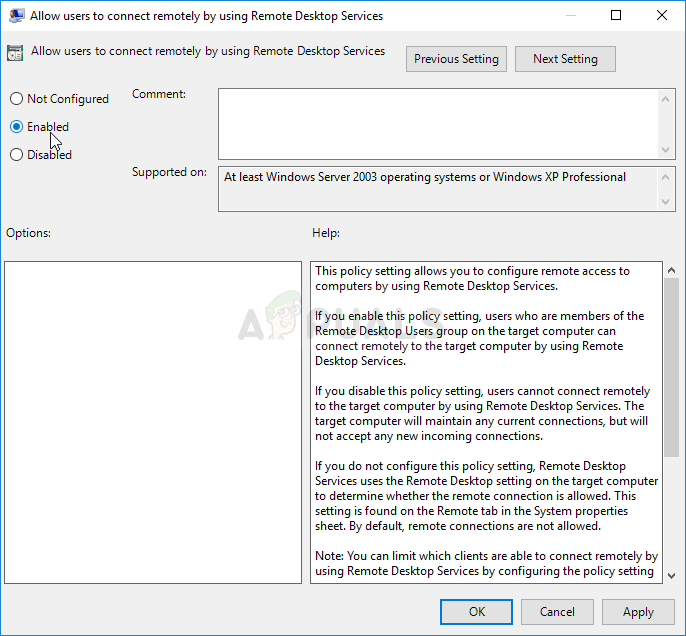
- Apply the changes you have made before exiting. The changes won’t be applied until you restart.
- Finally, reboot the computer to save the changes and check to see if you are still being targeted with the error.
Solution 3: Allow the Connection inside System Properties
The most common cause for the problem is the fact that remote access is, in one way or another, blocked on either the host or the client PC. This time, the problem may be with the host PC which may not be accepting connections from other PCs or the ones with another version of Remote Desktop running. Follow the steps below in order to fix this.
- Right-click either on My Computer/This PC depending on the version of Windows you have installed on your computer and choose the Properties
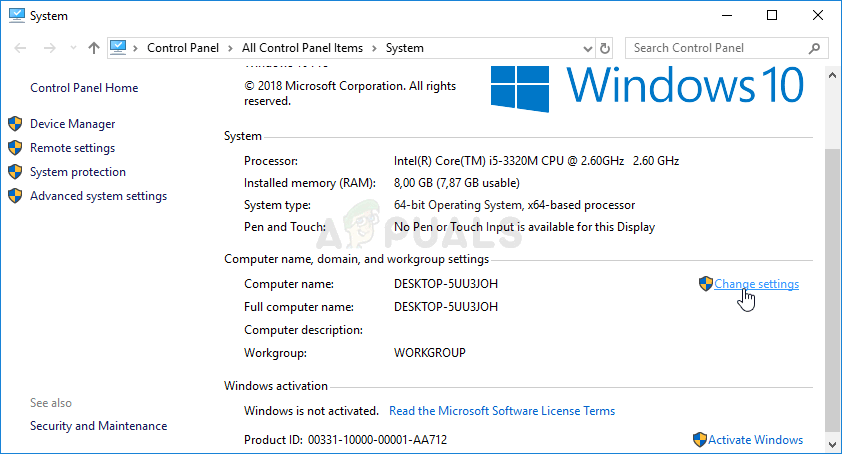
- After that, locate the Change settings button at the left side of the Properties window, under Computer name, domain, and workgroup settings, and click on it.
- In the Remote tab of System properties, check under Remote Desktop and click the radio button next to Allow remote connections to this computer. Also, uncheck the box next to the Allow connections only from computers running Remote Desktop with Network Level Authentication (recommended).
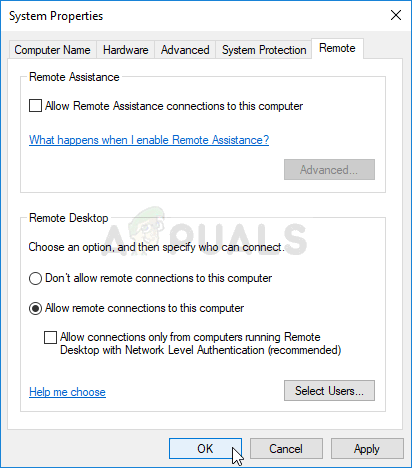
- Apply the changes you have made and check to see if the problem still appears.
Solution 4: Run a Helpful Command on the Host
This method is quite popular for its simplicity and plenty of people use it in order to fix most things related to connectivity issues. The funny thing is that it works and users have commented saying that this is the only step it took to resolve the problem. Try it out now!
- Search for “Command Prompt” by typing it right in the Start menu or by pressing the search button right next to it. Right-click the first entry which will pop up as a search result and select the “Run as administrator” option from the context menu.
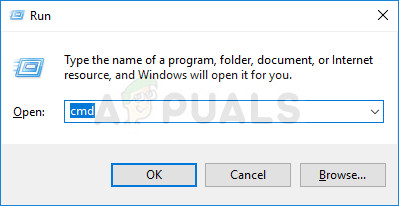
- Additionally, you can also use the Windows Logo Key + R key combination in order to bring up the Run dialog box. Type in “cmd” in the dialog box which appears and use the Ctrl + Shift + Enter key combination for administrative Command Prompt.
- Type in the following command in the window and make sure you press Enter after typing it out. Wait for the “Operation completed successfully” message or something similar to know that the method worked.
ipconfig/flushdns
- Try to reset the connection and check to see if the error still appears.
Solution 5: Set to Allow Connections from All Versions
Microsoft released an update to Windows 10 and Windows server to fix certain vulnerabilities and didn’t end up releasing one for Windows 7. Therefore, Windows 7 users were stuck on a different version. Therefore, you have to set up the connection in such a way that it allows connecting from any and all versions of Remote Desktop. However, keep in mind that this is much less secure than the latter option.


