How to Fix ‘the instruction at referenced memory at’ Error
Random Windows errors have been appearing since the first Windows operating system was invented. In order to deal with these issues, one often needs to perform a lot of research because there is not in the error message that would suggest a possible solution.
PCs are complex machines with a lot of components and it’s understandable that certain issues need to occur. That is why we come up with articles which should help you with these issues with multiple solutions carefully selected in order to get rid of problems permanently and efficiently.
“The Instruction at 0x00### referenced memory at 0x00###. The memory could not be written” – How to Solve?
This particular error message can occur with any application and it related to different parts of your memory. The hashes usually represent a string of numbers which refer to the location of the memory (RAM) fragment which is causing the issue.

Different problems occur with different apps but there are several solutions which might work for everything when you consider the fact that the real problem is sometimes in your computer’s components. Follow the solutions above and try out everything before giving up.
Solution 1: Graphics Card Issues
This particular solution usually depends on what type of application is causing this error message and you might need to use settings in order to avoid your graphics card from accessing the program at all. You can choose which graphics card can operate which program using your graphics card Control Panel.
This particular fix is related to Nvidia graphics cards. If you own an AMD cards, you can easily find how to operate its control panel.
- Right-click on your desktop and select Nvidia Control Panel. If you are unable to locate it in the context menu, just search for it by clicking on the Start menu button.
- When the tool opens, check under 3D Settings and select Manage 3D Settings.
- Switch to the Program Settings tab and choose the program that it causing your issues. You might need to locate it manually but you should look primarily in the Program Files folder.
- Under the “Select the preferred graphics processor for this program:” option, choose your Integrated Graphics Card and apply these changes.
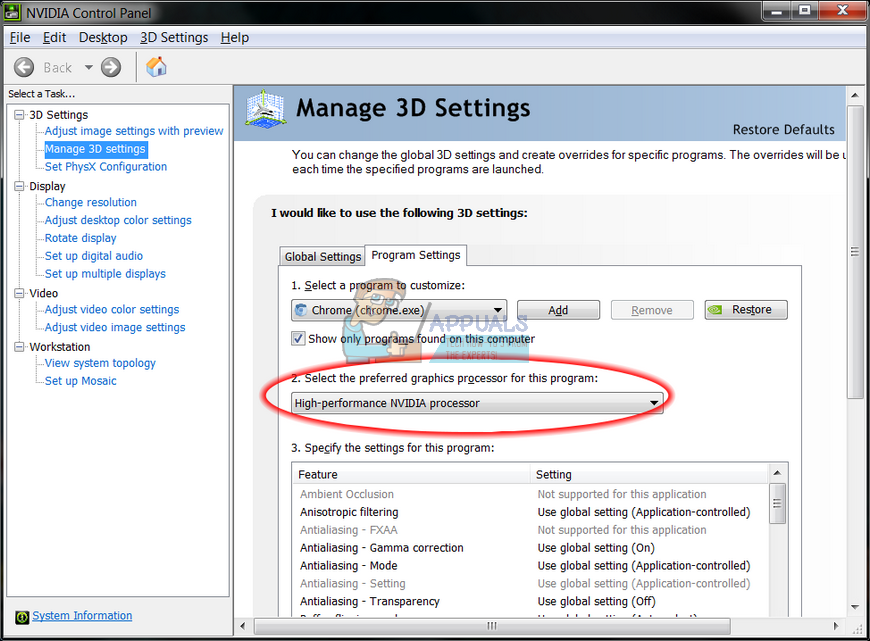
Note: If a video game is causing these issues, you might not be able to play it properly using your integrated graphics card. If that is the case, you can easily revert these changes and research online about that particular game or simply try other solutions in this article.
Solution 2: Updating your Microsoft .NET Framework
Microsoft experts have pointed out that using an application which was designed using Microsoft .NET Framework 1.1 and applying heavy memory load to it may cause the message “The instruction at “0x79259769′ referenced memory at ‘0x00000008’. The memory could not be read.”
This can be fixed by downloading and installing the latest version of .NET Framework to your PC.
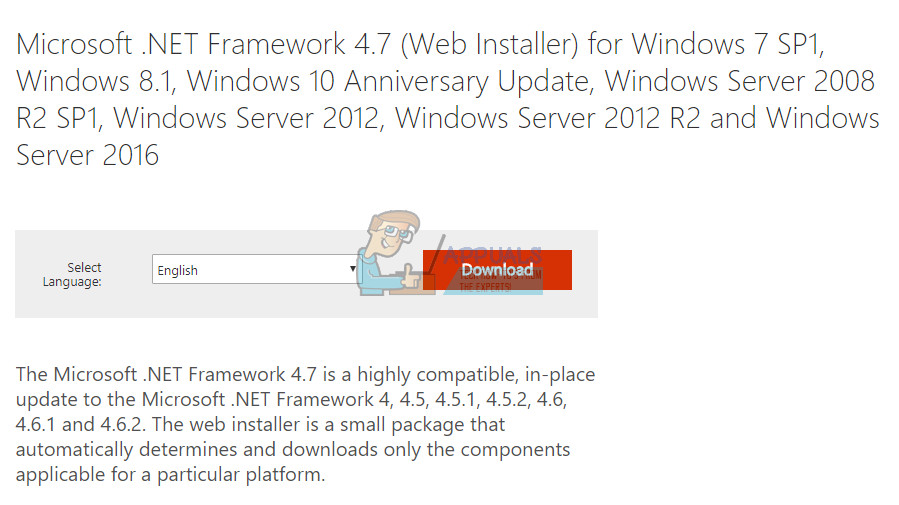
- Visit Microsoft’s official download website for .NET Framework.
- Scroll down to the Download .NET Framework section of the page and choose the latest version of it available for your operating system. The .NET Framework 4.7 is the latest version available for operating systems such as Windows 7 SP1, Windows 8.1, Windows 10 for both x86 and x64 versions (32 bit or 64 bit).
- Download the installer by clicking on the red download button and install it by following the instructions on screen.
- Restart your computer and check if the issue persists.
Solution 3: Disable Third-Party Audio Codecs
Plenty of users have been able to get rid of this issue simply by disabling third-party audio codecs and drivers (such as K-Lite and Realted audio tools). You don’t have to uninstall them completely but you can try this solution and check whether the issue persists. If you really need those codecs, you can try searching for an alternative.
- Click on the Start button located at the bottom left part of your screen and type “Task Manager”. Alternatively, you can use the Ctrl + Shift + Esc key combination.
- When Task Manager opens, navigate to the Startup tab.
- Locate some of your codec packs you might have installed such as K-Lite Codec Pack or Realtek HD Audio and disable them from Startup.
- Restart your computer and check to see if the issue persists.
Solution 4: Turn of Auto-Hide Taskbar
If the app which is causing these issues is explorer.exe itself, things may get more complicated because this app is pretty much responsible for the entire user interface. Explorer.exe usually presents these issues while restarting or shutting down your computer so it can get pretty annoying after a while. Luckily, there is a simple fix…
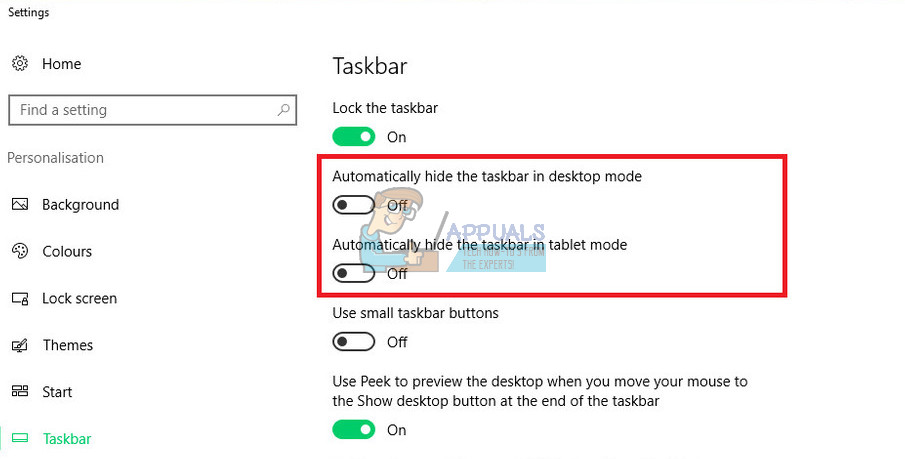
- Right-click anywhere on your taskbar (the horizontal menu at the bottom of your desktop and open Taskbar settings.
- Switch the slider on the “Lock the taskbar” option on in order to keep the taskbar fixed.
- Turn off the following options if they are not already off.
Automatically hide the taskbar in desktop mode
Automatically hide the taskbar in tablet mode
- Try restarting or shutting down your PC now.
Solution 5: Virtual Memory Issues
Virtual memory is a helpful tool which can improve your computer’s performance by providing a paging file on your hard disk which Windows can use as RAM when it runs out of real, physical RAM memory. Note that this virtual memory is nowhere near as fast as your RAM and increasing it won’t drastically improve your PC as if you were installing more RAM but it can help.
- Right-click on This PC shortcut on your desktop or in File Explorer and click on Properties.
- Information about your system should open so click on Advanced System Settings at the right part of the window.
- Navigate to the Advanced tab and click on Settings under the Performance section. Make sure you have administrator privileges if you wish to make changes to these settings.
- After Performance Options windows opens, navigate to the Advanced tab and click on the Change… button under the Virtual Memory section.
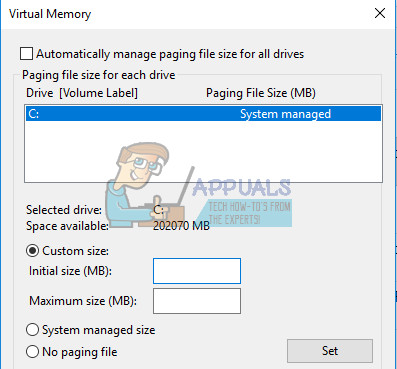
- Uncheck the box next to the “Automatically manage paging file size for all drives” and click on the radio button next to the Custom size option.
- If you have only one partition running, set both the initial size and the Maximum size of the paging file to around 1.5 times the amount of RAM in MB. For example, if you have 2 GB or RAM, that equals to 2048 MB so you can set the size of the paging file to 3072 MB.
- If you have two or more partitions, select the boot partition (where your Windows is installed) and set both the initial and maximum value to 250 MB in order to make space for the mini dump file. Select one of your other partitions and set 1.5 times the amount of RAM you have.
- If you have large quantities of RAM such as 8 or 16 GB, you probably won’t need large paging files so you can ignore the amounts of above and settle to around 2 GB or paging file or 2048 MB.
Note: The reason you choose the initial and maximum size of the paging file to be the same is because you don’t want Windows to grow or shrink the size of the paging file which can cause fragmentation and your computer to slow down. Defragmenting your computer regularly will also help improve the performance of your paging file.
Solution 6: Disabling Fast Startup
Several users finding themselves in a similar situation have managed to get the issue resolved after disabling the Fast Startup feature on Windows 10.
While in most cases fast startup is a pretty harmless tool capable of boosting the startup speed considerably, it also means that your PC will never truly shut down. Because of this, you might experience Wake-on-LAN issues, dual boot and virtualization complications, and random error codes during the startup procedure.
Keep in mind that it’s all guessing work by know – Fast Startup could have nothing to do with the error that you’re seeing.But in order to make sure of that, follow the instructions down below to disable Fast Startup:
- Press Windows key + R to open up a Run box. Then, type “ms-settings:powersleep” and press Enter to open the Power & Sleep tab of the Settings app.
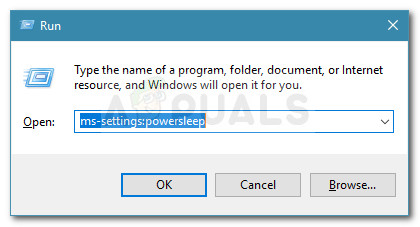
Run dialog: ms-settings:powersleep - Inside the Power & sleep tab, scroll down to Related settings and click on Additional power settings.
- Next, select Choose what the power buttons do from the right pane and then click on Change settings that are currently unavailable.
- Now scroll down to Shutdown settings and disable the checkbox next to Turn on fast startup (recommended).
- Save the changes and reboot your computer to see if they were successful. If you’re still seeing the 0x00000008 error at the next startup (or during a driver installation) or this method wasn’t applicable, continue down with the next method below.
Solution 7: Restart using the Last Known Good Configuration
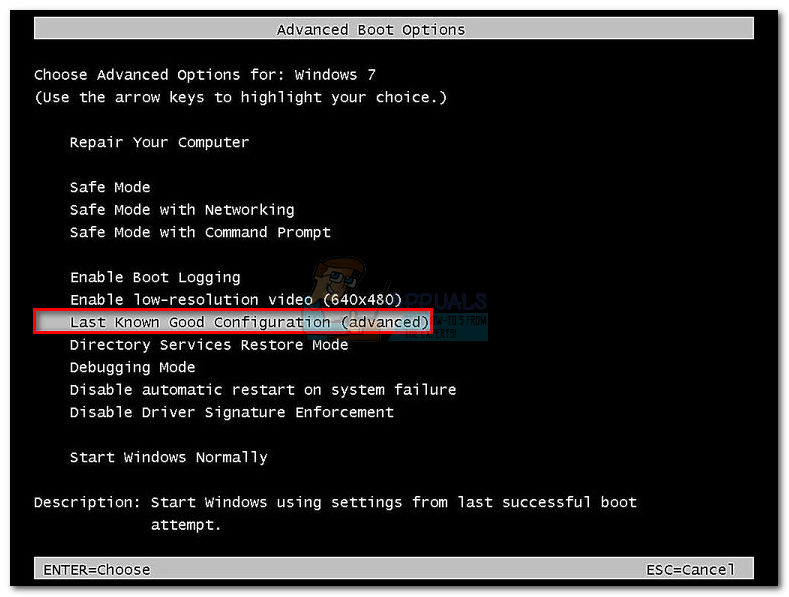
If the error occurs at every startup, you were probably unable to follow most of the methods above because you experience a BSOD crash long before you reach that screen. However, several users have managed to circumvent the issue by booting using the Last Known Good Configuration using the Advanced Menu.
To do this, restart your computer and press the F8 key continuously until you arrive at the Advanced Boot menu. Once you get there, select Last Known Good Configuration and press Enter.
If all goes well, your computer should boot up normally without the referenced memory error. If the method was not successful, continue down with the next method below.
Solution 8: System Restore
Several users have reported that doing a System Restore back to the point before these errors started happening usually does the trick and that is why we recommend you try this if the previous methods have failed. System Restore will keep your personal files but it may uninstall or delete apps you installed or settings you changed.
- Open Control Panel by searching for it.
- Switch the View as option to Large Icons and open Security & Maintenance.
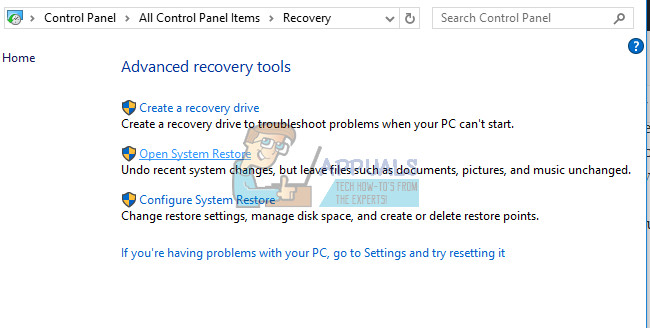
- Navigate to the Recovery menu and select the “Open System Restore” option. Note that you will need to have administrator privileges in order to open this. Be ready to lose everything you installed before the restore point of your choice.
- Follow the instructions on screen and choose a restore point back when you didn’t receive the memory issue.
- Be patient until the process finishes and reboot your computer.
- Check to see is the issue still persists.
Solution 9: Running the System File Checker (SFC)
System File Checker is a useful tool implemented in all versions of Windows which can search for missing or corrupted system files and it can either fix or replace them. This is quite useful when dealing with memory leaks and problems and several users have reported that simply running this tool has helped them solve the problem.
- Open your search bar and search for “Command Prompt”. Right-click on the first result and select the “Run as administrator” option.
- Copy and paste the following command in Command Prompt and wait for the process to finish.
sfc /scannow
- Restart your computer and check for any changes.
Solution 10: Suspicious Browser Add-ons and Extensions
If you received this error message with one of your browsers in the title, you may have installed a suspicious add-on. Disabling or deleting them can differ from browser to browser but the process is generally quite easy.
Microsoft Edge:
- Open the browser and click on the three horizontal dots at the top right part of the browser.
- Click on Extensions and remove anything you find suspicious, especially if they were added recently.
Google Chrome:
- Open Google Chrome and paste the following link in the address bar:
chrome://extensions/
- Locate anything suspicious and either uncheck the box next to Enables or click on the trash icon to the right.
Solution 11: Steam Game Problems
If one of the games in your Steam library is causing these issues, you should firstly research this game’s forum and maybe even start a thread yourself. However, one of the fixes which usually works for Steam games is verifying the game’s cache.
- Open your Steam client and navigate to the Library tab.
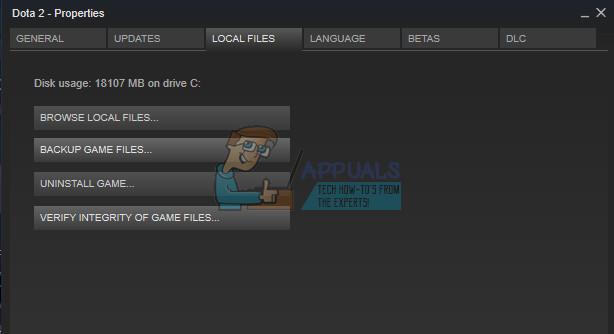
- Right-click on the game which is causing these issues and select Properties.
- Navigate to the Local Files tab and click on Verify Integrity of Game Files…
- Try running the game and check if the issue persists.
Solution 12: Scan Your System for Malicious Software
Viruses and other malicious applications are well-known for causing these errors and it won’t be long before everything gets worse. One of viruses’ well-known traits is its ability to reduplicate itself and spread itself throughout your system. There are a lot of great free antivirus scanners available online such as Microsoft Security Essentials and Malwarebytes: Anti-Malware.
- Download Malwarebytes: Anti-Malware from their official site.
- Run the installer and choose where you want to install the scanner. Follow the instructions on screen.
- Open Malwarebytes and run your scan by clicking on the Scan button. Malwarebytes will firstly update its database and scan your computer thoroughly.
- Wait for the process to finish and eliminate all threats the scanner finds.
- Reboot your computer and check to see if the error message still appears.
Method 13: Resolving a Xeon specific processor error
There is one common 0x00000008 error scenario with one or more Intel Xeon processors, but the error message is a little bit different: STOP 0x00000008 UNEXPECTED_KERNEL_MODE_TRAP.
There are three distinct scenarios that will trigger this particular error:
- The Xeon processor requires a BIOS update
- The processor is damaged or defective.
- The processor is overclocked and is operating outside the save ranges of temperature and power
If you have an Intel Xeon processor, start by navigating to your computer manufacturer’s website and see whether there’s a more recent microcode update than the one you currently have installed. Microcode updates are packaged in BIOS updates, so installing the latest BIOS update for your specific motherboard should resolve the issue automatically.
If you already have the latest BIOS update, verify whether the issue is occurring due to your own doing. If you previously overclocked the frequencies of your CPU, revert back to the stock frequencies and see whether the 0x00000008 error is still occurring. If the error is no longer occurring while the overclock is removed, tone down the frequencies until you reach a stable state.
In the event that your CPU is not overclocked and you have the latest BIOS updates, it’s very likely that your processor is defective or damaged. In this case, it’s recommended that you take it to a hardware technician to verify whether the voltage is fluctuating and it’s causing it to behave erratically.