How to Fix the Hamachi Tunnel Problem on Windows?
When you see a yellow triangle with a “tunneling problem” message in Hamachi, it means there’s a disruption in the direct connection between peers. This usually happens because the Hamachi Tunneling Engine service isn’t working correctly.
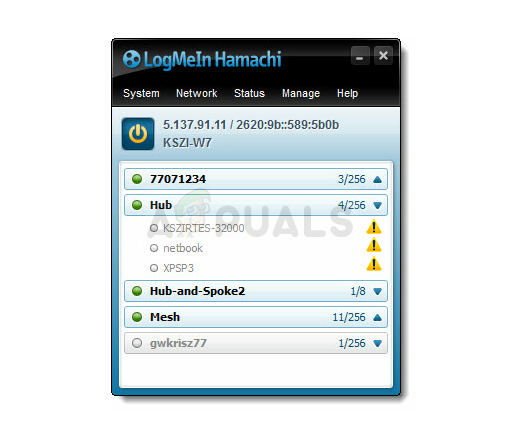
It might also be caused by problems with the Hamachi network adapter or interference from other VPN software. As a result, the connection defaults to a relayed mode, increasing latency and reducing performance.
Now that you know the causes, let’s discuss the solutions.
1. Disable and Re-enable the Hamachi Connection
Temporary problems with the Hamachi connection may cause tunneling issues. Turning the connection off and on can fix the network adapter and clear small errors or incorrect settings that might disrupt proper functioning.
- Press Windows + R to open the Run box, type ‘ncpa.cpl’, and click OK to access Internet Connection settings.
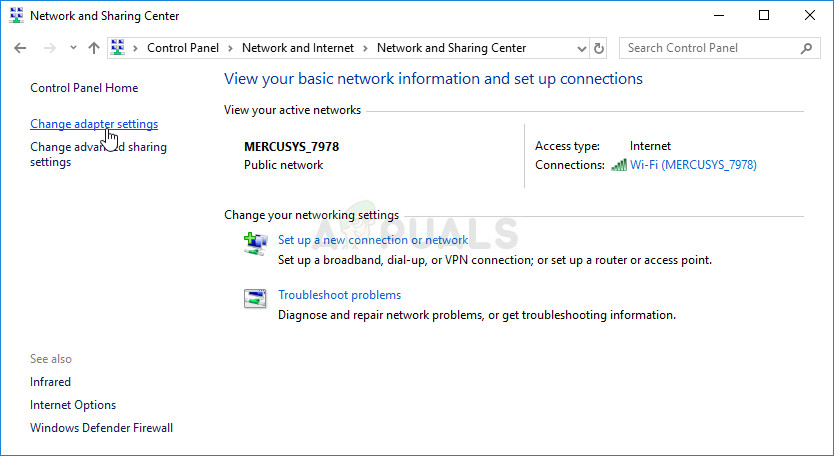
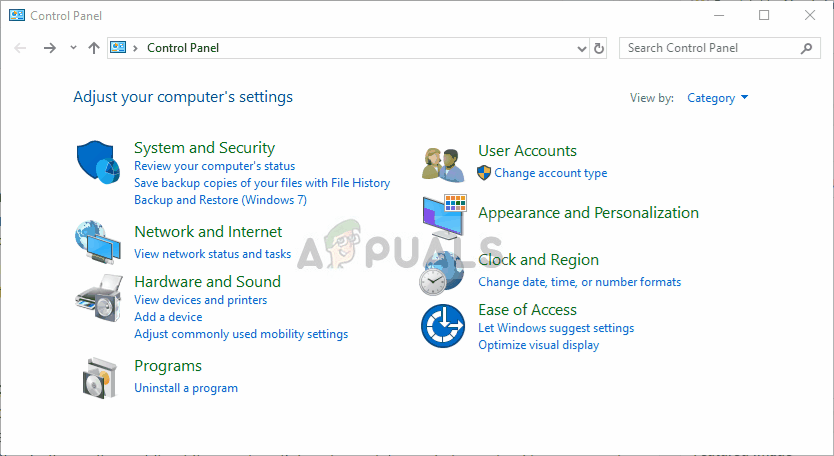
- Alternatively, open Control Panel, set “View by” to Category, then click Network and Internet. Open Network and Sharing Center and click Change adapter settings in the left menu.
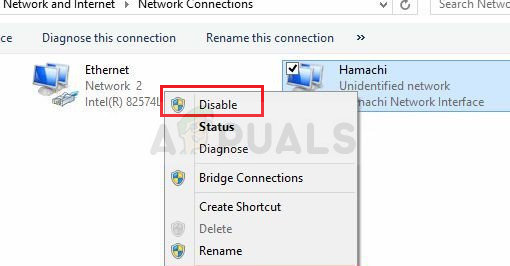
- In the Internet Connection window, right-click the Hamachi network connection and select Disable. Wait a few minutes, then right-click again and select Enable. Check if the Hamachi Tunneling issue persists.
2. Restart the LogMeIn Hamachi Tunneling Engine Service
An error regarding the LogMeIn Hamachi Tunneling Engine service may be preventing Hamachi from opening properly. Services can be restarted quite easily, and this method is straightforward for anyone to perform! Make sure you follow the instructions below carefully to restart the LogMeIn Hamachi Tunneling Engine service!
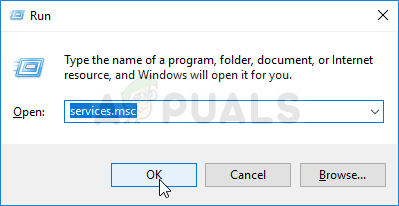
- Press Windows Key + R to open the Run box, type “services.msc“, and click OK to access Services.
- Alternatively, open the Control Panel from the Start menu, set “View by” to “Large Icons”, and click Administrative Tools then Services.
- In the list, find LogMeIn Hamachi Tunneling Engine Service, right-click it, and select Properties.
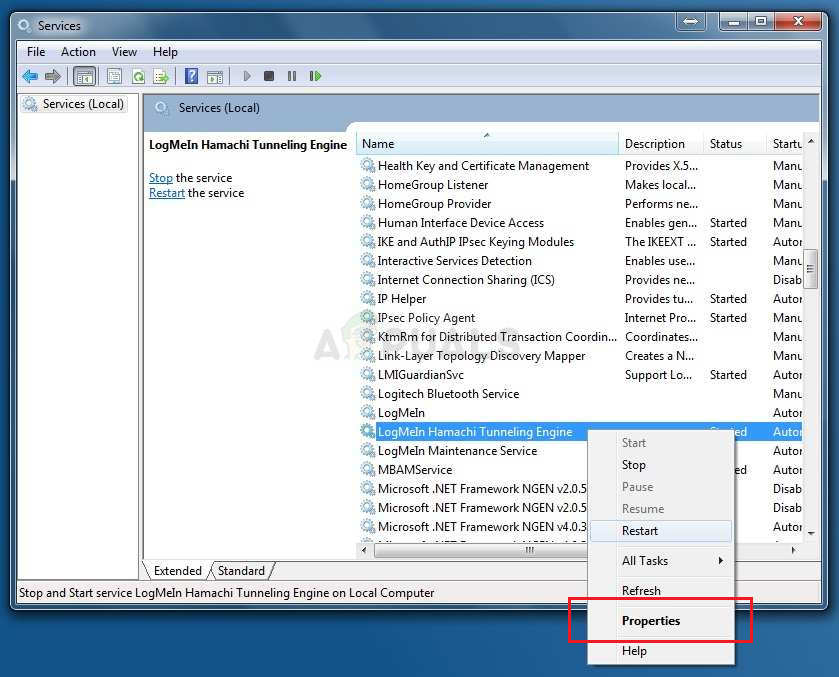
- If the service is running, click Stop. If stopped, leave it as is.
- Set Startup type to Automatic. Confirm any prompts and click Start. If you see “Error 1079,” follow the steps below:
Windows could not start the LogMeIn Hamachi Tunneling Engine service on Local Computer. Error 1079: The account specified for this service differs from the account specified for other services running in the same process.
- Repeat steps 1-3 to return to the service’s properties, go to the Log On tab, and click Browse….
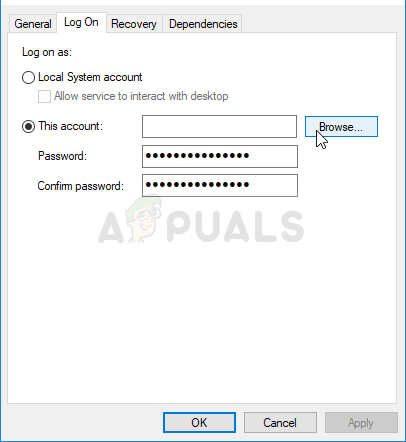
- Enter your account name in “Enter the object name to select”, click Check Names, then OK. Enter your password if prompted. Hamachi should now work properly.
3. Reinstall the Hamachi Virtual Ethernet Adapter
Refreshing the Hamachi Virtual Ethernet Adapter makes sure the network driver is set up correctly, removing any issues that could cause problems. This process reinstalls the adapter, fixes any conflicts, and helps Hamachi connect directly.
- Uninstall the current driver on your machine.
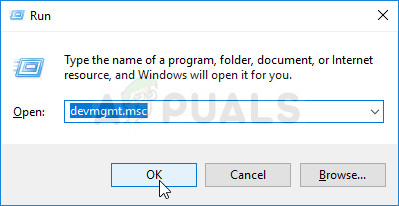
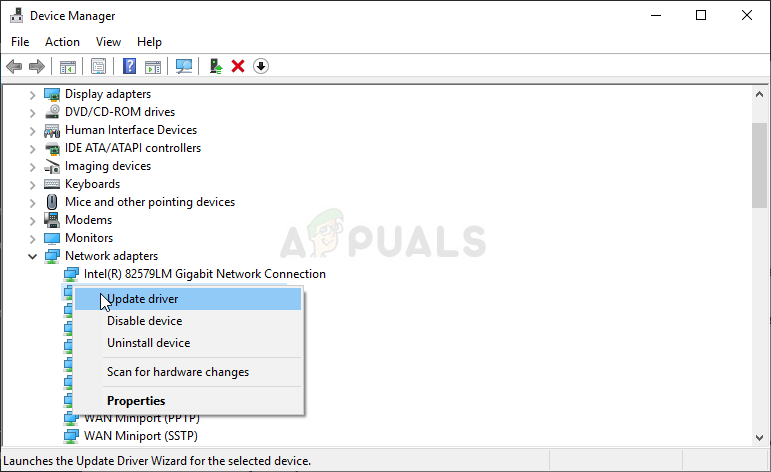
- Open Device Manager by typing “Device Manager” in the search field or using Windows Key + R and typing devmgmt.msc.
- Expand “Network Adapters” to see all installed adapters.
- Right-click the wireless network adapter you want, and select “Update driver“. This uninstalls the device.
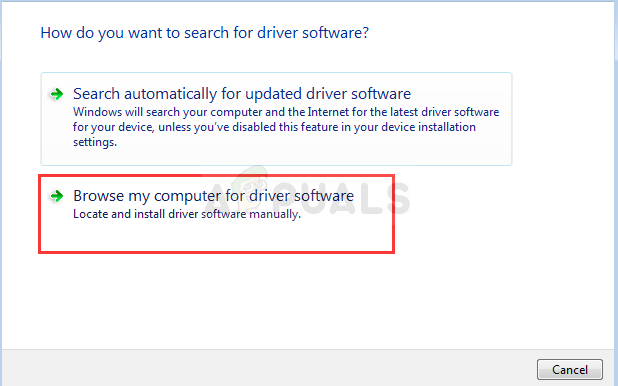
- Select “Browse my computer for driver software” when prompted.
- Navigate to the Hamachi installation folder, usually C:\Program Files (x86)\LogMeIn Hamachi. You can find it by right-clicking the Hamachi icon on the Desktop and selecting “Open file location“.
- Click Next to finish and check if your issue is resolved.
If a service is causing connection problems, restarting the LogMeIn Hamachi Tunneling Engine can fix temporary issues or errors. This resets the service, helping it connect correctly with the network again.


