How to Fix the GeForce Experience not Finding Games Problem on Windows?
When GeForce Experience can’t find installed games, users miss out on in-game overlays and optimization features, making setup harder. This problem usually means GeForce Experience can’t find game files, often because they are in non-standard folders or missing paths.

The games might be installed outside default locations, or there could be issues like lack of permissions, corrupted files, or an outdated version of GeForce Experience.
In this article, we will discuss different ways to solve this error.
1. Run GeForce Experience as an Administrator
Giving GeForce Experience administrator rights allows it to fully access system directories and game files. Without these permissions, the app may have trouble finding games in non-standard locations. Running it as an administrator removes these limits, letting GeForce Experience find games and optimize them easily.
- Find the GeForce Experience executable on your Desktop, or search for it in the Start menu. Right-click the result and select Open file location. Right-click the shortcut again and choose Open file location once more.
- Alternatively, check the default installation path:
C:\Program Files (x86)\NVIDIA Corporation\NVIDIA GeForce Experience
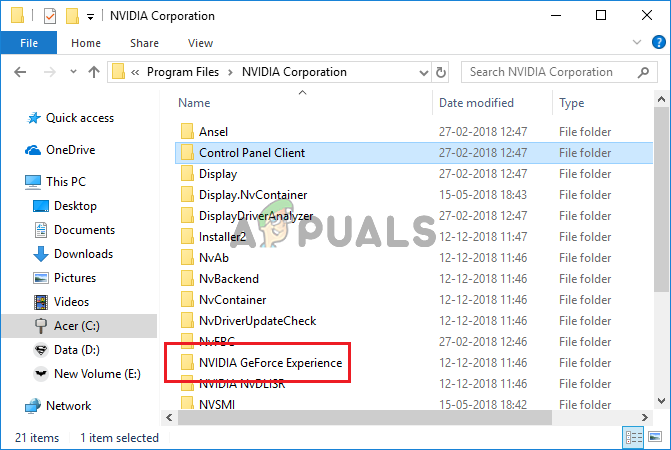
- Right-click the NVIDIA GeForce Experience executable, and select Properties from the context menu. Go to the Compatibility tab.
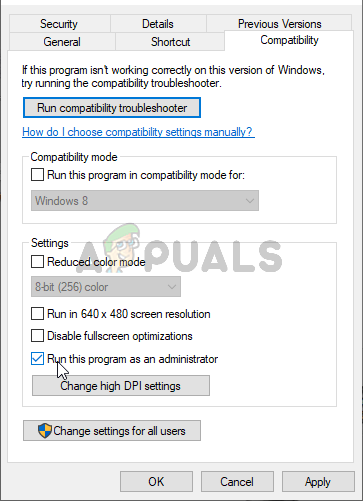
- Check the box next to Run this program as an administrator. Click OK to apply the changes. Reopen GeForce Experience to see if the problem persists.
2. Add Proper Folders as Game Locations
Manually directing GeForce Experience to the correct folders can fix detection problems. By adding your game folders, especially if they’re not in default locations, you ensure the app can find all games during scans to manage and optimize them.
- Find the GeForce Experience executable on your Desktop, or search for it in the Start menu. Open the application and go to the Preferences tab.
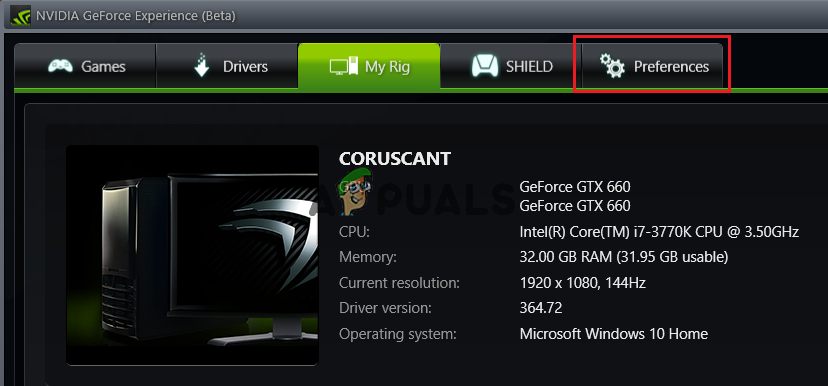
- In the Games section under Preferences, check Scan for games. If the folder with your problematic game is missing, click the plus button to add it.
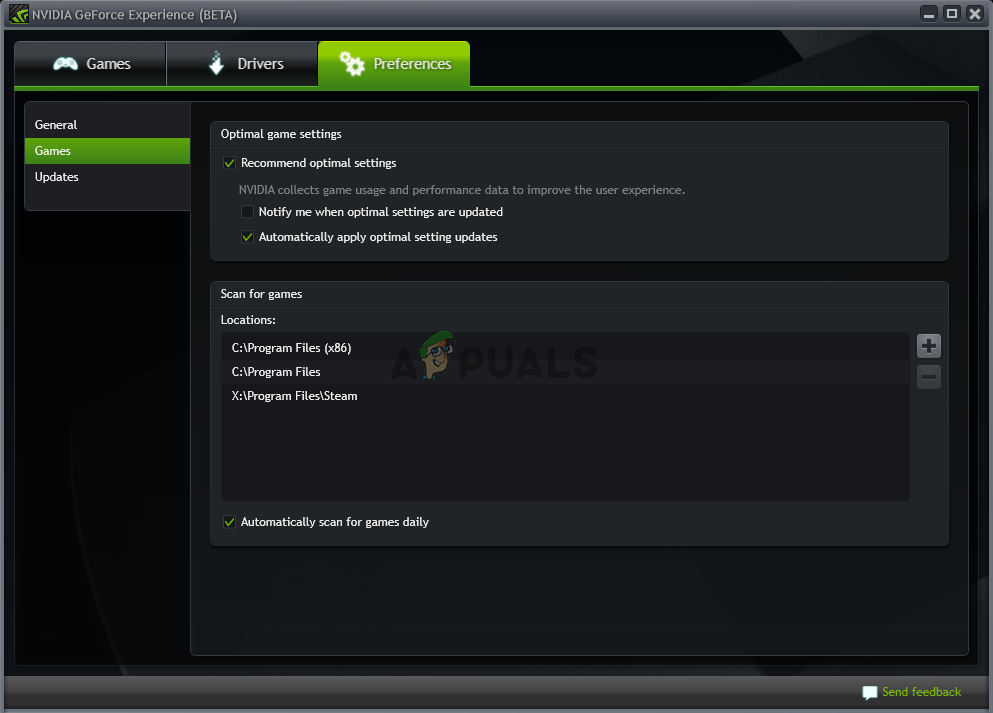
- After GeForce Experience scans for installed games, check if the issue is resolved.
3. Take Ownership and Provide Full Control for Game Folders
Giving full access to your game folders helps GeForce Experience detect your games. By taking ownership and allowing full control, you let the app scan and handle game files easily, fixing issues where default settings block access.
- Locate the game’s folder where most of your games are stored. If games are in separate folders, repeat this process for each one.
- Alternatively, check the default installation directory for programs:
C:\Program Files (x86)
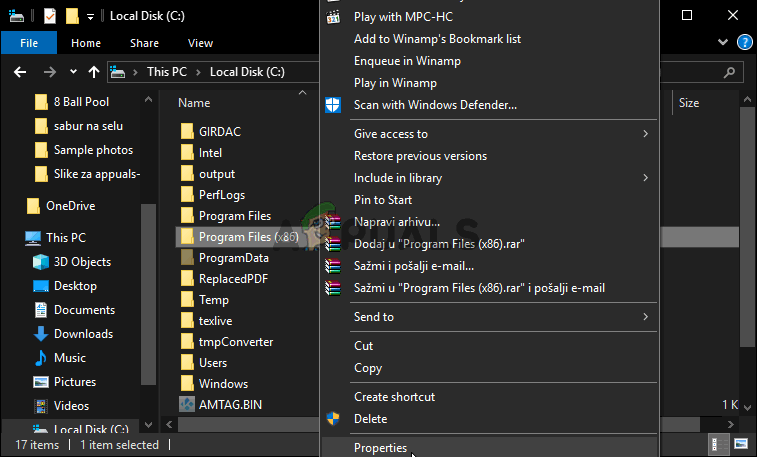
- Right-click the folder containing the games and select Properties. Access the Security tab.
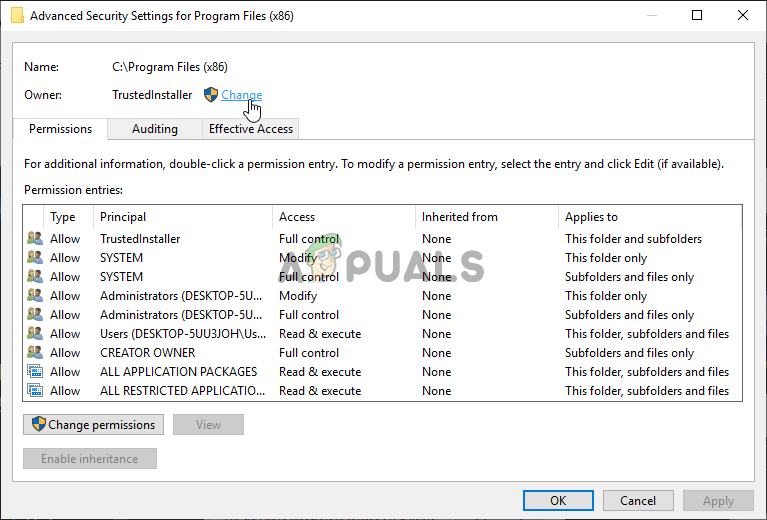
- Click Advanced at the bottom. In Advanced Security Settings, click the blue Change button next to Owner.
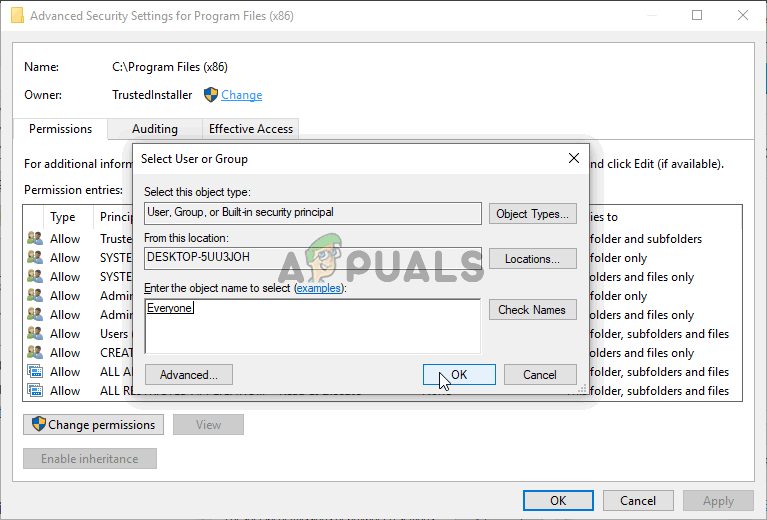
- In “Enter the object name to select,” type Everyone and click Check Names. The text should underline. Click OK to set Everyone as the folder owner.
- In Advanced Security Settings, click Add for new permissions. Click Select a principal, type Everyone, and click Check Names. Click OK. Ensure Type is set to Allow.
- Under Basic permissions, select Full control. Click OK to apply full permissions. Click OK again to close all windows and reopen GeForce Experience to check game detection.
4. Allow GeForce Experience in Windows Defender Firewall
If Windows Defender Firewall blocks GeForce Experience, it can’t find or update game files. Allowing it through the firewall lets the app access necessary resources for detecting and managing games.
- Search for Control Panel in the Start menu and click the first result. Alternatively, press Windows Key + R, type “control.exe,” and click OK.
- Change View by to Large or Small icons and select Windows Defender Firewall.
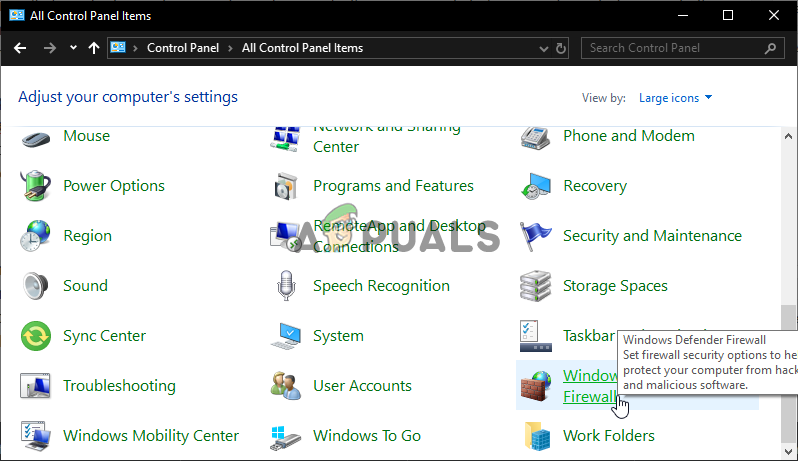
- In the left menu, find Allow an app or feature through Windows Defender Firewall and click it. Click Change settings at the top and provide administrator access if prompted.
- Find GeForce Experience in Allowed apps and features. If missing, click Allow another app.
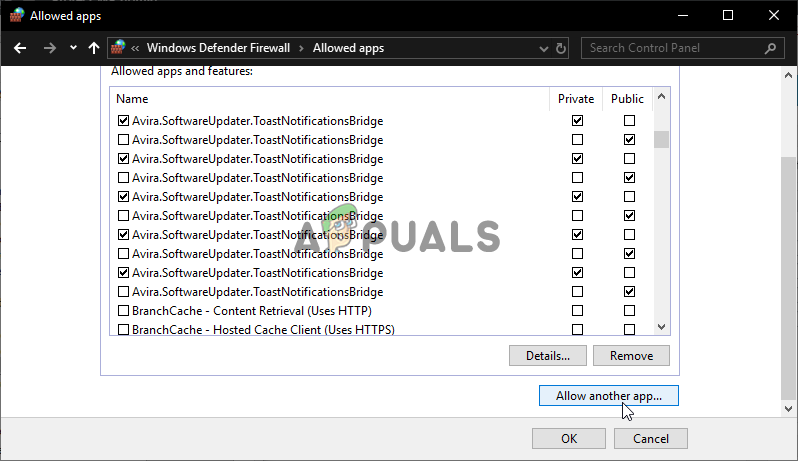
- Click Browse and navigate to the GeForce installation folder. The default path is:
C:\Program Files (x86)\NVIDIA Corporation\NVIDIA GeForce Experience
- Add the executable. Click Network types and check Private and Public, then click OK. Click Add, OK again, and reopen GeForce Experience to see if it detects games.
5. Enable Experimental Features
Turning on GeForce Experience’s experimental features lets you try the latest improvements and fixes before they are widely released. This can help with game detection issues, as these updates often fix compatibility and scanning problems by using newer methods to find games.
- Find the GeForce Experience executable on your Desktop or search for it in the Start menu. Open it and navigate to the Preferences tab.
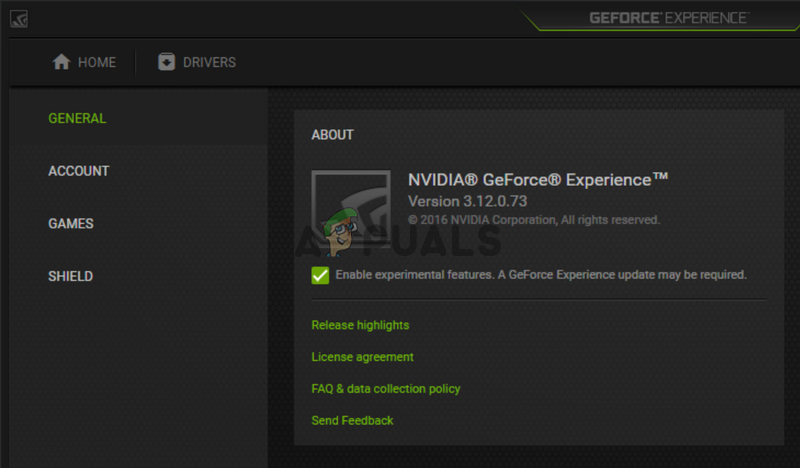
- In the General section under Preferences, go to About and enable experimental features. Restart GeForce Experience to check if it detects your games.
6. Delete the App’s Cache
Outdated or corrupted temporary files in GeForce Experience can cause issues. Deleting the app’s cache removes these files, allowing GeForce Experience to refresh and properly detect installed games again.
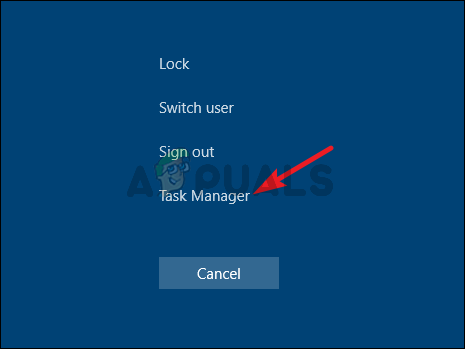
- Open Task Manager using Ctrl + Shift + Esc and click More details to expand the list. Under Background processes, locate NVIDIA GeForce Experience, NVIDIA Container, NVIDIA Container (32 bit), and NVIDIA Web Helper Service. Select each one and click End task.
- Open This PC from your Desktop or access any folder and navigate to This PC via the Quick Access menu.
- Open Local Disk, then Users. Double-click your username folder. Access AppData. If hidden, click View on the menu bar and check Hidden items.
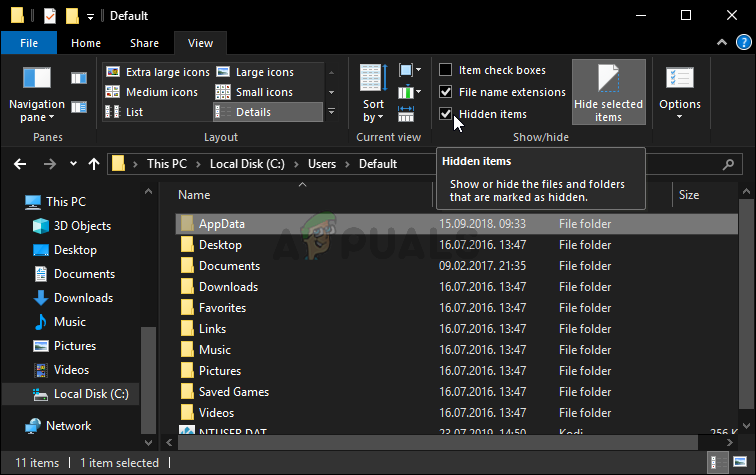
- Inside AppData, navigate to Local >> NVIDIA Corporation >> NVIDIA GeForce Experience. Right-click CefCache and click Delete. Reopen GeForce Experience to check if it detects games.
7. Update Your NVIDIA Drivers
Updating NVIDIA drivers is important for compatibility with new games and features. Updated drivers fix bugs and improve game detection, helping GeForce Experience recognize games better. This ensures smoother interaction between GeForce Experience and your game library, fixing detection issues from outdated software.
- Open the GeForce Experience on your Desktop or search for it in the Start menu. Navigate to the Drivers tab.
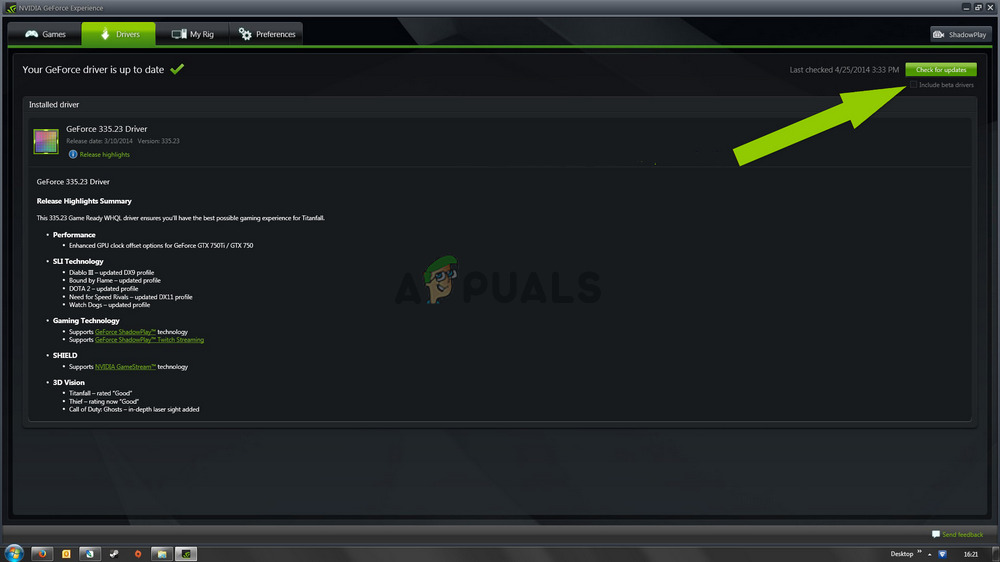
- Click Check for updates at the top-right corner. If new drivers are available, they will appear in the Available section. Click the green Download button.
- After the download, click Install. Restart your computer once installation is complete. Reopen GeForce Experience to check if the problem persists.
8. Reinstall and Update to the Latest Version
Several games have been problematic for GeForce Experience detection. NVIDIA indicates that a new update should fix this. However, fully reinstalling GeForce Experience and updating to the latest version can ensure any existing installation issues are resolved.
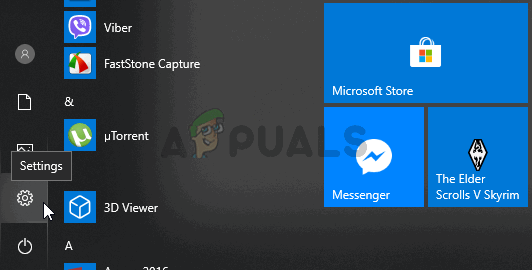
- Press Windows Key + I to open Windows 10 Settings directly. Click the Apps section for a list of installed programs. Find GeForce Experience, select it, and click Uninstall. Follow the on-screen instructions.
- Download the latest GeForce Experience version from this link by clicking the green “Download Now” button.
- Run the installer, follow the instructions on-screen, and verify if GeForce Experience recognizes your games after installation.


