How to Fix the Corsair Utility Engine won’t Open on Windows?
Corsair Utility Engine is used to control Corsair’s peripherals (mice, keyboards, headsets) and it should be installed if you are using any of these devices on your computer. However, some users have reported that they are simply unable to open the Corsair Utility Engine on their computer.
There is no error message or a crash. The program simply fails to open after double-clicking its icon. Check out the methods other users used to resolve the problem successfully and see if the solutions apply to your scenario. Good luck and follow the instructions carefully.
What Causes the Corsair Utility Engine not to Open on Windows?
The problem is most often caused by the faulty installation of the Corsair Utility Engine. Some files might have gone missing or corrupt which makes the tool impossible to open. You can resolve the problem by either repairing the Corsair installation or by reinstalling the tool and the device drivers completely!
Another cause is UI scaling. Having this option set too high can prevent Corsair Utility from opening at all. Consider lowering to the recommended option in order to resolve this problem!
Solution 1: Repair the Corsair Installation
The easiest thing you can do is run the repair tool which can repair the Corsair Utility Engine installation. It can be accessed the same way as you would expect if you wanted to uninstall the tool. This method has helped plenty of users so make sure you follow through the steps carefully!
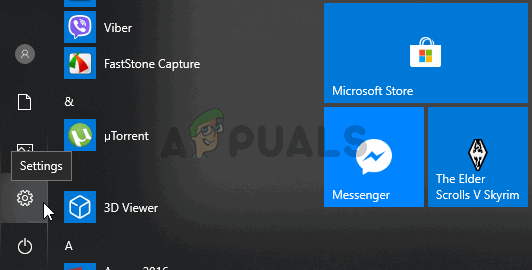
- Click the Start menu and open Control Panel by searching for it simply by typing with the Start menu window open. Alternatively, you can click the cog icon in the lower-left part of the Start menu in order to open the Settings app if you are using Windows 10.
Opening Settings from Start menu - In Control Panel, select the View as: Category option at the top right corner of the Control Panel window and click on Uninstall a Program under the Programs section.
- If you are using the Settings app, clicking on Apps should immediately open a list of all installed programs on your PC so wait for a while in order for it to load
- Locate Corsair Utility Engine in Control Panel or Settings and click on Uninstall/Repair. Follow any instructions which appear afterward in order to repair the installation. Check to see if it’s able to open properly after the process is over!
Solution 2: Decrease UI Scaling
It might seem like a weird cause to the problem, but having UI scaling set too high can prevent Corsair Utility Engine from opening at all. Many users were skeptic at first but they were actually able to resolve the problem using the set of steps below. Make sure you follow the instructions carefully to decrease UI scaling!
Windows 10:
- Right-click anywhere on your Desktop and choose the Display settings option from the context menu which will appear. Alternatively, you can use the Windows key + I key combination for the same effect. Click to open the System section and navigate to the Display tab at the left side of the window.
- Scroll down until you reach the Input section in the Sound tab and make sure you click the Scale and layout section. Under the Change the size of text, apps, and other items text, click to open the dropdown list and choose 100% (Recommended).
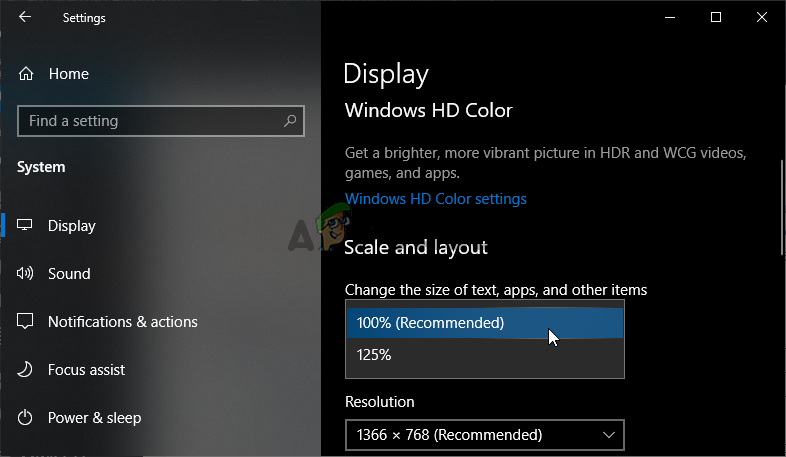
UI Scaling on Windows 10 - Make sure you reopen the Corsair Utility Engine to see if it opens properly now!
Other versions of Windows:
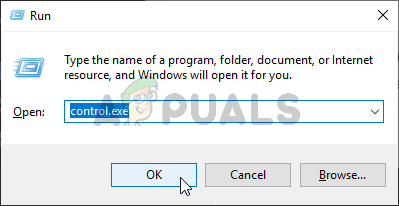
- Open up Control Panel by searching for the utility in the Start button or by clicking the Search button or the Cortana button at the left part of your taskbar (bottom left part of your screen). You can also open it by using the Windows Key + R key combination, typing “control.exe” in the Run box, and clicking OK in order to run Control Panel.
Running Control Panel - After Control Panel opens, change the view to Large or Small icons and navigate down the list in order to open the Display option.
- On Windows 8.1, the option is named Change the size of all items and there is a slider underneath which you can slide. Make sure you decrease until you are satisfied.
- On Windows 7, the section is named Make it easier to read what’s on your screen and here, you can choose between smaller, medium, and larger. Choose the Smaller – 100% (default)
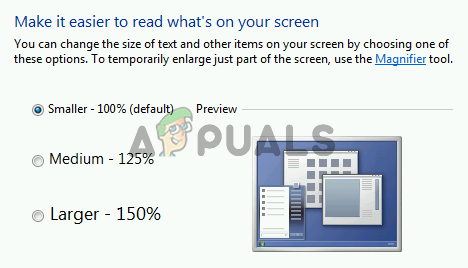
UI scale on Windows 7 - Reopen Corsair Utility Engine and check to see if it opens properly!
Solution 3: Uninstall Corsair Devices and the Utility Engine
This is the last troubleshooting method you should try out as it involves reinstalling virtually everything related to Corsair. First, you will have to uninstall all devices made by Corsair on your computer in Device Manager. After that, you will need to uninstall the Corsair Utility Engine tool before reinstalling everything! Follow the steps below!
Let’s start by uninstalling all Corsair device drivers in Device Manager.
- First of all, you will need to uninstall the driver you currently have installed on your machine.
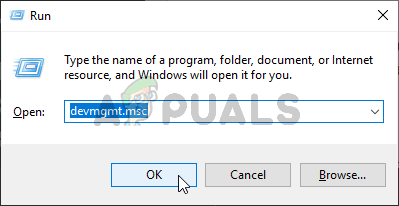
- Type “Device Manager” into the search field next to the Start menu button to open the device manager window. You can also use the Windows Key + R key combination in order to open the Run dialog box. Type devmgmt.msc in the box and click OK or Enter key.
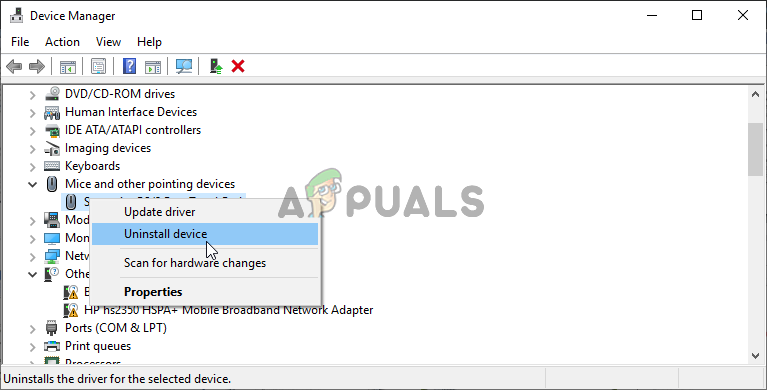
- Expand the proper section, depending on which type of device you have on your computer. Mice are located in the Mice and other pointing devices section, keyboards have their own section, and headsets are located in Sound, video and game controllers.
- Right-click on each entry you have made by Corsair and choose the Uninstall device option from the context menu. Make sure you repeat the same process for all entries.
- Confirm any dialog prompts, close Device Manager and proceed with the steps we have provided below.
After uninstalling all Corsair devices from your computer, it’s time to uninstall the Corsair Utility Engine on your computer by following the steps below!
- Click the Start menu button and open Control Panel by searching for it. Alternatively, you can click on the cog icon in order to open settings if you are using Windows 10.
- In Control Panel, select to View as – Category at the top right corner and click on Uninstall a Program under the Programs section.
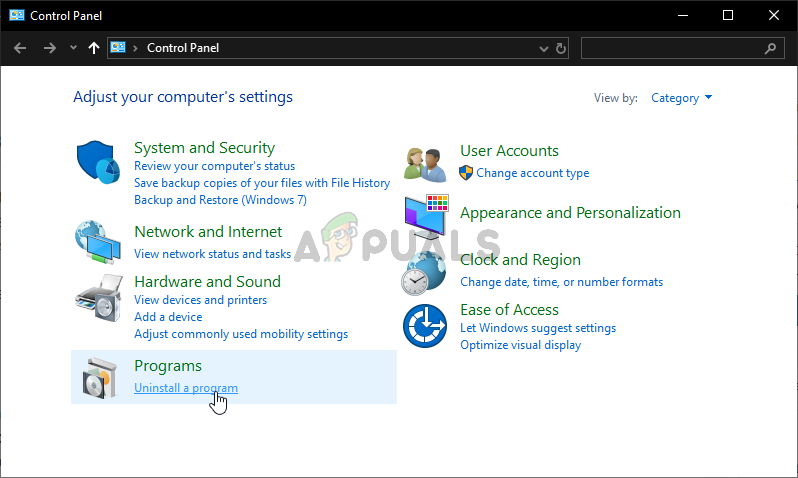
Uninstall a program in Control Panel - If you are using the Settings app, clicking on Apps should immediately open a list of all installed programs on your PC.
- Locate Corsair Utility Engine tool in Control Panel or Settings and click on Uninstall. Its uninstall wizard should open so follow the instructions to uninstall it.
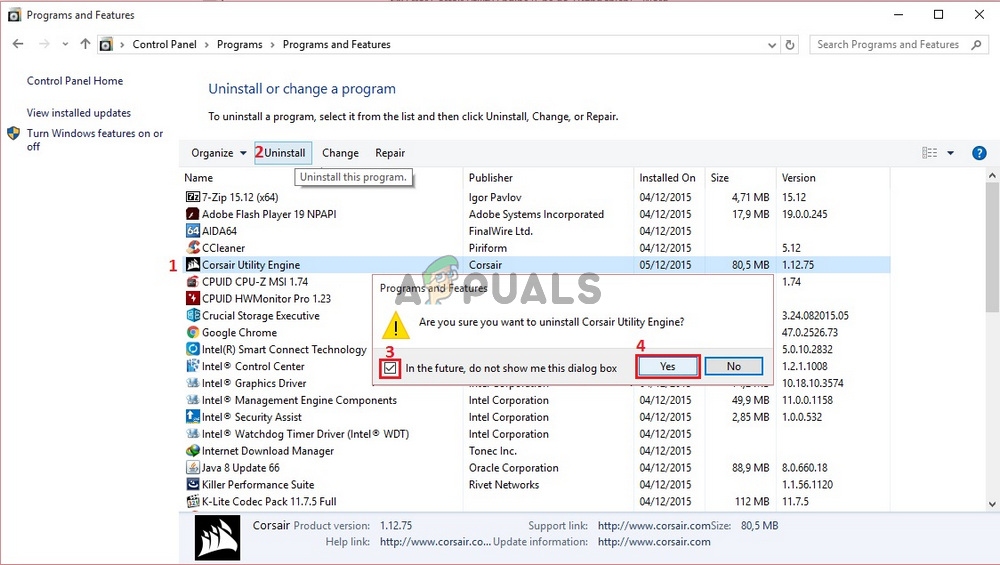
Uninstall Corsair Utility Engine - Click Finish when the uninstaller completes the process and restart your computer to see whether errors will still appear. Make sure you visit this website, download the installation file, and install it again to see if Corsair Utility Engine is opening properly!


