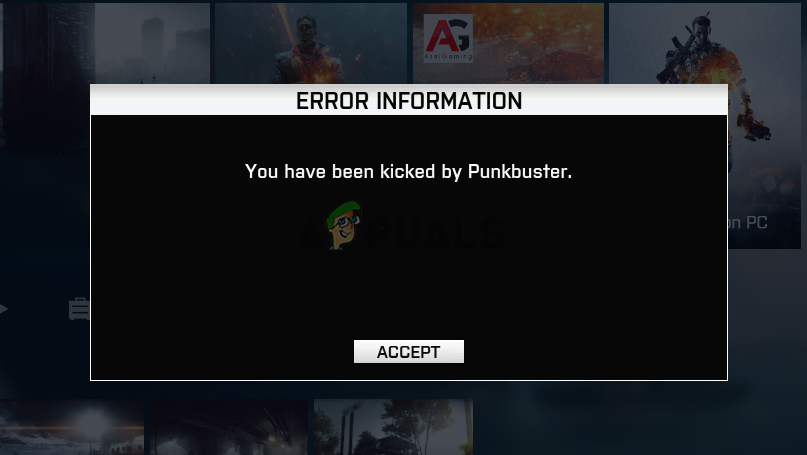
How to Fix the BF4 Kicked by PunkBuster Error on Windows?
PunkBuster is the engine used by many games (including Battlefield 4) to detect players who are using anything to improve their in-game performance illegally. However, PunkBuster can sometimes backfire and cause all sorts of problems even for users who aren’t using any cheats. They simply receive the “Kicked by PunkBuster” message without explanation.
If you are genuinely not using cheats, you can check out the methods we have prepared below to resolve your problem. Their methods have helped other users before so make sure you follow the instructions carefully.
What Causes the BF4 Kicked by PunkBuster Error on Windows?
There aren’t many different causes of this particular problem but the ones which were confirmed by other players can be resolved with relatively simple methods. Make sure you check out the list of causes we have prepared below!
- PunkBuster is not working – Reinstalling PunkBuster and updating to the latest is the recommended fix for the problem. The program’s malfunctioning is one of the most common causes and many users benefitted from uninstalling the current and installing the latest version.
- PunkBuster service not running properly – The PunkBuster service needs to be running constantly and it should reopen as soon as it has been closed. This can be set up in the service’s properties and it can resolve the problem easily
- Windows Defender Firewall – The program might be blocked by the Windows Defender Firewall and we recommend you make an exception for its executable!
Solution 1: Reinstall PunkBuster
The first method is probably the most obvious one but it’s also the one which has helped the most Battlefield 4 players around the world. Reinstalling PunkBuster can resolve many issues it has with your current setup and you can do that simply by following the instructions below!
First of all, you will need to uninstall it from your computer!
Windows 10:
- Make sure you open the Settings app on your Windows 10 PC by clicking the Start menu button and clicking the cog icon at the bottom right corner. Inside the Start menu, you can also search for Settings and left-click the first option which shows up.
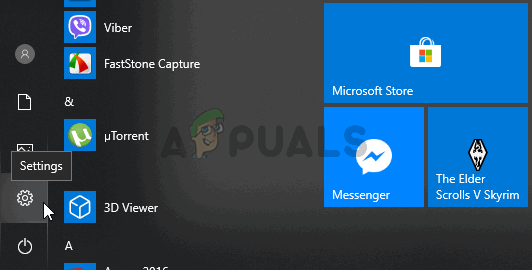
- Alternatively, you can simply use the Windows Key + I key combination. Open the Apps section inside Settings to view the list of all installed programs on your computer. Scroll down until you reach the PunkBuster Services entry, left-click it, and choose the Uninstall button which will appear.
- Make sure you follow the on-screen instructions to uninstall it from your computer.
Older versions of Windows:
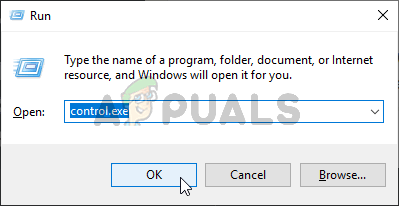
- PunkBuster can be uninstalled through Control Panel on older versions of Windows. Simply tap Windows Key + R keys at the same time and type “control.exe” in the Run dialog box which will appear. You can also search for Control Panel in the Start menu or the Search/Cortana window.
- Left-click the View by option at the top right corner of the Control Panel window and set it to Category. Click the Uninstall a program link under the Programs
- Locate the PunkBuster Services entry in the list of installed programs, left-click it once, and click the Uninstall button at the menu above. You can also right-click it and choose Uninstall from the context menu which will appear.
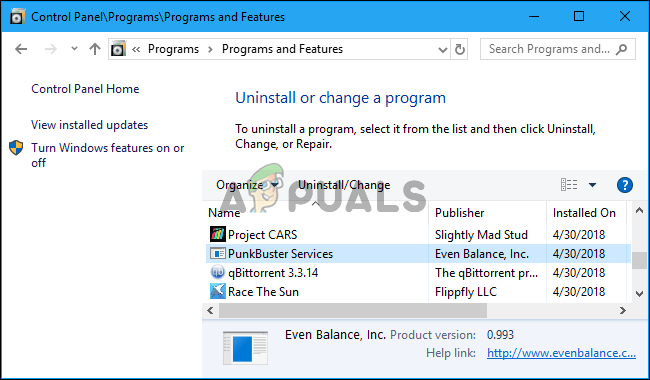
- Either way, follow the instructions which will appear on your screen to uninstall it completely.
Once you have uninstalled PunkBuster from your computer, it’s time to reinstall it. You won’t have to download it since there is an installation file already on your computer, inside the game’s installation folder. Follow the instructions below to install it!
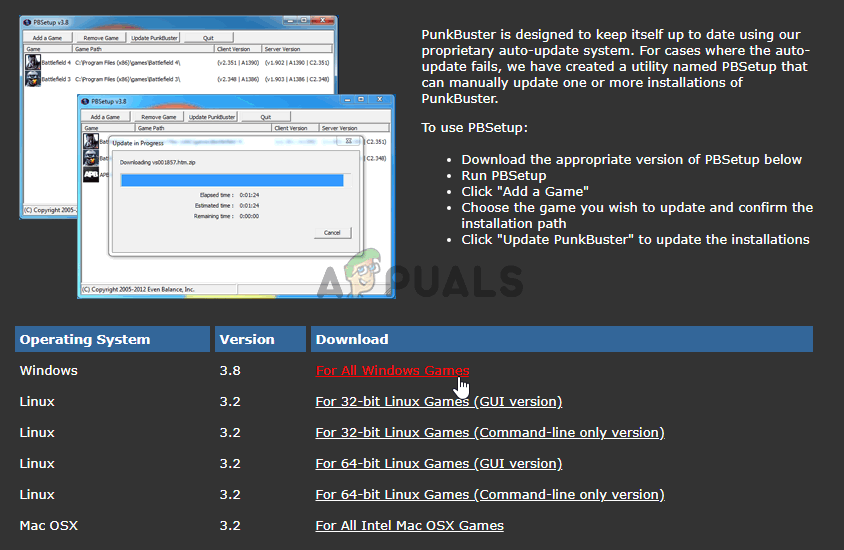
- Visit this link in your browser and download the latest Windows version of the program. Navigate to your Downloads folder, right-click the pbsetup.zip file inside, and choose the Extract here option from the context menu.
- Locate the pbsetup.exe file inside the Downloads folder and double-click to open it. Click the I Agree button from the initial screen after reading the PunkBuster End User License Agreement.
- After that, click the Add a Game button from the top left part of the window. In the Add a Game dialog window, choose Battlefield 4 from the Game Check the automatically generated Game Path option if it shows up. Make sure it’s valid. If it’s not, click the Browse button and set it manually.
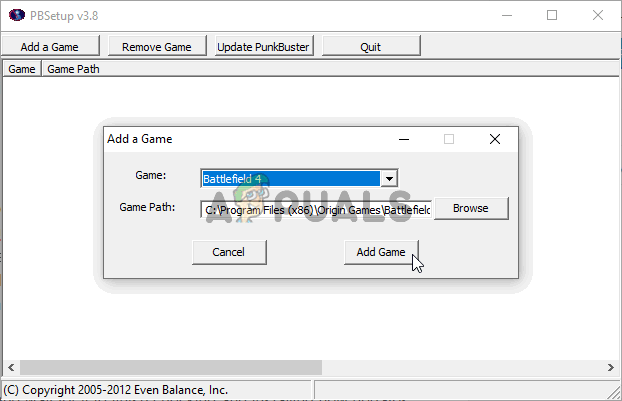
- After that, click the Check for Updates button and wait for it to finish checking and installing new updates. Close the setup.
- Navigate to your game’s installation folder. It should be located in your Origin library. If you have changed the library’s location from the default value, make sure you navigate to it. If you haven’t changed it, the default path should be:
C:\Program Files (x86)\Origin Games\Battlefield 4
or
C:\Program Files\Origin Games\Battlefield 4
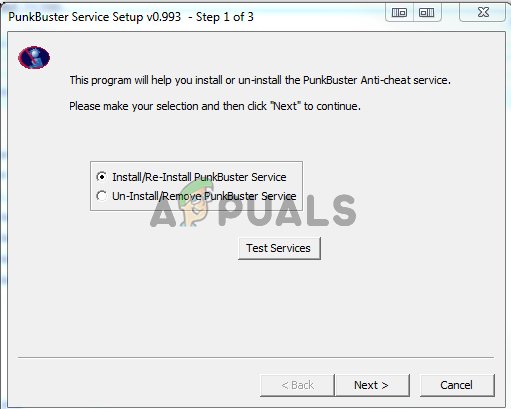
- Once inside, locate and double-click the _Installer Inside this folder, navigate to PunkBuster >> redist and double-click the pbsvc file located inside. Double-click to open it.
- Keep the Install/Re-Install PunkBuster Service radio button checked before clicking Next. Wait for it to reinstall the service!
- Reopen the game and check to see if you are still being kicked by PunkBuster even though you are not using any cheats!
Solution 2: Make Sure the PunkBuster Service is Running Properly
If the PunkBuster service is not running automatically, it may cause problems with game servers which think you’re using an unauthorized version of the game. The service needs to run all the time and it needs to restart automatically if it’s shut down by any means. This can be accomplished quite easily by following the set of steps we have prepared below.
- Make sure you open the Run dialog box by using the Windows Key + R key combination. Inside the text box next to Open, type “services.msc” without the quotation marks and click the OK button below to open Services.

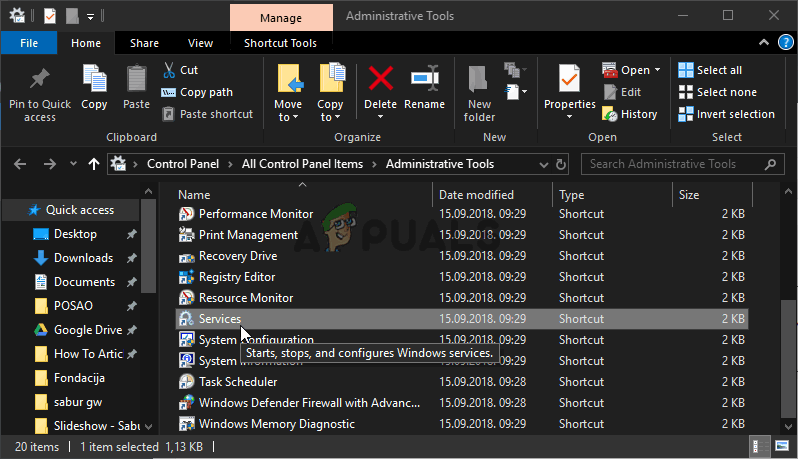
- Alternatively, you can type “control.exe” in the Run box above or simply search for Control Panel in the Start menu. Set the View by option to Large or Small icons by clicking it at the top right part of the window and click the Administrative Tools option at the top of the window.
- Inside this section, make sure you locate the Services entry and double-click to open it.
- Inside the list of services you have installed on your computer, locate the PunkBuster It can also go by the name of PnkBstrA. Right-click its entry in the list and choose Properties from the Context menu which will appear.
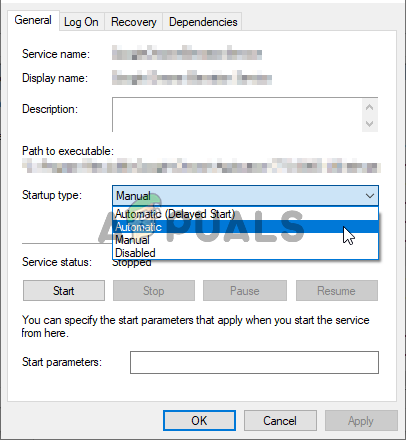
- If the Service status is shown as Running, make sure you click the Stop button below. Under Startup type, click the dropdown menu and choose Automatic from the list.
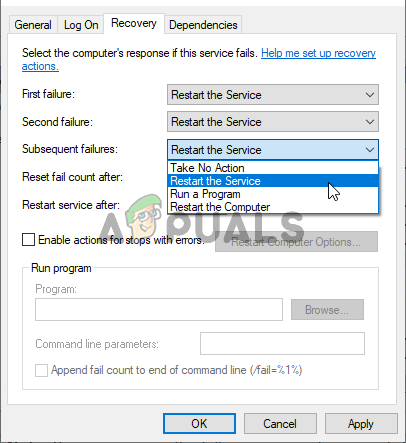
- After that, navigate to the Recovery tab inside the service’s Properties. You should see three options at the top of the window: First failure, Second failure, and Subsequent failures.
- Left-click the dropdown menu next to all three of these options and choose to Restart the Service from the list of options before navigating back to the General.
- Inside the General tab, left-click the Start button, wait for the service to start, and click the OK button to apply all changes you have made. Check to see if the “Kicked by PunkBuster” problem still appears while playing the game!
Note: You may receive the following error when you click on Start or Stop:
Windows could not start the PnkBstrA service on Local Computer. Error 1079: The account specified for this service differs from the account specified for other services running in the same process.
If this happens, follow the instructions below to fix it.
- Follow steps 1-4 from the set of steps above to open the service’s properties. Navigate to the Log On tab and click the Browse… button.
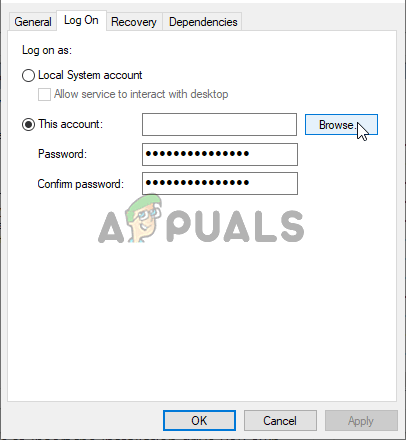
- Under the “Enter the object name to select” entry box, type in your PC’s account name, click on Check Names and wait for the name to become available.
- Click OK when you are finished and type in the password in the Password box when you are prompted with it (only if you have set up a password with the current account). The problem should be gone.
Solution 3: Exclude PunkBuster from Windows Defender Firewall
If your PunkBuster service is blocked by Windows Defender Firewall, the game might think you are trying to prevent it from accessing your internet connection and you will be banned by any server you try to connect to. The right way to resolve this problem is to simply add it to the list of exceptions. Do that by following the instructions below!
If you have a third-party firewall running on your computer, you should open it and look for the Exceptions/Exclusions section. If you are using the Windows Defender Firewall, you can follow the steps below!
- Open the Control Panel on your computer by searching for it in the Start menu. You can also use the Windows Key + R combination to open the Run dialog box and type “control.exe” inside to open it alternatively.

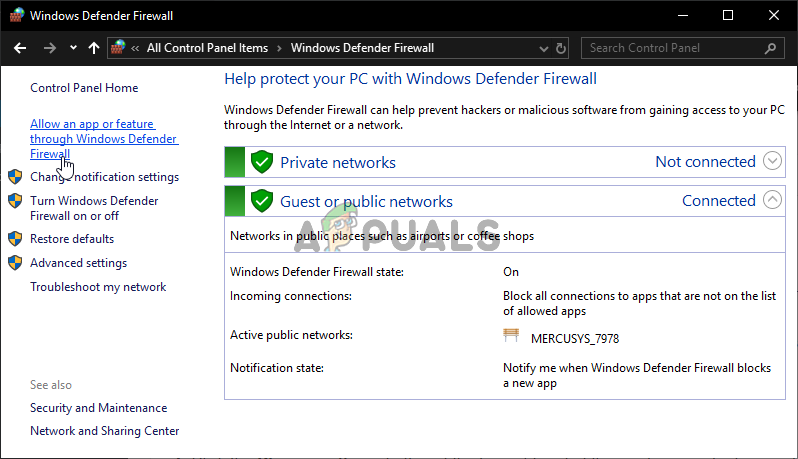
- Set the View by option inside the Control Panel window to Large or Small icons and scroll down to the bottom of the list for the Windows Defender Firewall
- Left-click to open this section and click the Allow an app through Windows Defender Firewall button at the left-side menu of the new window.
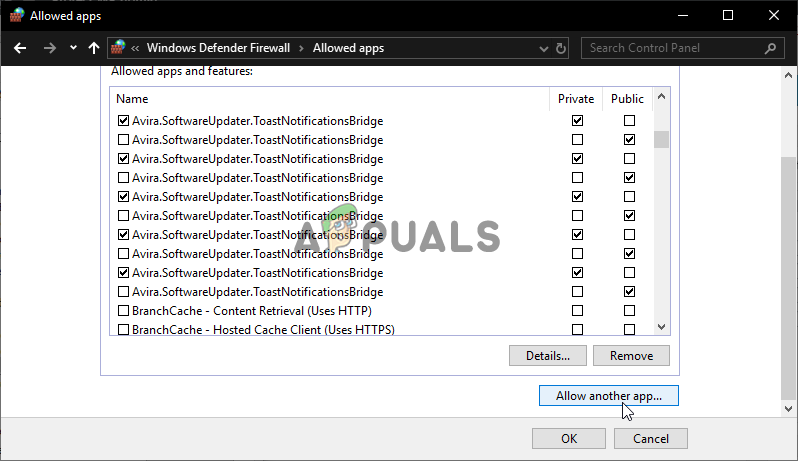
- Click the Change settings button at the top right part of the window to provide administrator permissions to add new programs. The PnkBstrA entry might already be in the list of Allowed apps and features to make sure you check the boxes next to both Private and Public columns in the window.
- If the PunkBuster service is not there, click the Allow another app button at the bottom. Click the Browse button inside and navigate to the executable’s location folder. The default location is:
C:\Windows\System32\PnkBstrA.exe
- Select this file. Click the Network types button and check the boxes next to both Private and Public Click the Add button to allow the game through. Click OK, run Battlefield 4, and check to see if the problem ceases to appear on your computer!


