How to Fix Teredo is Unable to Qualify
Teredo is a technology which allows users to have IPv6 connectivity while they are on IPv4 internet but don’t have any native connection on an IPv6 network. Teredo is considered a revolutionary protocol which is capable to perform its operations behind NAT (Network Address Translation) devices.

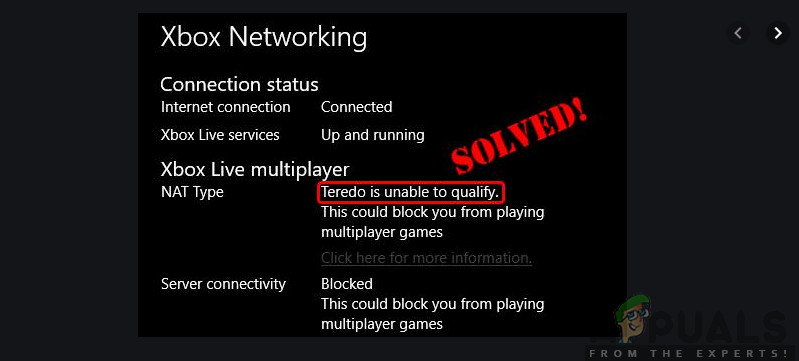
Teredo is used by several applications and games when making a connection to servers who communicate using the IPv6 medium. More specifically, the Xbox platform on Windows uses this feature extensively in its daily operations. Despite the active development and numerous support, many users experience the error message “Teredo is Unable to Qualify”. This is a very common error and can be easily fixed using the solutions down below. In this article, we will go through all the reasons as to why this issue occurs and what the possible workarounds are to fix them.
What causes the Error ‘Teredo is Unable to Qualify’?
When users see this error message, it is probably because they cannot connect to Xbox Live and have stumbled upon Xbox Line network settings while troubleshooting. There are several reasons as to why this issue might occur where most of them are related to the network.
- Bad internet connection: This reason tops the list because this is probably the most common one which occurs to users. Making sure that the internet is working perfectly is the first step in troubleshooting.
- Corrupt Teredo Adapter: In order to implement the Teredo protocol, the mechanism makes use of a Teredo adapter which is installed on your system by default and is hidden. If this adapter is corrupt or is having issues, you will experience problems.
- IP Helper service: The Teredo mechanism also makes use of the IP helper service in order to modify your network settings. If this service is not enabled or is manual, you will experience several problems.
- Teredo Server name: Teredo also has a virtual server setup on your computer for operating. If this server name is set to something else than the default name, you might experience issues when connecting.
- Teredo Disabled in Registry: If the Teredo protocol is disabled in your very registry, you will not be able to connect and will encounter the error message whenever Xbox tries to connect to Live service.
- UPnPv2: Your router also needs to support UPnPv2 in order to run the Teredo protocol properly. If it doesn’t support it or is disabled, the connection process will not be complete.
- Bad hosts file: Every Windows version has a hosts file which is used to map hostnames to IP addresses. If there are bad entries in the host file, you will experience issues when connecting to the Teredo protocol.
- Router not supporting Teredo: If your router doesn’t support Teredo or is disabled to support it, you might experience the error message under discussion.
- Outdated Windows: Microsoft Engineers also officially recognized the problem and released potential updates to fix the problem. If you have an outdated version of Windows, it is possible that this is the reason you are having the error message.
- VPNs: VPN or other network changing applications further change your network configurations. This will conflict with the Teredo mechanism.
Before we start with the solutions, make sure that you are logged in as an administrator on your computer. Furthermore, you should have your Xbox credentials at hand as you will be required to input them frequently.
Note: Before proceeding with other solutions, make sure that you update your Windows and all the games in Xbox to the latest version.
Solution 1: Checking Internet Connection:
The very first step in solving the error message of “Teredo is unable to Qualify” is making sure that you have an active internet connection. If there persist some issues with your internet where the computer is unable to connect to servers, you will not be able to connect using the Teredo protocol. In this solution, we will give you some handy tips which you can implement to make sure that you have a good internet connection.
- Try to connect to Microsoft’s Xbox website while connected to the internet. Check if you are able to log into your account properly.
- If you are able to connect to the website but not to the Live service, you should try connecting another computer to the same network and try launching Xbox Live and see if it connects properly.
- If you are using an organizational or public internet, it is recommended that you switch to a private Usually, open and public internets have limited access which causes some modules like Xbox Live not to work as expected.
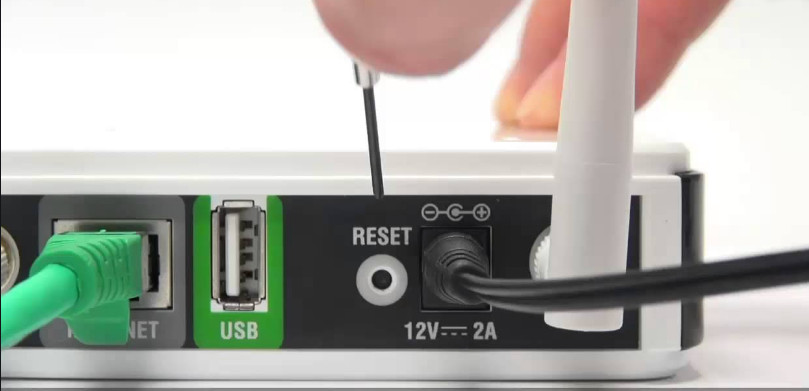
If the above tips don’t work, you should proceed to reset your router completely. This step can be skipped and followed at the end as well after you try all the other troubleshooting techniques.
Before we move on to reset your router, make sure that you have all the configurations saved beforehand. Every router usually has configurations saved by your ISP to access its network. Here, you need to navigate to the IP address associated with your router. This is either present at the backside of the device or in the box of your router. This can be something like ‘192.168.1.2’. If you don’t find the address associated, Google your router’s model and obtain the IP from there.
- Search for a button at the back of your router and press it for around 6 seconds until the router turns off and blinks its light to show it has been reset.

- Now connect to the router and enter the configurations back in. Now try connecting to Xbox Live service and see if this made a difference.
Solution 2: Reinstalling Teredo Adapter
Before we try out other technical workarounds, we will try to reinstall the Teredo adapter on your computer. By default, most of the computers have the Teredo Adapter hidden in their device managers. This adapter is used by the Teredo protocol in order to connect. If the very adapter is corrupt or has issues in its modules, you will experience the error message. In this solution, we will navigate to an elevated command prompt and after disabling the adapter, we will uninstall it before reinstalling it again.
- Press Windows + S, type “command prompt” in the dialogue box, right-click on the application and select Run as administrator.
- Now, execute the following command:
netsh interface Teredo set state disable

- After the adapter is disabled, press Windows + R, type “devmgmt.msc” in the dialogue box and press Enter.
- Once in the device manager, click on View and click Show hidden devices. Now, click on Network adapters, right-click on all Teredo adapters and select Uninstall.

Show hidden devices – Device Manager - After the uninstallation process, restart your computer completely. After logging back in, navigate to an elevated command prompt and execute the following command:
netsh interface Teredo set state type=default

- Now launch the Xbox application and see if the issue has resolved.
Solution 3: Checking IP Helper Service
The Internet Protocol Helper Service is an API which runs as a service on your Windows computer. Its main task is to configure and retrieve your network configurations for your local computer. This API is called wherever you are programmatically manipulating the network and TCP/IP configuration. If this service is not working as expected or is set to start manually, you might experience issues when connected to the Teredo protocol. In this solution, we will navigate to your services and make sure that the service is enabled.
- Press Windows + R, type “services.msc” in the dialogue box and press Enter.
- Once in the services window, search for the service of “IP Helper”.
- Right-click on the service and select Properties.

Properties – IP Helper Service - Once in properties of IP Helper service, make sure that the Startup type is set as Automatic. If the service is stopped, start the service and press Apply to save changes and exit.

Automatic Startup of IP Helper - Now try launching Xbox Live and see if the issue is resolved.
Solution 4: Setting Teredo Server Name to Default Value
Another thing which we can try is setting the Teredo server’s name back to its default value. There are numerous instances where the name could be changed by various applications or services for their own internal purposes. Either this or you have manually changed the name yourself. In this solution, we will launch the elevated command prompt again and then execute some commands.
- Press Windows + S, type “command prompt” in the dialogue box, right-click on the application and select Run as administrator.
- Now, execute the following command:
netsh interface Teredo set state servername=default

- Restart your computer completely and then check whether the issue is resolved for good.
Solution 5: Checking your Hosts File
Every computer has a hosts file which allows the mapping of hostnames to IP addresses whenever your computer is connecting to the internet. We came across several instances where this hosts file was either corrupt or had a lot of extra entries in it. This caused several problems which also affected the Teredo adapter. In this solution, we will navigate to the hosts file and make sure that everything is working perfectly.
- Press Windows + S, type “command prompt” in the dialogue box, right-click on the application and select Run as administrator.
- Now, execute the following command:
notepad.exe c:\WINDOWS\system32\drivers\etc\hosts

- When the Hosts file is open in Notepad, click Ctrl + F and type the following sentence:
win10.ipv6.microsoft.com
- If you find any entries, make sure that you remove them. Save changes to the hosts file and then restart your computer. Now check whether the issue is resolved and the issue is fixed.
Solution 6: Checking your Router
Before we start with other drastic workarounds involving system restores, it is vital that you make sure that are no conflicting settings in your router itself. Usually, some routers have some options disabled by default which causes issues when Windows tries to enable the Teredo protocol.
You can open your router settings by navigating to the IP address present at the back of your router. You can also Google your router model or check its box. Once in the settings, move around and make sure that the following settings are enabled:
UPnPv2

Teredo
If you made changes, save them and restart your router completely including your computer. Now check if the issue is resolved.
Solution 7: Changing Status of Teredo through Registry
Every computer has a registry which dictates the rules which the computer has to follow. It also contains settings for several network and application modules. During our research, we came across several instances where Teredo was disabled in the registry itself. In this solution, we will first query whether this is true and if it is, we will execute some commands which will make sure that the registry entry gets modified and Teredo is enabled again.
- Press Windows + S, type “command prompt” in the dialogue box, right-click on the application and select Run as administrator.
- Now, execute the following command:
reg query HKLM\System\CurrentControlSet\Services\TcpIp6\Parameters

This command will tell you whether the configuration is enabled or the key is even present or not. Nevertheless, you can execute the following command:
reg add HKLM\System\CurrentControlSet\Services\Tcpip6\Parameters /v DisabledComponents /t REG_DWORD /d 0x0
- Restart your computer after making the changes and then try launching Xbox Live and see if the issue is resolved for good.
Solution 8: Disabling VPN and Firewalls
Another reason why you might experience the error message is because of VPN’s and Firewalls installed on your computer. VPN’s redirect the internet traffic through a proxy and imitate that you are from another location as compared to your actual physical one. However, this process has many flaws and sometimes doesn’t let applications or modules connect successfully.
If you are using a work internet connection or a proxy, make sure that you disable it as well or consider changing your network and see if this makes any difference to your situation. Once you are absolutely through with this solution, only then move forward.
Solution 9: Performing System Restore
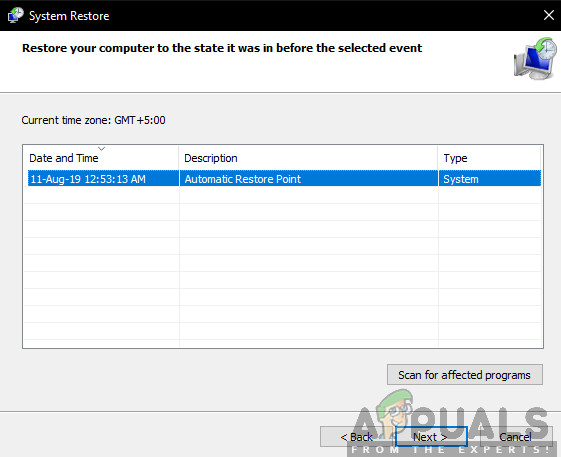
If all the above methods fail to work, you can perform a system restore and choose a recent restore point. Make sure that you select a recent restore point which was taken the latest and then work your way outwards.

If system restore doesn’t work, you probably need to create a new profile on Windows and see if the folder is present there. You can check our article on How to Create a New User Account and Transfer all the Data to it? Make sure that you perform all the steps and only transfer all the data when you are sure the new profile works properly with Xbox Live.


