‘Sync is not available for your account’ [5 Solutions]
Several Windows users have been seeing the ‘Sync is not available for your account. Contact your system administrator to resolve this.’ when trying to enable sync on Windows 10. This issue seems to only occur with Windows 10 builds that already installed the Fall Creators Update. The issue is exclusive to Windows 10 as it doesn’t occur on older Windows iterations.

What’s causing the ‘Sync is not available for your account’ error?
We investigated this particular issue by looking at various user reports and by testing out the various repair strategies that were used successfully by other users that also encountered this problem. As it turns out, several different scenarios might end up causing this issue. Here’s a shortlist of potential culprits:
- Connected work or school accounts – In most cases, this error will occur in cases where one or more accounts are connected in the Access work or school settings page. If this scenario is applicable, you can fix the problem by removing the accounts and enabling syncing on your Windows 10 computer.
- Microsoft account is not verified – Another potential cause that will trigger this error message is a Microsoft account that is not verified. In this case, you should be able to resolve the issue and establish syncing by verifying the account from the Your info tab on the official Microsoft website.
- A Registry policy is preventing syncing – As it turns out, a REG_DWORD named NoConnectedUser might also cause this behavior in situations where it’s enabled in your Registry. In this case, you can fix the issue by using Registry Editor to prevent the policy from affecting your Microsoft account syncing.
- Azure doesn’t allow syncing – If you’re using Azure AD, it’s possible that a Device setting doesn’t allow bound users to sync settings and app data across multiple devices. If this scenario is applicable, you can fix the problem by modifying an Azure Active directory setting from the Azure portal.
- System file corruption – In rare circumstances, this problem can occur due to some type of system file corruption that is affecting the syncing procedure. In this case, you can fix the problem by resetting every OS component with a repair install procedure.
Method 1: Removing work or school accounts
In most cases, the ‘Sync is not available for your account’ error will occur due to a problem with connected accounts in the ‘Access work or school’ settings page. As it turns out, this problem is only occurring on certain PCs and Notebooks that have connected work or school accounts before the installation of a critical Windows update.
Some users have confirmed that they were able to fix this issue by removing the work or school account, restarting their computer and retrying the syncing procedure. In most cases, affected users have confirmed that the syncing feature remained functional even if they ended up re-adding the work or school account afterward.
If the scenario you’re encountering is similar and you currently have a work or school account connected inside the Accounts menu, follow the instructions below to take care of the ‘Sync is not available for your account’ error.
Here’s a quick guide on removing the work or school account to re-establish the syncing feature:
- Press Windows key + R to open up a Run dialog box. Next, type ‘ms-settings:workplace’ inside the text box and press Enter to open up the Access work or school tab of the Settings app.

Accessing the Access work or school day of the Settings app - Once you’re inside the access work or school tab, move down to the right-hand pane and click on the Disconnect button associated with the connected Work or school account. Confirm at the next prompt, then restart your computer.

Disconnecting the connected work or school account - Once the next startup sequence is complete, press Windows key + R to open up another Run box. Inside, type ‘ms-settings:sync‘ and press Enter to open up the Sync your settings tab.

Accessing the Windows sync settings - Once you’re inside the Sync your settings menu, move over to the right-hand pane and enable the toggle associated with Sync settings.

- If you’ve been able to enable the Microsoft account syncing without encountering the ‘Sync is not available for your account’ error, you can return to the Access work or school account and re-add the account that was previously causing the problem.
In case the method above wasn’t applicable or you followed it without success, move down to the next potential fix below.
Method 2: Verifying your Microsoft account
Another potential cause that might trigger the ‘Sync is not available for your account’ error is a Microsoft account that needs to be verified. This typically occurs if the user has installed multiple critical pending updates at once.
To fix the problem in this case, you’ll need to sign in with your Microsoft account on their official website and verify the account from the Your info tab.
Several affected users have confirmed that this procedure has allowed them to resolve the ‘Sync is not available for your account’ error after they received the verification email. After completing this process, they were able to go to the Sync your settings tab again and enable Sync settings with no issues whatsoever.
Here’s a quick guide on verifying your Microsoft account:
- Open your default browser and visit this official Microsoft account website (here). Once you get here, click on the Sign In button (top-right corner of the screen). Then, on the next screen, insert your Microsoft account and password to log in.
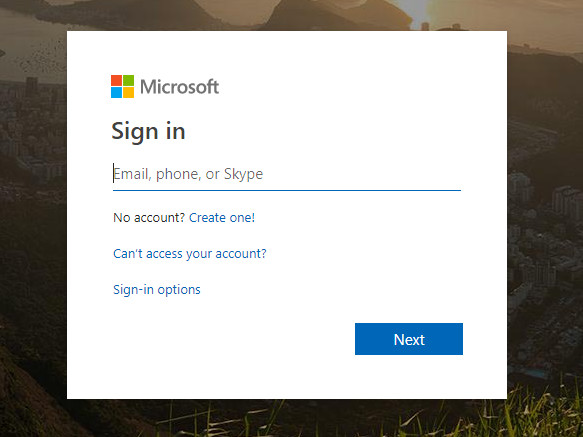
Signing in to Microsoft Account - Once you have successfully logged in, go to the Your Info > Security & Privacy and click on the Verify hyperlink associated with the phone number or email account that you use to sign in.
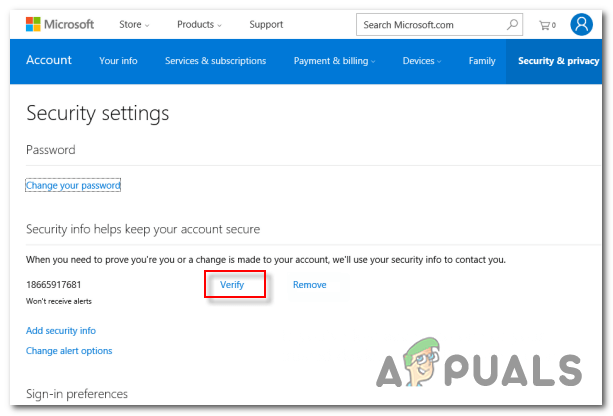
Verifying your Microsoft account - Use the verification code that you receive on your phone number or email associated with the Microsoft account to complete the verification process.
- Restart your computer. Once the startup sequence is complete, press Windows key + R to open up a Run dialog box. Next, type ‘ms-settings:sync’ and press Enter to open up the Sync your settings tab and enable account syncing via the Sync settings toggle.
In case your account was already verified and you’re still encountering this issue, move down to the next potential fix below.
Method 3: Enabling Microsoft account via Registry Editor
Another possibility that might end up triggering the ‘Sync is not available for your account’ error is a scenario in which your Microsoft account is disabled forcibly via a Registry key. In this case, you will be able to fix the problem by modifying the registry key accordingly.
Other users finding themselves in a similar scenario have managed to get the issue fixed by using Registry Editor to modify the REG_DWORD value of NoConnectedUser to 0. What this does is it disables the policy altogether, allowing you to connect and sync with Microsoft accounts normally.
If you think this scenario is applicable and a policy rooted in your Registry may be causing this issue, follow the instructions below to disable it. This will finally allow you to enable syncing on your Windows 10 computer.
Here’s what you need to do:
- Press Windows key + R to open up a Run dialog box. Next, type ‘regedit’ inside the Run text box and press Enter to open up the Registry Editor utility. When you’re prompted by the UAC (User Account Control) prompt, click Yes to grant admin access.

Running the Registry Editor - Once you’re inside Registry editor, use the left-hand side to navigate to the following location:
HKEY_LOCAL_MACHINE\SOFTWARE\Microsoft\Windows\CurrentVersion\Policies\System
Note: You can also get there instantly by pasting the location directly into the navigation bar and pressing Enter.
- When you manage to arrive at the correct location, move over to the right-hand side and double-click on the NoConnectedUser value.
- Inside the Edit DWORD (32-bit) Value of the NoConnectedUser, set the Base to Hexadecimal and change the value data to 0 before clicking Ok.

Changing the NoConnectedUser policy via Registry Editor - Restart your computer to allow the changes to take effect and see if the syncing process is succesfull after the next successful system startup.
If you’re still encountering the ‘Sync is not available for your account’ error, move down to the next method below.
Method 4: Enable Syncing from Azure Active Directory (if applicable)
If your PC also has an Azure AD account that’s bound to it, you likely need to change some settings in the Azure portal in order get around the ‘Sync is not available for your account’ error and allows your PC to establish syncing with your MS account.
Note: Disregard this method if you’re not using Azure integration.
Some Azure users have managed to fix this problem by accessing the Azure Active Directory and changing the Device settings so that bound users can sync settings and app data across devices.
Here’s a quick guide on enabling syncing from Azure Active Directory:
- Visit the Azure Portal (here) and log in with your AzureAD administrator account or Office365 account (depending on which one is applicable).
- Once you’ve successfully logged in, go to Azure Active Directory > Device Settings.
- Once you’re inside the Device Settings tab, move over to the right-hand section and set the User may sync settings and app data across devices to All.

Enabling user syncing from the Azure Active Directory - Once syncing is enabled, press Windows key + R to open up a Run dialog box. Once you’re inside, type ‘ms-settings:sync’ and press Enter to open up the Sync your settings tab. Once inside, enable the Sync settings tab.
If you’re still encountering the same ‘Sync is not available for your account’ error, move down to the final method below.
Method 5: Performing a repair install (in-place upgrade)
If none of the methods above have allowed you to resolve the issue, chances are you’re dealing with some kind of OS component issue that cannot be resolved conventionally. If this scenario is applicable, you can resolve the issue easily by refreshing every OS component.
You have the option of a clean install, but that will likely cause you to lose all your user settings and any personal data that you don’t back up in advance.
A lengthy but superior method is to perform a repair install (in-place upgrade). This will require you to use a compatible installation media, but it will allow you to keep all personal files, apps, games and user preferences.


The first solution worked. Thanks for sharing these.