How to Fix SMS Fails to Send in Android?
When SMS fails to send on an Android device, you typically see a message indicating failure or a red exclamation mark next to your message. This issue usually means there is a problem with the message center number (SMSC) configuration (a setting that routes your SMS messages to the recipient’s phone), which is critical for routing SMS messages correctly.
If your SMSC setting is incorrect, you’ll still receive messages because the sender’s SMSC dispatches them directly to your SIM. However, your outgoing messages fail because they don’t reach your carrier’s SMSC. For context, see this diagram:
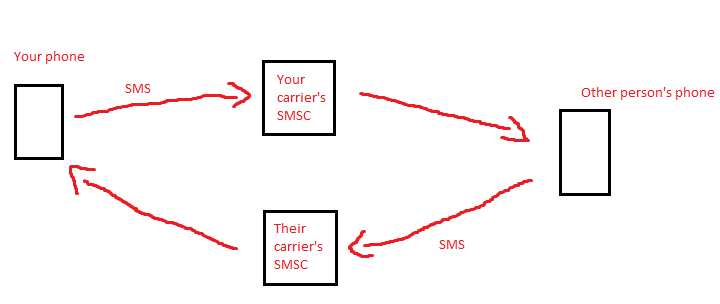
Your SMSC might have been misconfigured or deleted, perhaps after downloading a root app intended to enable VoLTE. The lesson here is that apps modifying telephony settings can cause issues if their function isn’t clearly understood.
1. Set SMSC Through Secret Phone Menu
By accessing the secret phone menu, you have the ability to directly refresh or modify the SMSC number—the gateway responsible for proper SMS delivery. It’s a useful approach that can bypass usual system limitations and make sure your messages find their way to the intended recipient.
- Open your phone’s dialer app.
- Dial *#*#4636#*#* on your keypad.
- When the menu appears, select Phone Information.
- Scroll to the SMSC option and tap Refresh. This attempts to set the SMSC number correctly.
- If Refresh error appears, you need to input the number manually.
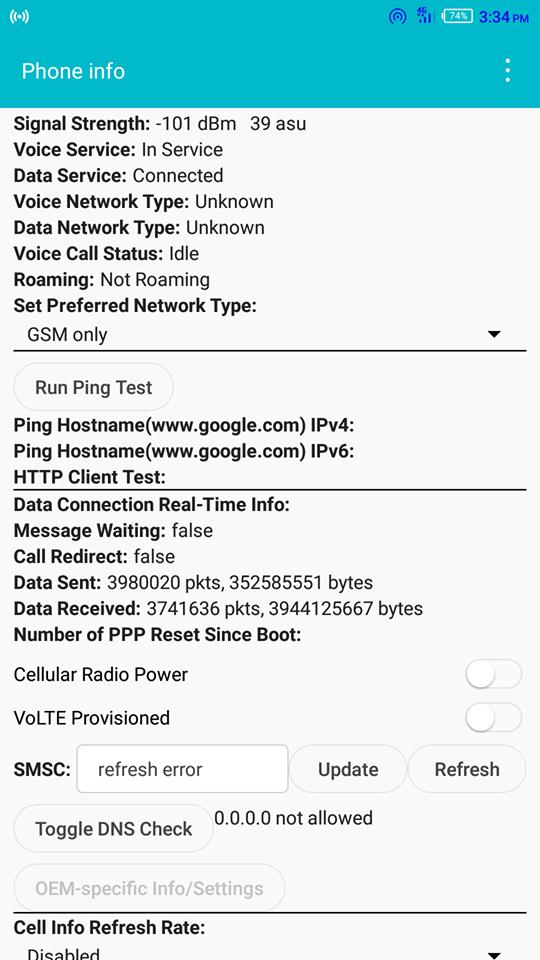
Example of an SMSC refresh error. - Enter your carrier’s SMSC number in the designated field.
- Tap Update after entering the number.
If unsure of your carrier’s SMSC, you could consult a list of global SMSC numbers for popular carriers by country, but be aware such lists may not be current. Contacting your carrier directly for the correct SMSC number is most reliable.
If Update error occurs after manual entry, you may convert the SMSC to PDU format. Although this didn’t work for me, the following steps might succeed for you:
- Go to an Online PDU Encoder and Decoder.
- Locate the SMSC conversion field.
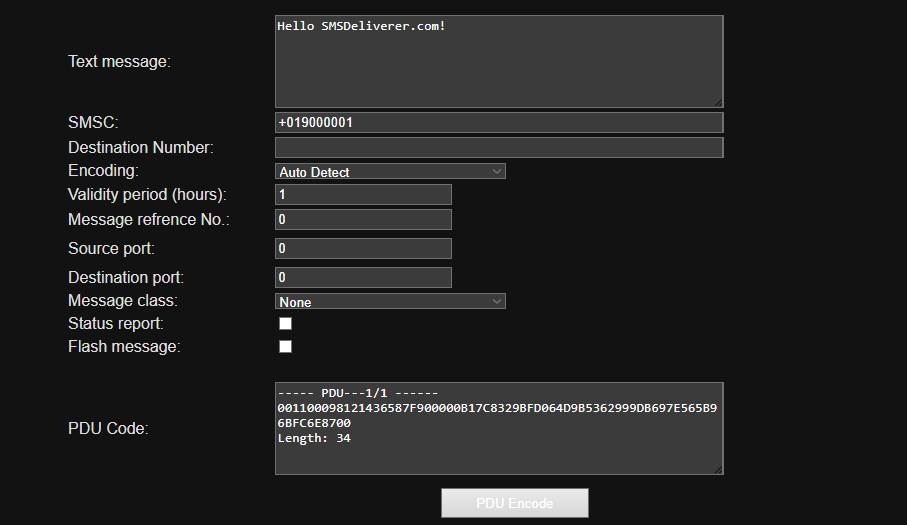
- Clear all text in the Destination Ne= and message fields.
- Type in your SMSC number and click PDU Encode.
- Use the first 16 digits from the second line under PDU Code.
- Enter the PDU string in the SMSC field and press Update. If unsuccessful, prepend a + to the PDU string.
2. Set SMSC in Default Messaging App
Some users favor third-party messaging apps over native ones. However, if you’ve disabled bloatware as a root user, you might have disabled the default SMS app, which often can adjust the SMSC number – a function not typically present in third-party apps due to the default app’s system privileges.
By accessing the default messaging app’s settings, you can directly input the correct SMSC value. This approach bypasses potential restrictions you might encounter with third-party apps, thus restoring your ability to send SMS messages effectively.
- Head to Settings > Apps and find your device’s stock SMS app.
- Make sure it’s enabled or enable it if necessary.
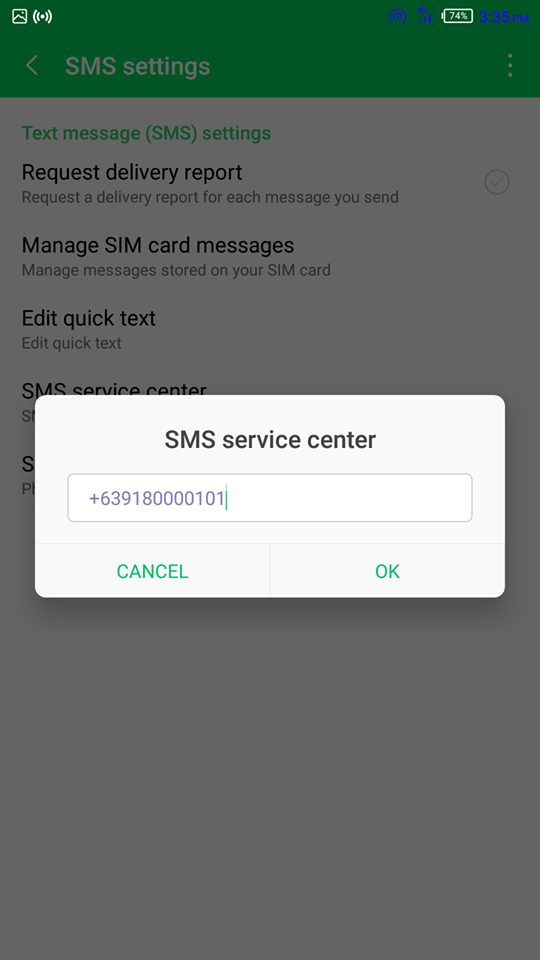
- In the SMS app, locate the SMSC setting, which on my device was under Settings > SMS settings > SMS service center.
- Input your SMSC, save, and attempt to send a message.
Note: Settings may vary depending on your phone.
A successful text message indicates the problem is resolved. You can switch back to your chosen SMS app, but keep the default one enabled.
3. Reset the SMSC in Another Phone
If none of the above works, try configuring the SMSC using another phone and then reinserting the SIM into the original device.
- Transfer the SIM card to a different phone, an old Nokia will do.
- In the other phone, access the SMS/SMSC settings and set them correctly. Since SMSC configurations are tied to the SIM card, returning the SIM to your phone retains the settings.
One user reported success only after an extra step:
“I inserted my SIM into an old Nokia 6120 C and changed the ‘Pusat Pesan SMS’ title to ‘Message Centre,’ after which it worked.”


Question, is it just the + and the number with it, or are you supposed to include the stuff after the comma (mine has 3 digits), and there’s also ” marks. Thanks in advance.