How to Fix Skype Share System Sound not Working on Windows?
The “Share system sound” option available for Skype on Windows is very useful as you can share the sound playing on your computer to your call partner’s speakers. This is very useful while screen-sharing! However, Skype users have reported that this option sometimes simply doesn’t work and nothing they do seems to resolve the problem.

We have prepared a few methods which might help you resolve the problem and we hope you check them out before calling it quits. Follow the steps below carefully and good luck!
What Causes Skype “Share System Sound” Not to Work on Windows?
There aren’t many causes which prevent the “Share system sound” feature to function improperly in Skype but it’s possible to find two distinct scenarios which account for at least 90% of the problem’s occurrences. Check it out below in order to prepare for troubleshooting the problem!
- Windows is interfering – Windows sometimes decides to disable system sounds when it detects that a call is incoming or outgoing. That makes sense for regular calls but the “Share system sound” requires the opposite. This can be resolved in Windows or in the Skype client.
- Old or faulty audio drivers – Audio drivers pretty much control everything related to sound on your computer and if they are faulty, many errors are bound to appear, including this one. Make sure you update them as soon as possible!
Solution 1: Do Nothing When Windows Detects Communications Activity
This option inside Sound settings in Control Panel is used to silence your computer if it notices any communications activity such as incoming or outgoing calls. However, this comes into conflict with the Skype “Share system sound” option as you definitely don’t want to silence sound on your computer. Performing the steps below should clear this confusion!
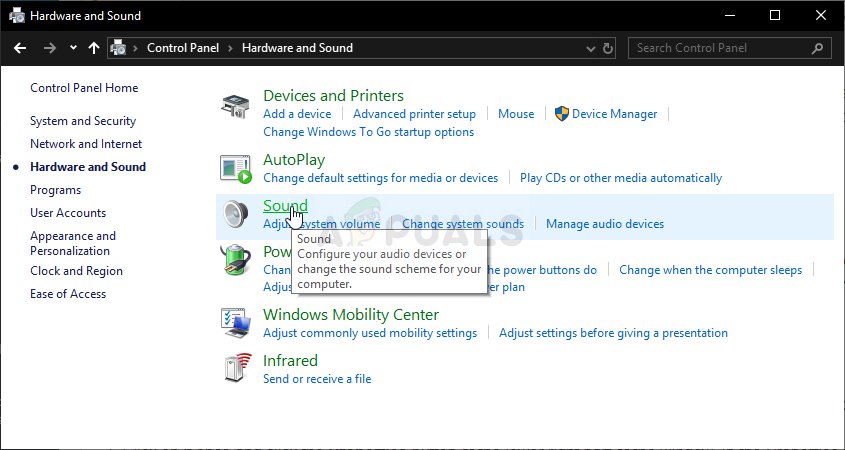
- Right-click on the volume icon located at your taskbar and choose the Sounds If this icon is not located at your taskbar, you can locate Sound settings by opening Control Panel, switching the view to Category and selecting Hardware and Sound >> Sound.
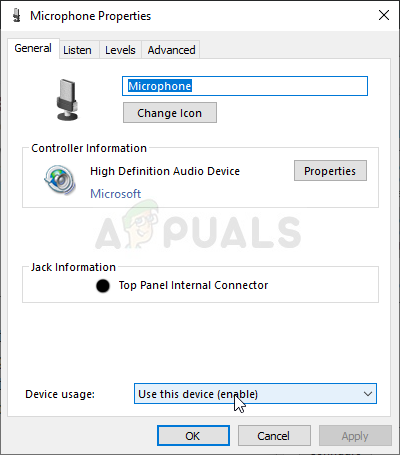
- Check to see if your microphone is enabled under the Recording tab. Switch to this tab by clicking at the top of the window and locate the device you are using. It should be located at the top and selected.
- Click on it once and click the Properties button at the lower right part of the window. In the Properties window which opens, check under Device usage and set the option to Use this device (enable) if it wasn’t already and apply the changes.
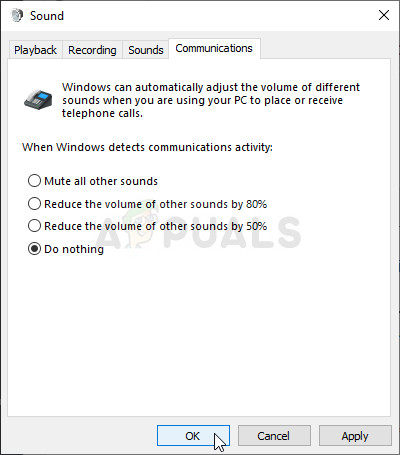
- Navigate to the Communications tab inside the Sound window after you finish making changes with your speaker.
- Under the When Windows detects communications activity option menu, set the radio button next to the Do nothing option and click the OK button in order to apply the changes.
- Check to see if Skype “Share system sound” option still works properly when using Skype on Windows.
Solution 2: Stop Automatically Adjusting Speaker Settings
This method is largely similar to Solution 1 because of the fact it deals with automatic audio adjustment when a call is being made or received. This time, however, the option to change audio settings is located in the Skype client. Skype can also manage the audio levels which change when a call is made and you should disable that by following the steps presented below!
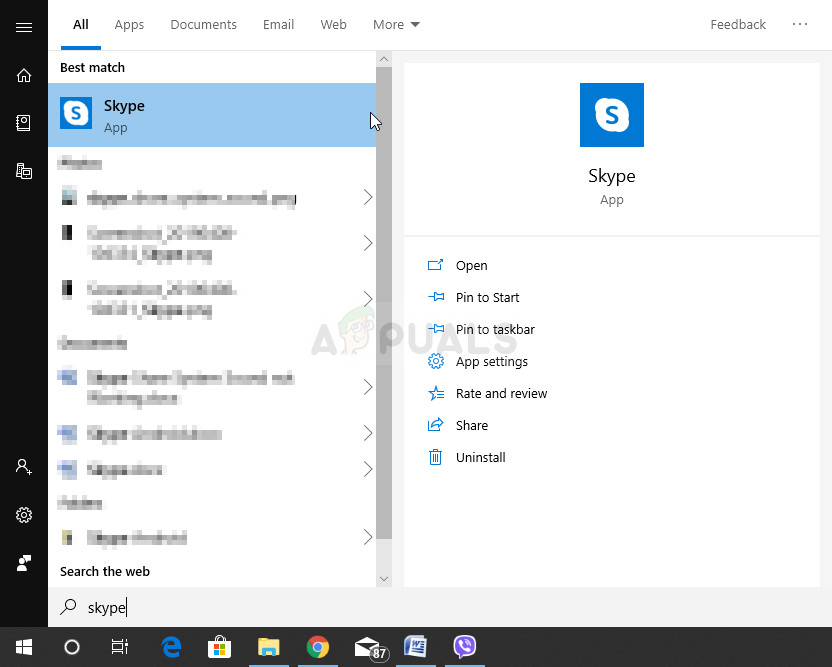
- Open Skype by double-clicking its icon from Desktop or by searching for it after opening the Start menu and left-clicking the top result.
- If you are using the classic Skype app (downloaded from their official website), visit the menu bar and click Tools >> Options in order to change Skype settings.
- Navigate to the Audio Settings tab and uncheck the boxes next to both Automatically adjust microphone settings and Automatically adjust speaker settings. Make sure you click the Save button at the bottom of the window before exiting.

- If you using the Windows 10 app for Skype instead, make sure you open it and click the three horizontal dots next to your profile picture from the home screen. Choose Settings from the dropdown menu which will pop up.
- Navigate to the Audio & Video tab inside the Settings window which will appear and slide the slider next to the Automatically adjust microphone settings option to Off.
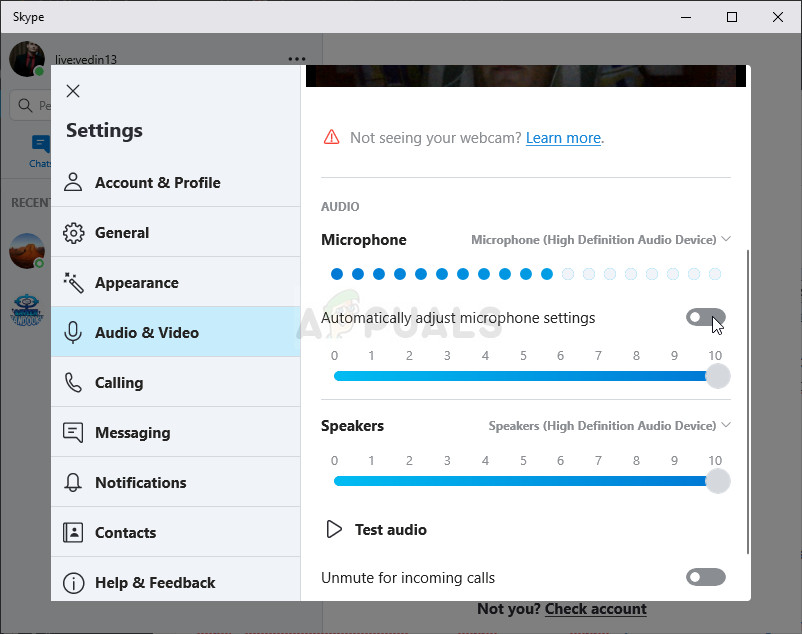
- For both steps, make sure you select the default microphone and speaker level. Start another call and check to see if Skype “Share system sound” started working!
Solution 3: Update Audio Drivers
Many users have reported that updating to the latest drivers fo managed to resolve the problem immediately. Since drivers are often not updated automatically, it’s very important to keep them up to date in order to prevent problems such as this one from happening. Follow the steps below in order to update your audio drivers.
- Click the Start menu button at the lower left part of the screen, type in “Device Manager”, and select its entry from the list of available results by clicking the first one.
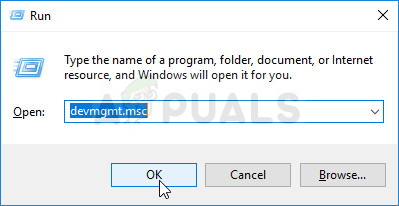
- You can also use the Windows Key + R key combination in order to bring up the Run dialog box. Type in “devmgmt.msc” in the dialog box and click OK in order to run Device Manager.
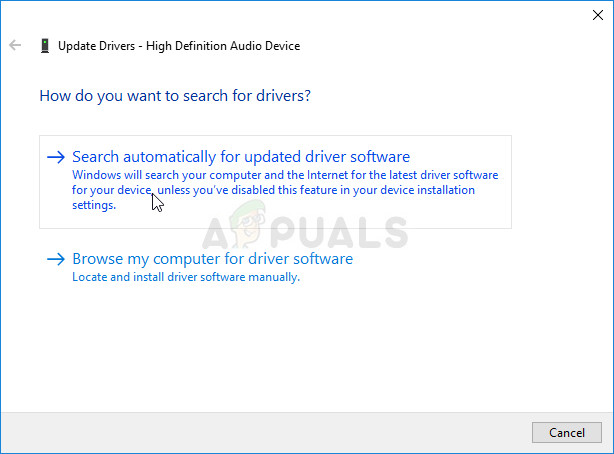
- Since you want to update the driver for your sound devices, expand the Sound, video and game controllers section by left-clicking the arrow next to the name. Right-click on each entry in the list and choose Update driver from the context menu.
- Choose the Search automatically for updated driver software option from the new window and wait to see if the tool is able to find newer drivers. Repeat the same process for all audio devices.
- Check to see if “Share system sound” issues have been resolved!
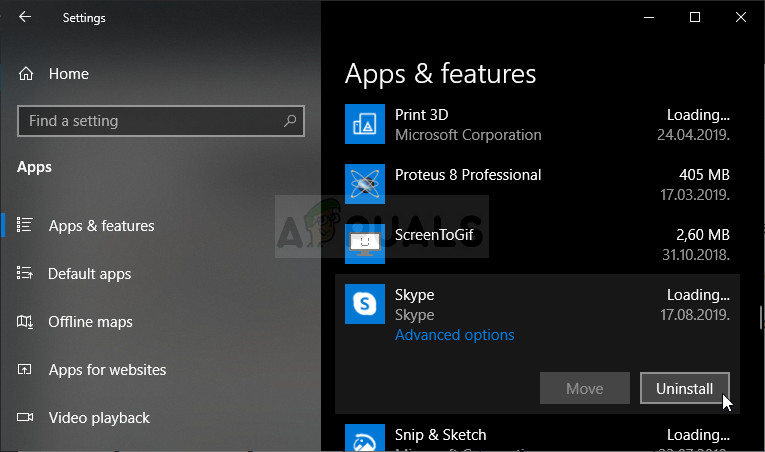
Solution 4: Reinstall Skype
If all methods above fail to work, reinstalling Skype is the last method which can help you resolve the problem on your computer. It should be fast and painless if you follow all the steps properly!
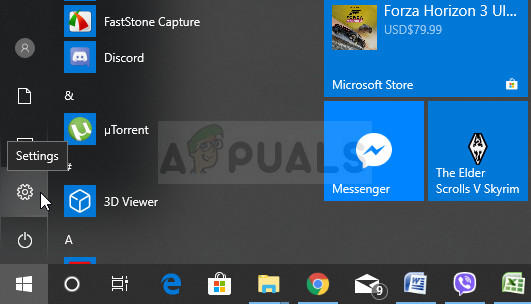
- Click the Start menu and open Control Panel by searching for it simply by typing with the Start menu window open. Alternatively, you can click the cog icon in the lower-left part of the Start menu in order to open the Settings app if you are using Windows 10.
- In Control Panel, select the View as: Category option at the top right corner of the Control Panel window and click on Uninstall a Program under the Programs
- If you are using the Settings app, clicking on Apps should immediately open a list of all installed programs on your PC so wait for a while in order for it to load
- Locate Skype in Control Panel or Settings and click on Uninstall/Repair. Follow any instructions which appear afterward in order to uninstall it completely.
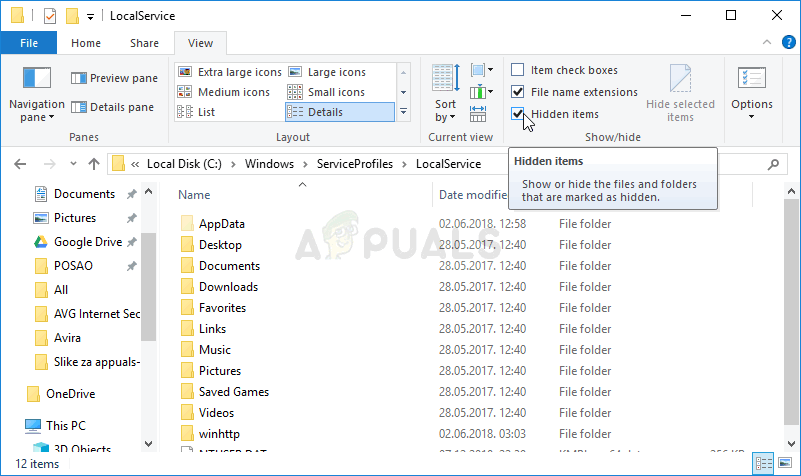
- Navigate to the following location on your computer by opening the Windows Explorer and clicking on This PC:
C:\Users\YOURUSERNAME\AppData\Roaming
- If you are unable to see the AppData folder, you may need to turn on the option which enables you to view hidden files and folders. Click on the “View” tab on File Explorer’s menu and click on the “Hidden items” checkbox in the Show/hide section. File Explorer will show the hidden files and will remember this option until you change it again.
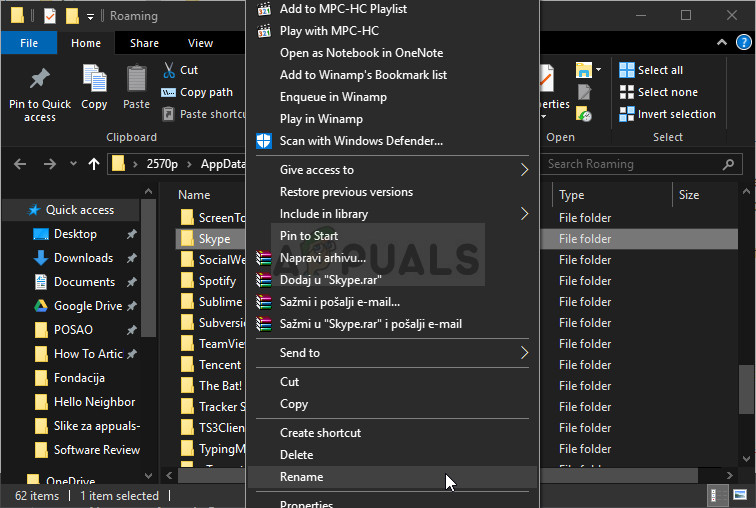
- Open the Skype folder inside, locate the file named xml, right-click on it, and choose Delete from the context menu which will appear. After that, open the folder named the same as your Skype name and delete the config.xml file inside.
- Navigate back to the Roaming folder, right-click it, choose Rename from the context menu, and set its name to something like Skype_old.
- After the process is over, download Skype again from the Internet or from Windows Store and check to see if the problem persists!


I was having problems with “Unspecified error” that was causing sound sharing to stop, my only workaround was to share a specific window. But after I disabled automatic settings on my microphone screen sharing with sound started working(no longer necessary to share a specific window)! Thanks a lot!