How to Fix ‘Servers are too Busy’ Error on PUBG?
PUBG (Players Unknown’s Battlegrounds) is one of the most popular battle-royale game and is one of the first to make the genre popular. The game has a player base of more than 50 million people and receives regular updates from the developers. However, quite recently, there have been a lot of reports of the “Servers Too Busy Please Try Again Later” Error while trying to get into a match.

What Causes the “Servers are too Busy” Error on PUBG?
After receiving numerous reports from multiple users, we decided to investigate the issue and devised a set of solutions which fixed it for most of our users. Also, we looked into the reasons due to which this error is triggered and listed them as follows.
- Server Maintenence: PUBG is one of the most popular multiplayer game right now and it has a large player base from all over the world. Due to this, the game receives regular updates and the servers also undergo maintenance every once in a while. Therefore, it is highly likely that the servers might be under maintenance due to which the error is being triggered.
- Incompatible Software: There are a couple of applications which can cause issues with steam and prevent the application from working properly. Steam needs to be running in the background in order to play PUBG and if it is facing issues while running in the background this error can be triggered.
- DNS Cache: There might be a buildup of corrupt DNS cache within the router or the computer due to which the game is facing issues while establishing a connection with the server. If the game can’t establish a secure and stable connection with the servers this error might be triggered.
- IP Configuration: In some cases, the IP configuration type that you are using might not be the correct one for establishing a stable connection. There are two types of IP configurations, an IPV4 and an IPV6 configuration. IPV4 is the most common type of configuration and is enabled for most computers by default, however, in some cases, this might be altered by some software and it might end up preventing a secure connection with the servers.
Now that you have a basic understanding of the nature of the problem, we will move on towards the solutions. Make sure to implement these in the specific order in which they are presented to avoid conflict.
Solution 1: Shutting Down Incompatible Software
There are some applications that aren’t compatible with Steam. If the applications and Steam is running side by side it can cause issues with the connection. Therefore, in this step, we will be checking to see if any of these applications are running in the background,
- Refer to this list which indicates the software that is incompatible with Steam.
- Press “Ctrl” + “Alt” + “Del” and select “Task Manager“.
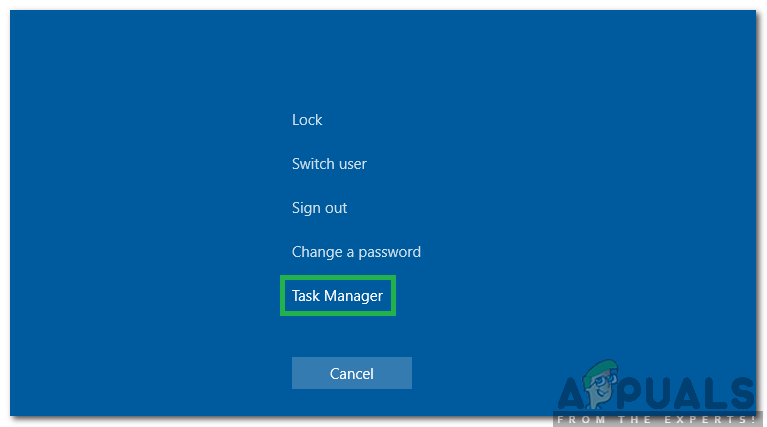
Pressing “Ctrl” + “Alt” + “Del” and selecting Task Manager - Click on “Startup” to view the list of programs that launch at startup.
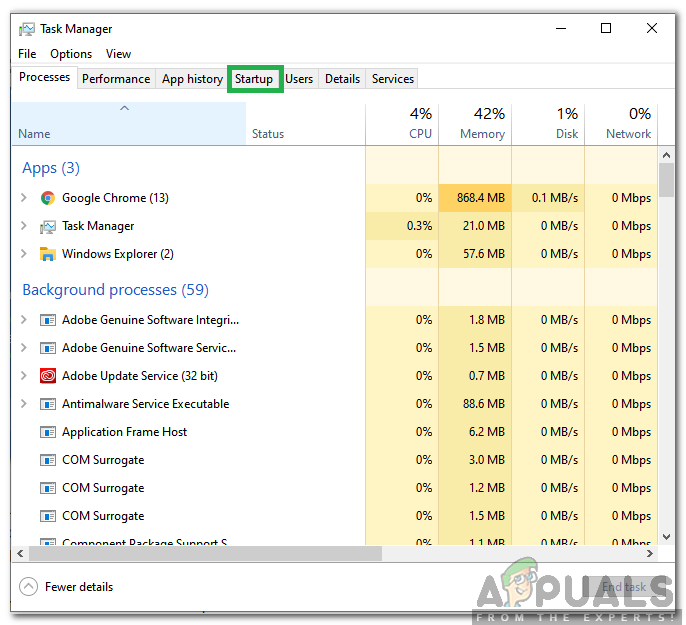
Clicking on “Startup” - Check to see if there are any programs in this list which are incompatible with Steam.
- If there are, click on the programs one by one and select the “Disable” option to prevent them from launching at startup.
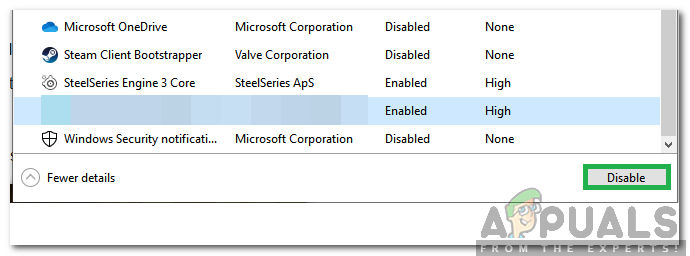
Selecting an option from the list and selecting “Disable” - Restart the computer after completing this process and check to see if the issue persists.
Solution 2: PowerCycling Internet Router
In order to get rid of the DNS cache built up within the internet router, we will be completely power cycling it. For that:
- Unplug the power to the internet router from the wall socket.

Unplugging the router from the wall socket - Press and hold the “power” button on the internet router for at least 30 seconds.
- Plugin the power to the internet router and wait for it to be started.
- Wait for the internet access to be granted and check to see if the issue persists.
Solution 3: Resetting DNS Configurations
There are also many DNS configurations that are set in the computer, sometimes these configurations can be corrupted and they might prevent a stable connection from being established. Therefore, in this step, we will be executing some commands in the command prompt to refresh these configurations. In order to do that:
- Press “Windows” + “R” to open the run prompt.
- Type in “cmd” and press “Ctrl” + “Shift” + “Enter” to provide administrative privileges.
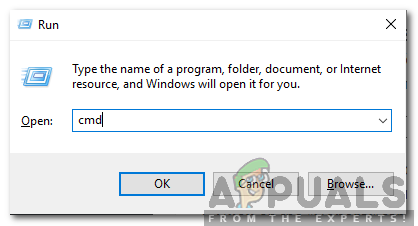
Typing cmd in the Run Prompt and pressing “Shift”+ “Ctrl” + “Enter” - Type in the following commands one by one and press “Enter” after typing each one to execute them.
ipconfig /flushdns
netsh int ipv4 reset
netsh int ipv6 reset
netsh winsock reset
ipconfig/ registerdns
- After executing all the commands in the list, run PUBG and check to see if the issue persists.
Solution 4: Changing IP Configurations
In some cases, it is possible that the IP configurations might not be set properly, therefore, in this step, we will be changing certain IP configurations to fix the error. For that:
- Press “Windows” + “R” to open the command prompt.
- Type in “ncpa.cpl” and press “enter“.
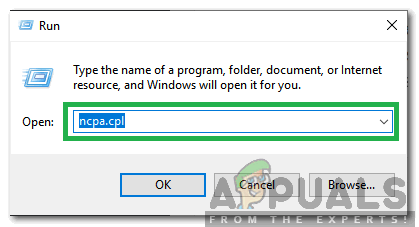
Typing in “ncpa.cpl” and pressing “Enter” - Right-click on the connection you are using and select “Properties“.
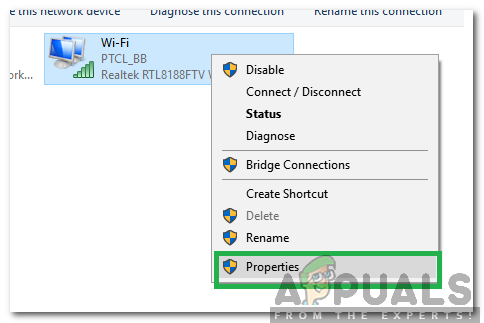
Right-clicking on the connection and selecting “Properties” - Check the “Internet Protocol Version 4 (TCP/IPV4)” option and uncheck the “Internet Protocol Version 6(TCP/IPV6)” option.
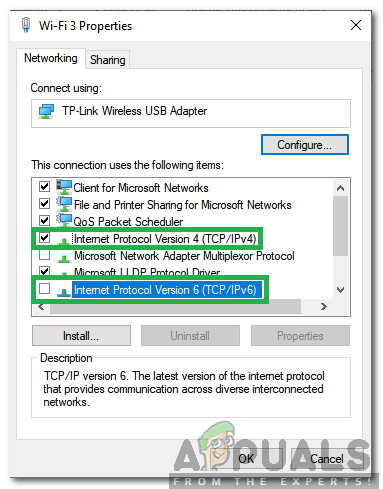
Checking IPV4 option and unchecking IPV6 option - Click on “OK” to save your changes and check to see if the issue persists.


