Fix: ‘Publisher detected a problem in the file you are trying to open’
Several Windows users have been encountering the “Publisher has detected a problem in the file you are trying to open” whenever they try to open a file with Publisher. This happens with both files that were created in this Publisher program or obtained externally. As it turns out, this particular issue is confirmed to occur with Windows 7, Windows 8.1 and Windows 10.

What’s causing the ‘Publisher has detected a problem’ Error?
We investigated this particular issue by looking into various user reports and trying out different repair strategies that other affected users have recommended. As it turns out, several different scenarios are known to produce this error. Here’s a shortlist of culprits that might be responsible for this issue:
- 3rd party AV interference – As it turns out, one of the most common issues that might trigger this error is a conflict between a 3rd party AV and the Publisher app. In most cases, Norton security products are blamed by affected users. If this scenario applies to your situation, you should be able to resolve the issue either by disabling the real-time protection of your AV or by uninstalling the security suite altogether.
- Corrupted file properties – Although we haven’t been able to confirm this officially, a lot of users are suggesting that the issue might occur due to a series of corrupted properties. This typically happens on Windows 10 computers. In this case, you can resolve the issue by duplicating the file to refresh the permissions of the files.
- Corrupted images inside the .pub files – In some cases, this issue can occur due to some image issues that are preventing the Publisher app from opening the .pup file normally. If this scenario is applicable, you should be able to resolve the issue by hiding the pictures using the Graphics Manager utility first (before you attempt to open the file that is causing the error)
- Unsupported .pub file – If you’re using a severely updated Publisher client, you might also encounter this error message because your Publisher app is unable to handle the format it’s dealing with. In this case, you should be able to salvage some content by creating a new document and importing the unsupported .pub file using the Insert Text feature.
- Missing PromptForBadFiles subkey – If the Registry key reserved for the Publisher installation is missing the PromptForBadFiles key, you will get this error message with partially corrupted files. If this scenario is applicable, you should be able to resolve the issue by adding the PromptForBadFiles key manually.
- Corrupted Office Installation – In rare occurrences, you might face this error message due to some kind of Office installation corruption. If you are facing a scenario like this one, chances are you will be able to resolve the issue by repairing the entire Office installation from the Programs and Features screen.
If you’re currently struggling to resolve the ‘Publisher has detected a problem’ error, this article will provide you with several different repair strategies that should end up resolving the issue. Down below, you’ll find a collection of potential fixes that have been confirmed for being effective by at least one affected issue.
If you want to remain as efficient as possible, we advise you to follow the fixes below in the same order that we arranged them in. Eventually, you should stumble upon a fix that will resolve the issue regardless of the culprit that’s causing the problem.
Let’s begin!
Method 1: Disabling 3rd party AV protection (if applicable)
Historically, Publisher is known to had compatibility issues with certain 3rd party security options – especially with Norton products. If you’re using Norton (or a different 3rd party AV) you should start this troubleshooting guide by ensuring that an external AV is not interfering with Publisher.
If this scenario applies to your current situation, you should start by disabling the real-time protection of your AV. If that doesn’t work, you should move up to uninstalling the overprotective suite and reverting to the built-in utility to see if the ‘Publisher has detected a problem’ error stops occurring.
If the error doesn’t occur while the 3rd party AV is removed, it’s clear that it was previously the source of the conflict.
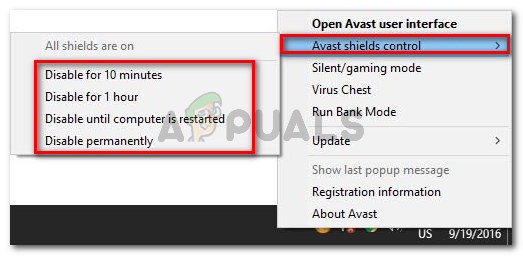
Let’s start by disabling the real-time protection of your 3rd party security suite and see if the issue stops occurring. But keep in mind that the steps of doing this will be different depending on which 3rd party AV you’re using. In most cases, you will be able to do this directly from the taskbar menu.
After you manage to disable the real-time protection, see if the issue is now resolved by trying to open the Publisher file that was previously triggering the ‘Publisher has detected a problem’ error to see if the problem has been dealt to.
If the same problem is still occurring, chances are the security settings that are causing the issue (of your AV) are still in place. In this case, you’ll need to uninstall the program altogether to ensure that the issue is not being caused by your 3rd party security suite.
To uninstall the active security suite and ensure that you’re not leaving behind any leftover files that might still facilitate the apparition of this issue, follow this step-by-step article (here).
After the 3rd party suite is removed, restart your computer and repeat the action that was previously triggering the ‘Publisher has detected a problem’ error.
If this scenario wasn’t applicable or you’re still encountering the same error message even after you followed the instructions above, move down to the next method below.
Method 2: Duplicating the .pup file
If you’re looking for a quick and painless fix that will end up resolving the issue with minimal effort, you can try copying the file and opening the new copy with Publisher instead. Several affected users that have done this have reported that the ‘Publisher has detected a problem’ error no longer appeared with the new copy.
There’s no official explanation of why this method is effective, but some affected issue is making suppositions that some properties will get lost during the copying procedure, which ends up resolving the issue.
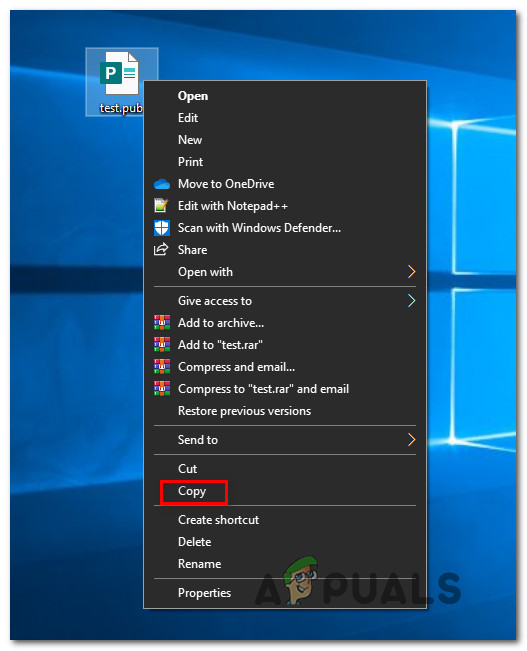
To make use of this fix, simply right-click on the Publisher file that’s causing the issue and select Copy from the newly appeared context menu.
Right-click on an empty desktop/ file explores space and choose Paste from the context menu to spawn a copy of the Publisher file.
Once the new file has been obtained, open it and see if the ‘Publisher has detected a problem’ error stops occurring.
But keep in mind that this method doesn’t resolve the underlying causes of the issue. So if a different culprit is causing this problem with multiple Publisher files, expect the error to return promptly.
If you’re still encountering the same problem or you’re looking for a permanent fix, move down to the next method below.
Method 3: Hiding Pictures using Graphics manager
As it turns out, this particular issue can also occur due to some kind of file corruption contained within the Publisher file that you’re trying to open. Some users that were also encountering the same issue have reported that they finally managed to open the file without issues after they open Publisher’s Graphics Manager and hiding the display of pictures.
After they did this and saved the changes, they were able to open the file that was previously failing with the ‘Publisher has detected a problem’ error. In most cases, the error message stopped occurring.
But keep in mind that similar to the method above, this is is more of a workaround than a fix. If some kind of file corruption is causing this error, chances are it will return with a different file.
If you want to make use of this fix, follow the instructions below to hide the Publisher file pictures using Graphics manager:
Note: You should be able to follow the instructions below regardless of your Office version.
- Open Publisher and go to the ribbon bar at the top. Once you’re there, select the View tab and check the box associated with Graphics Manager.
- Once Graphics Manager is enabled, move down to the right-hand menu (Graphics Manager) and click on Change picture display.
- Once you’re inside the Picture Display menu, set the toggle to Hide pictures and click Ok to save the changes.
- Close the current Publisher window, then open the file that was previously showing the error message and see if the operation is successful this time.
If the same ‘Publisher has detected a problem’ error is still occurring, move down to the next method below.
Method 4: Recovering data using the Insert Text feature
If you’re encountering the issue even after following the instructions above, you’re likely dealing with a corrupt or a file that is not supported by your Publisher version. You may be using a highly-outdated Publisher version or the file that you’re trying to open is not a Publisher file.
In situations like this, you should be able to resolve the issue by salvaging some of the content using the Insert /Text file feature. Several users that have been affected by this problem have reported that they were able to recover most of their data by following the instructions below.
Here’s a quick guide on recovering Publisher data using the Insert Text feature:
- Open your Publisher app and create a new Blank workspace by going to New > Blank.
- Once the new file has been created, go to the Insert tab (from the ribbon bar at the top) and click on Insert File or Insert text file (depending on your Publisher version).
- After you’re inside the Insert Text window, select the .pub file that you’re encountering issues with and click on Ok.
- Now that the content is imported to the new file, arrange it, then save the files using the Save As feature.
- Open the newly created file again and see if the ‘Publisher has detected a problem’ error has been resolved.
If you’re still encountering the same problem, move down to the next method below.
Method 5: Creating the PromptForBadFiles subkey
If none of the methods above have allowed you to resolve the issue, chances are your Publisher installation is missing a Registry key called PromptForBadFiles. Several affected users that were previously struggling to open multiple native Publisher files have reported that this procedure has fixed the procedure indefinitely.
This procedure is a little more tedious as it involves doing some registry edits, but it will resolve the issue for good (you won’t encounter the ‘Publisher has detected a problem’ error again).
Note: This is typically reported to be effective with older Publisher versions, but we’ll include instructions on applying this fix regardless of your Publisher version.
Here’s a quick guide on creating the PromptForBadFiles subkey to resolve the ‘Publisher has detected a problem’ error when opening Publisher files:
- Press Windows key + R to open up a Run dialog box. Next, type ‘regedit’ and press Enter to open up Registry Editor. Once you see the UAC (User Account Control) prompt, click Yes to grant administrative privileges.

Running the Registry Editor - Once you’re inside the Registry Editor, navigate to one of the following locations, depending on your Publisher version:
Publisher 2016:
HKEY_CURRENT_USER\Software\Microsoft\Office\16.0\Publisher

Publisher 2007:
HKEY_CURRENT_USER\Software\Microsoft\Office\12.0\Publisher

Publisher 2003:
HKEY_CURRENT_USER\Software\Microsoft\Office\11.0\Publisher

Publisher 2002:
HKEY_CURRENT_USER\Software\Microsoft\Office\10.0\Publisher

Publisher 2000:
HKEY_CURRENT_USER\Software\Microsoft\Office\9.0\Publisher
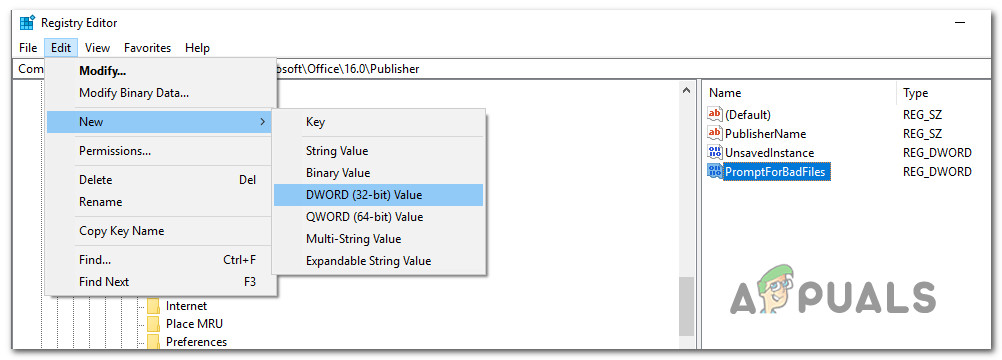
- With the Publisher key selected, go to the top of the menu and choose Edit > New > Dword (32-bit Value). Then, name the newly created file PromptForBadFiles.
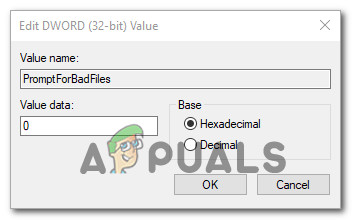
Creating the PromptForBadFiles Registry keys - Once the PromptForBadFiles key has been created, double-click on it. When you’re inside the Edit DWORD (32-bit) Value window, set the Base to Hexadecimal and the Value data to 1 before clicking on Ok.
- After you manage to create the new file and set the value accordingly, close the Registry Editor and open the file that was previously causing the error once again.
If you’re still seeing the ‘Publisher has detected a problem’ error, move down to the next method below.
Method 6: Repairing the Office Installation
If none of the methods above have allowed you to resolve this issue, chances are you’re encountering this issue due to some kind of corruption inside your Office installation. Other users dealing with the same issue have managed to resolve the problem by repairing the office installation using the Program and Features menu.
This procedure will refresh every component of your Office installation without affecting your files or user preferences. Here’s a quick guide on repairing the Office installation:
- Open up a Run dialog by pressing Windows key + R. Inside the text box, type “appwiz.cpl” and press Enter to open up the Programs and Features screen.

Typing in “appwiz.cpl” in the Run prompt - Once you’re inside the Programs and Features screen, scroll down through the list of installed applications and locate your Office installation. Once you manage to locate it, right-click on it and choose Change from the newly appeared context menu.

Changing the Microsoft Office installation - At the first repair prompt, choose Quick repair from the list of available options, then click on Repair to initiate the procedure.

Repairing the Office Installation - Wait patiently until the process is complete, then restart your computer and see if the issue is resolved at the next system startup.


https://uploads.disquscdn.com/images/b99a9e190cf0100990874ac206f827d10be5e8cb895d988dfd8a263652b3be3b.gif For the issue “How to Fix ‘Publisher has Detected a Problem’ Error on Windows?” I can say that solution 5 was very helpfull. In addition to “Publisher has Detected a Problem in the file you are trying to open. It gave me the picture uploaded. By clicking OK I could open the file. Great, Thank you