How to Fix Portable VirtualBox Kernel Driver Runtime Error
Portable VirtualBox allows you to emulate a full computer system inside your existing installation without actually installing many packages. In some cases, you might have just been able to unzip an archive and start rolling. This makes configuration far easier than working with a full installation of the software, and it also lets you take your VirtualBox emulated computer-within-a-computer anywhere you go that has a machine running the appropriate system software.
Once in a while, you might end up with a kernel driver error from Portable VirtualBox, which occurs because of an incorrectly configured package. This probably sounds very counterintuitive, because this portable installation isn’t supposed to mess with packages at all.
Fixing Portable VirtualBox Kernel Errors
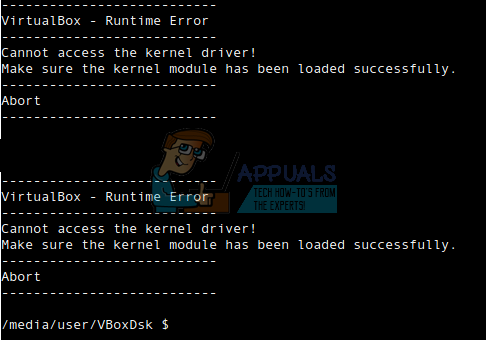
Before proceeding, make absolutely certain that what you’re dealing with is an error from the way that VirtualBox interacts with the kernel and not a result of, say, something having to do with the actual Linux or NT kernel itself. You’d receive an error message that indicates specifically that you’re suffering from a “VirtualBox – Runtime Error” and that the software “Cannot access the kernel driver!” If you’re receiving an actual panic that halts your operating system, then you’re actually dealing with something totally unrelated to VirtualBox.
Depending on what your host operating system is, you may want to use one of several different tools used to inspect the service. You could try using ServiWin VBoxDrv under Windows or simply try top, htop or busybox top under Linux. In either case, you may find that the service never stops or becomes a zombie process. Your next step here is to try PSEXEC -s, but you’ll find in most cases this doesn’t do anything.
Trying a fresh install of Portable VirtualBox may remedy the situation, and it’s easy enough to do. Simply copy the files from your USB memory stick or whatever medium you used to store the portable directories into a new directory and give it a try again. If this does the trick, then you simply lost something in your old directory and can move any VXD files into your new one.
You may be missing something if none of these processes actually worked for you. In that case, you could be missing a generic header or something. You may wish to restore them with:
sudo apt-get install dkms
sudo apt-get -y install linux-headers-generic linux-headers-lbm-#.#.#-##-generic
Replace the octothorpes with the correct numerals for the current generic Linux headers you were working with. These numbers change with each update, which reflects the nature of Linux upgrades. Naturally, if Windows 7 x86_64 or something similar was actually your host operating system, then this won’t work natively, but it’s worth a try if you’re working from inside of an apt-get managed environment. It might also solve this error for users of Microsoft Windows 10 who have the optional Ubuntu files installed inside of Windows. In this case, apt-get should still work just fine in a majority of cases.
This type of error is often caused by loosing some files, possibly because of an overzealous update routine or perhaps because of file system corruption. This sort of thing happens when power is removed during a file system write. In either case, sudo apt-get install –reinstall linux-headers-#.#.#.##-generic might also be of help with the correct version numbers replacing the # symbols with the most current versions again.
Should these commands produce some form of error as well, phrase them instead as:
sudo apt-get remove linux-headers-#.#.#.##
sudo apt-get install linux-headers-#.#.#.##-generic
While this might look fairly drastic as it removes existing Linux headers and replaces them with fresh copies, this actually doesn’t touch any sort of configuration files, which helps to keep your installation intact the whole time. It merely refreshes the headers that were already there. If you’re working with any sort of portable computer, then make sure to plug in the charger before doing this. A loss of power during this type of operation won’t completely trash a file system, but it will give you plenty of headaches.
Should you be working from an Ubuntu or compatible system, you can open the Synaptic Package manager from the System – Administration menu. Select the Edit menu and then select Fix Broken Packages. Pay close attention to the bottom of the window. This is where the status bar is, and this will act as the only output you receive about this process. You won’t find any dialog box or pop up window that would otherwise be of help to you.

If you only have terminal access, then you can run sudo apt-get -f install to carry out the same thing. In either case, this should make sure that you have all the files you need. As soon as you’ve verified everything, you should reboot the system to make sure that everything is loaded from its most recent copy.
Since this did involve replacing header packages, this could be a good time to actually do a full package system upgrade. You can do this by running sudo apt-get update followed by sudo apt-get upgrade to make sure that every package that you have installed on your system is currently updated. This is actually good to do periodically when running any version of VirtualBox, since it also helps to reduce any security risks that comes with running two operating systems together.
Once you have VirtualBox Portable working perfectly again, you might find this is a perfect time to back the entire directory up. You don’t need to do anything special to do so since the portable version doesn’t create many other files elsewhere on your system besides where you installed it, though you might want to have a look in your home directory to see if there are any important configuration files in a subdirectory in there. This isn’t a necessary step either, but taking a moment to do this now could help to prevent VirtualBox Kernel Errors from popping up again in the future.