How to Fix ‘Plugged in, Not Charging’ on a Windows Laptop
Laptops are designed for portability and battery life plays a great deal in achieving this. Without a battery, your laptop is in no way different from a stand-alone desktop PC since you will always need a power outlet. Many of us, if not all, have come across the “n% available, battery plugged in, not charging” message on the battery meter icon. The percentage charged may vary and can be anything between “0% plugged in, not charging” to “99% plugged in, not charging.” Unplugging your AC charger when the charge is less than 5% will turn off the laptop. This article seeks to give reasons why this issue occurs and give known solutions to the problem.
Why your battery does not charge when AC is plugged in
There are numerous reasons why your battery would not charge. You might want to try your charger on another laptop (same make), or switch your battery to another laptop (same make) in order to diagnose the problem. Also, try charging with your OS shut down; if it does not charge then the Windows OS is not the issue. If your charger is genuine and works on another laptop, try swapping the battery, if that works too then your charging system might have a problem and can be anything between mild to a severe issue that might need component replacement on the motherboard circuit.
Most of the time, this issue occurs because of a misalignment between the battery and charger. Discharging and resetting your laptop will work for such cases. If you are using the wrong charger or the wrong battery for your system, then you will definitely get this problem. Some laptops like Dell give a warning message at startup indicating a wrong charger wattage, or battery voltage. The battery drivers (yes, they have drivers too) might also be a culprit in this issue and will need an update or reinstallation. The problem might also be related to out of date BIOS or BIOS configuration. Those people that use power conditioning equipment (e.g. surge protectors) have also experienced this problem. Some laptops have intelligent charging systems and will stop charging when charged to 100% then resume charging when the battery level falls down to 80% or 90%; so don’t be alarmed when you see this.
Below are the solutions to the ‘battery plugged in, not charging’ problem. We will begin with simple solutions and advance to more complex solutions.
Method 1: Unplug and plug back your AC charger
By simply unplugging your AC charger and plugging it back in after a few seconds, you can get your battery to charge again. The charging system will recalibrate and realign your battery with the charging system and have it charging again.
Method 2: Connect directly to AC source without a power surge protector
Power surge protectors or other power conditioners can change the sinusoidal input of the mains AC hence your charger does not function as anticipated. Most systems can pick these irregularities and refuse input from the charger to the battery. Try connecting your charger directly to your socket without going through a power surge protector or an extension plug. Also, check the connections between the outlet and your DC port.
Method 3: Do not plug in till the system has fully booted
You must at least have some power on your battery for this. Remove your AC charger, boot your system until all icons are displayed, and then plug in your charger.
Method 4: Flip the battery release latch to the lock position
Some batteries do not charge if they are not locked into their port. This is because the battery release lock is incorporated into the charging circuit somehow. Simply turn your laptop over and make sure the release lock is flipped to the locked position.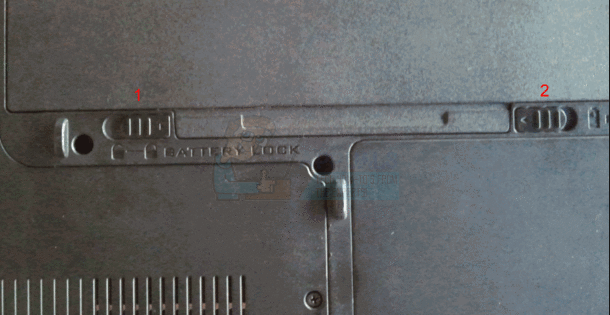
Method 5: Let your computer discharge for a while
Charging your battery to 100% and leaving your charger still plugged in significantly reduces your battery lifespan. Storing your battery at 0% and can also do the same other than being an inconvenience when you want to head out. Most laptops have now incorporated an intelligent charging system to handle charging cycles.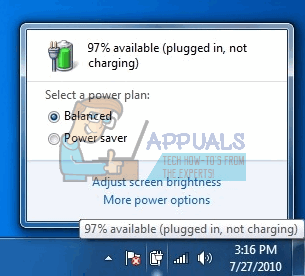
If your computer says that the battery is not charging at around 80 to 97%, then this is not a defect or a problem. Your battery firmware or software driver is probably configured to forego charging when the battery is very near to 100%. Remove your AC adapter, let the laptop discharge for a while to below 80%, or 50% for some laptops, and then plug in the AC charger. It should resume charging automatically below a certain threshold.
Method 6: Turn off battery life extender
If you are not pleased by the intelligent charging system, you can disable the behavior on your computer. Remember that this will affect your battery longevity. Simply look for you a battery life extender app on your laptop and change the behavior to normal.
For Samsung laptops, you can find it here: Start > All Programs > Samsung > Battery Life Extender > Battery Life Extender and then change it to normal mode.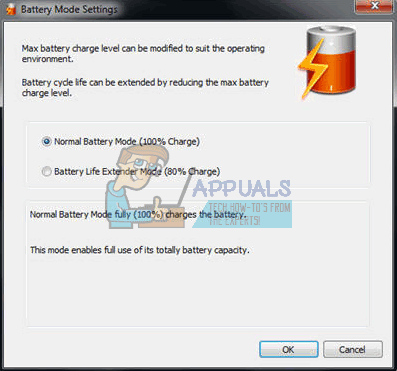
Some like the Sony VAIO lets you choose a life extender percentage or turn it off completely.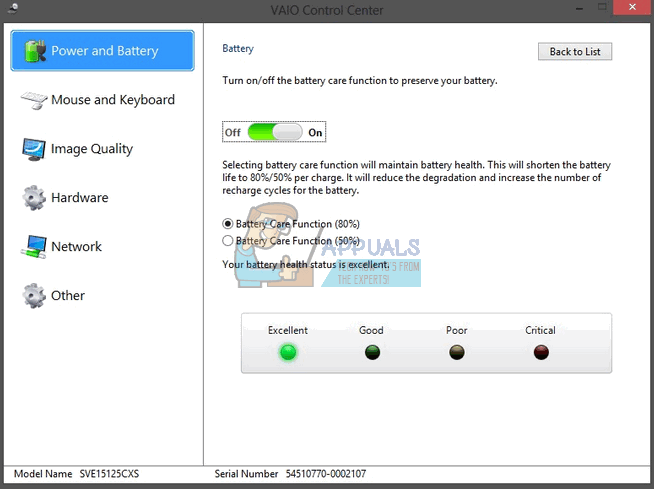
For Lenovo, you can switch it to optimize runtime rather than lifespan.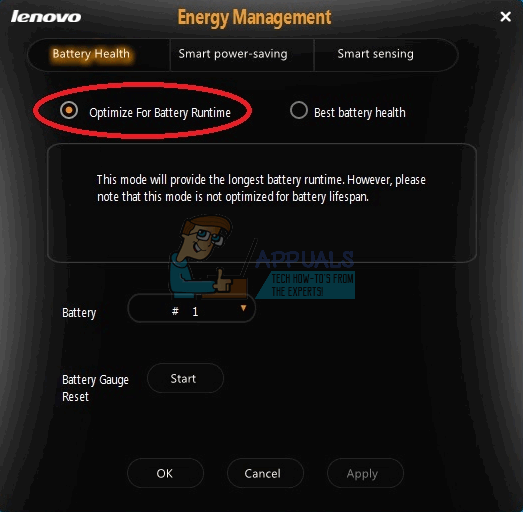
Other laptops can also toggle this behavior from within the BIOS; just press F2 or F10 during booting in order to enter the BIOS.
Method 7: Discharge your motherboard
This will discharge the capacitors on the motherboard, and force the battery to be recalibrated and realigned with the charger.
- Shut down the system.
- Disconnect any external peripherals (flash drives, printers, external hard drives, mouse, keyboard e.t.c.) from the computer.
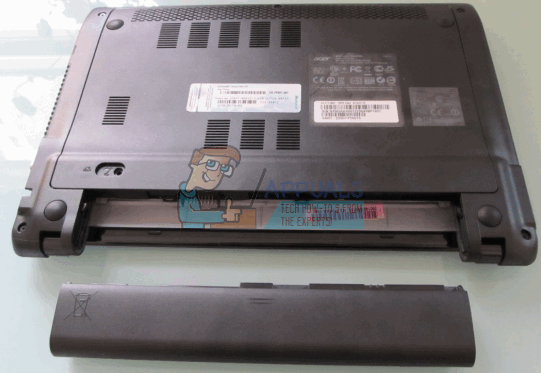
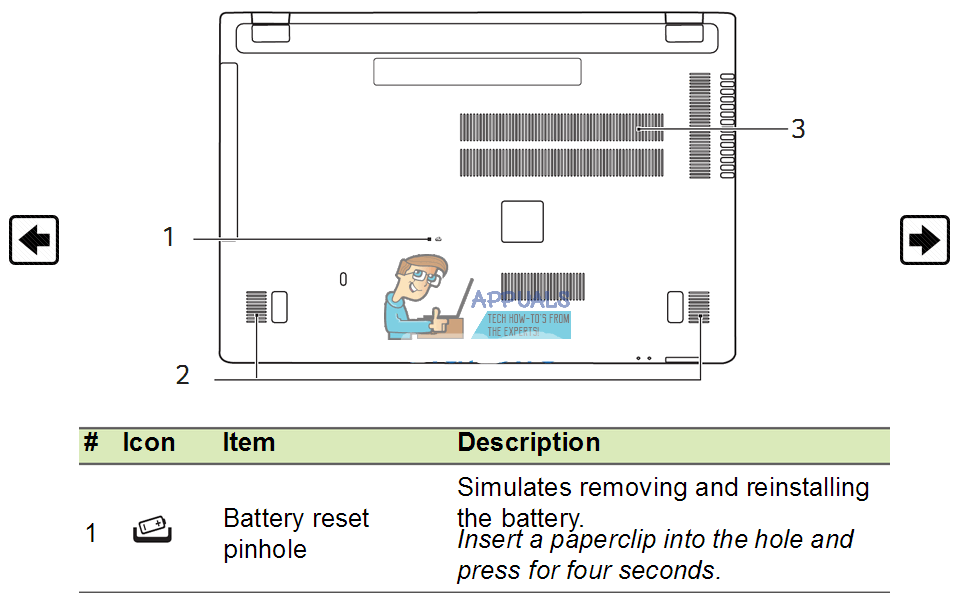
- Disconnect the AC Adapter and remove the battery from the laptop. If your computer does not have a removable battery, there is usually a tiny hole at the back that you can poke with a paper clip to simulate a removed battery (press and hold the pin in position).
- Press and hold the power button for 20 to 30 seconds to release the residual charge from the laptop. Blowing compressed air into all holes and ports on your laptop might help to remove charged dust particles.
- Reconnect the AC Adapter.
- Once the system is powered on and booted properly, re-seat the battery. Check if you still get the error or not.
Method 8: Reset BIOS to default settings
If the problem is related to the firmware settings, you can reset the BIOS by:
- Shut down your PC
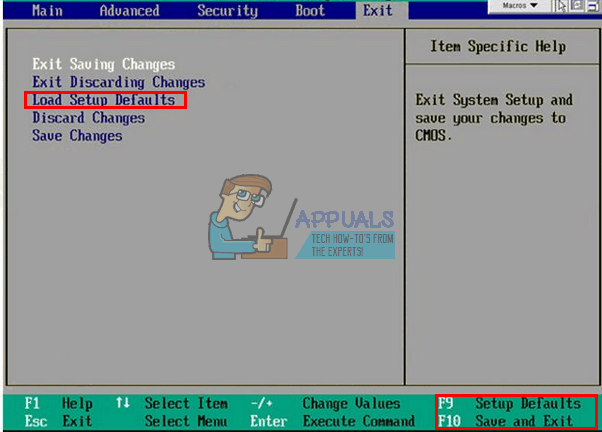
- Press the power button and immediately press F2 or F10 to enter the BIOS
- Press F9 to load the defaults, press F10 to accept changes or exit while saving changes. You can alternatively exit with defaults.
You can also try updating your BIOS since this controls charging too. You can find our guides on this here.
Method 9: Uninstall and reinstall your ACPI-Compliant Control Method battery drivers
The drivers control the charging meter and how your PC charges when you have booted into your operating system. Uninstalling them will let Windows reinstall the correct drivers from its repository.
- With your AC charger plugged in, Press Windows + R to open Run
- Type devmgmt.msc and hit enter to open device manager

- Expand the Batteries category.
- Under the Batteries category, right-click the ‘Microsoft ACPI Compliant Control Method Battery’ listing, and select ‘Uninstall’.
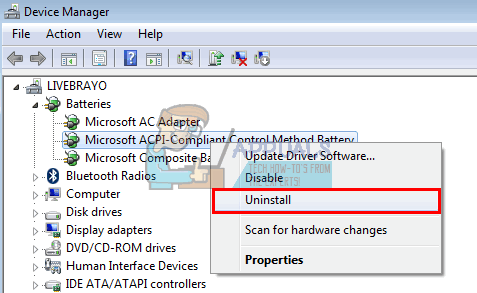
WARNING: Do not remove the Microsoft AC Adapter driver or any other ACPI compliant driver.
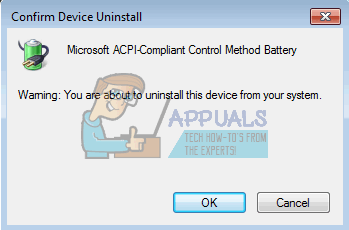
- Confirm that you want to uninstall the driver
- Remove your battery, wait around 10 seconds and then plug it back in.
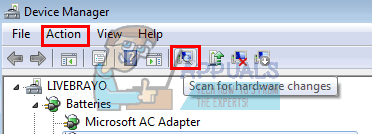
- On the Device Manager toolbar, click ‘Scan for hardware changes’ or, go to Action > ‘Scan for hardware changes’. Your computer will find your battery and reinstall your drivers (this might take a while). You might need to restart your PC and check if your battery is now charging.
Try disabling then enabling your drivers in step 4 above instead of uninstalling.
Method 10: Update your ACPI-Compliant Control Method battery drivers
Updating drivers will install newer drivers that are compatible with your OS. You can search for drivers from your manufacturer or:
- Press Windows + R to open Run
- Type devmgmt.msc and hit enter to open device manager
- Expand the Batteries category.
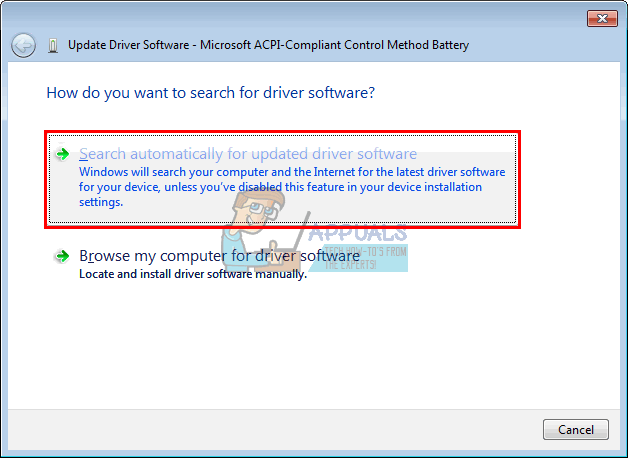
- Under the Batteries category, right-click the ‘Microsoft ACPI Compliant Control Method Battery’ listing, and select ‘Update software driver’.

- With an active internet connection, click on “Search automatically for updated driver software” in the next window. Let the PC search for an update and automatically install it on your computer.
You can also try updating your BIOS. You can find our guides on this here.
Method 11: Get a new charger or a new battery
Most laptops let you check the health of your battery from the BIOS advanced tab. They can also tell you if your charger is identifiable. Just press F2 or F10 during boot to go into BIOS; you can find battery and charger information in the ‘system’ or ‘advanced’ tab. If your charger is unknown or unidentifiable or indicated as the wrong charger, you might need to replace it. If your battery is indicated as ‘failed’ or of poor health, then you might also need to replace it.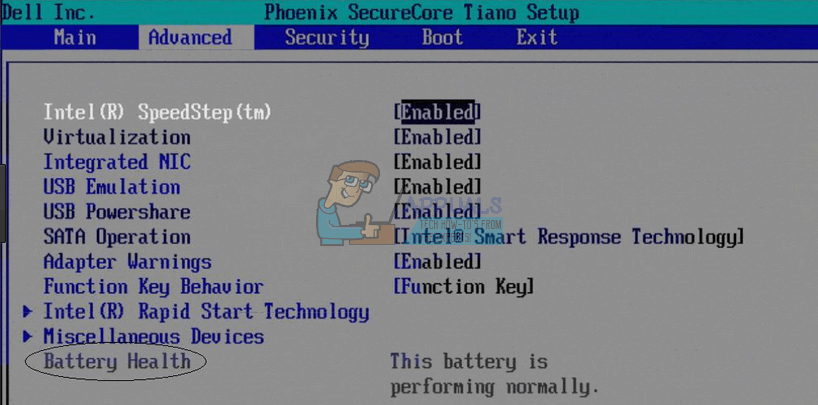
If you are absolutely sure that your charger and battery are in prime condition and are the correct ones for your laptop, then you might want to have the charging system on your motherboard checked out.
Tip: Batteries usually need replacement after 3-7 years. The battery should be stored at 50% when not in use for a long time to prolong the life of the battery. It should also not be drained to 0% often. Maintain a good recharge cycle to give your battery a longer life. If your laptop does not have an intelligent charging system, do not leave it plugged in all the time. Let the battery discharge a little before charging it again to 100% in order to enhance its life length. Do not let your computer or battery overheat especially when playing games or running software that needs a lot of power.
Run a battery test of HP: open the HP Support Assistant –> Troubleshoot –> Power, Thermal and Mechanical. In the Power, tab click on Battery check. If you do not get a pass or OK on the battery check, then contact HP Total Care for warranty service.